
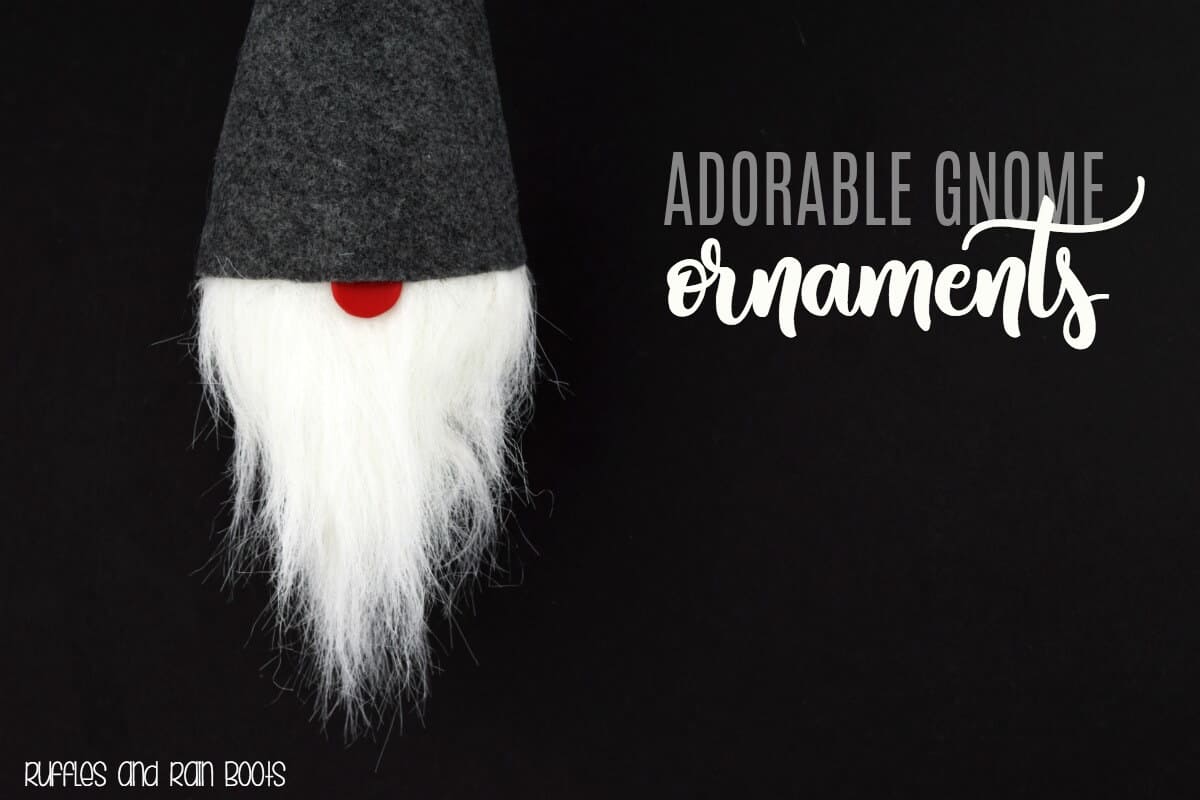
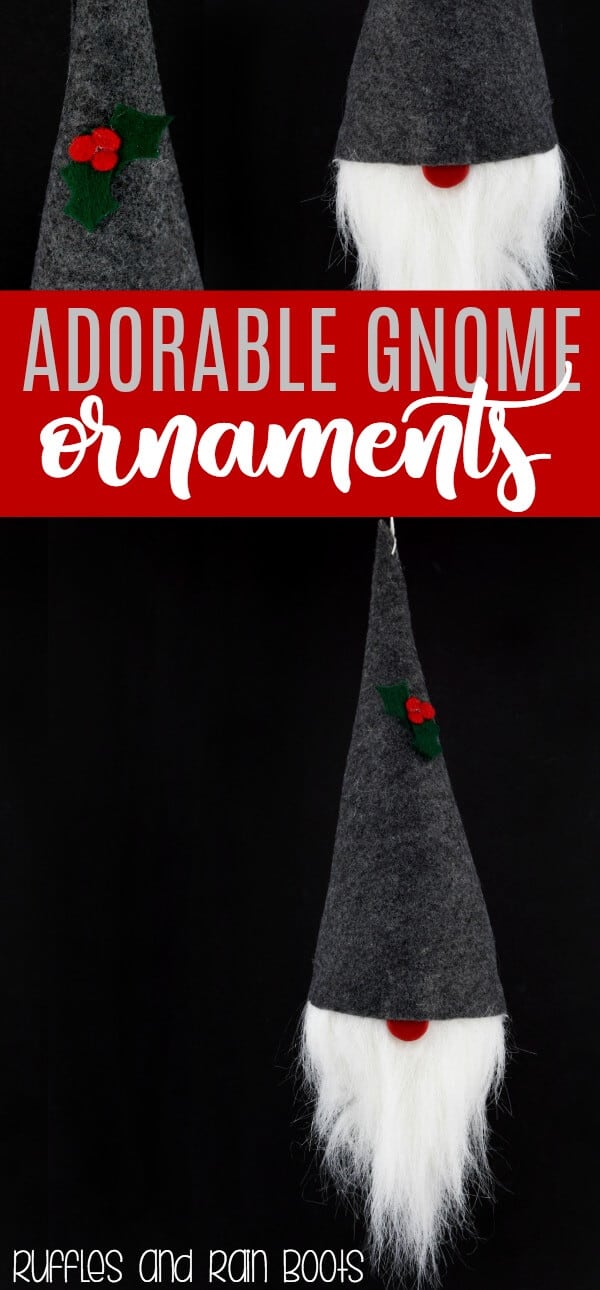
An Adorable, Easy Scandinavian Gnome Ornament
Make this easy DIY gnome ornament for your holiday decor (or year-round ‘cuz he’s just too cute)! You can also use it in wreaths or hung on a doorknob.
What You'll Find On This Page
Gnome Ornament DIY Tutorials
We’re a bit gnome-obsessed ’round these parts. So far, we’ve made this easy gnome family display: the large, male gnome, the female gnome with braids, and the little gnome made from rice.
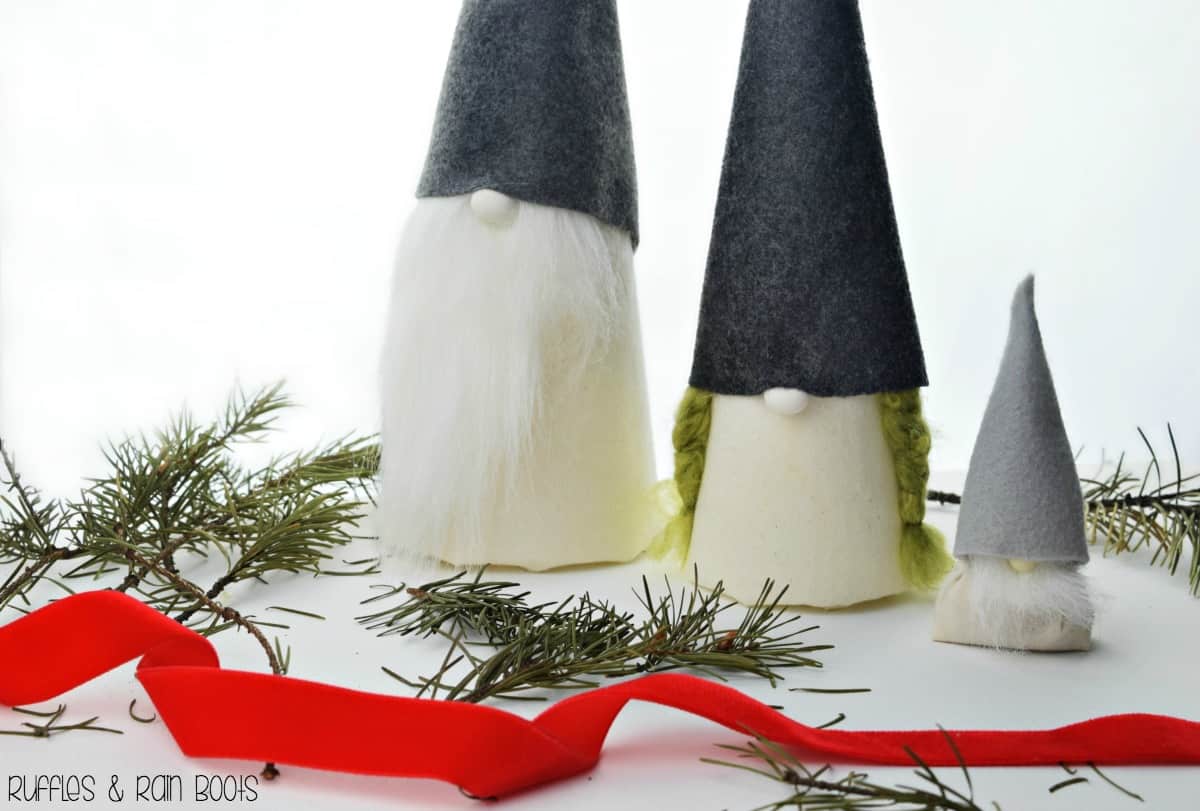
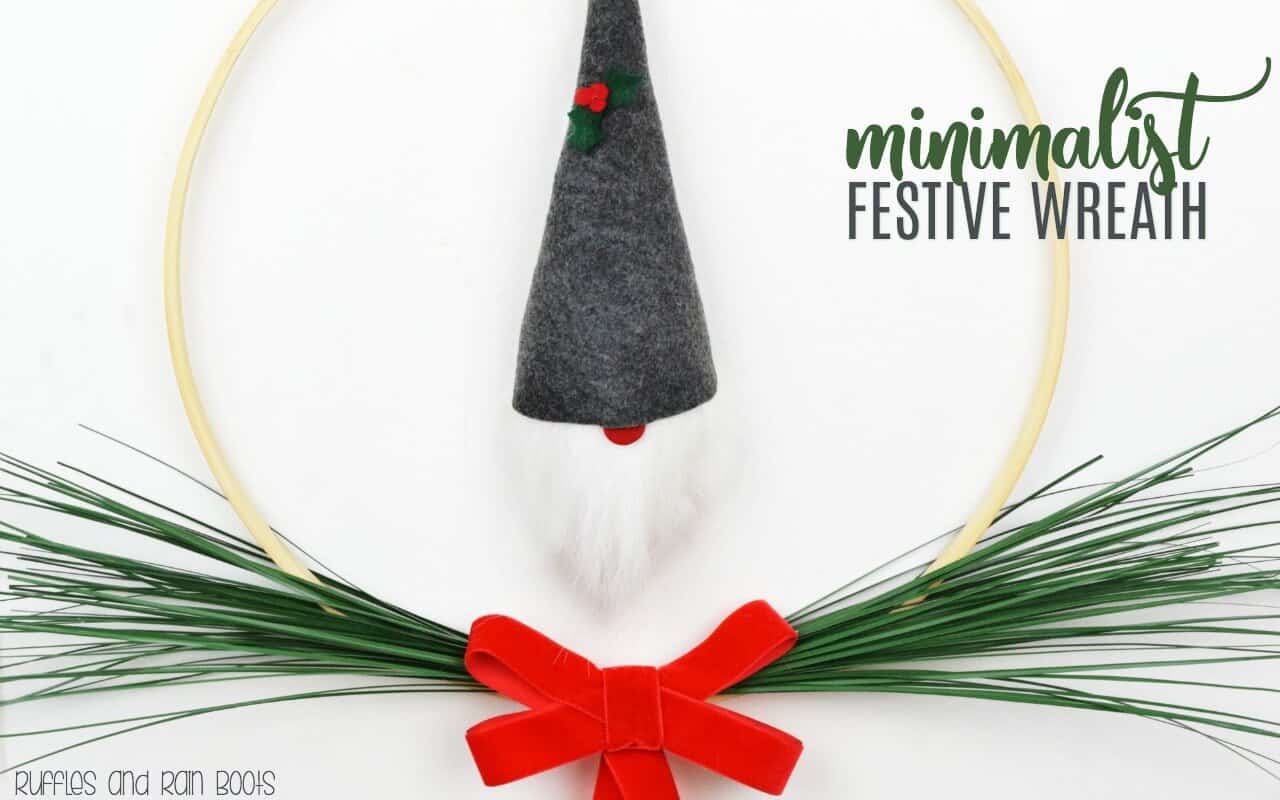
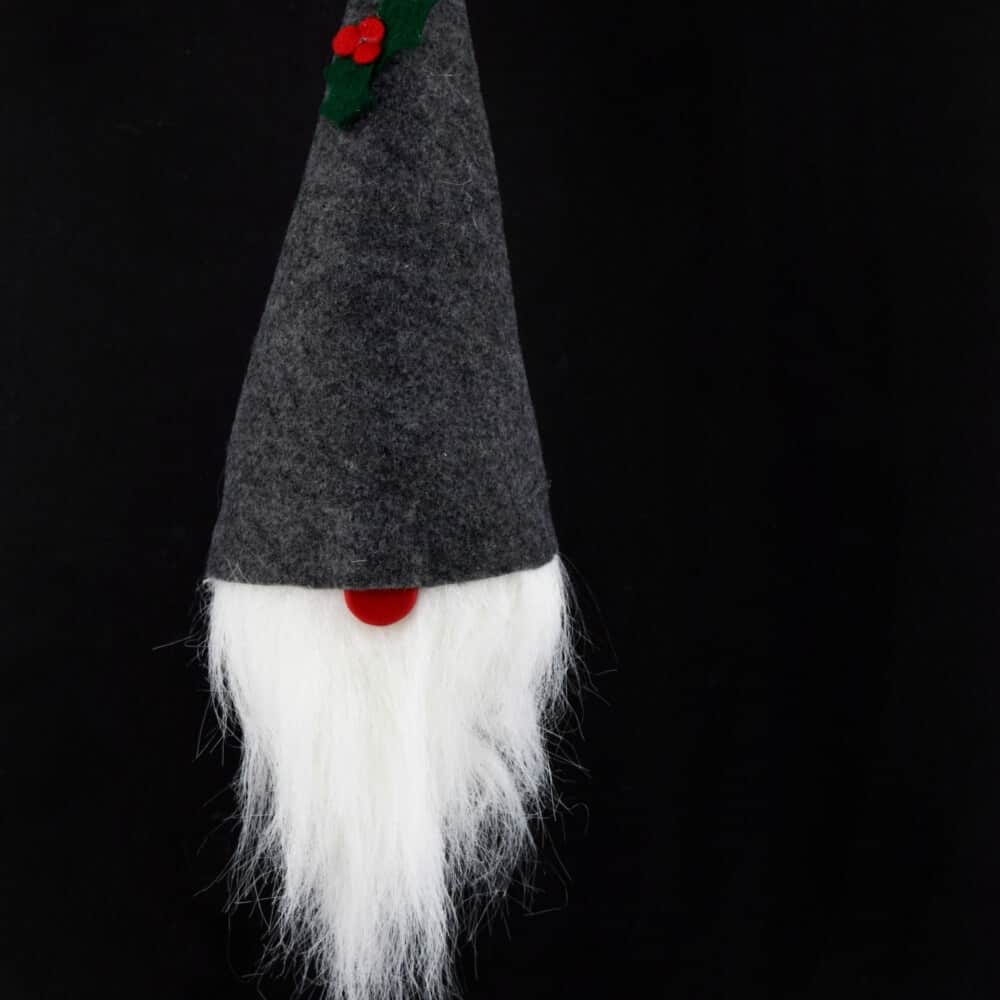
But I just can’t be done with these little cuties because I want them throughout the house and outside it! We used this adorable DIY gnome ornament on our Scandinavian wreath.
DIY Christmas Gnome Tutorials
If you’re looking for the best DIY Christmas gnome tutorials, you have come to the right place. Check out all of my favorite tomte tutorials for the holidays!
There are affiliate links in this article which means, at no additional cost to you, we could receive compensation for our recommendations. You can read our full disclosure policy.
If you just want to buy one because you’re strapped for time, here are our favorites:
- this guy is adorable (look at his cute little feet!)
- love the bright color options for her gnomes
- the hat design on these popular Swedish gnomes is just the best thing ever
Supplies for a DIY Christmas Gnome Ornament
We make gnomes so much here on Ruffles and Rain Boots that we’ve created our own Amazon supplies list for making Swedish gnomes. Check it out!
- Foam egg
- Natural-looking fabric (I used leftover muslin, but anything will do)
- Faux fur
- Felt
- Clay or button nose (I chose red to match the velvet ribbon on my wreath)
- Needle and string (I used a large darning needle)
- Hot glue gun, razor, and scissors
Watch How Easy It Is to Make
Instructions for a Felt Nordic Gnome (Swedish Gnome)
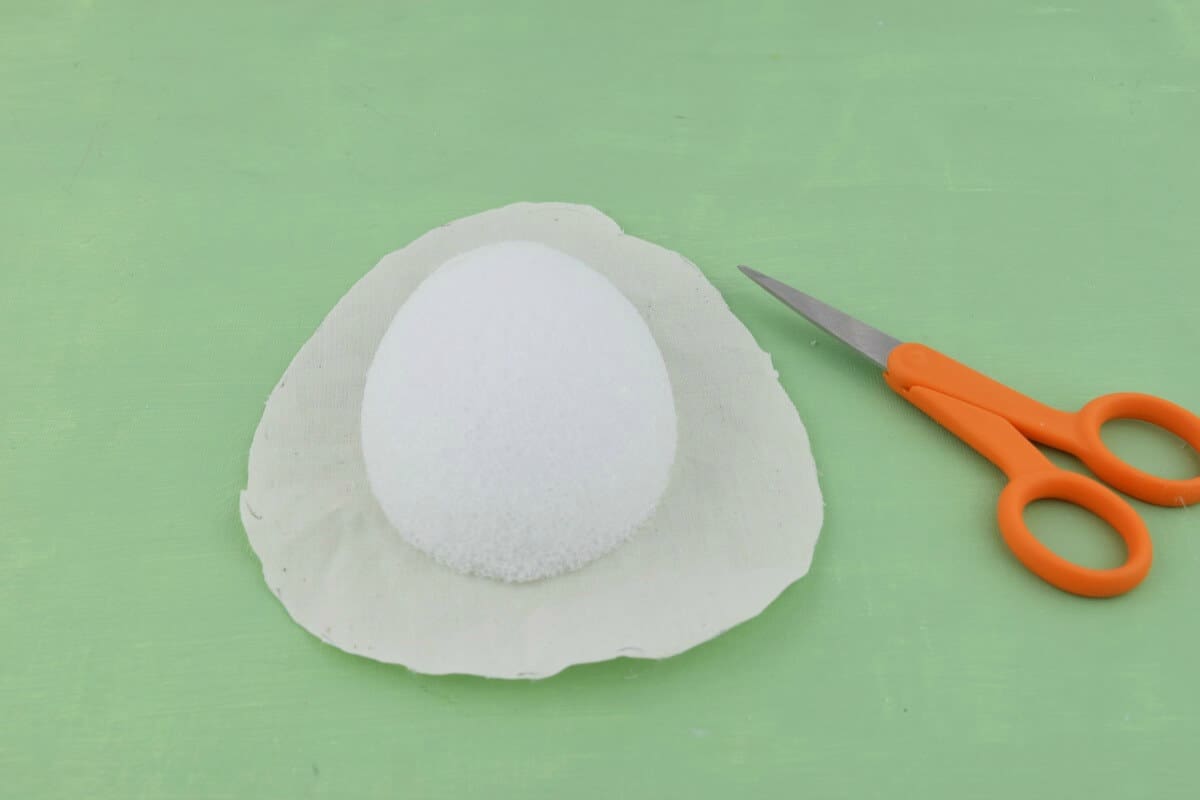
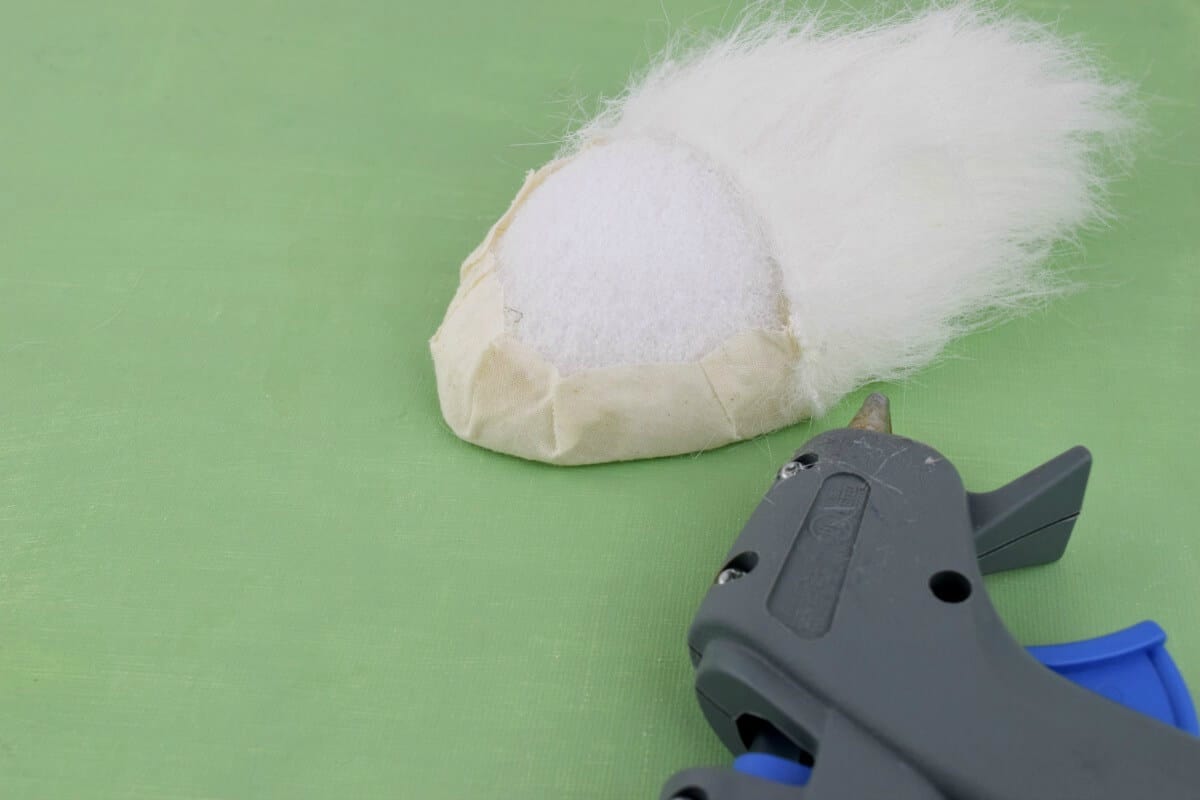
Cut the foam egg in half (you can make two gnome ornament cuties or save it for another project).
Trace a 1.5-inch border around the egg and cut the fabric. Cut slits in the fabric and hot glue it to the egg form. Note: the rounded part of the gnome face won’t be seen, so you don’t have to make it gorgeous.
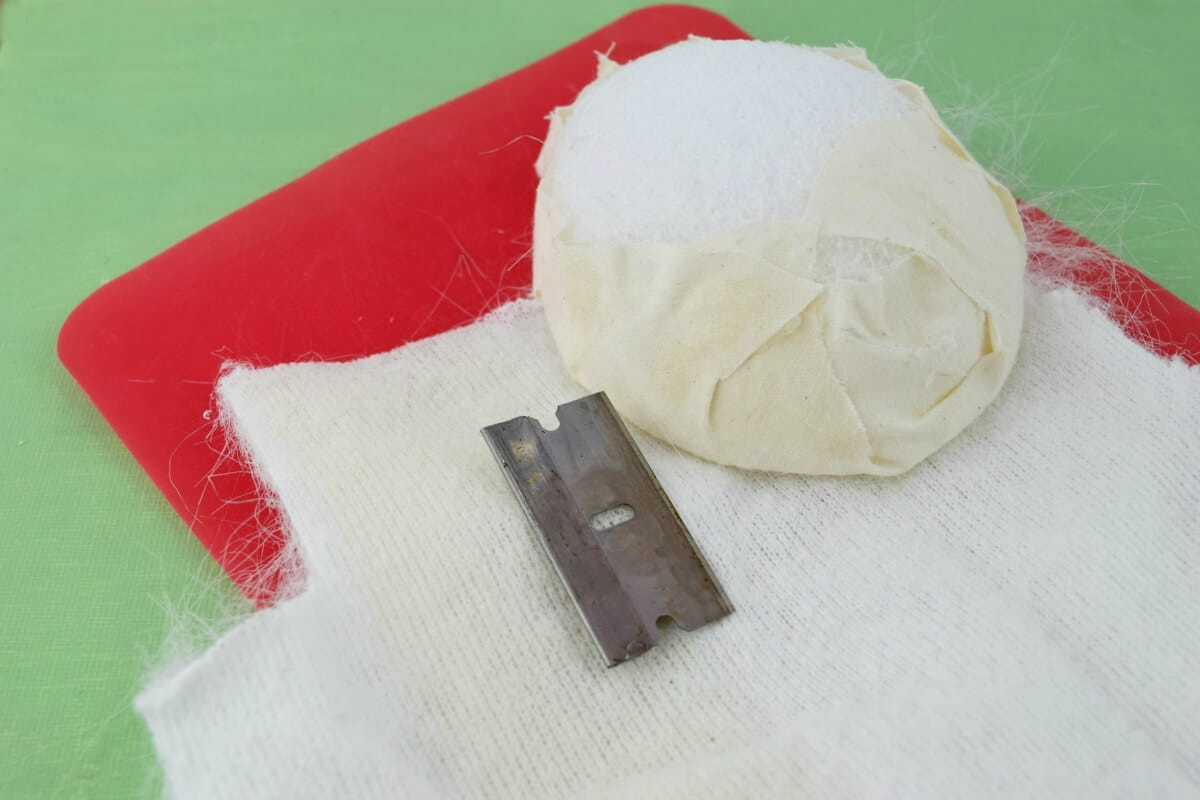
How to Cut Faux Fur (and Cut the Gnome Beard)
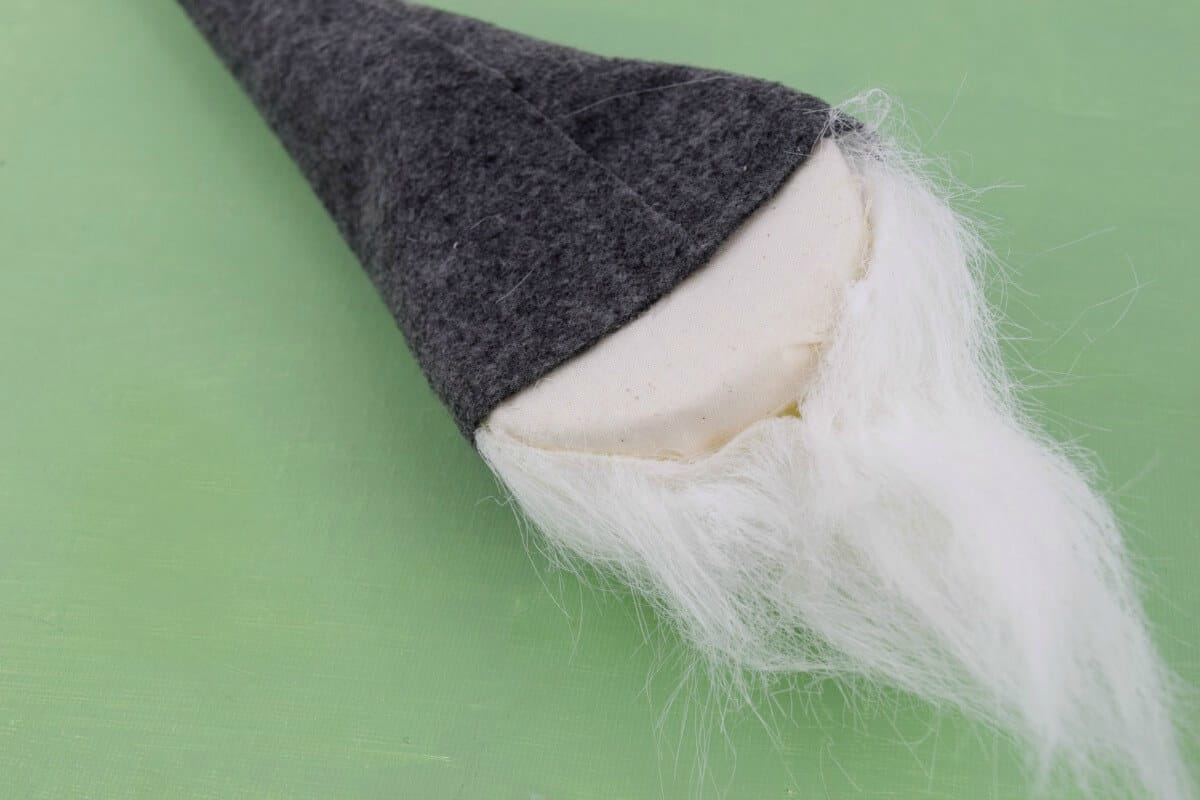
Cut the faux fur, leaving just a bit more on the edges because we’ll wrap it around the rounded part of the egg.
If you’re new to cutting faux fur, here’s a breakdown:
1. Turn it over
2. Use a razor blade.
3. Only cut through the connective fabric.
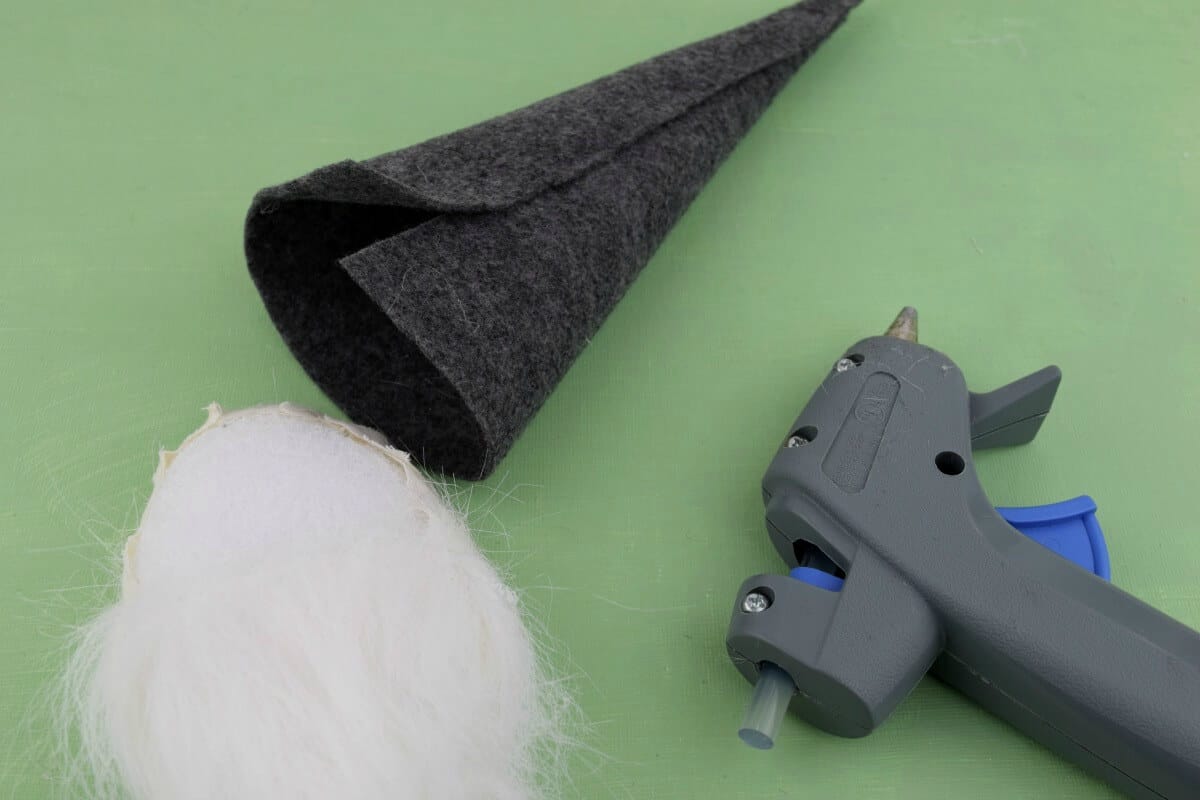
How to Make a Gnome Hat for a Christmas Gnome Ornament
Make the gnome’s hat by rolling a rounded triangle of felt. Do NOT secure it all the way down the closure and do not attach the hat to the gnome ornament yet.
When rolling the felt, only hot glue the top portion because we’ll need access to the inside of the hat.
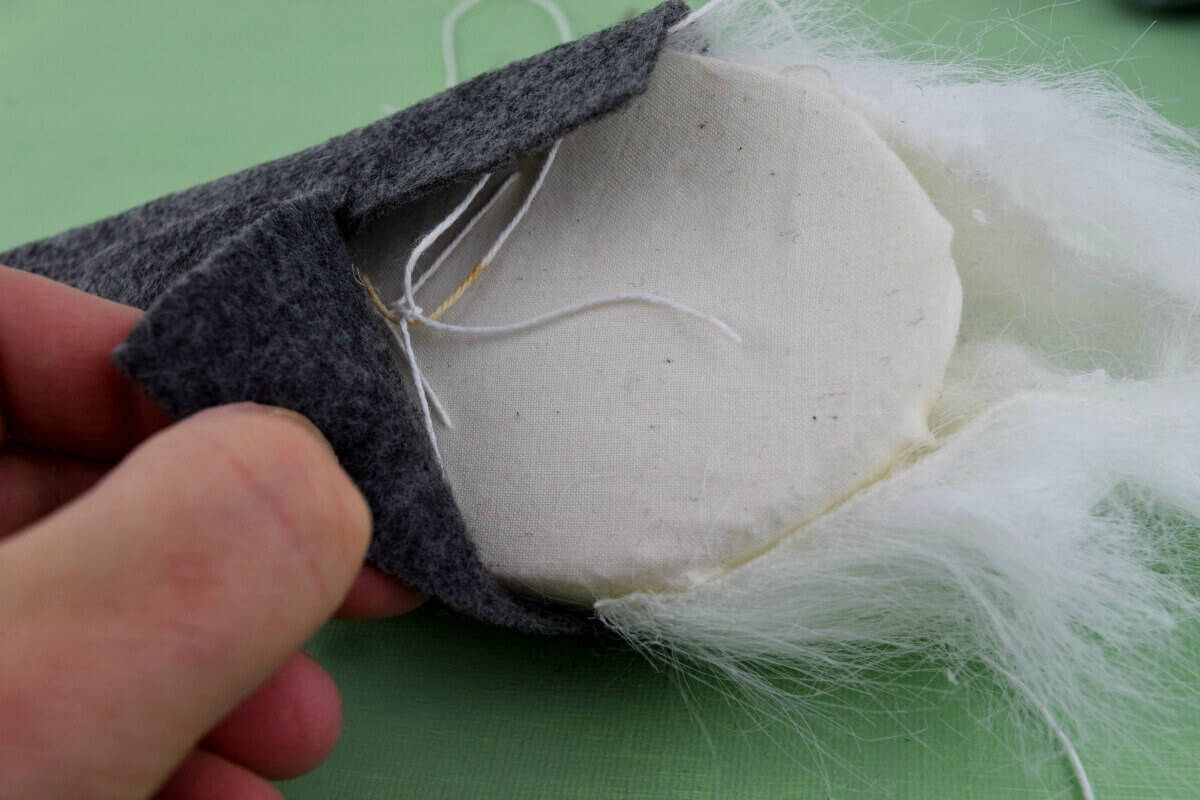
To make the hanging string, we’ll need to secure it (so it doesn’t just rip off the hat later). I used a darning needle threaded with kite string and put it first through the side of the foam egg (yep, right through it).
I then took the same thread and sent it through the outer edge of the other side of the foam egg. Finally, I strung it up through the (not-yet-attached) felt gnome hat (inside the hat).
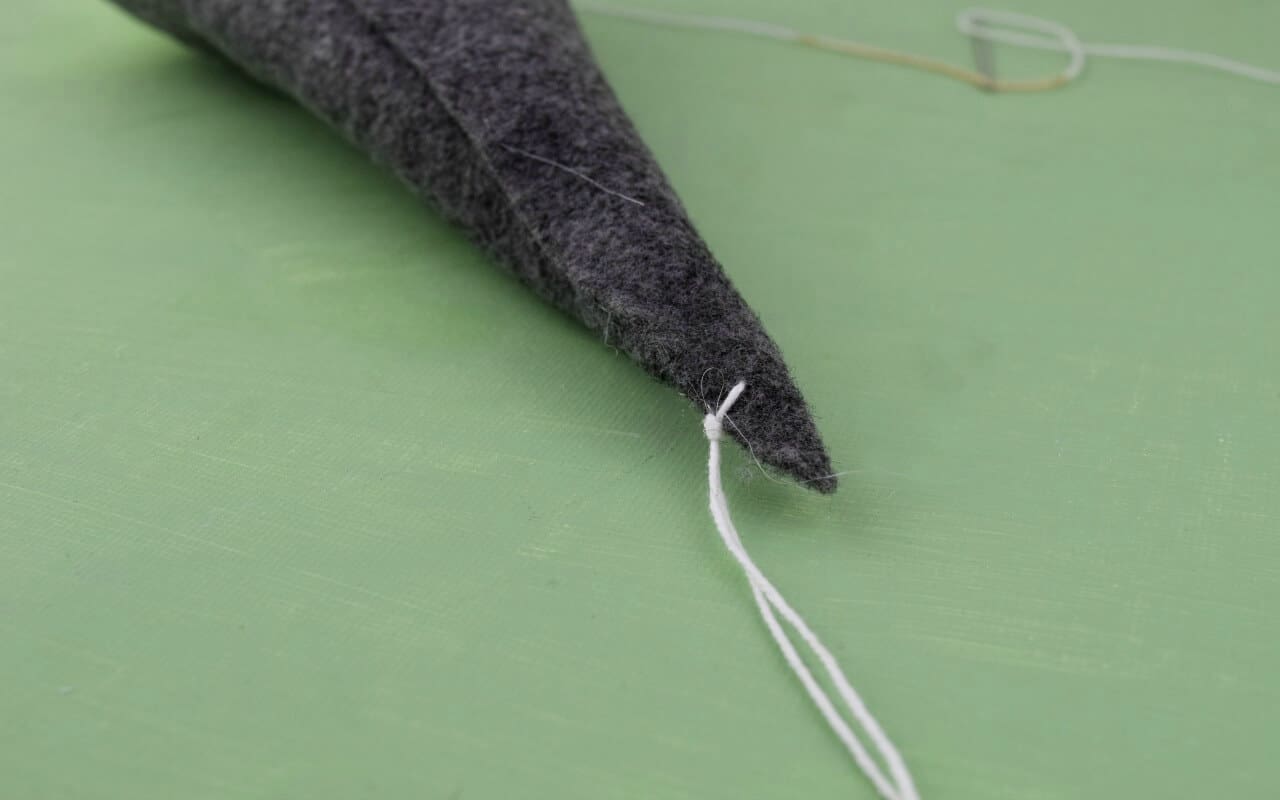
Once I had a loop at the top of the hat, I strung it back down through the hat and tied off the string on the back of the gnome. I made sure that the place I tied it off would be covered by the felt hat.
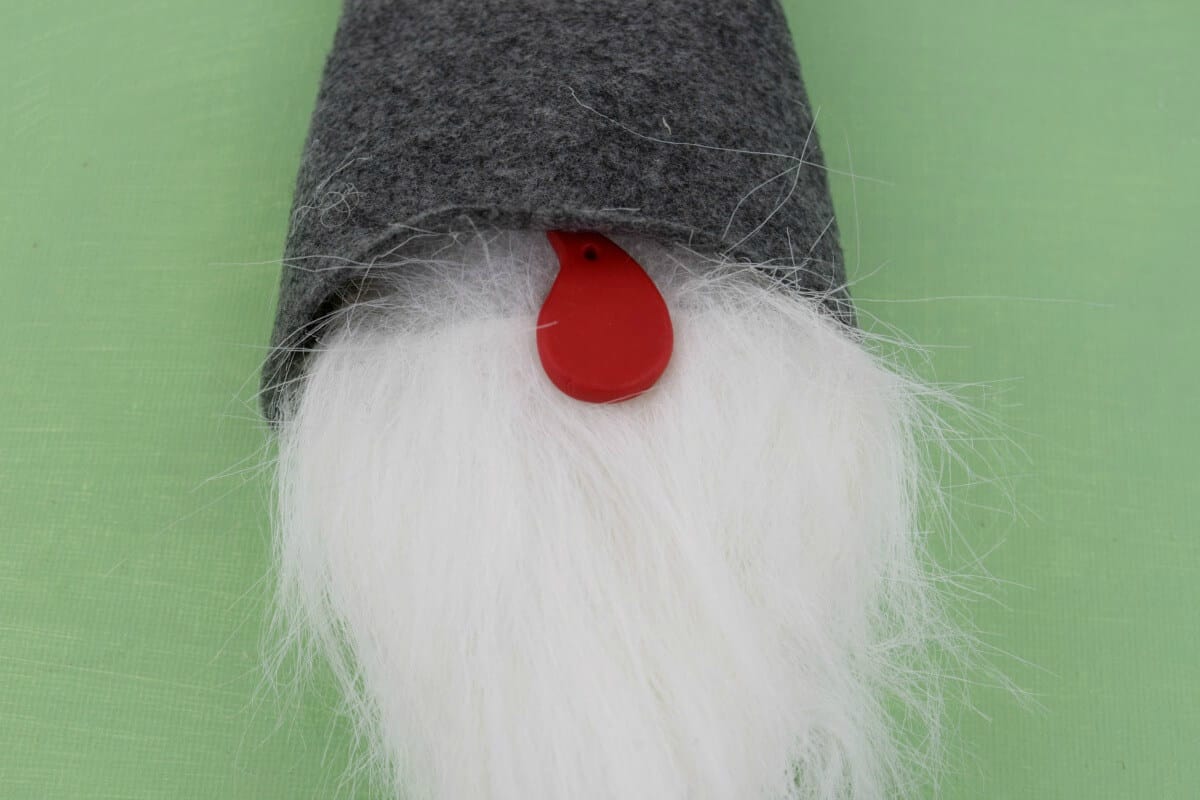
How to Make a Gnome Nose and Position It
Using anything you have on hand in your craft stash (or your kid’s craft stash), affix the gnome’s nose just below the felt hat position. You want it to stick out just a bit.
A peek-a-boo nose…
I’ve used clay balls, beads, and in this one used a raindrop-shaped clay tag we made from red clay. The size and style is anything to get you the look you want. We’re all about easy crafting ’round here.
The last step was to hot glue down the hat and secure the faux fur along the bottom of the foam egg. I just did that to tidy it up and make sure that if the gnome ornament turned around, it would still look presentable(ish).
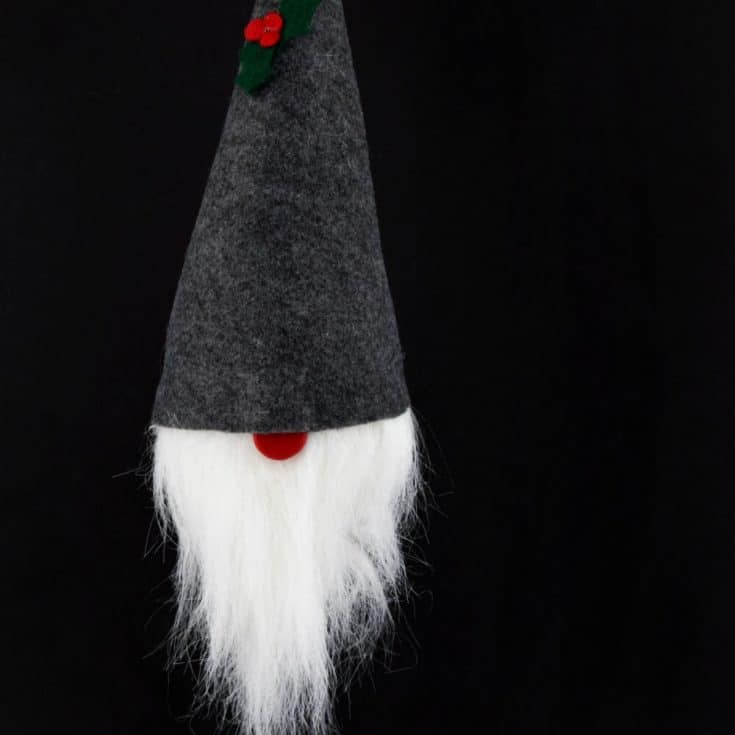
Add Details to Your Adorable Swedish Gnome Ornament
You could be done here or add a little embellishment to your gnome. Some ideas to decorate your gnome ornament:
- create holly leaves and berries from felt (this is what I did)
- color the beard edges with fabric or dye
- on my next gnome, I’m going to sew tiny snowflakes into the felt (best done before gluing the hat down)
An Adorable, Easy Scandinavian Gnome Ornament
Make this easy DIY gnome ornament for your holiday decor (or year-round ‘cuz he’s just too cute)! You can also use it in wreaths or hung on a doorknob.
Materials
- Foam egg
- Natural-looking fabric (I used leftover muslin, but anything will do)
- Faux fur
- Felt
- Clay or button nose (I chose red to match the velvet ribbon on my wreath)
Tools
- Needle and string (I used a large darning needle)
- Hot glue gun, razor, and scissors
Instructions
- Cut the foam egg in half (you can make two gnome ornament cuties or save it for another project).
- Trace a 1.5-inch border around the egg and cut the fabric. Cut slits in the fabric and hot glue it to the egg form. Note: the rounded part of the gnome face won’t be seen, so you don’t have to make it gorgeous.
How to Cut Faux Fur (and Cut the Gnome Beard)
- Cut the faux fur, leaving just a bit more on the edges because we’ll wrap it around the rounded part of the egg.
How to Make a Gnome Hat for a Christmas Gnome Ornament
- Make the gnome’s hat by rolling a rounded triangle of felt. Do NOT secure it all the way down the closure and do not attach the hat to the gnome ornament yet.
- When rolling the felt, only hot glue the top portion because we’ll need access to the inside of the hat.
- To make the hanging string, we’ll need to secure it (so it doesn’t just rip off the hat later). I used a darning needle threaded with kite string and put it first through the side of the foam egg (yep, right through it).
- I then took the same thread and sent it through the outer edge of the other side of the foam egg. Finally, I strung it up through the (not-yet-attached) felt gnome hat (inside the hat).
- Once I had a loop at the top of the hat, I strung it back down through the hat and tied off the string on the back of the gnome. I made sure that the place I tied it off would be covered by the felt hat.
How to Make a Gnome Nose and Position It
- Using anything you have on hand in your craft stash (or your kid’s craft stash), affix the gnome’s nose just below the felt hat position. You want it to stick out just a bit.
- The last step is to hot glue down the hat and secure the faux fur along the bottom of the foam egg.
Notes
If you’re new to cutting faux fur, here’s a breakdown:
1. Turn it over
2. Use a razor blade.
3. Only cut through the connective fabric.
Over to You
We are having so much fun creating these cuties. Let us know how you’re incorporating them into your decor in the comments below.
And would you please pin this to your favorite holiday board on Pinterest? Shares are how we grow and meet new crafters!
Meet the Creator
Hi there, I’m Sarah Nenni-Daher. I’m a crafty gal and always have at least 14 projects going at once. I am a crafter, designer, DIYer, and pattern maker. I share my creations here and in the Ruffles and Rain Boots® Shop.
Here at Ruffles and Rain Boots®, you’ll find DIY gnomes, crafts, gifts, cupcakes, laser crafts, and so much more. I love sharing video tutorials over on YouTube and chatting with other crafters in my Facebook groups. We’d love to have you!