
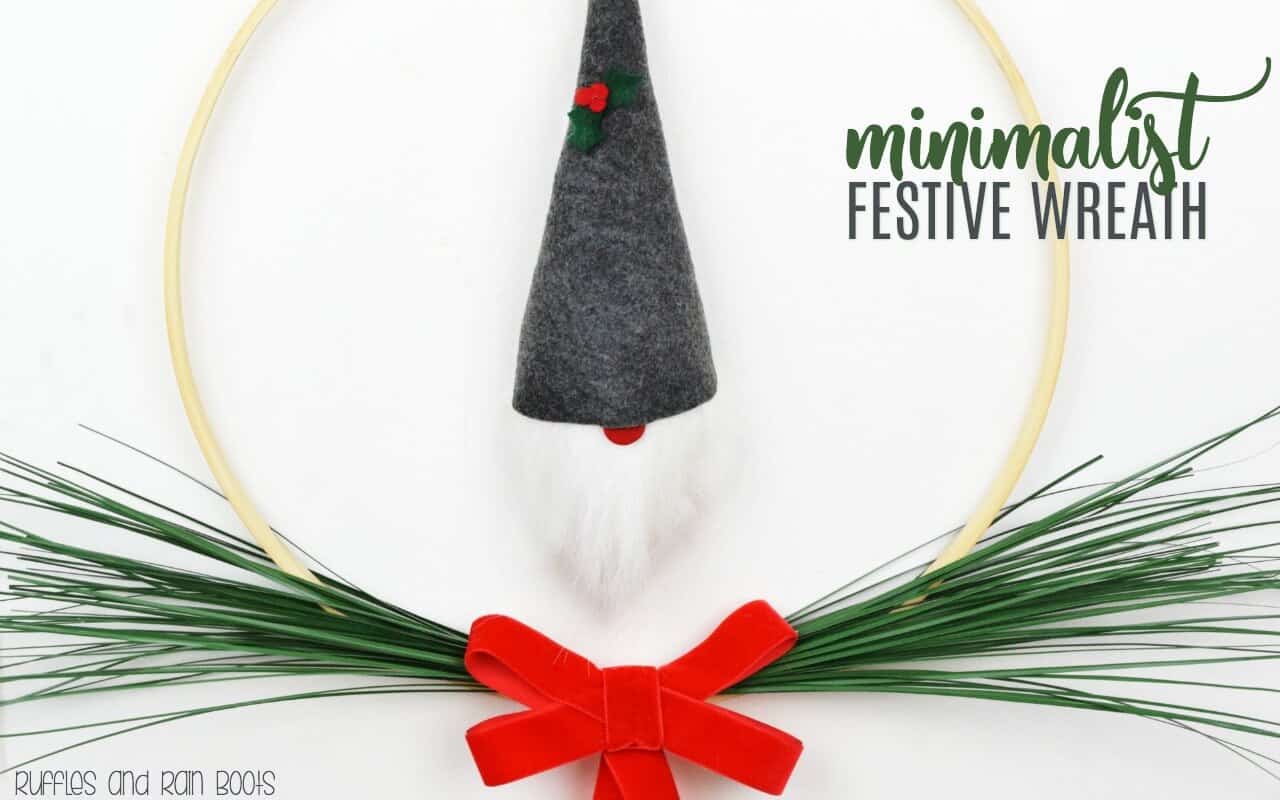
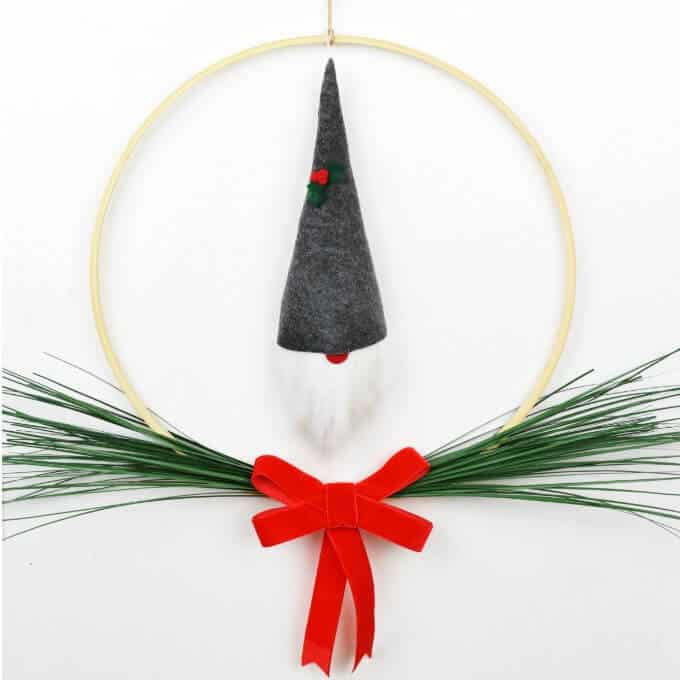
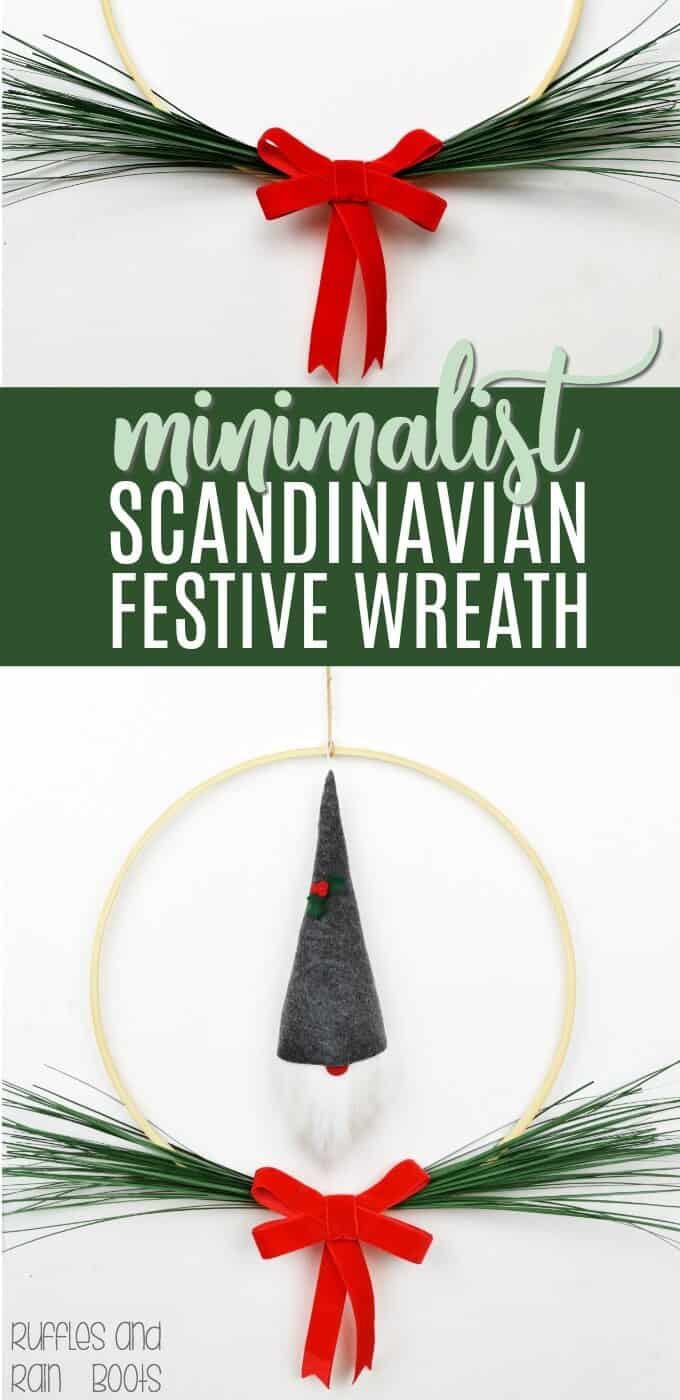
Scandinavian Minimalist Wreath
Make this Scandinavian minimalist wreath in 30-minutes with or without the most adorable gnome ornament made from a surprise craft supply! Bring gnomes into your home this holiday season.
What You'll Find On This Page
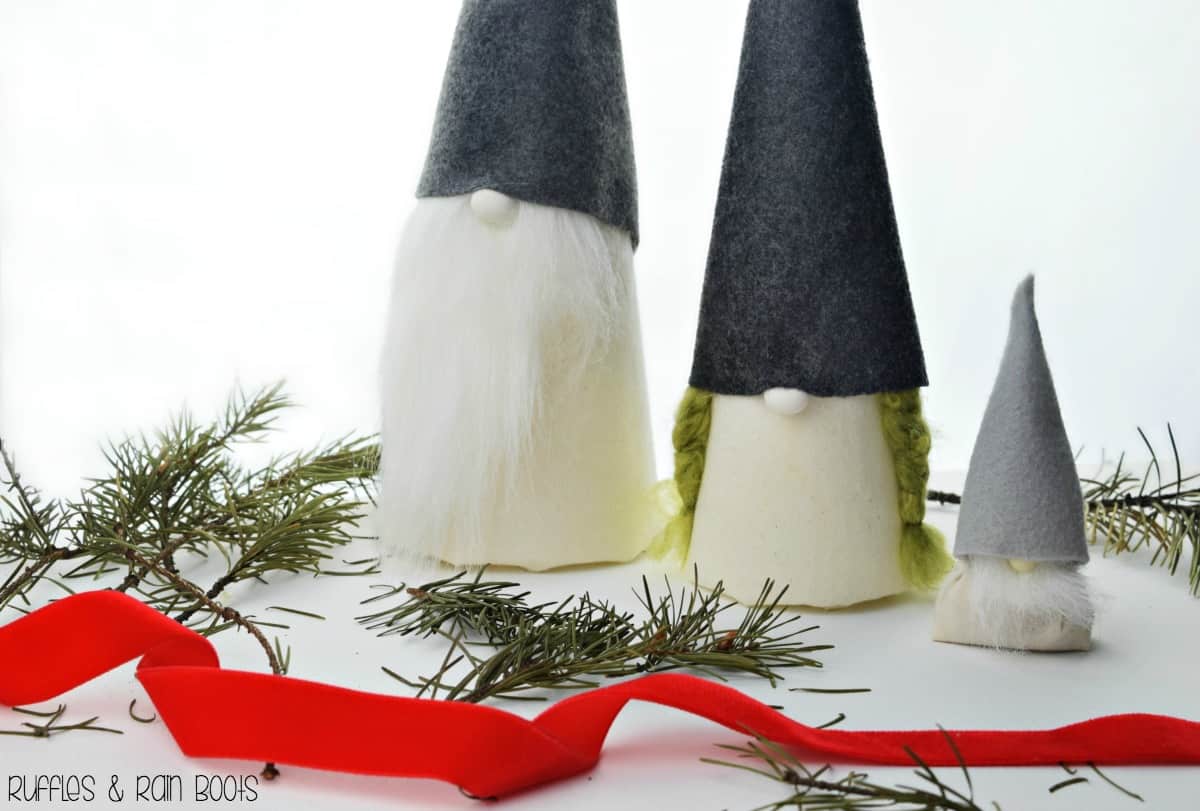
Gnomes, Gnomes, Everywhere!
Are you addicted to little tomte and nisse like we are? We’ve made an entire family of gnomes for our living room. We’ve made the daddy gnome, the mommy gnome (with braids), and the baby gnome (made with rice) and they’re just so easy to make!
Note: if you’re here for the Scandinavian gnome ornament, the instructions for the adorable gnome ornament are here.
There are affiliate links in this article which means, at no additional cost to you, we could receive compensation for our recommendations. You can read our full disclosure policy.
Supplies for a Scandinavian Minimalist Wreath
- 14-inch embroidery hoop
- 6 bunches onion grass (faux greenery)
- 1-inch red velvet ribbon
- Hot glue gun, scissors, twine (for hanging)
Easy Scandinavian Christmas Wreath Tutorial
First, take a minute and wipe the hoop and remove any splintered sections.
Remove the onion grass from it’s binding and the stem (save for when you make paper flowers).
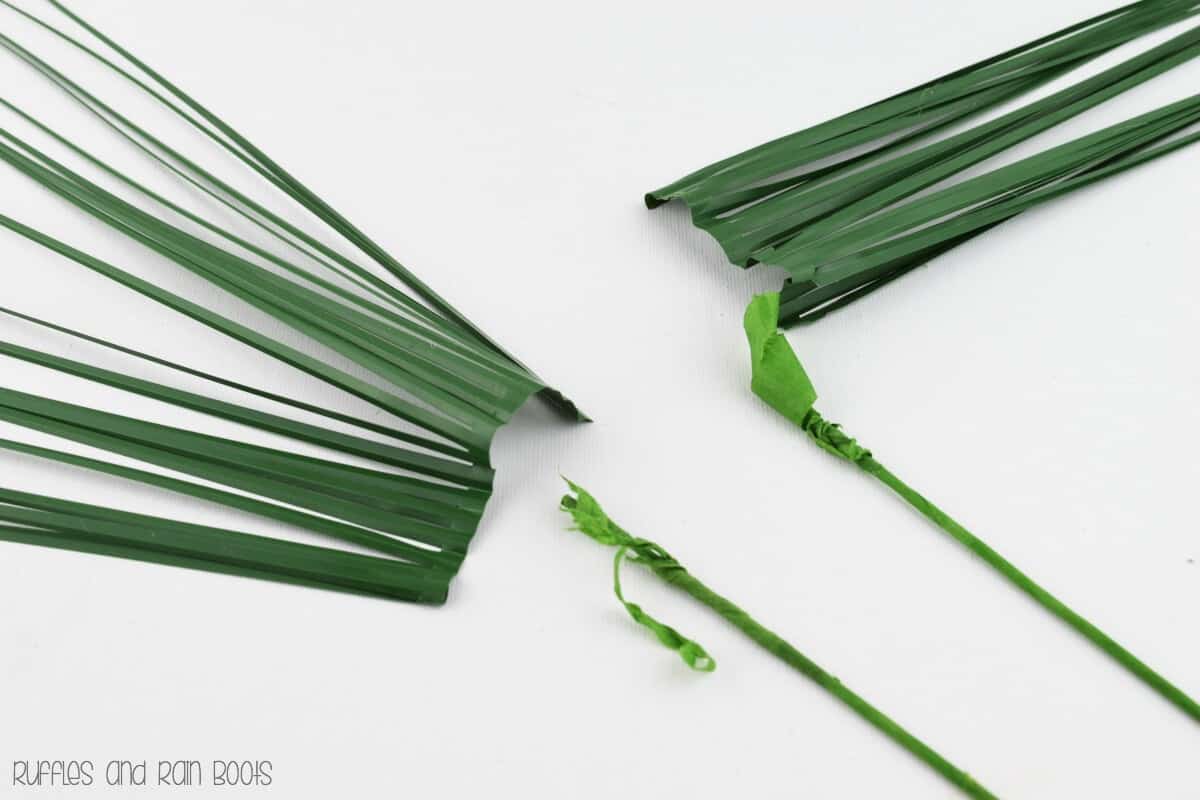
Using your hot glue gun, fold over the onion grass to just bigger than the width of your embroidery hoop. Stack until all of each bunch is secured.
Cut down two groups of onion grass (from the top about 2-3 inches) and set them aside.

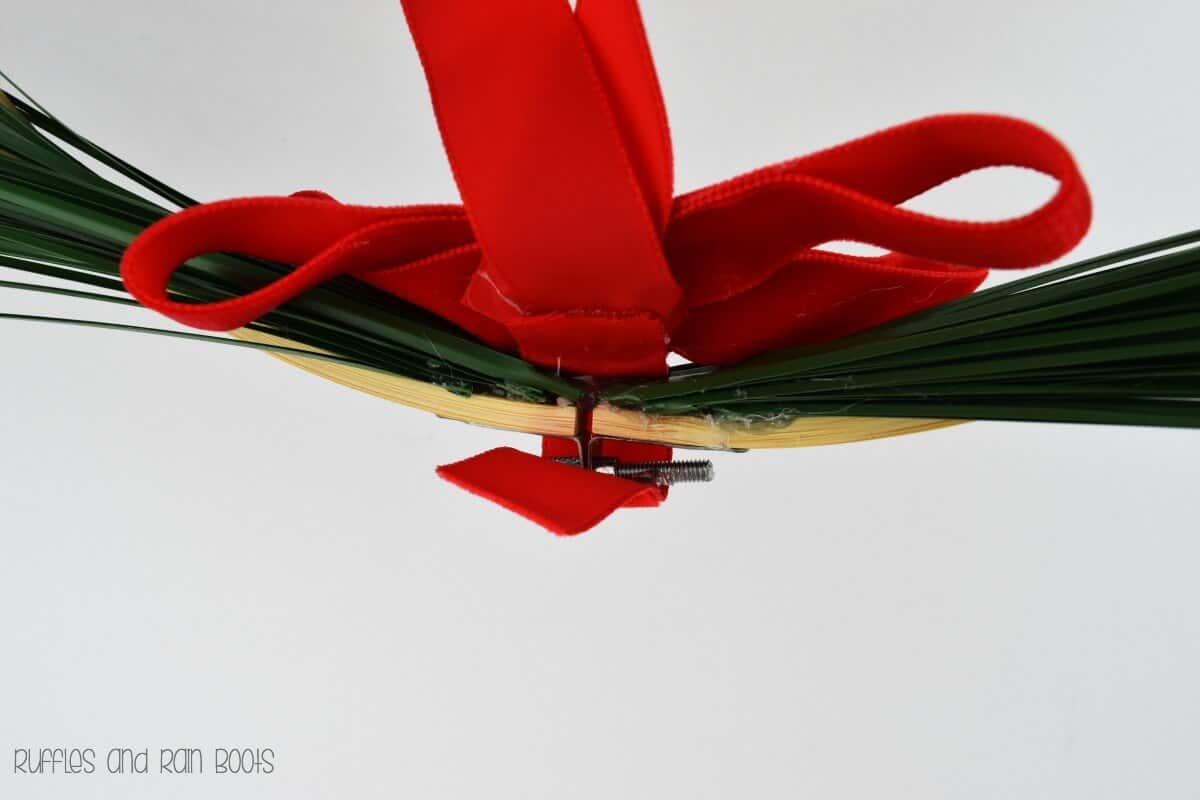
Hot glue one of the four longer bunches to the embroidery hoop, leaving space between the connecting point for the other two bunches to be placed.
Stack another long bunch on top of the first and hot glue it to the hoop.
Finish off that side with the third bunch (one of the short bunches), placing it just inside the hoop’s connection point.
Repeat with the other side and all three remaining bunches. Take care to place the shortest on top when assembling the embroidery hoop wreath.

How to Make a Bow for a Wreath
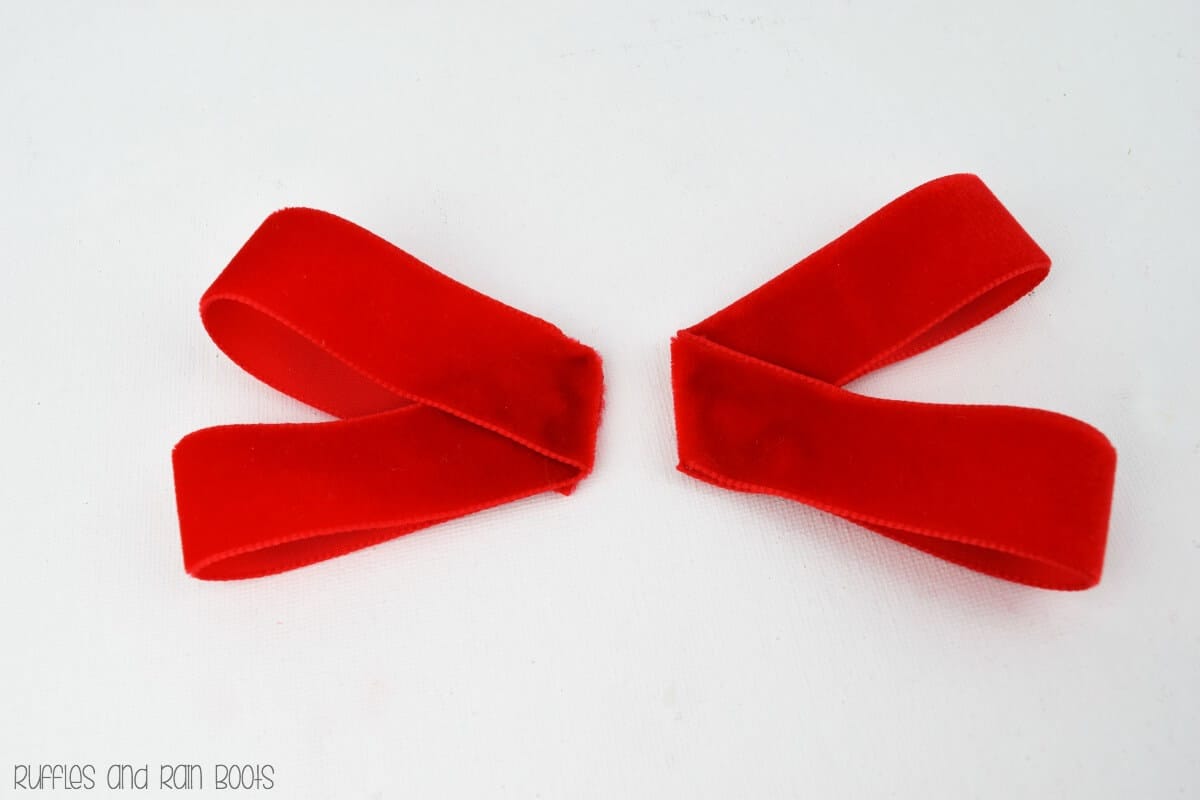
First, make your ribbon cuts. I used:
- 2, 11-inch sections
- 2, 6-inch sections (one end cut with a decorative finish)
- 2, 3.5-inch sections (one to complete the bow and the other to affix the bow to the wreath and cover the connecting point)

To make the bow, I folded over one of the 11-inch sections by 2.5 inches to make a loop. Then I turned the ribbon before making another loop. Try to make the sections even(ish).
It’s a wreath, not quantum physics – nothing needs to be exact.
Repeat the same process with the other 11-inch piece of ribbon.
Next, create the bow cover by looping one of the small pieces and gluing it onto the bow. Glue on each 6-inch ribbons.

Use the last 3.5-inch piece to glue the bow to the wreath, covering up the embroidery hoop join. And wouldn’t you know it, your simple, charming Scandinavian minimalist wreath is done!
Scandinavian Minimalist Wreath
Make this Scandinavian minimalist wreath in 30-minutes with or without the most adorable gnome ornament made from a surprise craft supply! Bring gnomes into your home this holiday season.
Materials
- 14-inch embroidery hoop
- 6 bunches onion grass (faux greenery)
- 1-inch red velvet ribbon
Tools
- Hot glue gun, scissors, twine (for hanging)
Instructions
- First, take a minute and wipe the hoop and remove any splintered sections.
- Remove the onion grass from it's binding and the stem (save for when you make paper flowers).
- Using your hot glue gun, fold over the onion grass to just bigger than the width of your embroidery hoop. Stack until all of each bunch is secured.
- Cut down two groups of onion grass (from the top about 2-3 inches) and set them aside.
- Hot glue one of the four longer bunches to the embroidery hoop, leaving space between the connecting point for the other two bunches to be placed.
- Stack another long bunch on top of the first and hot glue it to the hoop.
- Finish off that side with the third bunch (one of the short bunches), placing it just inside the hoop's connection point.
- Repeat with the other side and all three remaining bunches. Take care to place the shortest on top when assembling the embroidery hoop wreath.
How to Make a Bow for a Wreath
First, make your ribbon cuts. I used:
- 2, 11-inch sections
- 2, 6-inch sections (one end cut with a decorative finish)
- 2, 3.5-inch sections (one to complete the bow and the other to affix the bow to the wreath and cover the connecting point)
To make the bow, I folded over one of the 11-inch sections by 2.5 inches to make a loop. Then I turned the ribbon before making another loop. Try to make the sections even(ish).
It's a wreath, not quantum physics - nothing needs to be exact.
Repeat the same process with the other 11-inch piece of ribbon.
Next, create the bow cover by looping one of the small pieces and gluing it onto the bow. Glue on each 6-inch ribbons.
Use the last 3.5-inch piece to glue the bow to the wreath, covering up the embroidery hoop join. And wouldn't you know it, your simple, charming Scandinavian minimalist wreath is done!
Scandinavian Gnome (Tomte / Nisse) Ornament
I wanted to see if I could use an old foam Easter egg in an ornament and this little guy popped into my head. I was able to make a tutorial for a felt nordic gnome ornament this way and it’s adorable!
The minimalist wreath doesn’t need him but if you’re looking to add a little fun and Scandinavian detail, he’s easy to put together.
Get the instructions for the Scandinavian gnome ornament.
Watch Us Make It
Over to You
We’re are so very happy with our festive wreath. This year, we’re creating a Scandinavian holiday theme for our tree, home, and even some kids crafts.
Please pin this Scandinavian minimalist wreath to your favorite holiday board.
Meet the Creator
Hi there, I’m Sarah Nenni-Daher. I’m a crafty gal and always have at least 14 projects going at once. I am a crafter, designer, DIYer, and pattern maker. I share my creations here and in the Ruffles and Rain Boots® Shop.
Here at Ruffles and Rain Boots®, you’ll find DIY gnomes, crafts, gifts, cupcakes, laser crafts, and so much more. I love sharing video tutorials over on YouTube and chatting with other crafters in my Facebook groups. We’d love to have you!