
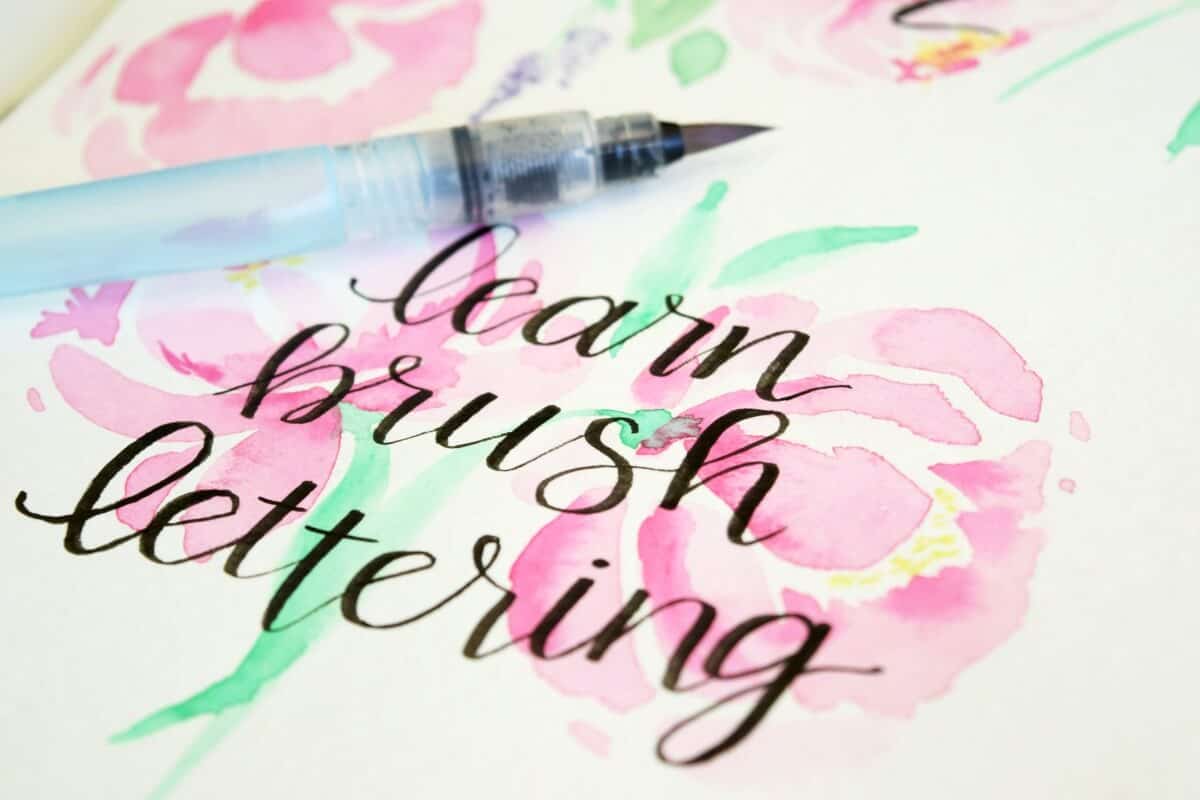
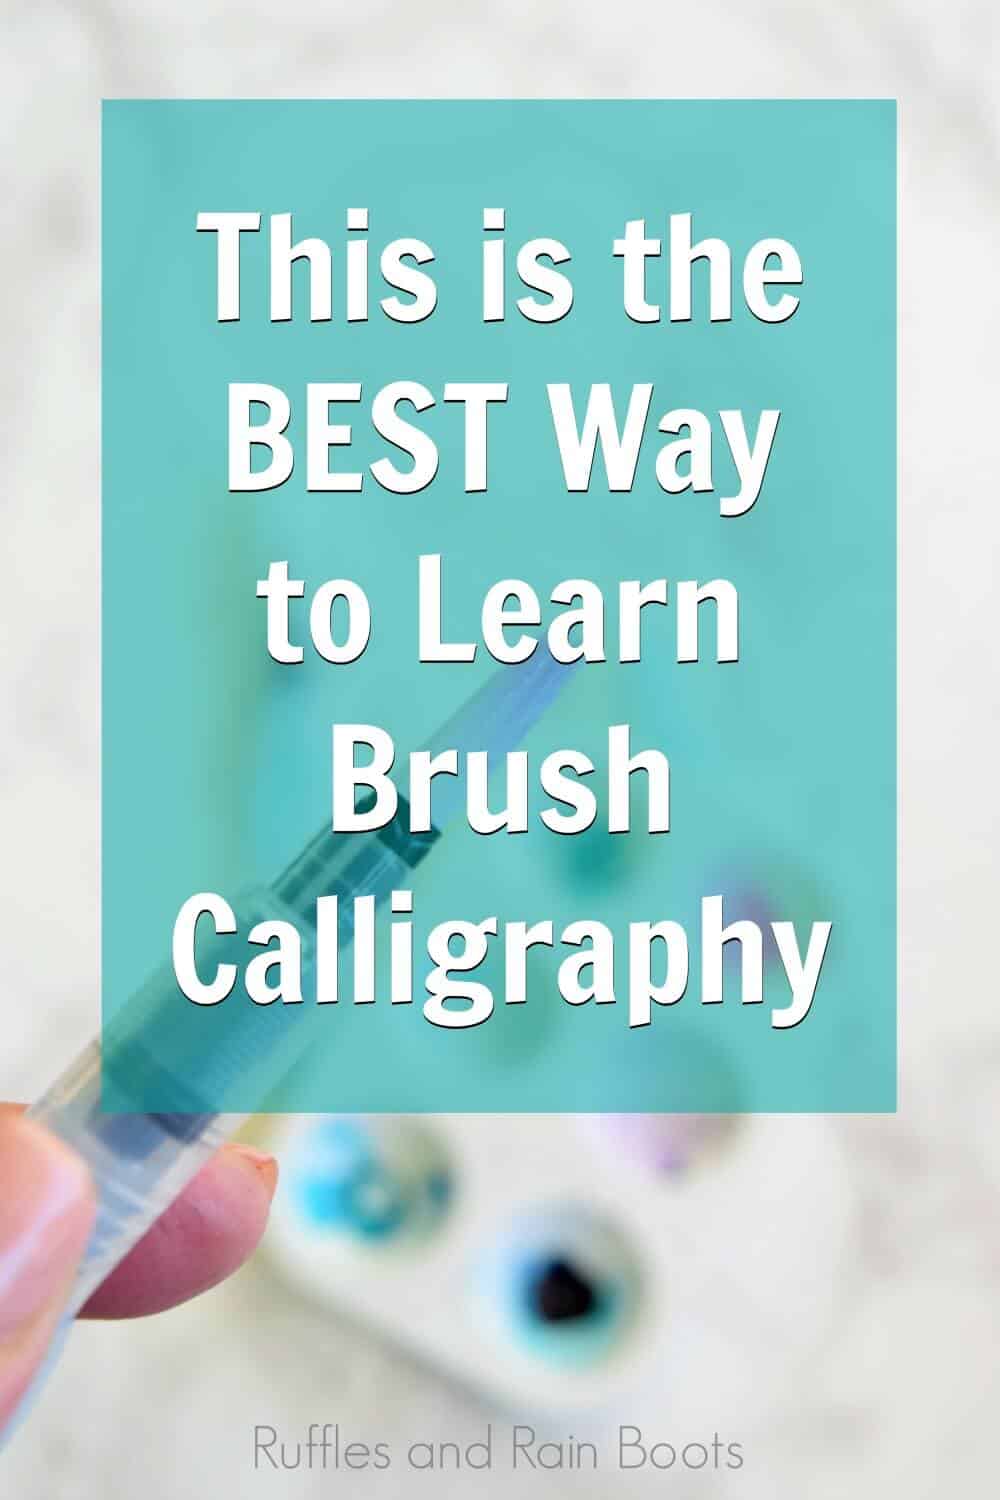
How to Learn Brush Calligraphy and Brush Lettering
Do you want to make those amazing brush calligraphy cards you see on Pinterest and in stores? Whether you want to practice with pen and paper, watercolor, or digitally using Procreate, you absolutely CAN learn to letter.
The best part is that it doesn’t take a long time to actually get good if you start with a strong foundation. If you’re interested in starting brush lettering, start here to learn hand lettering the easy way.
What You'll Find On This Page
Brush Lettering Basics and Getting Started
Here on Ruffles and Rain Boots, I love to share my love of hand lettering. I’ve been practicing this hobby for years and, like many, believe it to be one of the most rewarding activities. I can make gifts, digital products, and even get a kick when I look back (and cringe) at my old stuff. It shows me how far I’ve come.
If you’re interested in learning brush lettering (also called brush calligraphy), you’re in the right place. On this page, you’ll find the only two supplies you really need, tips on keeping your equipment in good shape, how to actually start lettering, and even free practice sheets. For added measure, I’ve included quite a few tips, too.
RELATED READING: Swash and Flourish Christmas Practice Sheets
Are You Here for the Free Basic Strokes Practice Sheets?
If you’re here for only the new basic strokes practice sheets and you get my emails, log into the Lettering Library. New here? Sign up to gain access to the free Lettering Library. The basic strokes practice sheets are in there, along with TONS of free lettering practice.
If you prefer NOT to sign up, you may purchase the basic strokes lettering practice sheets here.
No Time to Read This Now? Save it for Later
If you’re waiting on some hand lettering supplies to arrive, save this to a hand lettering pin board or share it on social media. This is a quick, meaty read but it’s also a great reference for you to save to easily find later.
Brush Calligraphy Supplies
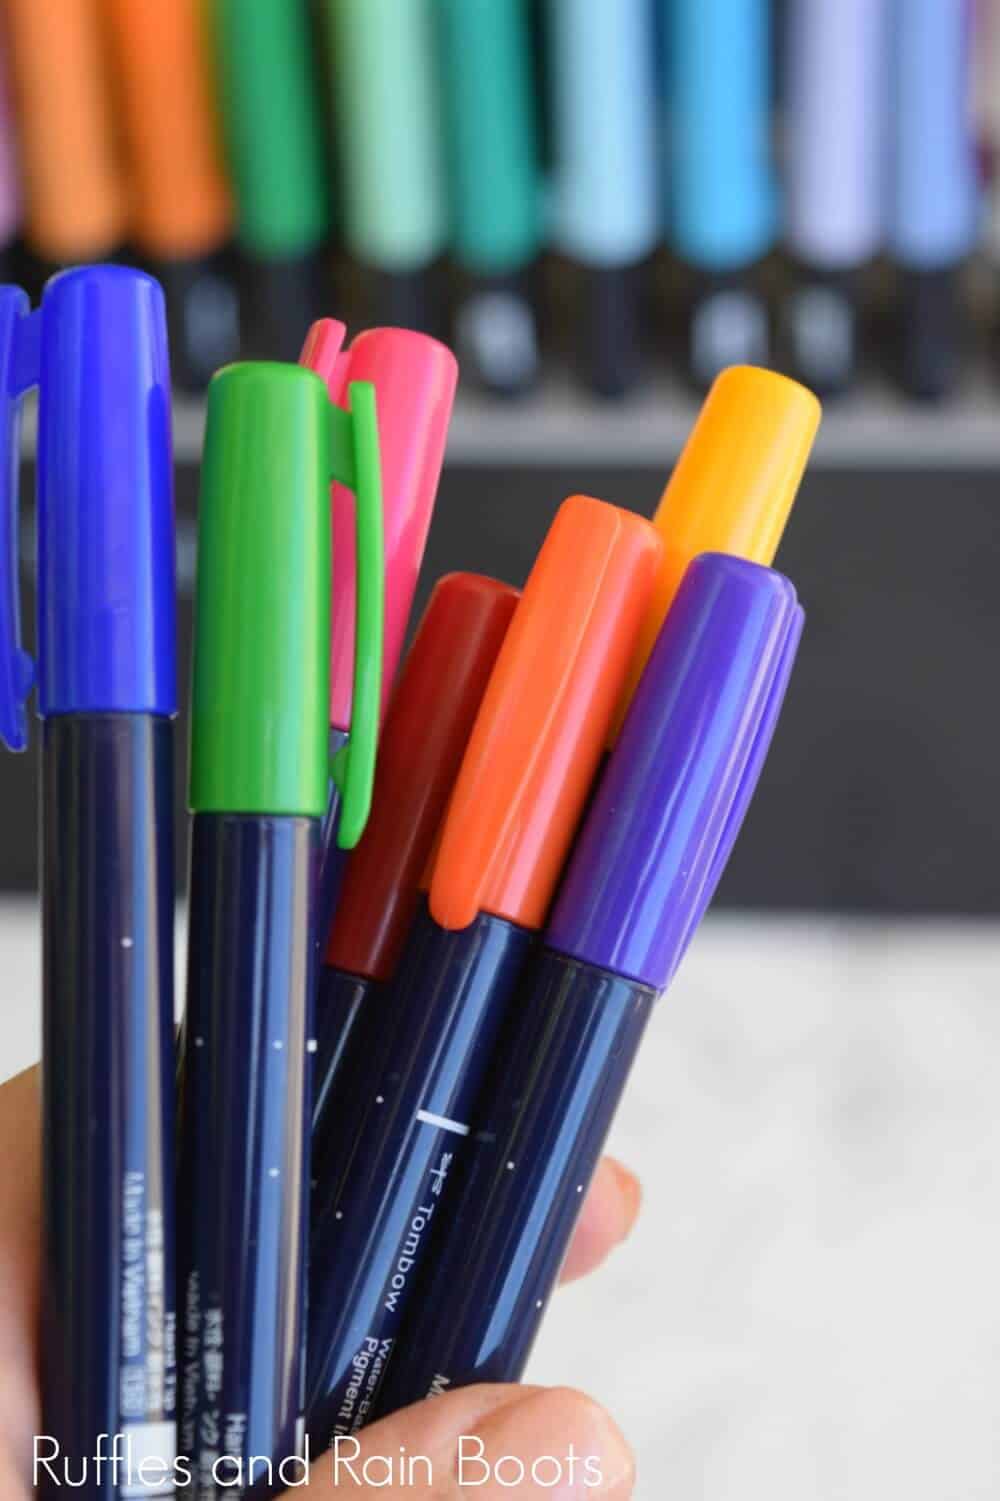
Do you need to steal your kid’s Crayola markers? Spend a fortune at the craft store? The answers are no and nope. Inexpensive black or colored small brush tip pens are the BEST brush calligraphy tool!
Brush Lettering Pens
If you’re new to brush lettering, start with a smaller pen. It’s fun to watch videos on Instagram of the large Tombow dual brushes being blended or the metallics gliding over black paper, however, when learning, you will progress much faster if you master control of smaller pens first.
You can also practice with a small water brush (or paintbrush), but I recommend a small brush pen the first ones here. They are small, have a strong tip, and are easily available on Amazon, from online retailers, and even in craft stores.
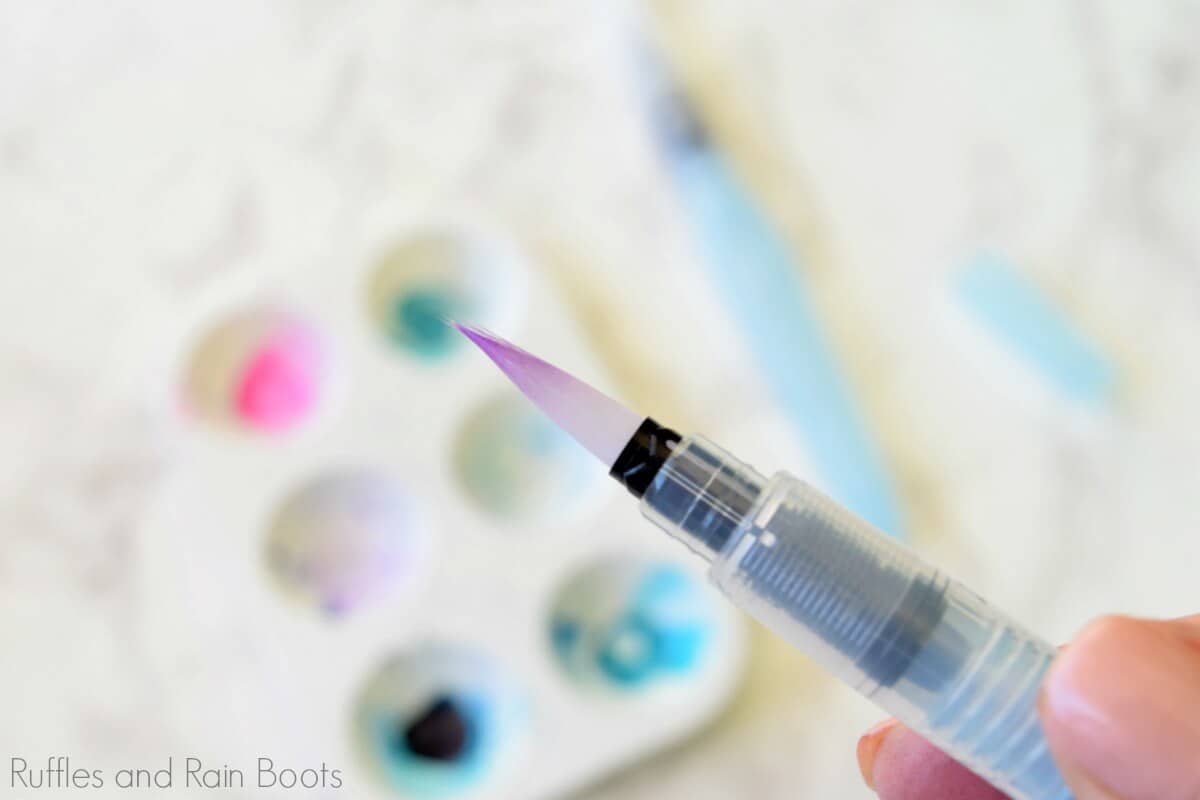
Water Brush Pen Calligraphy / Brush Lettering Water Brush
Love watercolor and really want to make beautiful art prints? A water brush is a favorite of hand lettering folks because it snaps back (similar to a brush pen), can travel well, and lasts a very long time. This is my favorite brand (I buy the three size pack).
The Best Brush Lettering Markers
Now let me just tell you – I’ve tried a lot of lettering supplies and not all of them are created equal. Stick with the better known brands: Tombow, Ecoline, Pentel, Sakura, and even Crayola are all good to start with brush calligraphy.
Whether you want a big, chunky Ecoline or a fine-tipped Tombow, those brands will not do you wrong.
I have received a lot of this question: is the Dollar Tree calligraphy pen good? No. It is not a good pointed pen NOR is it used for brush lettering. You’d be better off picking up something from their marker selection than this pen.
The Best Brush Calligraphy Paper
Brush pens aren’t like your Bic – they need a little care to remain bouncy and without frays. We’ll get to how to keep brush pens working their best a little later, but for now, let’s talk about the paper.
The paper you use should be smooth for practice. I love marker paper for this and I buy these pads from Amazon. They can be found at craft stores, as well, but look for them on sale or use coupons.
If you’re printing off any of my free practice sheets, invest in a smooth paper like laserjet paper (I buy this one). You’ll work on this a lot and, in order to keep your pens working well, pick up a pack.
When I work in watercolor, I do art prints and cards on both hot and cold press papers. Hot press is smoother than cold, so if you’re using PENS, spring for the hot press watercolor paper for lettering projects.
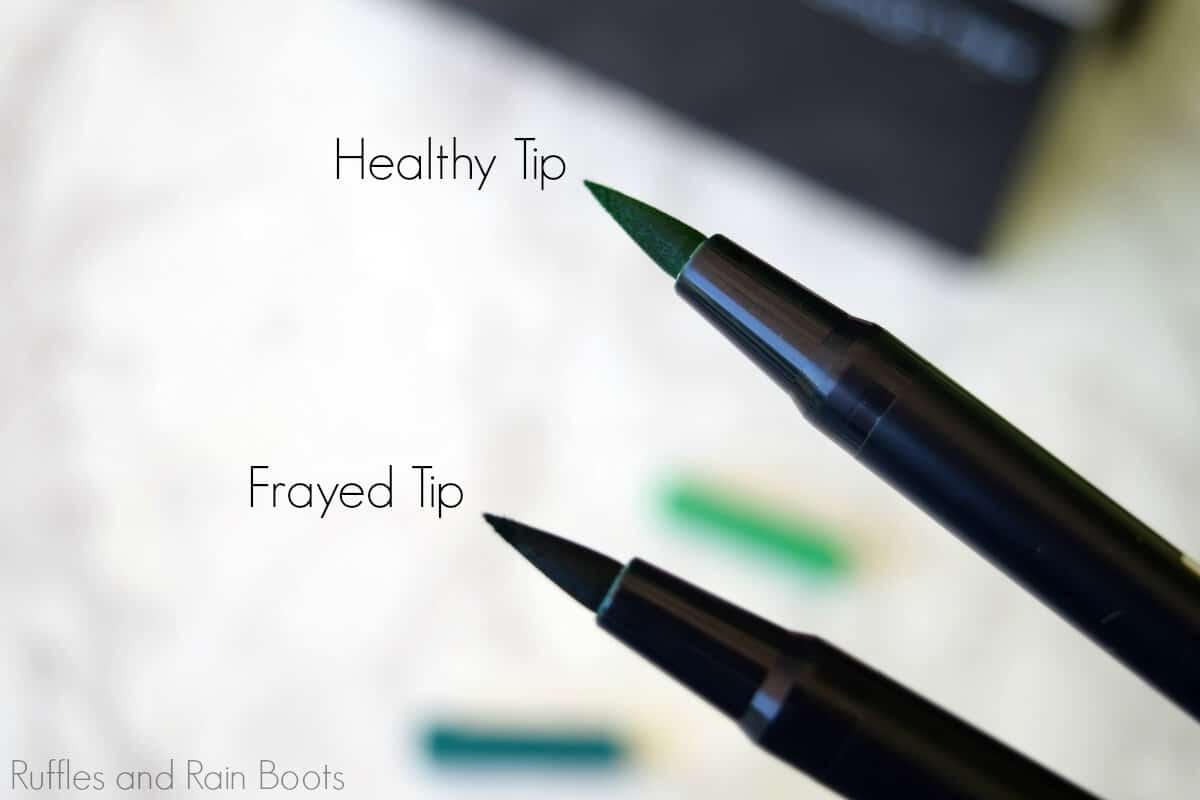
How to Keep Brush Calligraphy Pens Nice
UGH – there is nothing more frustrating than pressing a pen to paper and finding the brush tip is frayed! If you’re like me, have a set your daughter can use and keep it separated from your lettering supplies.
Brush Pen Care
Brush pens, especially certain brands over others, will last a very long time (when not handed to a 6-year-old). I practice every day (at 12:30, just after lunch) and have been using the same set of Fudenosuke pens for months. A few tips to keeping brush calligraphy pens nice are:
- Angle your hand. When writing with a brush pen, you should be writing with the pen at an angle because it not only helps letter form but also to keep the tip from catching and skipping.
- Be mindful of direction. Hand lettering is often taught “thin upstroke, thick downstroke” but the angle in which your pen sits against the page matters. Never use your brush pens like markers in a quick back and forth motion. It will fray the tip.
- Don’t press hard. I know it seems counterintuitive, but you do not need a great deal of pressure to get thick downstrokes. It’s easier in the short run but its killer on your wrist after a while! Increase the angle and add slight pressure. Slight.
- Clean the tips. We’ve all been there when we’ve repeated a section over and over and ripped up pieces of the paper. Oops. Stop and remove and bits of paper, even rinsing the tip with a slight stream of water (pen facing down). Get the gunk out of the tip.
Water Brush Care
These synthetic tips are very hearty and will keep their shape a very long time. You don’t have to be as mindful of the water brush as you do the brush pens.
- Clean them properly. I’m 100% guilty of just wiping the tip of a lettering water brush on a blending pad or at the bottom of my paper. Instead, use a glass of water to clean the brushes. Dip the tip in, swish it around, and wipe it (in the direction of the bristles) on a clean rag or lint-free towel.
- Store dry. Empty out your brush’s cartridges before putting them away. Sometimes I fill mine with colored water and with a quick clean, they’re as good as new because I make sure to drain and store them dry.
How to Start Brush Lettering
Honestly, pick up a pen, grab some basic brush strokes lettering practice sheets, and get started. Learning about (and practicing) different styles will help you to find your signature style of brush lettering.
How to Hold a Brush Pen
When you first pick up a brush pen, tilt your hand to an angle. It doesn’t matter if you’re left or right-handed, this is the starting place for brush calligraphy. It places the brush tip in the perfect angle to control the pressure and make the “thin upstroke, thick downstroke” look of this lettering style.
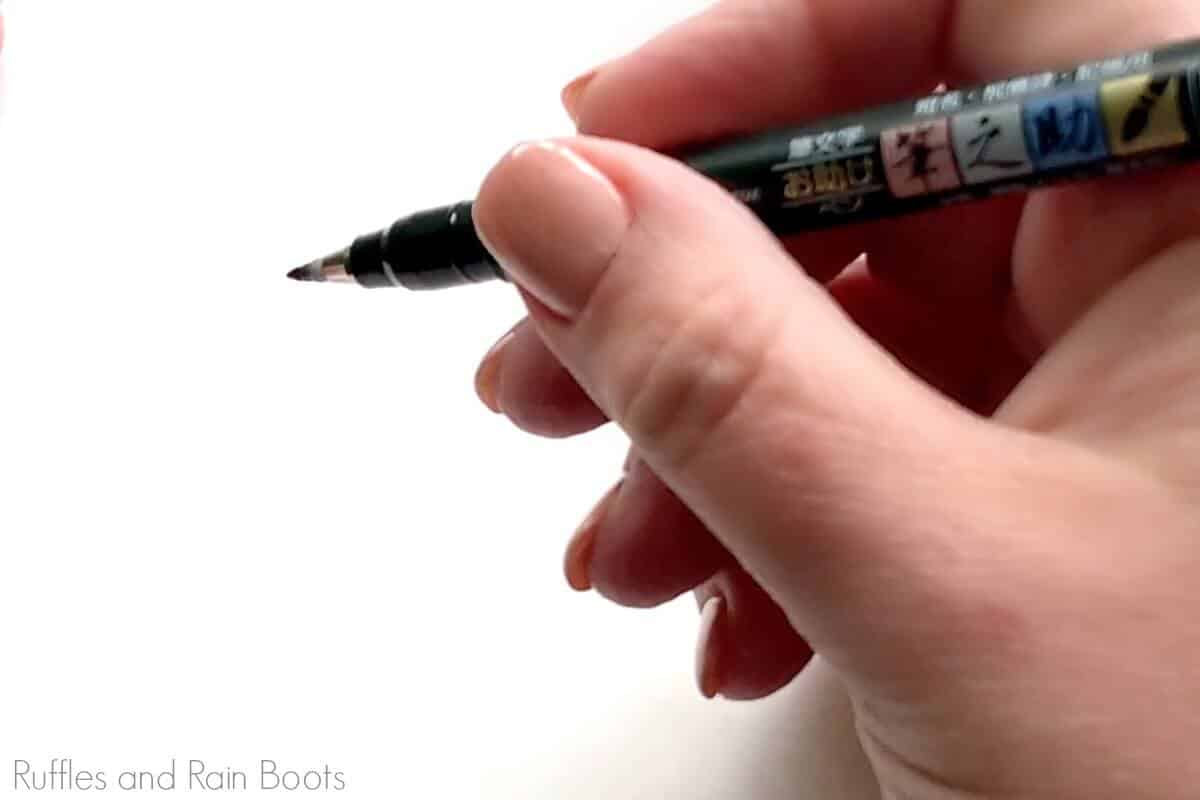
Note: if you’re using a water brush, you can hold it a little more upright than the brush pens. That said, pay attention to the spread of tip and make sure it bends in the direction of the bristles.
Start with the Basic Strokes (and Cheat a Little)
Did you know there are really only a few strokes that are added together for brush lettering? The basic strokes vary by artist, but here are a few of the need-to-know moves:
Listen, I get it – doing the same thing over and over and over is boring! Practice the basic strokes for 10 minutes (set a timer) and then practice using a “copy, then create” method with any of the free practice sheets in the free Ruffles and Rain Boots Lettering Library.
RELATED READING: Lowercase Letter Practice Sheets (FULL SET)
Try Many, Many Styles
It might sound counter-intuitive, but in order to find your personal style of brush calligraphy, I encourage you to try many different styles. It will help you figure out if you like bounce lettering, something which appears more like Spencerian calligraphy, or even something entirely new!
In the Ruffles and Rain Boots Lettering Library, I’ve got you covered with a TON of different styles!
Place Your Entire Arm On Table
Does this sound weird? Yes, a little, but run your own experiment: letter with your elbow on the table and off. What happens with most of us is that our lines aren’t as shaky and we have a stronger base which helps stave off fatigue.
Note: if you’re digital lettering (iPad lettering, for example), remove the iPad from the case if it’s a thick one.
How to Hone Your Basic Brush Calligraphy Practice
Add shadows, gift everyone a hand made card or present, build art prints, get creative with monthly intro pages in your bullet journal – there are so many ways to get better at hand lettering. Below are a few common brush lettering problems and solutions.
Shaky Lines
First, let me say that shaky lines happen to us all. In the free basic strokes lettering set, I give you a few tips for beating shaky lines when lettering but the most important one is slow down (I have to constantly remind myself, too). I also remedy shaky lines by making sure my entire arm is on the table (up to the elbow).
Shadows
There is nothing like giving dimension and life to a brush calligraphy piece. Whether you’re lettering with a paintbrush or a brush pen, you can add shadows. Here is a video that tells you how to add shadows to hand-lettered pieces.
Move Your Entire Arm
Okay, so many people stare at me when I say this but I’m telling you that if you learn to move your arm (not just your wrist), your body will thank you. Your work will also be smoother and you can work large elements in very easily.
Hand Lettering Monthly Prompts Quick List
- January Lettering Prompts
- February Hand Lettering
- March Hand Lettering Prompts
- April Lettering Prompts
- May Hand Lettering
- June Hand Lettering Prompts
- July Lettering Prompts
- August Hand Lettering
- September Hand Lettering Prompts
- October Lettering Prompts
- November Hand Lettering
- December Hand Lettering Prompts
Free Brush Calligraphy Sheets on Ruffles and Rain Boots
If you’ve made it this far down, woohoo! You must be very serious about brush calligraphy and hand lettering as a hobby. So, let me help you.
Free practice sheets are available in the Lettering Library. In order to access it, you’ll need to be signed up (there is a big, teal box on this page – sign up there).
More Practice Sheets You Mike Like
- Ways to Letter F – This is a tricky letter in a number of styles.
- Letter A Brush Lettering Practice Sheets – Practice with eight different styles to challenge yourself and build skill.
Digital Brush Lettering
You have a couple of options to take your brush calligraphy digital. Personally, I use Illustrator and the iPad app Procreate. I’ll write a separate article on these because it’s a very different lettering experience than pen and paper.
Please Save or Share This Beginner Hand Lettering Resource
Your shares are how this site grows and I am sincerely thankful. Please save this to a lettering pin board or share it on Facebook, Instagram, or other social media to help others.
Meet the Creator
Hi there, I’m Sarah Nenni-Daher. I’m a crafty gal and always have at least 14 projects going at once. I am a crafter, designer, DIYer, and pattern maker. I share my creations here and in the Ruffles and Rain Boots® Shop.
Here at Ruffles and Rain Boots®, you’ll find DIY gnomes, crafts, gifts, cupcakes, laser crafts, and so much more. I love sharing video tutorials over on YouTube and chatting with other crafters in my Facebook groups. We’d love to have you!