
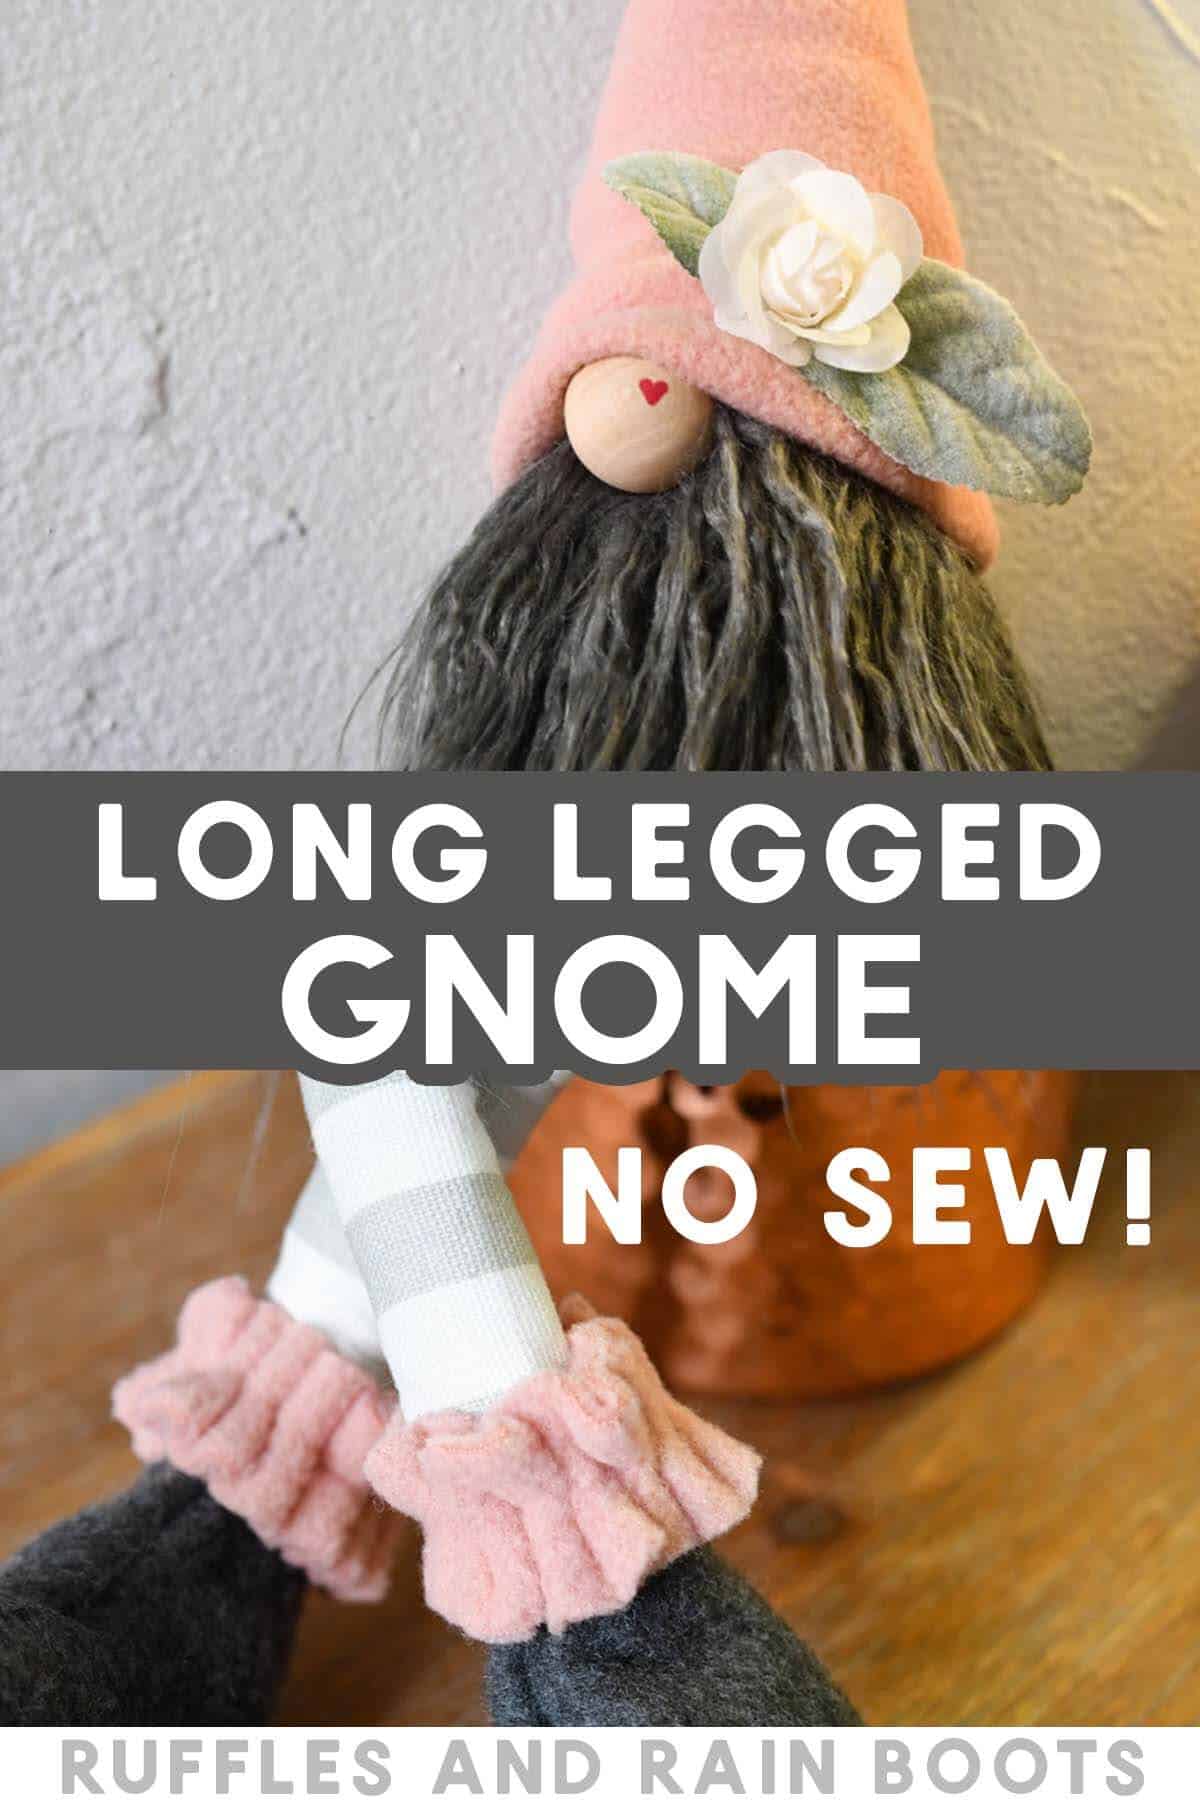
DIY No Sew Gnome with Long Legs
Learn how to make your own no sew gnome with long legs for any holiday using your hot glue gun! This gnome tutorial includes a free gnome shoe pattern, along with full, detailed video instruction.
What You'll Find On This Page
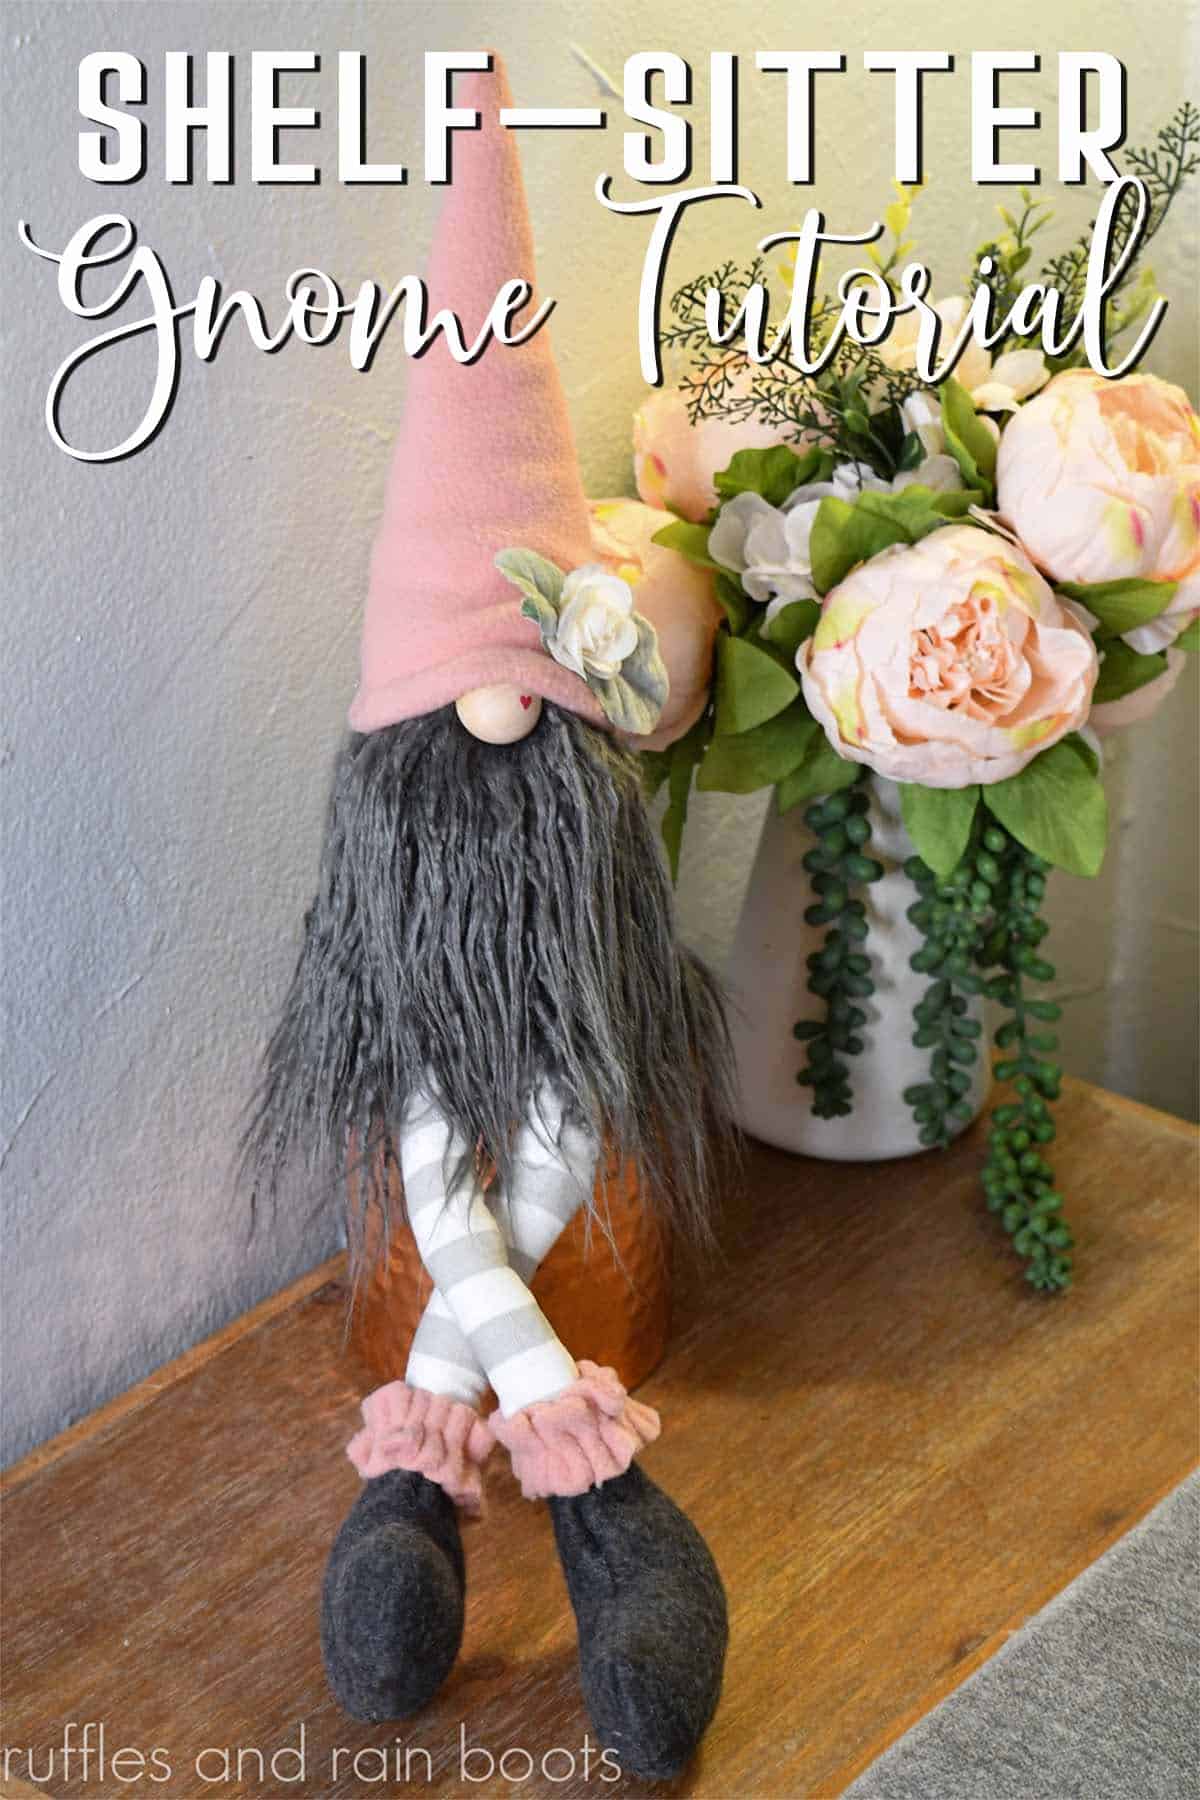
Shelf Sitter Gnome with Legs
Here at Ruffles and Rain Boots, I’ve taken to decorating only a small area for Valentine’s Day. It’s one day I know, but I love the bright pop of color in the home when outside is just so gray.
This year, I’m choosing to add a pale, peony pink to my decor and when I came across this fleece I was instantly inspired to make a gnome with long legs. The same day I picked up the stripe fabric, a YouTube viewer requested a shelf sitter gnome using this pattern and well, this guy was drawn up and made in just about 40 minutes.
For this DIY gnome with a wrap-around beard and dangling legs, you will need your glue gun or a sewing machine. Keep reading for the full written and video tutorial where I use just a hot glue gun to assemble this guy.
RELATED READING: Fall Shelf Sitter Gnome with a Gorgeous Full Beard
Save or Share for Later
If you need to gather supplies or figure out how many Valentine’s Day gifts you might need to make, save this to your favorite crafty pin board or share into a fun Facebook group. I appreciate the share and you will easily find it later.
Tips for Making a Shelf Sitter Gnome
- Choose a stretchy fabric for the body, hat, and shoes. I like to work with fleece for this because it comes in a huge array of colors and textures while giving you as much stretch as needed.
- The leg fabric can be cotton, knit, fleece, or most any other material (no need to have a lot of stretch). Do no choose a thick felt for this, however, because it will be difficult to turn.
- Use a detail tip hot glue gun for this project and you will be able to mimic the seams achieved when sewing.
- The wrap around beard hides the join of the legs, however, you do not have to make your beard go all the way around. Here are some other options for how to make gnome beards.
- If you are a fan of making sock gnomes, skip to the part in the tutorial about creating and attaching the legs. This will work for sock gnomes, as well.
Accessories Used on This Gnome
I’m often asked how to make decorations and accessories for gnomes. When I can, I share as much about what I do and even show creating them in video tutorials alongside the gnomes. For this sweet guy:
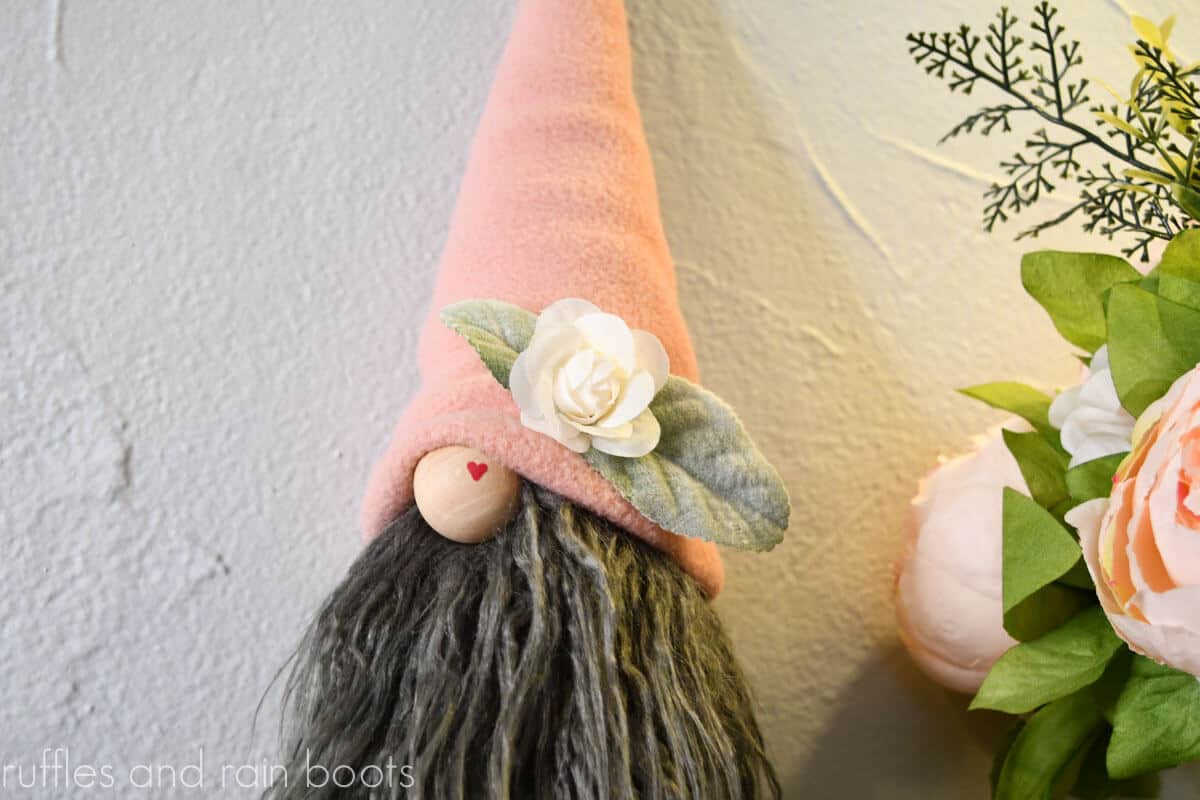
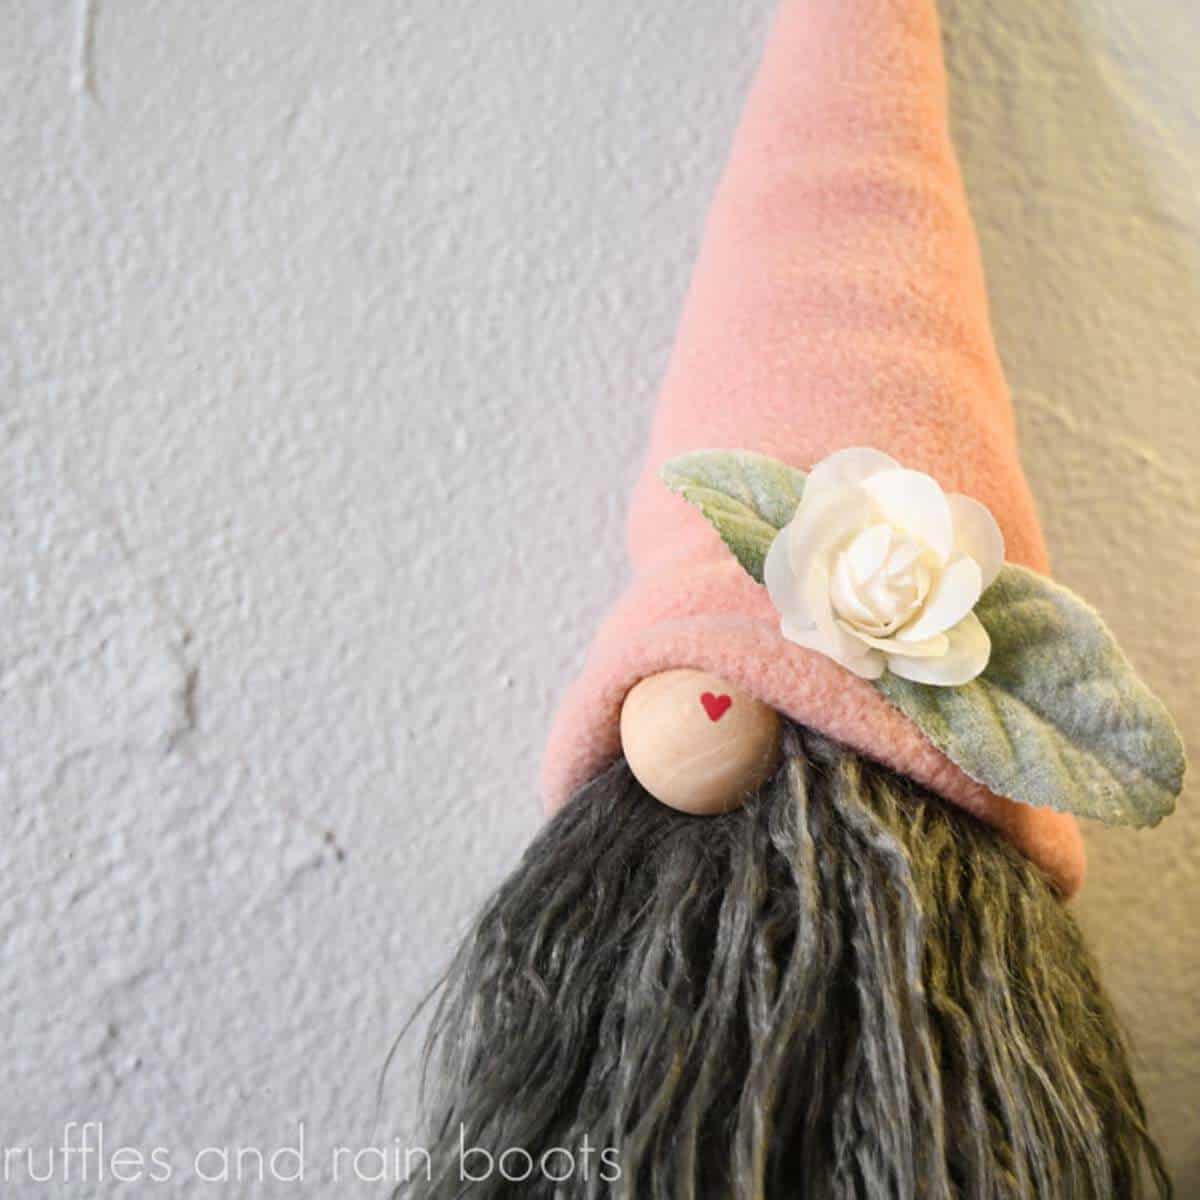
- I used a dark pink marker to draw on a very small heart on the wood ball for the nose to make him more of a Valentine gnome. You can use anything for a gnome nose, however, like wood beads, pompoms, felted wool balls, or a nylon full of poly-fill.
- My floral detail includes two lamb’s ear leaves pulled off a sprig from a craft store. In the center, I used a flower sticker and removed the sticky in order to hot glue it on.
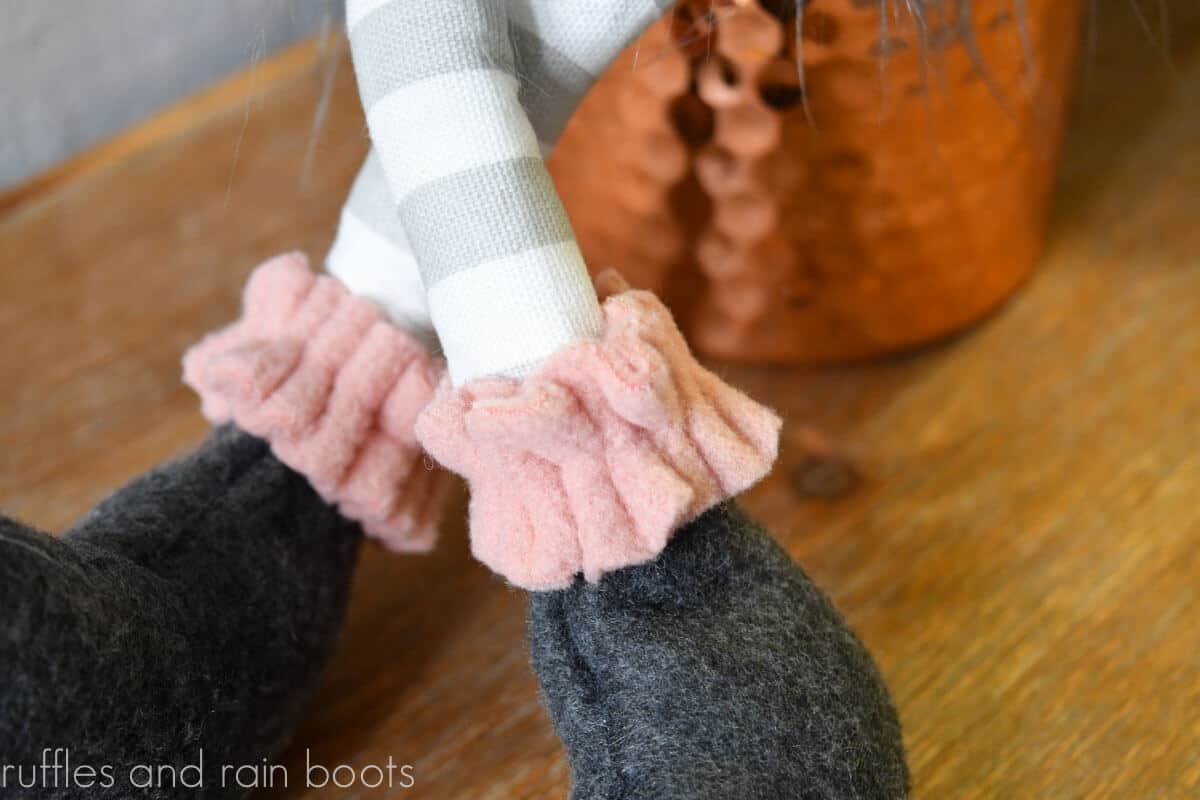
- The detail on the legs (shown below) is easily made from any fabric or ribbon (the how to is in the tutorial and video). I wanted to match the hat so I used the same fleece, however, you can use anything pliable. If you want, you can quickly make a ruffle using a sewing machine.
- Add on a memorial brooch or other piece of jewelry, a flower, or other item to customize this gnome and make him your own.
- Another idea is to use the Dollar Tree string of lights and hide the battery pack in the back of the hat. As long as you’re using fleece, you can tuck it up in the back between the hat tacks.
Instructions to Make a Gnome with Long Legs
Below is my written tutorial and supplies list. If you are a visual learner, here is the Valentine’s Day No Sew Gnome with Long Legs video tutorial. While you’re there, be sure to subscribe to the YouTube Channel – we have a good time.
Valentine's Day Gnome Shelf Sitter
Make this elegant shelf sitter gnome with long legs for Valentine's Day, Spring, or any occasion. Use a hot glue gun or a sewing machine.
Materials
- Pattern: Free Slopey Bootie Gnome Shoe
- Pattern: Scandinavian Sweetie (body, base, and hat)
- Fleece in Color 1 (body, base, and shoes)
- Fleece in Color 2 (hat and ruffles)
- Fabric for Legs (I used cotton)
- Fur
- Wire for Legs
- Poly Pellets
- Poly Fill
- 1” Wood Ball
- Decorations (I used lamb’s ear and a flower)
- Embroidery thread
Tools
- Detail Tip Hot Glue Gun and Glue Sticks
- Sewing Pins and Clips
- Embroidery Needle
- Optional, Pink Marker
Instructions
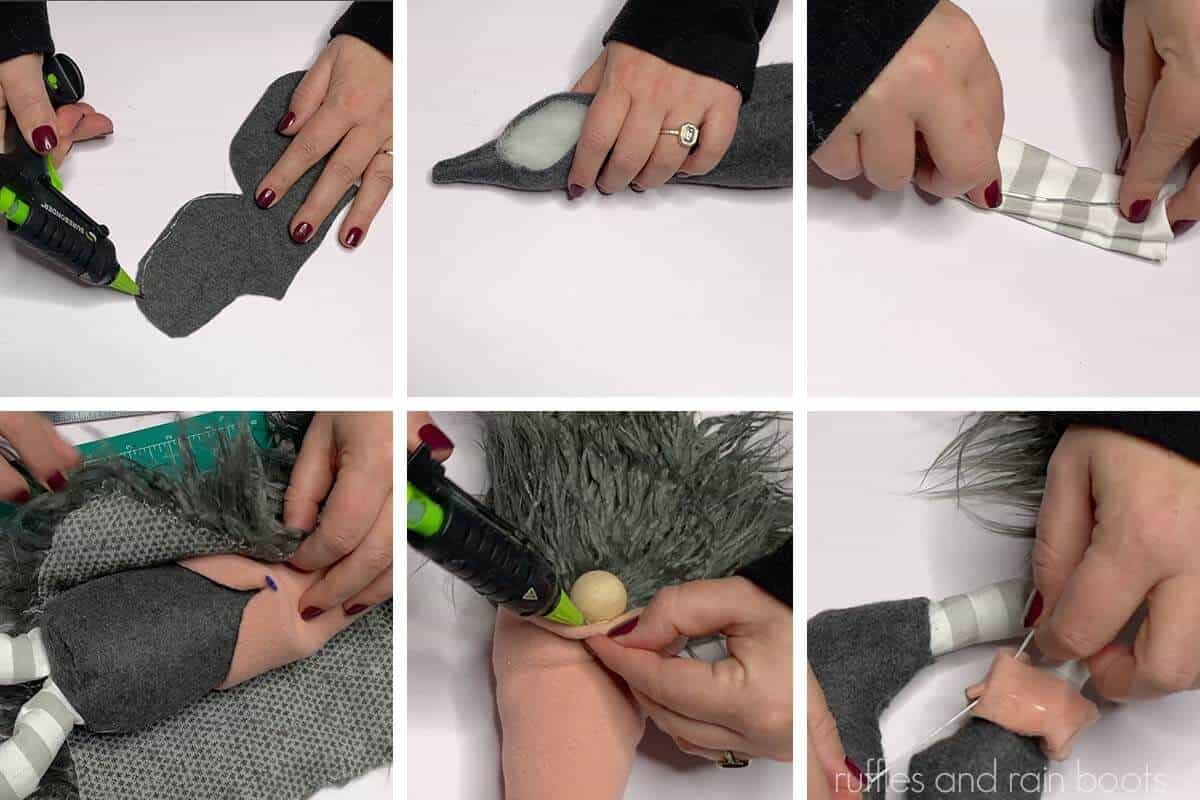
- As a reminder, there is a full length video tutorial showing each step. Cut body, base, and shoes from color 1 fleece. Cut hat from color 2 fleece. Cut 10” x 3” leg pieces. Pull all right sides together and pin.
- Use the detail tip glue gun to create the legs by gluing along the long edge. Let sit to dry and turn right sides out.
- Glue the shoes, hat, and body piece. Let sit to dry. Turn shoes and hat right sides out and set aside.
- Attach the base to the body piece (face the base into the body). Pin and secure with hot glue. Let sit to dry and turn right sides out.
- Add 1 cup of poly pellets into the body. Fill the rest with the poly fill. Close up the back with glue and slip on the hat.
- Pin the hat in the back to keep it in place and scrunch up the hat. Place a pin where the nose will go.
- Close up one end of the legs with glue, taking care to clip at least one inch to keep free of poly fill. Fill up the leg with poly fill and cut a length of wire two inches longer than the leg. Roll the wire ends down and tuck into the leg.
- Fill the boot with poly fill and slip the leg into the boot. Secure with glue. Glue the completed legs to the bottom of the base of the gnome.
- Measure the fur for a wraparound beard, making sure the fabric backing extends down to the base of the gnome and at least 1/2 inch above the nose position.
- Glue the beard to the body. Split the fur and attach the nose and hat to the body. Draw a small heart onto the nose.
- Decorate the hat and create a ruffle for the boot top by cutting 2 strips of fleece in the same color as the hat to 8 3/4 inch x 1 inch long. Using the embroidery thread and needle, create a running stitch through the center of the fleece, tie onto the leg, and glue into place.

Notes
Free Gnome Shoe Pattern: https://shop.rufflesandrainboots.com/product/slopey-boot-pattern-for-gnomes/
Scandinavian Sweeties Pattern: https://shop.rufflesandrainboots.com/product/gnome-scandinavian-sweeties/
More No Sew Gnomes You Might Like
Many of my patterns are used for both gnome sewing patterns and can be made with a detail tip hot glue gun. Below are a few more DIY gnome ideas you might be interested in making.
- Adorable Reindeer Gnomes – Chose one or both of these no sew reindeer gnomes, both with fun sleigh bells and antlers.
- No Sew Beach Gnome – This guy is kickin’ back and enjoying the sun. Make a gnome with the cutest belly button, beach hat, and board shorts.
- Slouchy Hat Gnome – Use your glue gun to make this farmhouse gnome in just a few minutes. This is an iconic style that works perfectly with tiered trays.
Please Save or Share
Your shares are how this site grows and I am sincerely grateful. Please save this to a DIY pin board or share to a crafty group on Facebook.
Meet the Creator
Hi there, I’m Sarah Nenni-Daher. I’m a crafty gal and always have at least 14 projects going at once. I am a crafter, designer, DIYer, and pattern maker. I share my creations here and in the Ruffles and Rain Boots® Shop.
Here at Ruffles and Rain Boots®, you’ll find DIY gnomes, crafts, gifts, cupcakes, laser crafts, and so much more. I love sharing video tutorials over on YouTube and chatting with other crafters in my Facebook groups. We’d love to have you!