
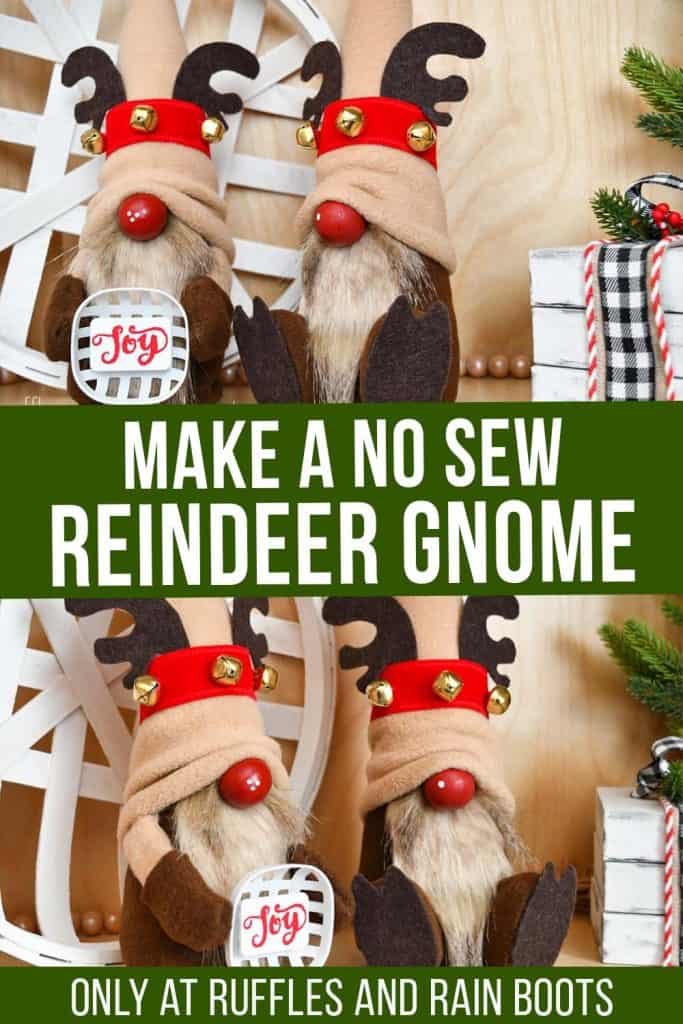
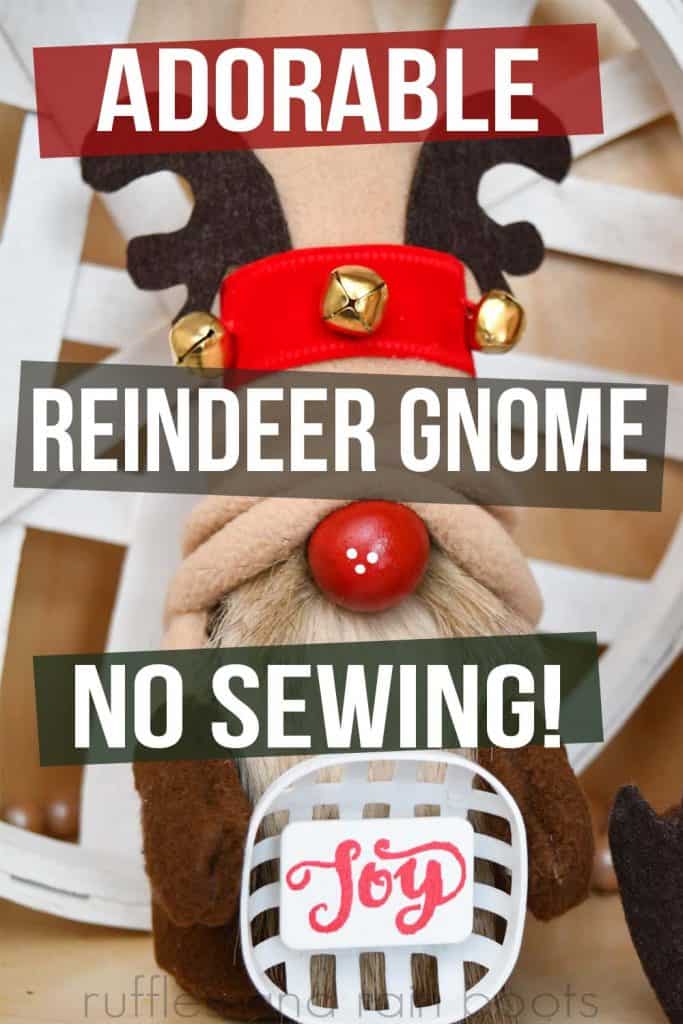
Make These No Sew Reindeer Gnomes
These no sew reindeer gnomes are made using the best-selling gnome pattern and a hot glue gun. Below are inspiration for a reindeer gnome holding an ornament and a reindeer gnome with hooves.

RELATED READING: GNOMES MADE WITH SCANDI SWEETIES PATTERN
What You'll Find On This Page
Reindeer Gnome Pattern – No Sewing!
Here at Ruffles and Rain Boots, I love, love, love when readers and viewers of the YouTube channel share their creations with me. Recently, I received 5 emails from crafters who used a sewing pattern of mine to make the Angel gnome I shared recently.
I was blown away! Honest-to-goodness, they sent me picture after picture and you could not tell it was hot glued. So of course, they inspired me to give it a try. If you’d like to make some, let’s get started.
Please Share or Save
If you need to gather up supplies, please save this or share it to your favorite crafting group on Facebook so you can find it again easily.
As an Amazon Associate, I could earn from qualifying purchases. There could be affiliate links included in this article.
Tips for Making Adorable Reindeer Gnomes
- Grab the Scandinavian Sweeties pattern here. While over there, browse through some of the inspiration already shared (there is a lot).
- Decide whether you want arms and an ornament or hooves. You can try both, but I felt it was a bit crowded.
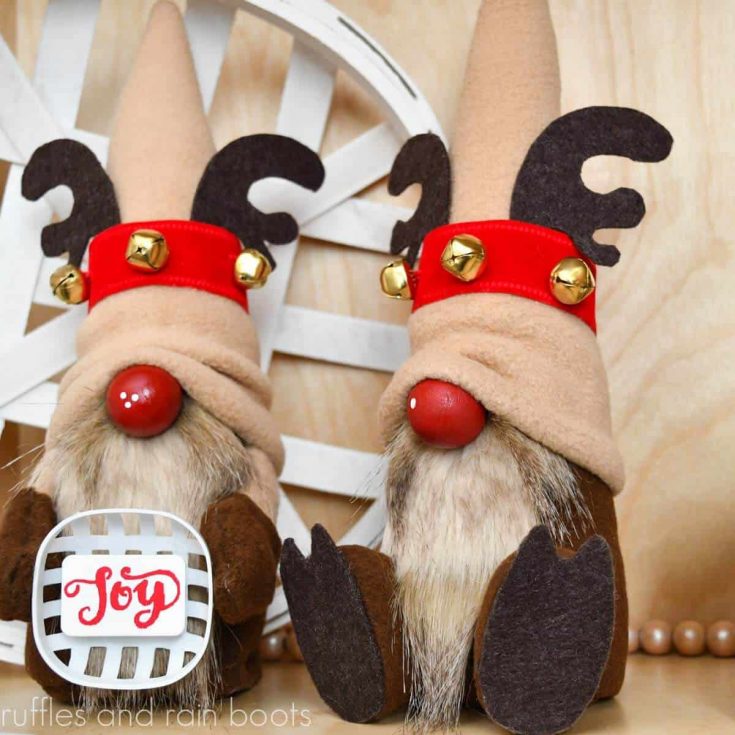
- The “face” of the gnome brings out the personality, so give some thought to your nose. I painted a wood round a glossy red, but a little black nose with a few white dots would be adorable.
- The antlers are from a dollar store reindeer set, however, you can use any shape of antlers you’d like (search reindeer antler png for inspiration).
- The beards I made for the inspiration pieces were made of the Shannon Fabrics lux wolf in sand. I love ordering swatches from fabric.com to test out new fur styles.

How to Make No Sew Reindeer Gnomes
Below is the written instruction to go along with the Scandinavian Sweeties pattern. You can find the full no sew reindeer gnome video tutorial here on the YouTube channel.
No Sew Reindeer Gnome
I just took the best-selling gnome SEWING pattern and turned it into a NO SEW gnome pattern. Well, actually readers did it and told me about it so I decided to make a no sew reindeer gnome to try it out myself.
Materials
- Scandinavian Sweeties Pattern
- 1/8 yard Fleece, color 1 (brown)
- 1/8 yard Fleece, color 2 (tan)
- 1 inch Wood Round
- Poly Pellets
- Poly Fill
- Faux Fur (I got this from Fabric.com)
- Wire (bendable, but not too thin)
- Red Velvet Ribbon
- Gold Bells
- Brown Stiff Fleece
- Optional, Baby Booties Party Favors and Brown Fleece Scraps
- Optional, Item for Gnome to Hold (I used a mini ornament from Walmart)
Tools
- Hot Glue Gun and Glue Sticks
- Scissors and Exacto Knife
- Pins
- Red Paint and Foam Brush
- White Paint Pen or Paint
- Gloss ModPodge and Small Brush
- Red embroidery thread and needle
- optional, heat gun
Instructions
- Prep: Use the Scandinavian Sweeties pattern to cut out the body, base, hat, arms, and tie top mittens (the longer ones) from fleece. I used dark brown for the body and mittens, and light brown fleece for the arms and hat.
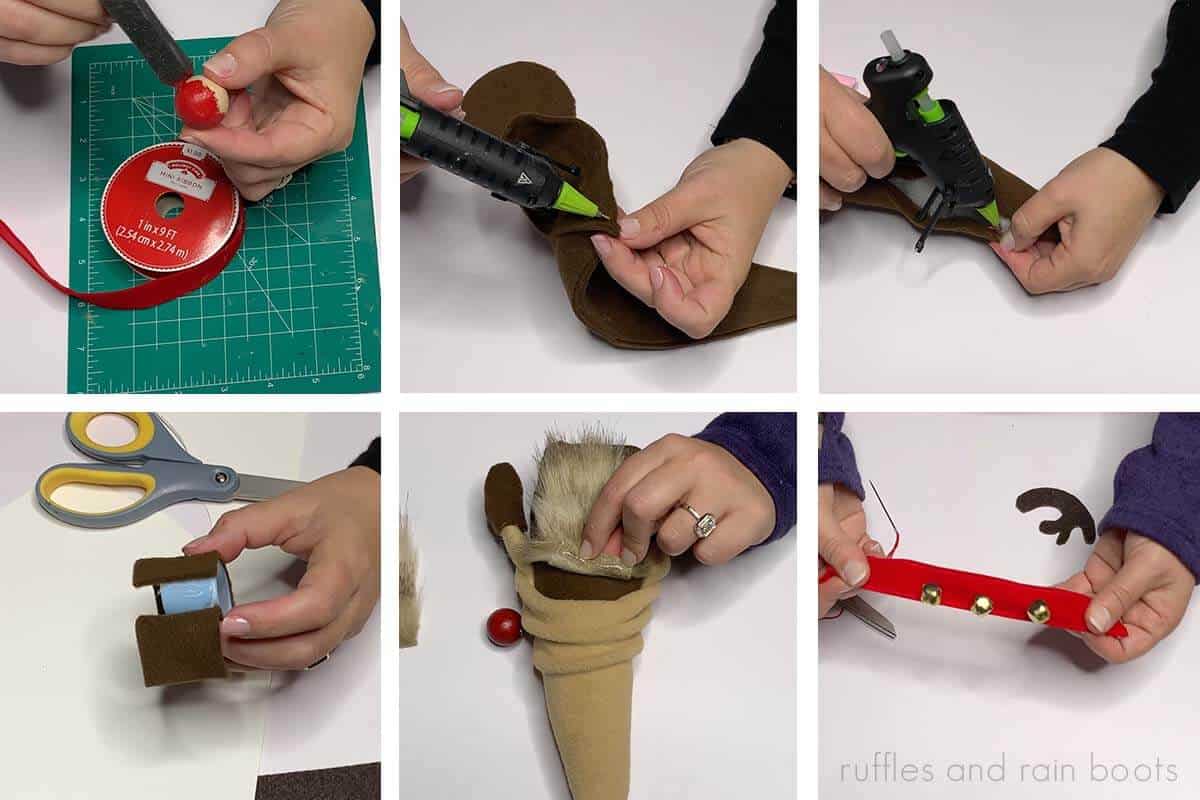
- Paint the wood round red and use the heat gun to dry. Add one or three dots with the paint pen or white paint. Let dry and cover with a coat of Gloss ModPodge.
- Put right sides together and hot glue the long side of the body, taking care to follow the pattern. Once dry, secure the base (right side facing in). Also, glue the long edge of the hat right sides of the fabric together and the arms with the wrong sides of the fabric together. Finish gluing with the mittens, right sides together.
- Once everything has set, turn the body and hat right sides out. Add one cup of Poly Pellets to the body, followed by Poly Fill. Add the wire, bending each end downward and align inside. Secure the back of the body, taking care to capture the wire in the seam.
- Slip on the hat, lining up the back seam with the body and scrunch the fabric in front to get an idea for the nose position. If making the arms, stuff the arm (seam in the middle) into the mittens and secure with glue. Tuck under the hat and pin in place.

- If making the reindeer feet, cover the baby booties with a strip of fleece about 6 inches long by 1.5 inches wide. Cut off the excess along the open portion of the bootie. Trace the bottom of the bootie onto dark felt and add two hoof cutouts to the top. Cut out two of these and secure to the bottom of the covered booties.
- Measure out a cut of fur for the beard (mine was about 1.5 inches wide) by your desired length, making sure it goes higher than the nose. Secure beard to the body with hot glue and add the nose.
- Scrunch down the front of the hat and secure to the top of the nose. If you are using the reindeer feet, secure the hat all the way around. Add the feet on either side of the beard.
- If you are using the arms, follow step 8 but glue down the arms to the body and then the body to the hat. Once the arms are dry, secure the hat all the way around with hot glue. Secure your ornament, if using.
- Cut a piece of red ribbon to fit around the hat and tuck under the ends to secure with glue. Sew on three bells. Draw or trace antlers onto the back of the stiff brown fleece, cut out, and tuck into the ribbon on either side of center. It's time to display your no-sew reindeer gnome!
Notes
The Scandinavian Sweeties is the best-selling pattern from Ruffles and Rain Boots. If you would like to see all of the inspiration gnomes I've made with it, just search, "Scandinavian Sweeties" here on the Ruffles and Rain Boots.com.
Other Christmas Gnomes You Might Like
It’s no secret I love to share DIY gnomes. Here are a few more no sew gnome patterns for you.
- Farmhouse Christmas Gnomes – These are SO popular for a reason: they’re made from socks – NO KIDDING!
- Stackable Gnomes for the Holidays – Make a pair, a trio, or any number you’d like with these easy stackable, no sew gnomes.
- Scandinavian Gnomes – Finding the right material might be a fun hunt for you because these no sew Christmas gnomes are winners.
Please Share This with Other Crafters
Your shares are how this site grows and I am sincerely grateful. Please share this to your favorite crafting group on Facebook or save it to a pin board for the future.

this is so blooming cute. Is there a pattern for the hoofs and the reindeer horns. And I think on the video page I asked about the stiff fleece. I will have to see if I have fleece I can use in the right colors. I think I even have fur close to that color.