
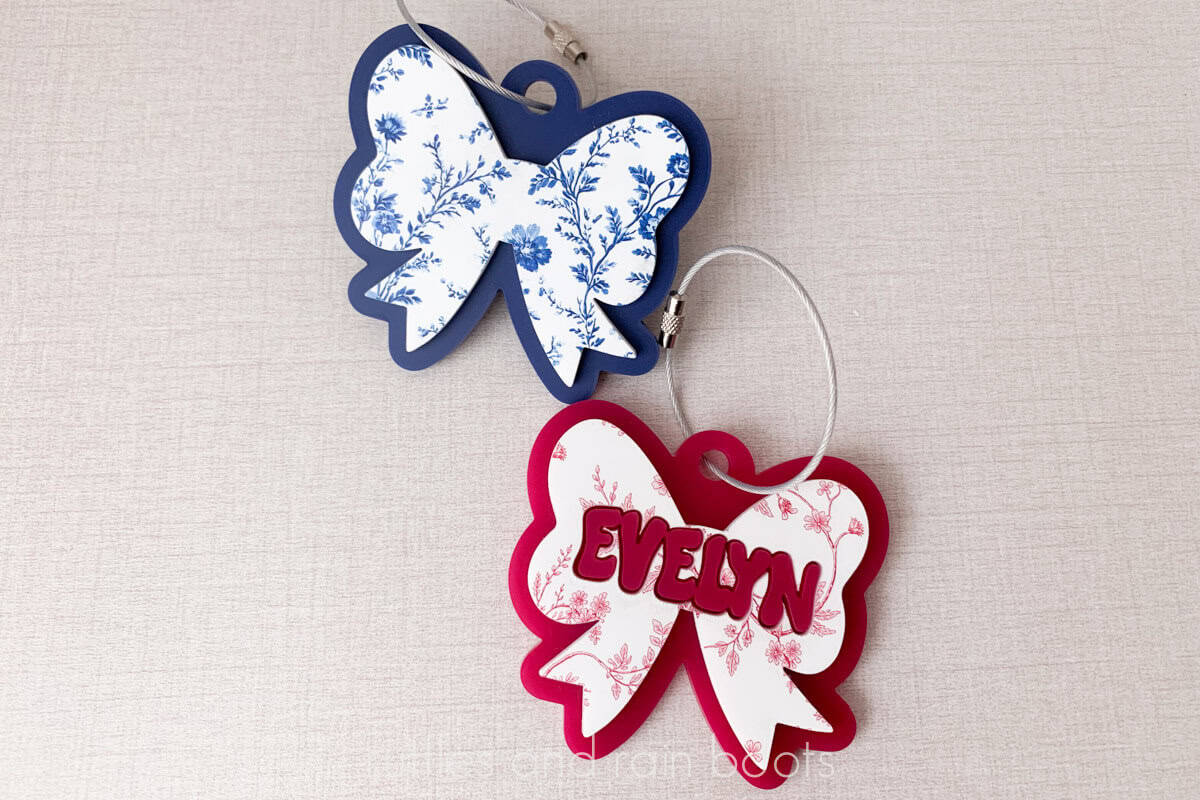
Cute Laser Cut Bow Bag Tags
These adorable bow bag tags are great for backpacks, as bag charms, fun additions to boat totes, or even name tags for sports bags, party favors, and more. I’ll also share the process of getting nearly anything you wanted printed on acrylic!
RELATED READING: Laser Masking 101 – What Is It and Should You Use It?
What You'll Find On This Page
Layered Acrylic Bag Tag Laser Files
Here at Ruffles and Rain Boots, I’ve been making a lot of acrylic work lately. From bag tags to cake / cupcake charms, it’s been pretty busy over here.
Today’s share is a fun, beginner laser project idea that uses two colors or layers of either acrylic or wood. I’m also sharing how I had printed acrylic made for me from Houston Acrylics!
As an Amazon Associate, I could earn from qualifying purchases. There could be affiliate links within this article.
How to Order Custom Printed Acrylic from Houston Acrylics
Houston Acrylics is my go-to for much of my (overflowing) acrylic stash. From patterns to basics, they keep me well stocked.
Recently, I found two Chinoiserie style patterns that I wanted on acrylic. I prepared the file (12 x 19 inches) for a PNG format and selected the backer acrylic (white).
For diode users, be sure to select a core your machine can cut.
Once I emailed the Houston Acrylics team the file, they confirmed a few things and my order was processed. It was quick, ridiculously easy, and priced fairly – what more could I need?
What You’ll Need for This Project
Below are the supplies I used, however, any 1/8th acrylic or wood will work. If you’re using wood, please remember to seal it well because bag tags take a beating. As always, my designs come with a commercial license.
- the cute bow bag tag laser template set (includes SVG EPS PNG PDF DXF and XCS)
- a laser (I am using a CO2)
- 1/8th acrylic in color or pattern 1 (for the top layer)
- 1/8th acrylic in color 2 (for the bottom layer)
- 3M 467MP or WeldOn 3
- Wired Cable Tie (these are the ones I use and recommend)
- optional, Novus acrylic cleaner (you can use a gentle dish soap)
How to Set Up, Cut, and Assemble Layered Laser Cut Bag Tags
Step 1: Load File and Make Edits
Open the XCS file or drag the SVG file into your laser software. You can determine the size you would like for your charm, however, these do well at 3 inches wide by 2.75 inches tall.
Make sure the pieces are not on top of each other in the software, as they will be cut out separately.
If you would like to add text and cut it out of the top layer, type the text and either weld it or make it a compound path. Duplicate the text. Place one text on top of the top bow (the smaller one) and use the Boolean function “subtract” to remove it.
Set parameters for the top piece (mine were the same as 1/8 white acrylic). Set parameters for the bottom piece (mine were for a red acrylic). Set all items to cut.
Notes:
- If you’re using 3M 467MP adhesive tape, remove the back masking from the acrylic and apply per the package instructions prior to cutting.
- Make sure if you’re using text, it is not on top of either of the layers once it has been cutout of the top layer in the software. If using the same color text as the backer, you can position and group them together.
Step 2: Process the Cuts
Set one of the layers to process.
Set the material into the laser bed, measure, and process. Note: if using 3M, put that side on the honeycomb or slats.
Repeat with the second material, noting to turn off the previously cut layer.
Step 3: Assemble and Clean
Remove masking. Remove the 3M backer (if using) or apply WeldOn and align the small bow onto the larger bow. If using text, add that in after the smaller bow has been attached.
Clamp to set. Once set, clean with Novus acrylic cleaner or a gentle dish soap. Add the wired tag or package flat next to the bow tag for shipping.
More Laser Projects for Beginners You Might Like
Please Save or Share This Fun Acrylic Laser Project Idea
Your shares are how this site grows and I am sincerely grateful. Please save this to a DIY laser crafts pin board or share it with a craft laser group on social.


I just saw one of your videos on YouTube from a couple of years ago showing your s1 40w laser and some acrylics. We have been wanting to do acrylics forever but have been a little bit intimidated. We are going to try a few, but I noticed a spreadsheet of all of your tests and wondered if you would be willing to share it. Thank you so much in advance! Love your creative stuff.
Oh thank you for watching the video on YouTube! I don’t keep it active anymore, as most of them are personal preference for the edges and top hazing (if any occur). I ran the same test on all of them 100/4/1 to see if they cut. If they did, then I ran a more nuanced test for them to get the cleanest edges and/or no hazing on the top surface. Most of the settings we’ve all contributed are now loaded into the software! When I got the S1, it was prior to launch and we weren’t working with current software but now, we’ve been loading them for years.