
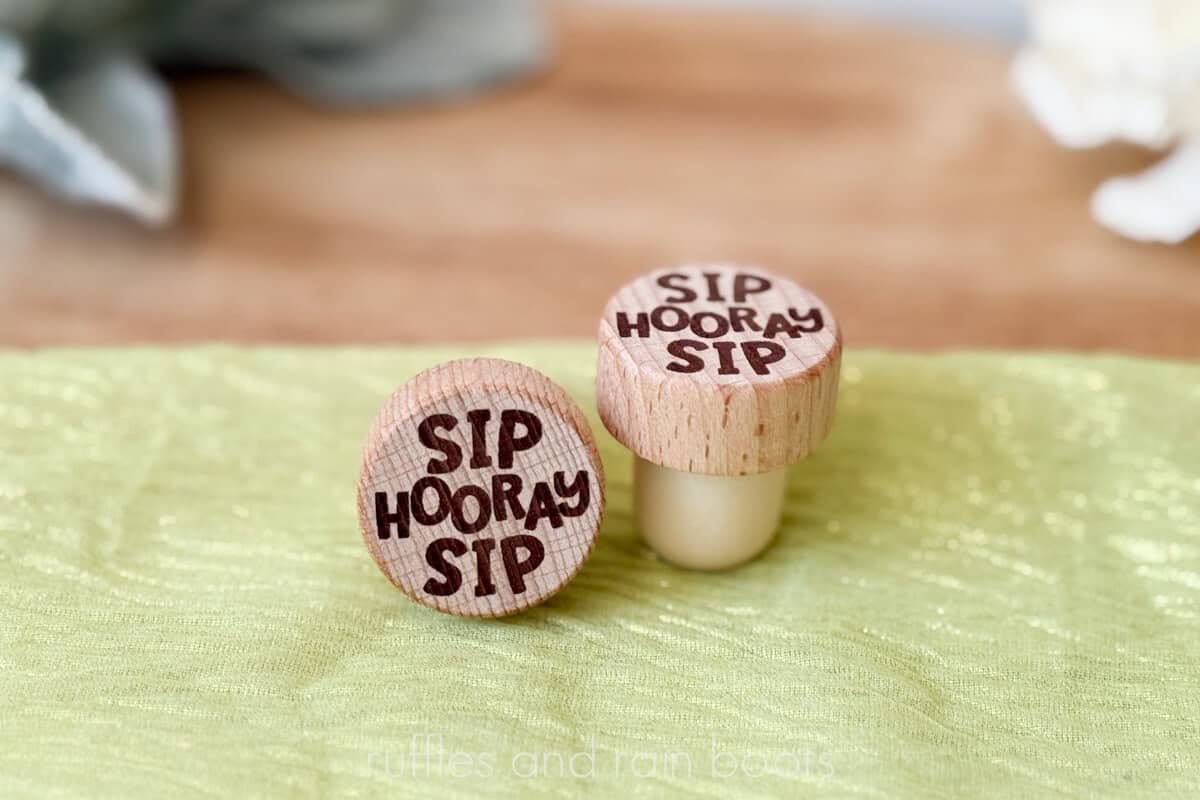
How to Laser Engrave Wine Bottle Stoppers
I’m working on my wedding and party product ideas, so today I’m sharing how to laser engrave wine bottle stoppers. This free laser file set and tutorial will teach you how to use the xTool F2 to make each cork in just 15 seconds, but you can use any diode or CO2 laser.
RELATED READING: All About Laser Masking and When You Should Use It
As an Amazon Associate, I could earn from qualifying purchases. There could be affiliate links within this article.
What You'll Find On This Page
Laser Engraving Premade Wine Corks and Bottle Stoppers
Here at Ruffles and Rain Boots, we’re prepping for wedding season. It’s such a fun time of year and a great time to position your laser made products.
Today, I’ll be sharing:
- the easiest jig to quickly place and position items like corks,
- how to get a consistent burn in one pass,
- and how you can use free laser software to create your own designs!
Laser Engraved Wine Corks Video Tutorial
If you really want to see how quickly these come together from scratch, this laser engraved wine bottle stoppers video tutorial will have you making your own in less than 3 minutes. I am only using the free xTool Studio software to create these and sharing tips and software features to make your own.

Materials and Equipment You Will Need
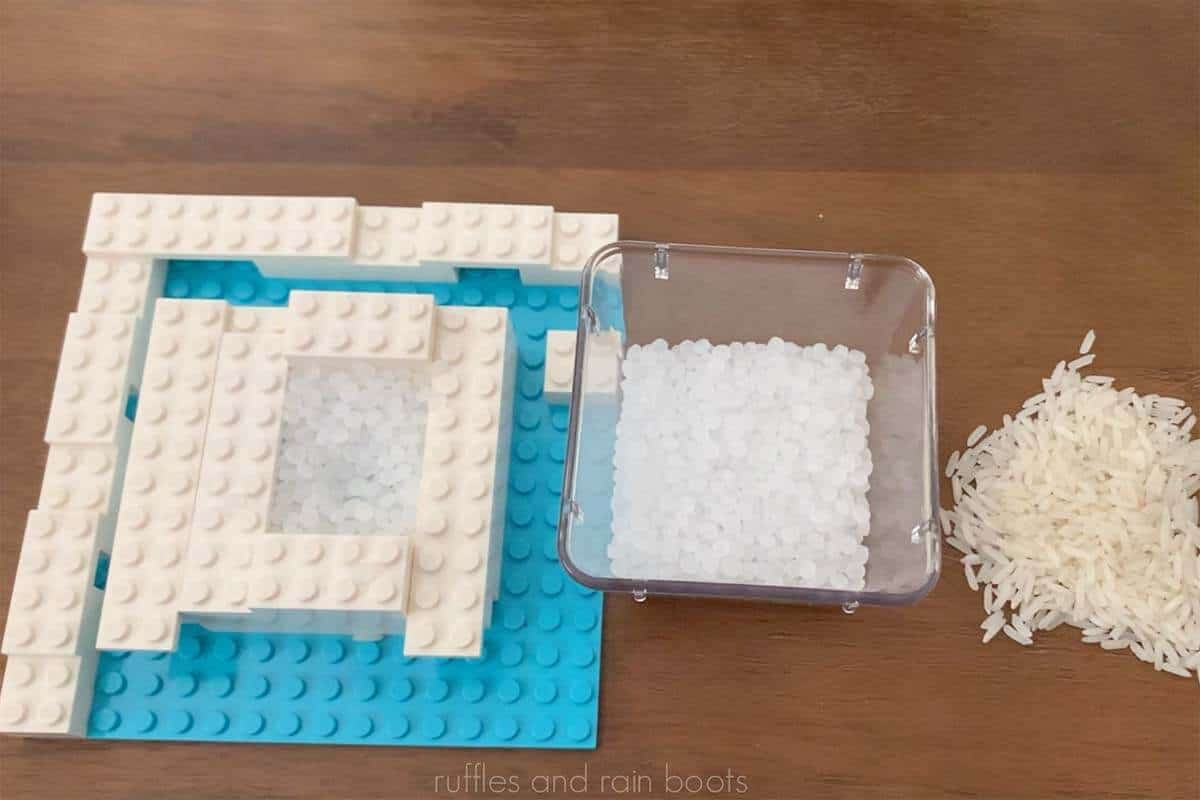
Okay, so technically, you only need a laser and some wine bottle stoppers (these are exactly what I use). That said, I’m going to share my favorite jig set up EVER – it has yet to fail me, so I think it’s a winner. Watch the short video to see some options.
You’ll also need a laser (I’m using the xTool F2 dual laser’s 15 watt diode) and tape to clean up the engraving. I also have the xTool AP2 (air purifier) connected.
How to Engrave Wine Bottle Stoppers
As with most things, the easiest path to success is to plan. I’m going to pop the jig onto the base of the laser and set a cork in a small opening. There is no rice or poly pellets in this set up today – just the LEGO and stopper.
Next, open the free Sip Sip Hooray file in laser software (I’m using Studio) and we’re going to measure the distance to the top of the cork. On the xTool F2, pull the lid down for the most accurate measurement and select “Auto-Measure.”
Once you see the red and blue light aligned, you’ll know you’re ready to position the design. Use the camera (or PinPoint Positioning for other lasers) to move the design into place.
Set the parameters for engraving. If you don’t know yours, I would recommend a material test (just a couple of small circle will yield great insight).
My parameters for the xTool F2 15 watt diode were 70 power, 250 speed, and 1 pass with a 100 LPC.
Once the parameters are set, always frame the design. Lift the lid, select a shape (for something like this, I suggest polygon), and make any minor adjustments, if needed. You can move either the design in the software or the cork in the jig.
Process the cork – at this setting, it took 15 seconds. Remove from the jig and blow off any detritus or use a piece of tape to clean it up. Repeat with more corks, always taking a measurement to ensure the best placement.
You can opt to seal these, however, the wine stopper’s base should be covered and avoid getting sealant on it.
Notes to Sellers
- Position these to couples, venues, wineries, and wedding planners.
- If selling at markets, create a display for weddings or graduation. I love this fun wine stopper display and this muted, elegant wine cork display.
- Up-sell a gift box for individuals or laser cut a cork display stand.
More Laser Crafts You Might Like
- Popular Easter Basket Tags – These can be made on the xTool F2 using craft plastic or 3mm basswood.
- Laser Cut Earrings – Scrap wood can be utilized for quick earners like these scored earrings.
- Laser Engraved Patches (Gradient) – If you want to up your laser engraving, make a multi-color patch using your F2.
Please Save or Share This Laser Wedding Idea
Your shares are how this site grows and I am sincerely grateful. Please save this fun laser engraving idea for weddings, parties, and graduation favors to a laser projects pin board or share it with a crafty group on Facebook.

Laser Engraved Wine Bottle Stoppers

Make 12 corks in under 5 minutes using this free Sip Sip Hooray laser template with commercial license. Sell to wedding venues, coordinators, brides, at markets and fairs, and for graduation, birthdays, and more.
Materials
- Free Sip Sip Hooray Laser Template
- Wine Bottle Stoppers
Tools
Instructions
- If using, place a jig into the base of the laser.
- Next, open the free Sip Sip Hooray file in laser software (I'm using Studio) and measure the distance to the top of the cork. On the xTool F2, pull the lid down for the most accurate measurement and select "Auto-Measure."
- Once you see the red and blue light aligned, you'll know you're ready to position the design. Use the camera (or PinPoint Positioning for other xTool lasers) to move the design into place.
- Set the parameters for engraving. If you don't know your settings, I would recommend a material test (just a couple of small circle will yield great insight).
My parameters for the xTool F2 15 watt diode were 70 power, 250 speed, and 1 pass with a 100 LPC. - Once the parameters are set, always frame the design. Lift the lid, select a framing shape (for something like this, I suggest polygon), and make any minor adjustments, if needed. You can move either the design in the software or the cork and jig.
- Process the cork. At these settings, it took 15 seconds. Remove from the jig and blow off any detritus or use a piece of tape to clean it up. Repeat with more corks, always taking a measurement to ensure the best placement.
- You can opt to seal these, however, the wine stopper's base should be covered and avoid getting sealant on it.
Notes
Notes for Sellers
- Position these to couples, venues, wineries, and wedding planners.
- If selling at markets, create a display for weddings or graduation.
- Up-sell a gift box for individuals or laser cut a cork display stand.
Meet the Creator
Hi there, I’m Sarah Nenni-Daher. I’m a crafty gal and always have at least 14 projects going at once. I am a crafter, designer, DIYer, and pattern maker. I share my creations here and in the Ruffles and Rain Boots® Shop.
Here at Ruffles and Rain Boots®, you’ll find DIY gnomes, crafts, gifts, cupcakes, laser crafts, and so much more. I love sharing video tutorials over on YouTube and chatting with other crafters in my Facebook groups. We’d love to have you!