
Laser Cut Felt Garland 4th of July
I set out to answer the question on whether I could make clean, scorch free cuts in felt using a laser. Turns out, you can – check out this laser cut felt garland (and I’m sharing my settings).

RELATED READING: Christmas Laser Project Ideas
As an Amazon Associate, I could earn from qualifying purchases. There could be affiliate links within this article.
What You'll Find On This Page
July 4th Laser Banner Project
Here at Ruffles and Rain Boots, I’ve been having a TON of fun with the lasers. Now that I have so many, I feel guilty if I’m favoring one over another. I’ve been working so much with the xTool M1 Ultra these days, that I decided to work with the xTool P2 (my CO2, 55 watt laser).
I love this machine. Now don’t get me wrong: there is NOTHING like the wood burn from a diode laser. But the power of a CO2 and its ability to cut through most things like butter makes it a fun machine.

What You Will Need
For this project, you won’t need much. I designed the entire thing using the free xTool XCS software in just a five minutes. It’s some basic shapes and letters, so you can do this!
- xTool P2 Laser (or equivalent)
- 3mm Felt
- Tacky Glue
- Baker’s Twine
Easy Laser Cut Garland Video Tutorial
If you’re a visual learner and want to see this quick project come together – the whole video is only 5 minutes long – watch the 4th of July laser cut felt garland video tutorial. While you’re there, be sure to subscribe, as we have a lot of fun on the channel.

How to Make This Felt Laser Cut Garland (with Settings)
First, load a single sheet of felt into the laser bed. I used the honeycomb, but you can load it onto anything as long as it is level.
Next, make a triangle and size it to 3 inches wide by 4 inches tall. Turn it upside down.
Create a small circle at .25 inches and make a copy. Position the circles in place in the top left and right corners (leave a bit of room from the top and side edges).
Subtract (in XCS, Combine > Subtract) the circles from the triangle to get the bunting shape. Make two copies.

Add text (I used the Uncle Grump font) for a U, S, and an A. Position and size each into the bunting (my letters were 1.75 inches tall).
Create two stars and subtract out a .25 circle for the twine. Make sure you now set all pieces to the colors you would like so you can swap the felt for each.
Set all pieces (there should be 8 total items) to cut and set the laser settings for felt at 30 power, 20 speed, and 1 pass.
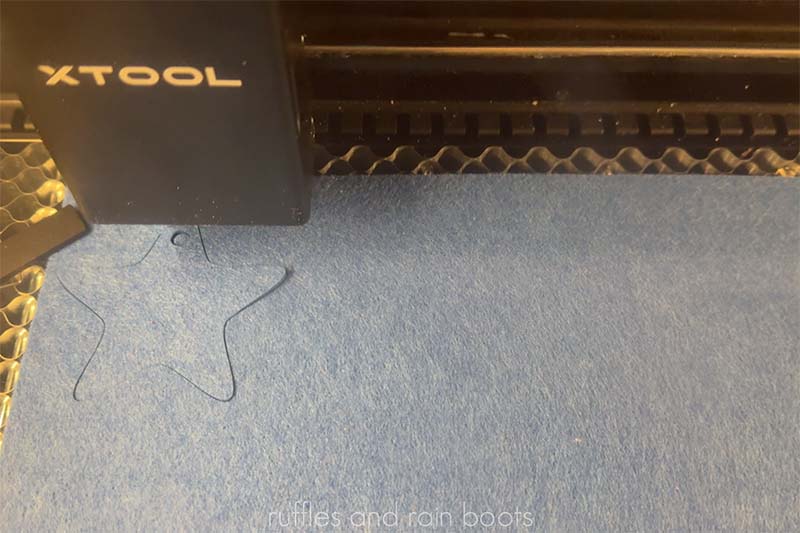
Auto-measure the distance, move the items into place using the camera, and process the cuts for each piece. Repeat all colors.
Run a bit of twine through the garland pieces and glue on the letters with the tacky glue. Let dry and your 4th of July laser cut banner is ready to display!

More Crafts You Might Like
- Valentine’s Day Laser Ideas – You’ll have everyone covered with these laser products to make and sell (or gift to friends and family).
- Easter Laser Crafts to Make and Sell – The sweetest holiday is a breeze when you get some inspiration from these Easter laser projects.
- Leather Gradient Engravings – Learn how to make laser engraved leather that is different colors (using inexpensive faux leather).
Please Save or Share This Fun Independence Day Laser Project Idea
Your shares are how this site grows and I am sincerely grateful. Please save this to a laser cut product idea board or share it with a laser group on Facebook.

Meet the Creator
Hi there, I’m Sarah Nenni-Daher. I’m a crafty gal and always have at least 14 projects going at once. I am a crafter, designer, DIYer, and pattern maker. I share my creations here and in the Ruffles and Rain Boots® Shop.
Here at Ruffles and Rain Boots®, you’ll find DIY gnomes, crafts, gifts, cupcakes, laser crafts, and so much more. I love sharing video tutorials over on YouTube and chatting with other crafters in my Facebook groups. We’d love to have you!