
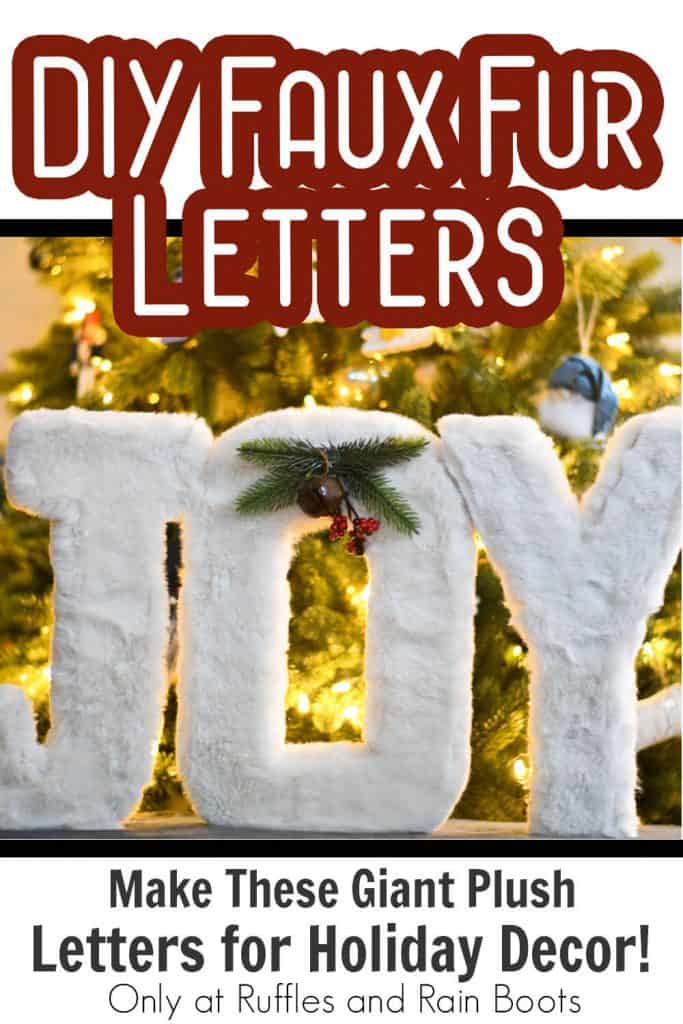
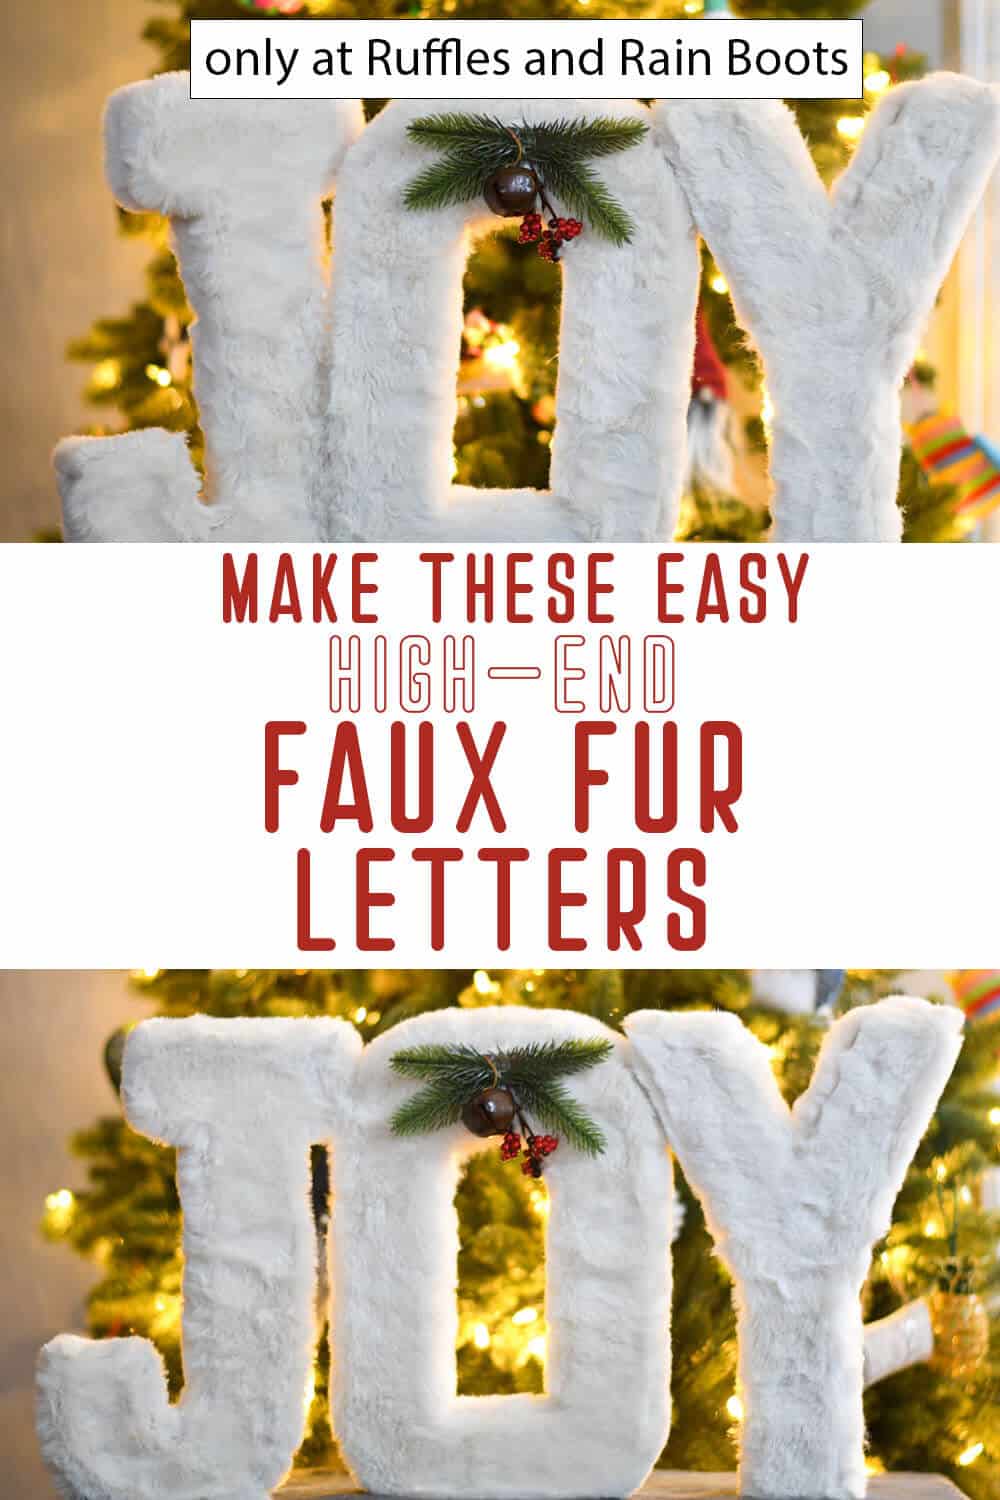
How to Make Faux Fur Letters
For the longest time, I’ve wanted to figure out how to make faux fur letters to add to my holiday displays. And because I’m lazy but want a high-end look, this is the easiest tutorial for making fur covered letters you’ll find.
RELATED READING: DIY Christmas Gnome (10-Minute Craft)
What You'll Find On This Page
How to Make Faux Fur Letters
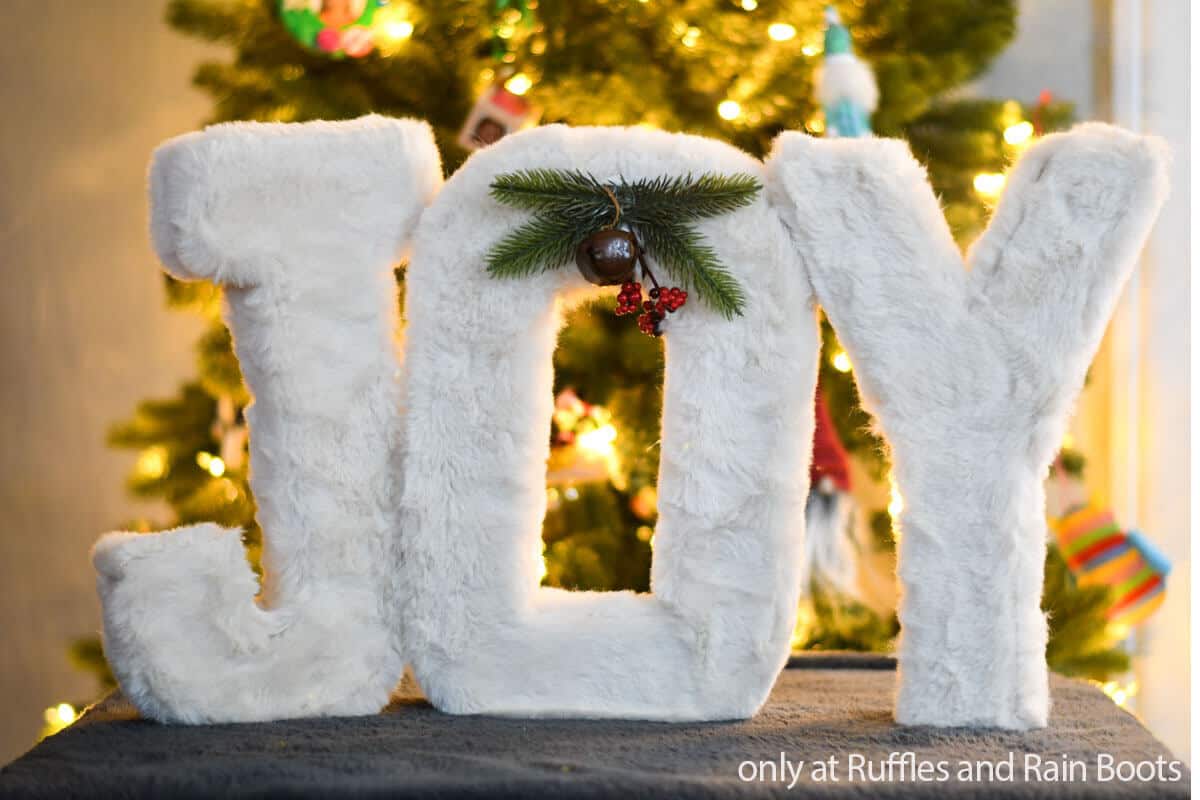
Here at Ruffles and Rain Boots, I’ve had an idea of making giant fur letters that would go with holiday displays and make my decor pop. Today, I finally found the time and dug into my craft boxes to find the perfect materials to make my faux fur letters!
What I ended up with was a really easy tutorial anyone can make. And it looks so incredibly fantastic in person.
If you’re too busy to get started on this right now, save it to a DIY Christmas craft pin board or share it on social media. It will be easier to find when you’re ready to begin.
As an Amazon Associate, I can earn from qualifying purchases. There could be affiliate links within this article.
Tips to Make Giant Fur Letters
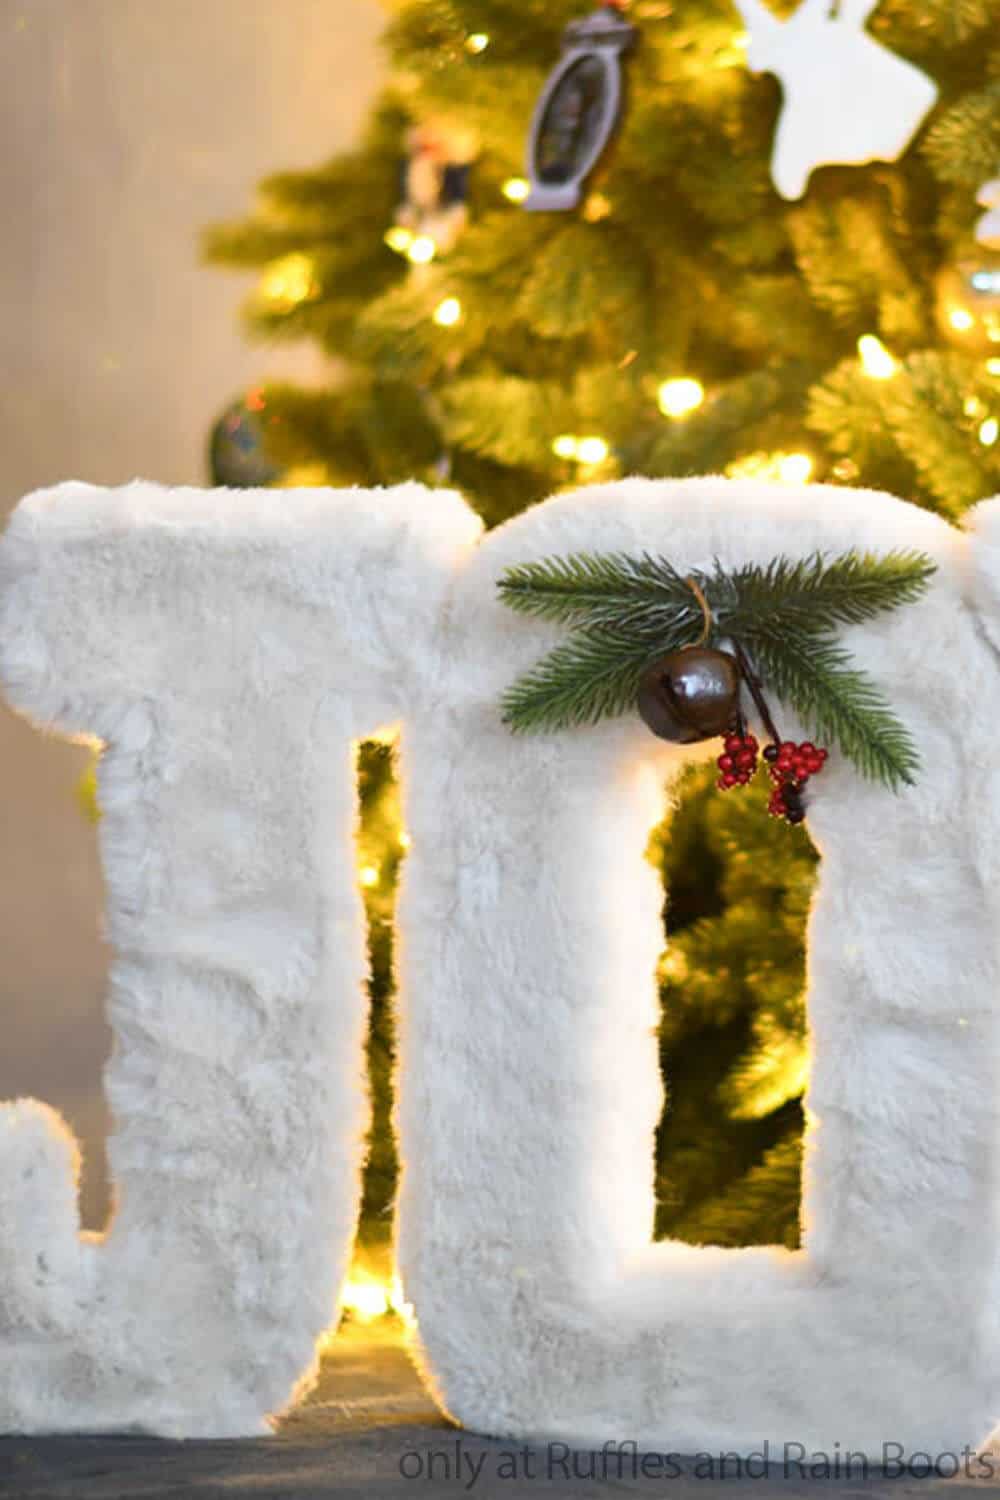
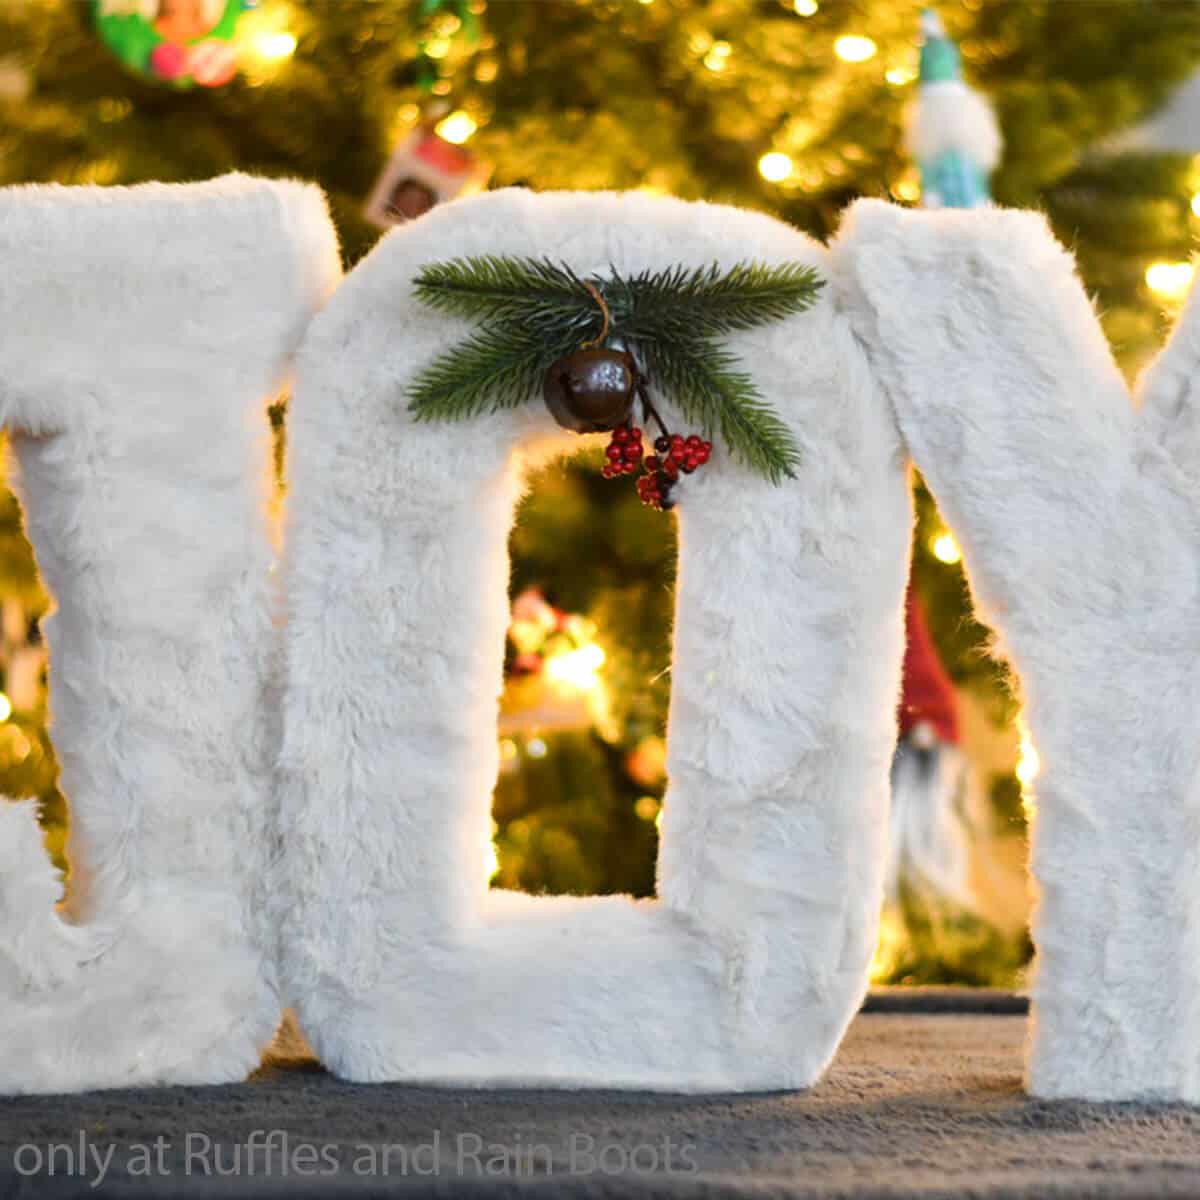
- Use a low-pile plush fur OR a minky fabric. Anything with a long pile is going to look messy and make the letters hard to read.
- Grab some 12-inch paper mache letters like these. It might seem big, but trust me – it’s the perfect size.
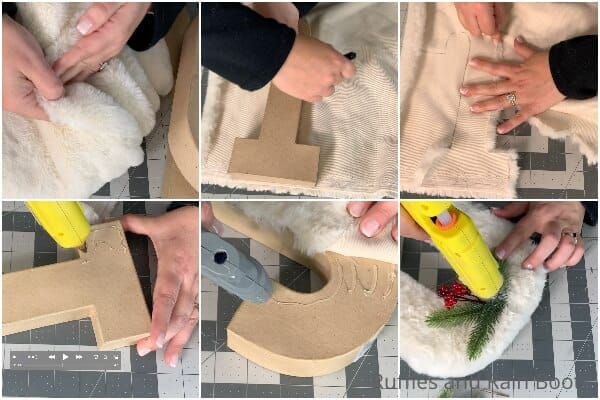
- You will not need scissors – pick up a razor blade, rotary cutter, or craft knife (I use an X-Acto). Cutting faux fur is so much more beautiful and fluffy when you flip the faux fur face-down on the table and cut the fabric backing with a single blade.
Visual Learner? Watch the Step by Step Video
If you’re a visual learner like I am, watch the faux fur covered letters video tutorial on YouTube. While you’re there, be sure to subscribe – we have a lot of fun on the channel.
More Holiday Crafts You Might Like
- Rudolph Gnome – It’s adorable.
- DIY Santa Cookie Plate – Santa loves his cookies and to help that rotund fella stay round, make a cookie plate for the kids to put out.
- Santa Gnome from a Cone – The easiest gnomes are the ones with patterns you can read, follow a tutorial and make a gnome from a cone with a big jolly belly!
Please Save or Share This High-End Holiday Craft Idea
Your shares are how this site grows and I am sincerely grateful. Please share it on Facebook or save it to your favorite holiday crafts pin board.
How to Make Faux Fur Covered Letters
Below is the step by step written tutorial. Keep this page open and follow along or print the tutorial.
How to Make Faux Fur Letters

Sometimes, you just need some giant fur letters to make a fun scene with a DIY gnome. So, let's walk through how to make faux fur letters and bring it all together!
Materials
- 1 - 2 yds Low-Pile Plush Fur
- 12-inch Paper Mache Letters
- 1 Floral Pick for Accents
Tools
- Razor Blade, Rotary Blade or Craft Knife
- Pencil or Fabric Marker
- Hot Glue Gun & Glue
- Wire Cutters
Instructions
- Spread the faux fur fabric-side up on your craft table.
- Place the paper mache letter onto the fabric backing of the fur and trace the letter's shape onto the fabric.
- Move the letter off the fabric, then using the razor blade, rotary blade or craft knife, cut out the shape of the letter carefully, only cutting the fabric and not the fur. Gently pull the fur apart as you're cutting, taking care to go slow on any curves in particular.
- When the letter has been completely cut out from the fur, gently pull on the edges of the faux fur, pulling away any transfer to clean up the edges.
- Working in very small sections, hot glue your cut-out letter to the paper mache letter.
- You can finish at this point, or you can take the time to cut out each of the sections from the faux fur, using the same method, to fit the edges of the paper mache letter. I did this and I think it really made the piece look beautiful. Note, if working on an "o", "c", or similar shape, you can cut out just a slit in the center, followed by smaller perpendicular slits all around this larger slit, rather that cutting out the center of the letter. For more detail on this technique, check out the video where I explain that in detail.
- Cut off elements from the pick to use for your accents, then hot glue them in place on the front of the letters and enjoy!

Notes
For more fun holiday crafts, visit Ruffles and Rain Boots!
Meet the Creator
Hi there, I’m Sarah Nenni-Daher. I’m a crafty gal and always have at least 14 projects going at once. I am a crafter, designer, DIYer, and pattern maker. I share my creations here and in the Ruffles and Rain Boots® Shop.
Here at Ruffles and Rain Boots®, you’ll find DIY gnomes, crafts, gifts, cupcakes, laser crafts, and so much more. I love sharing video tutorials over on YouTube and chatting with other crafters in my Facebook groups. We’d love to have you!