
How to Make a Woodland Gnome – a Rustic Gnome Tutorial
This woodland gnome is SO adorable and because it’s such an easy rustic gnome to DIY, you are going to love making it. It comes together fairly quickly and you can even raid your donation pile to get started.
RELATED READING: Easy Gnome Tutorials and Creative Gnome Ideas
Woodland Gnome
Here at Ruffles and Rain Boots, I make a lot of gnomes. Seriously, I love making gnomes and sharing them here and on my gnome tutorials YouTube channel here. When I come up with a ridiculously simple way to make a gnome, I get excited to share. This no-sew gnome looks complex, but is ready in no time.
If you need to gather supplies, save this to your favorite rustic ideas pin board or share it to your Facebook feed. Use the sharing buttons on this page to make it easy to find again when you’re ready to begin.
As an Amazon Associate, I can earn from qualifying purchases. There could be affiliate links within this article.
RELATED READING: Rustic Woodland Forest Gnome – Check Out the Hat!
Tips to Make a Rustic Gnome
- If you don’t have an old sweater to make this up-cycled sweater gnome, pick one up at the thrift store for SUPER cheap OR use a sock for the hat, too.
- The base of this rustic farmhouse gnome is one of the easiest you can make because it’s a sock gnome. The details on this creative gnome are what really make it pop.
- Decorating this little cutie is a lot easier than he looks: hot glue, a button and some raffia are what I used, but you can turn it into a spring or summer gnome with a few bright colors and flowers.
- No Spanish moss hanging in your trees? That’s fine! I didn’t have any either but found a this Spanish moss.

How to Make a Woodland Gnome
Below is the written tutorial with step-by-step instructions for this rustic-looking gnome. He’d fit in perfectly with a farmhouse or neutral decor in fall or winter but will work for spring with a colorful sweater or sock.
First, fill a white kid’s quarter sock full of rice by scooping it in and smooshing it down to get the rice as full as possible. Fill up to the sock band. Note: if you have a decorative sock that is thick and fuzzy, you can skip the white sock and just fill that.
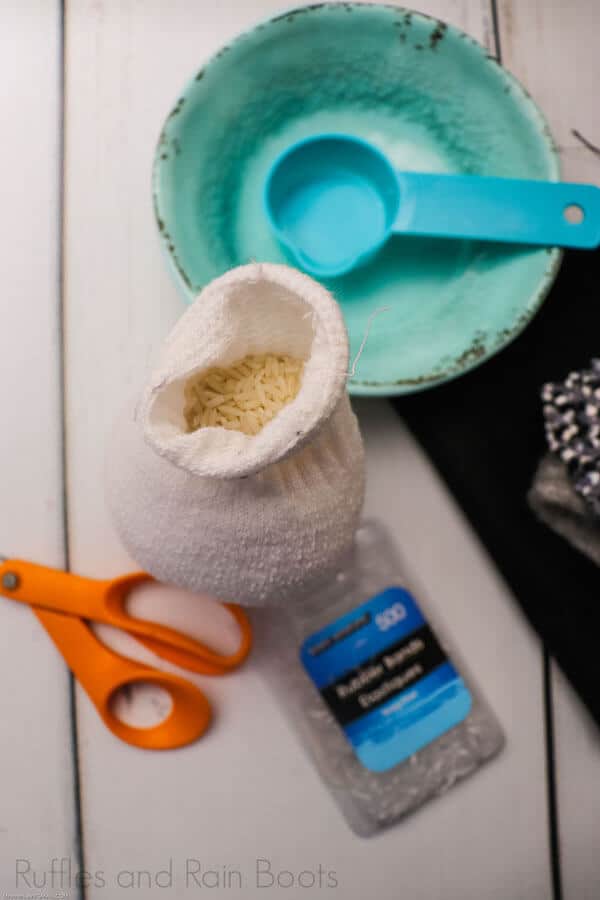
Use the heel side for the face. Using your fingers, form a sizable nose out of the heel.
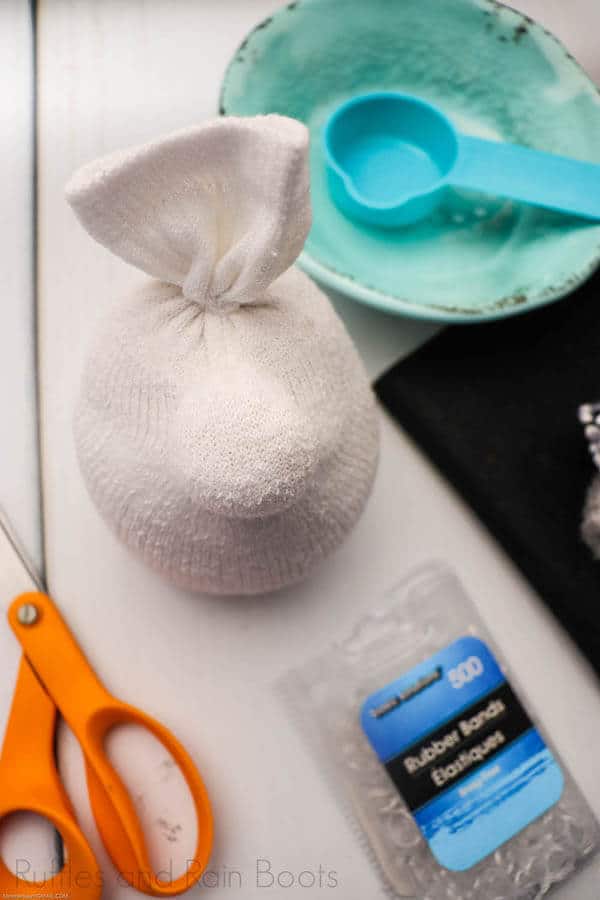
Take 2 tiny clear rubber bands and use 1 to secure the nose, wrap twice if you can. Use the other to secure the top of the sock, and wrap twice.
Fit the multicolor soft sock over the white sock body.
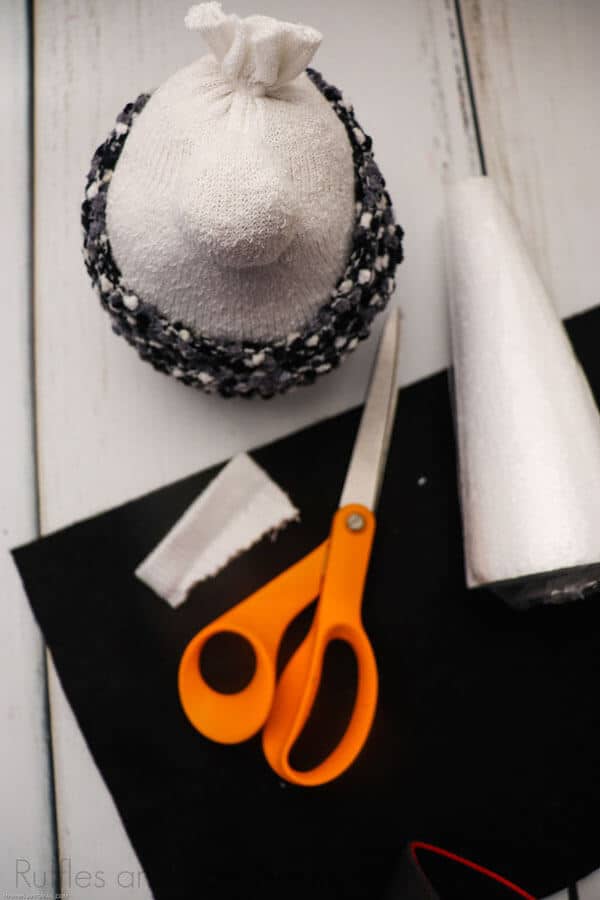
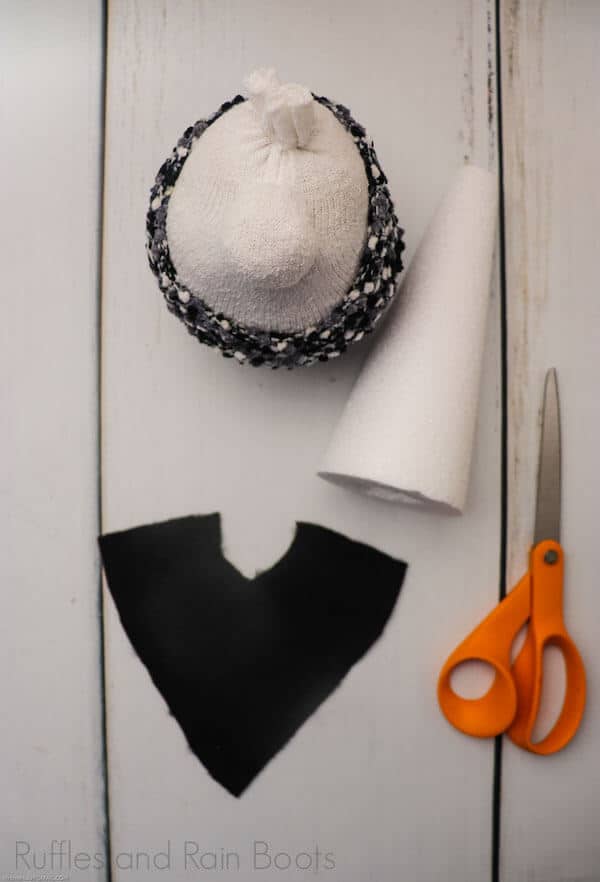
Using scissors or a knife, hollow out the bottom of the foam cone to fit over the white sock and rest on the gnome head in the shape you would like. Fit one of the red soft socks over the foam cone.
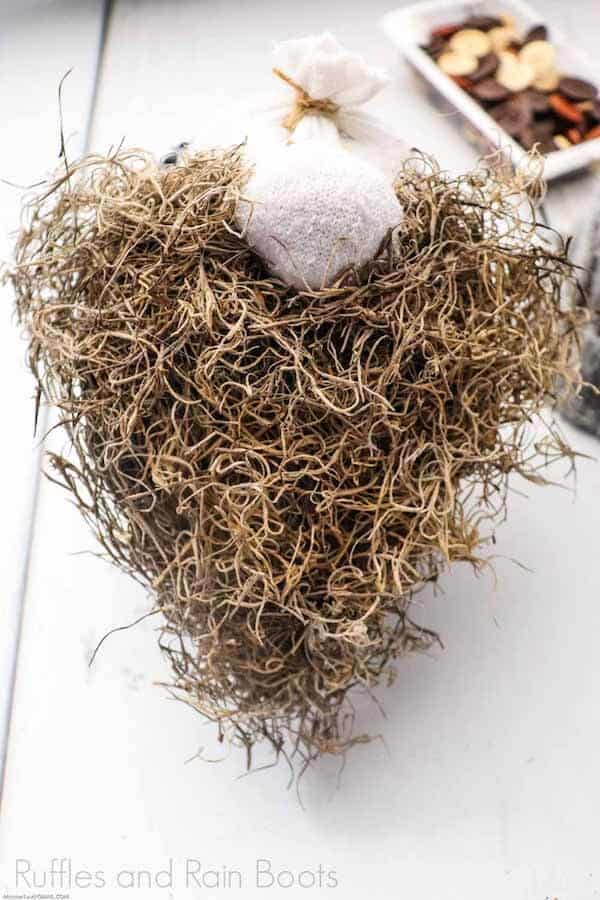
Prepare the beard by cutting a piece of felt in the shape of the beard you want. Hold the felt up to the nose and trace a small circular cutout for the nose.
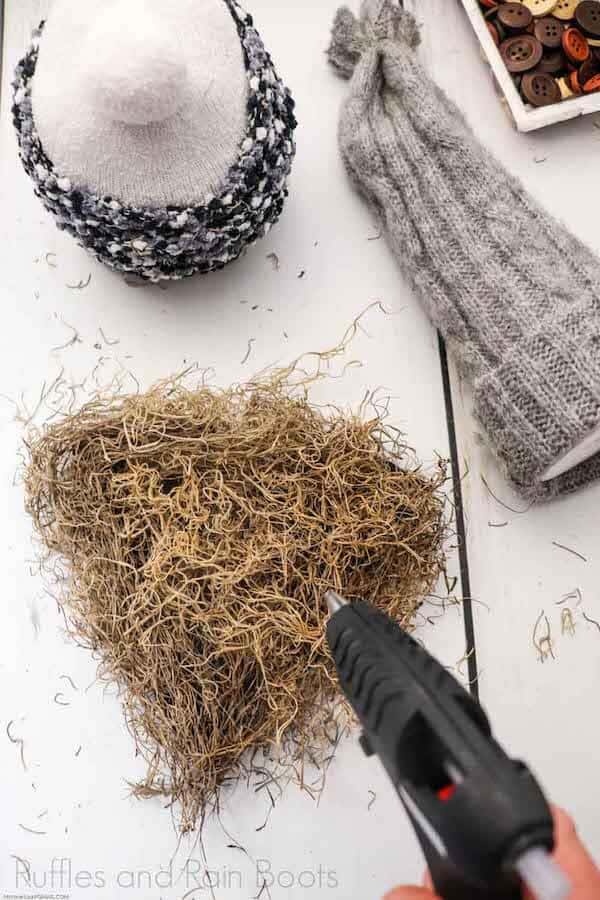
To create the beard “hair”, use a hot glue gun to glue clumps of Spanish moss to the felt. This can be trimmed along the edges when finished. To create a more fluffy beard, separate the strands of the moss or layer it on top of the first set.
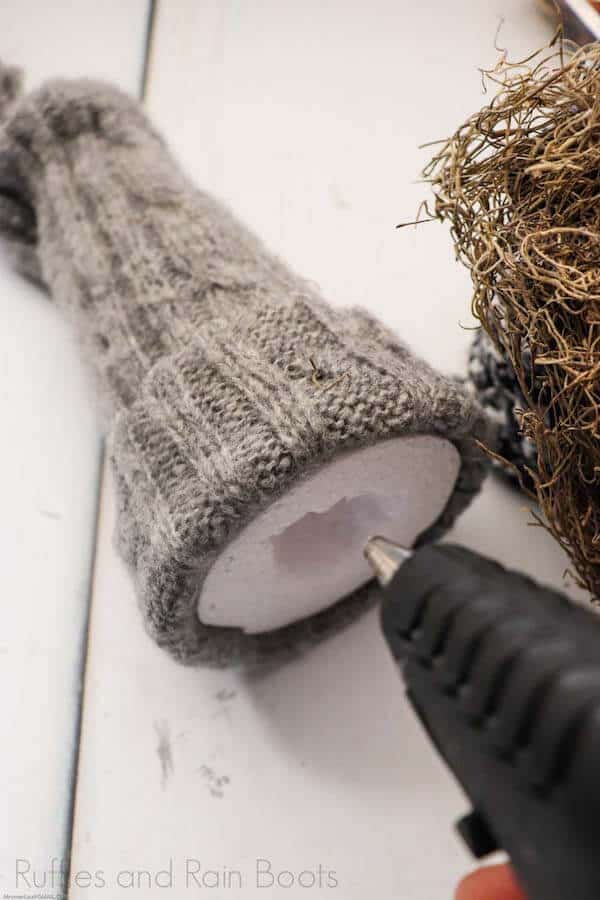
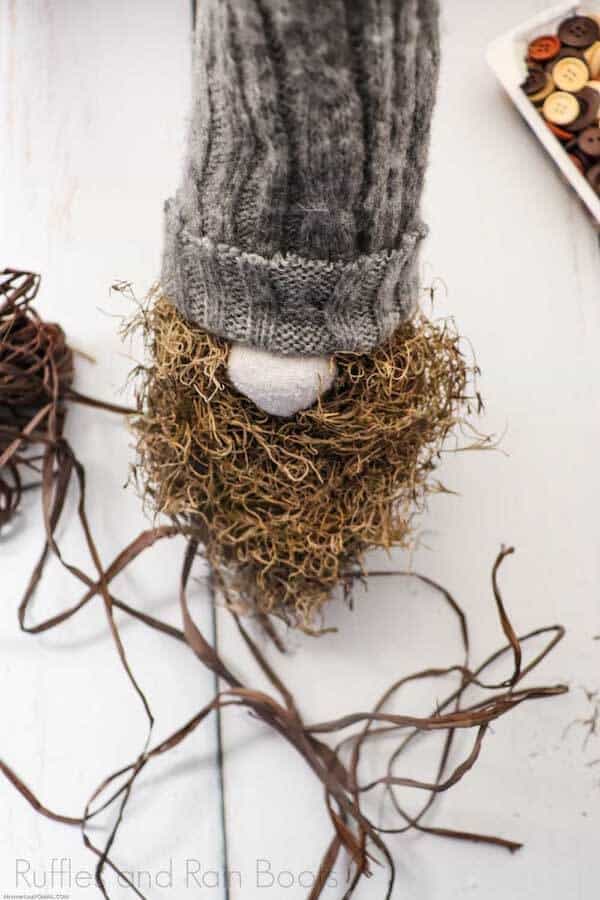
Cover the foam cone with a sweater long enough to make a generous cuff around the base of the hat. Secure the top with a small rubber band and trim to get a hat-top appearance.
To secure the gnome even more and in case a rubber band breaks, wrap twine or yarn tightly around the nose and top of the head and knot tightly.

Trim the top of the white sock down.
Carefully glue the Spanish moss beard to the gnome’s face, just up and under the nose, pulling as high as you can because we want the hat to fit snuggly up against the beard.
Pull the multicolor sock up to the top of the body and glue it around the top of the head.
Hot glue the sweater-covered foam cone to the top of the gnome head by putting the glue on the gnome head. Be generous with the amount of glue. Hold the form down firmly until it sets.
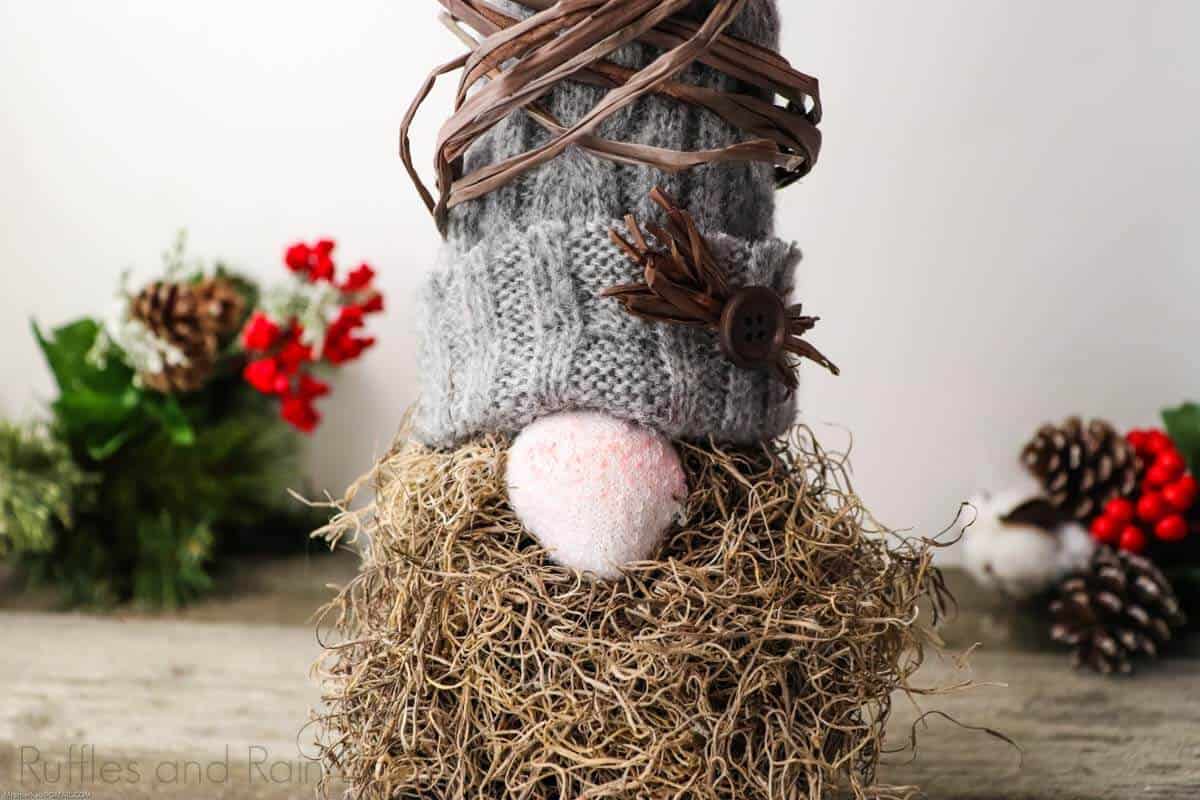
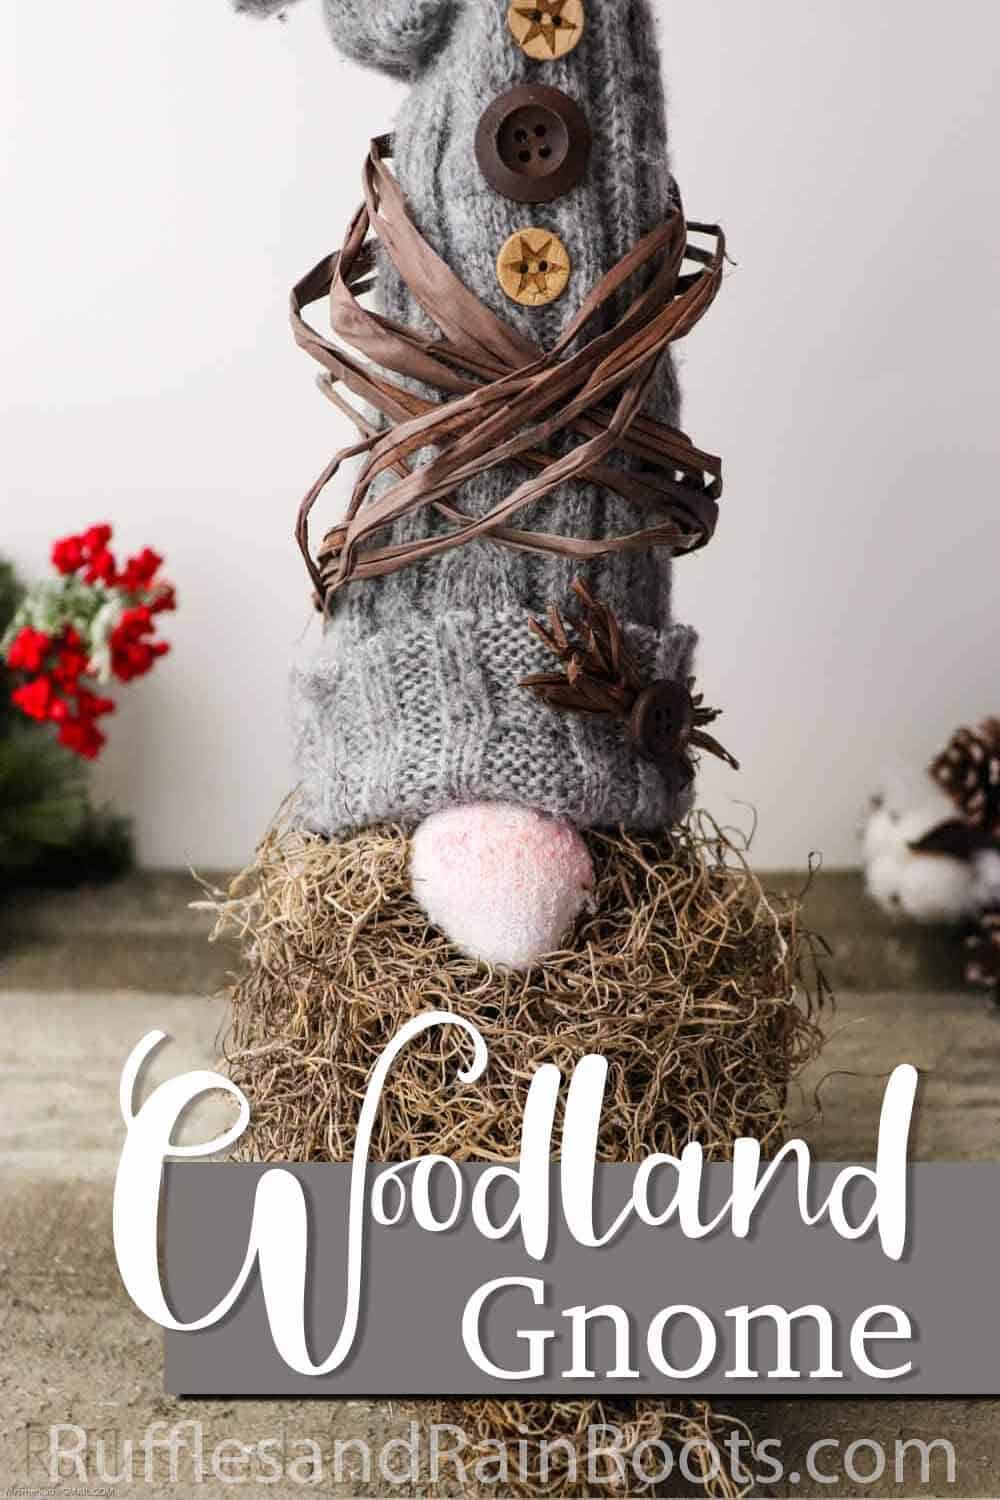
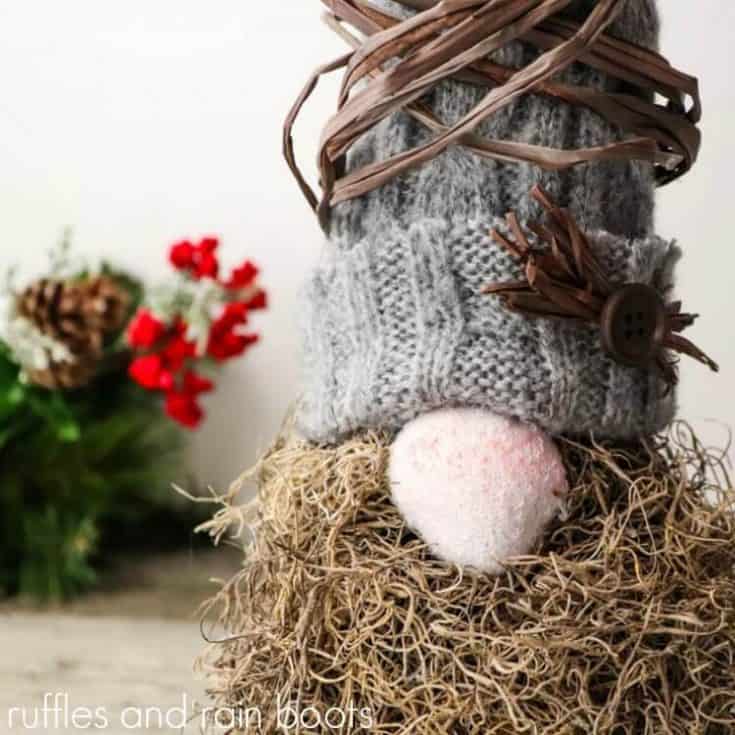
Decorate the hat with the dark brown raffia by wrapping it around and crisscrossing. Hot glue raffia into place under the cuff of the hat.
Glue a wooden button to the hat or use another embellishment of choice, such as, raffia tied in a bow.
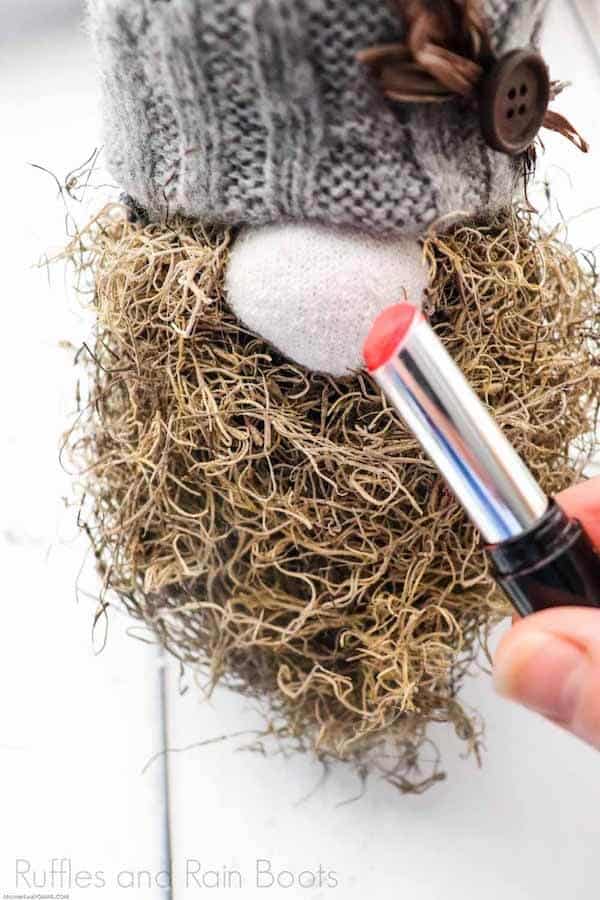
Make the gnome’s nose a pink color by wiping some bright pink lipstick onto the nose fabric. Putting the lipstick on your fingers first to then wipe on the nose is a helpful tip but you can also use a bit of blush or eyeshadow.
More Gnome Tutorials You Might Like
- DIY Farmhouse Gnome – Easily our most popular farmhouse gnome–and he’s RIDICULOUSLY simple to make!
- Welcome Sign with Gnome Display Shelf – All your gnomes need to live on a shelf of honor while you’re displaying it.
- Farmhouse Girl Gnome – If you need a cute gnome to keep you company in the kitchen, this cute girl gnome is perfect!

Please Save or Share This Creative Gnome Idea
Your shares are how this site grows and I am sincerely grateful. Know a friend who’d like this? Please share it on Facebook or save it to your favorite DIY ideas pin board.
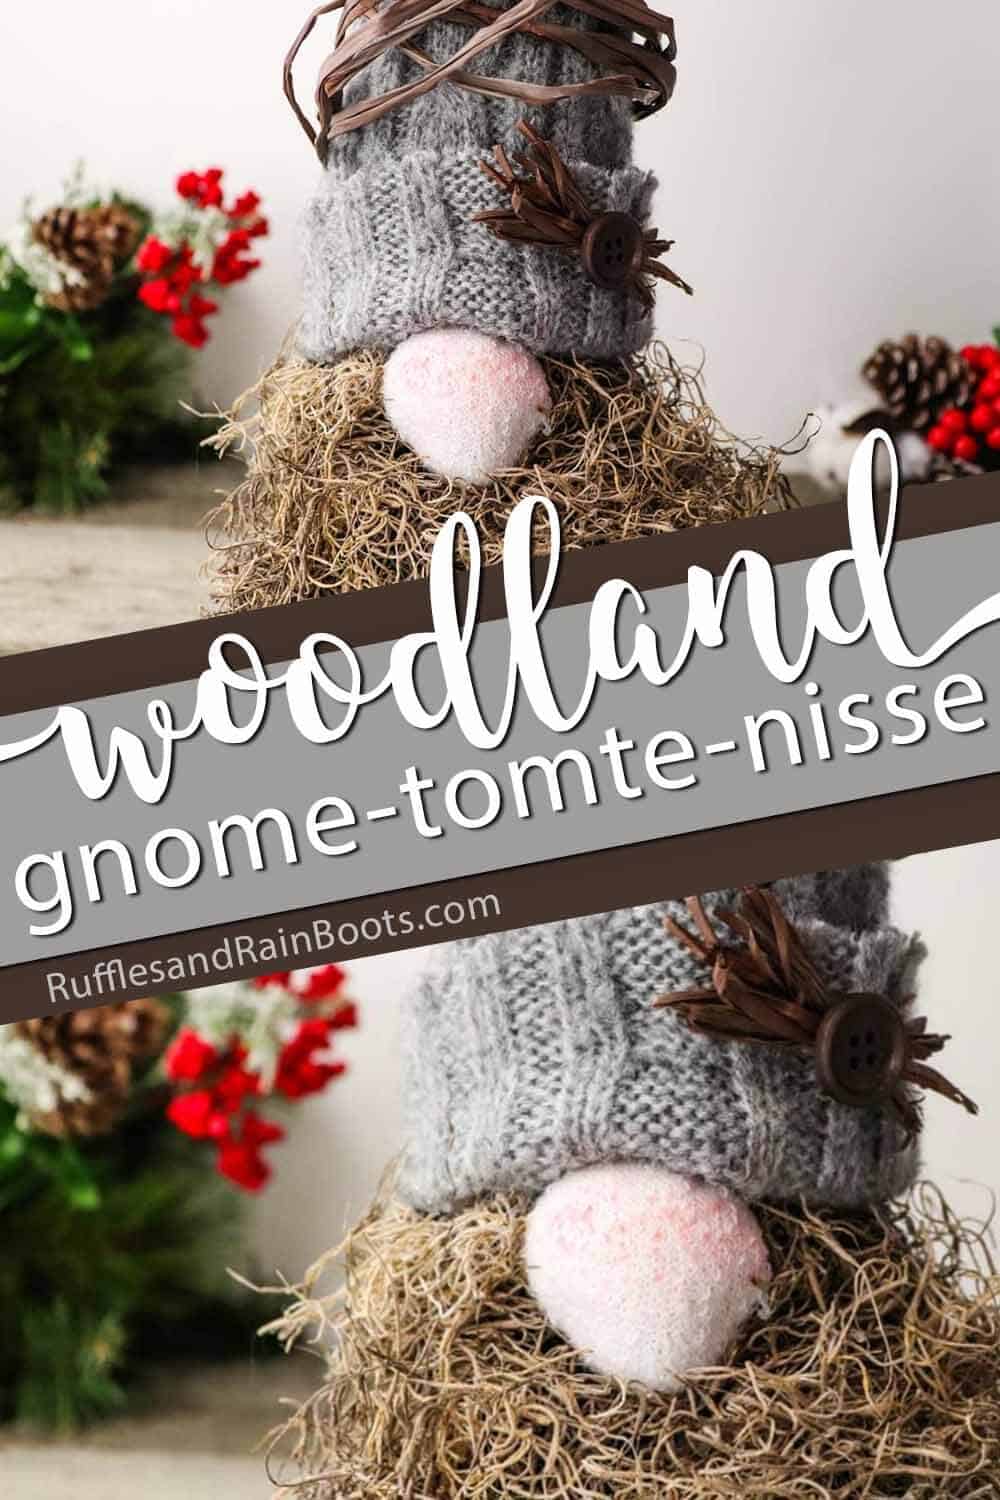
Woodland Gnome
This rustic farmhouse gnome is absolutely stunning. Perfect winter decorations or even rustic Christmas decor. I just can't get enough of that upcycled sweater gnome hat!
Materials
- 3-4 cups white rice
- Small clear rubber bands
- Spanish moss, one package
- Wood buttons
- Pink lipstick
- White, black or light colored felt (will use half of this)
- Floral foam cone
- Multicolor adult super soft socks, gray, black, and white
- White Kid's quarter sock
- Sleeve of old sweater
- Twine
- Dark brown raffia
Tools
- Scissors
- Hot glue gun and hot glue
Instructions
- Fill white kid's quarter sock full of rice by scooping it in and smooshing down to get the rice as full as possible. Fill up to the sock band.
- Use the heel side for the face. Using your fingers, form a sizable nose out of the heel.
- Take 2 tiny clear rubber bands and use 1 to secure the nose, wrap twice if you can. Use the other to secure the top of the sock, wrap twice.
- Fit the multicolor soft sock over the white sock body.
- Using scissors or a knife, hollow out the bottom of the foam cone to fit over the white sock and rest on the gnome head in the shape you would like. Fit one of the red soft socks over the foam cone.
- Prepare the beard by cutting a piece of felt in the shape of the beard you want. Hold the felt up to the nose and trace a small circular cutout for the nose.
- To create the beard “hair”, use a hot glue gun to glue clumps of Spanish moss to the felt. This can be trimmed along the edges to form when finished. To create a more fluffy beard, separate the strands of the moss to make as much fluff as you desire.
- Cover the foam cone with a sweater long enough to make a generous cuff around the base of the hat. Secure the top with a small rubber band and trim to get a hat-top appearance.
- To secure the gnome even more and in case a rubber band breaks, wrap twine or yarn tightly around the nose and top of the head as knot tightly.
- Trim the top of the white sock down.
- Carefully glue the spanish moss beard to the gnome face, just up and under the nose, and pulling as high as you can because we want the hat to fit snuggly up against the beard.
- Pull the multicolor sock up to the top of the body and glue it around the top of the head.
- Hot glue the sweater-covered foam cone to the top of the gnome head by putting the glue on the gnome head. Be generous with the amount of glue. Hold the form down firmly until it sets.
- Decorate the hat the dark brown raffia by wrapping it around and crisscrossing. Hot glue raffia into place under the cuff of the hat.
- Glue a wooden button to the hat or use another embellishment of choice, such as raffia tied in a bow.
- Make the gnome's nose a pink color by wiping some bright pink lipstick onto the nose fabric. Putting the lipstick on your fingers first to then wipe on the nose is a helpful tip.
Notes
For more fun gnome tutorials you'll love, visit Ruffles and Rain Boots!

Hello! Thank you SO much for all of these gnome tutorials. I have boldly entered my first craft fair! Your easy to follow tutorials have given me the confidence I needed to succeed. I love how simple you make the directions, the step by step pictures, tips and fun ideas. This is the best crafting website – you are literally at the top of my crafting websites! Thank you again so much!
Momma Gnome
Missouri, USA