
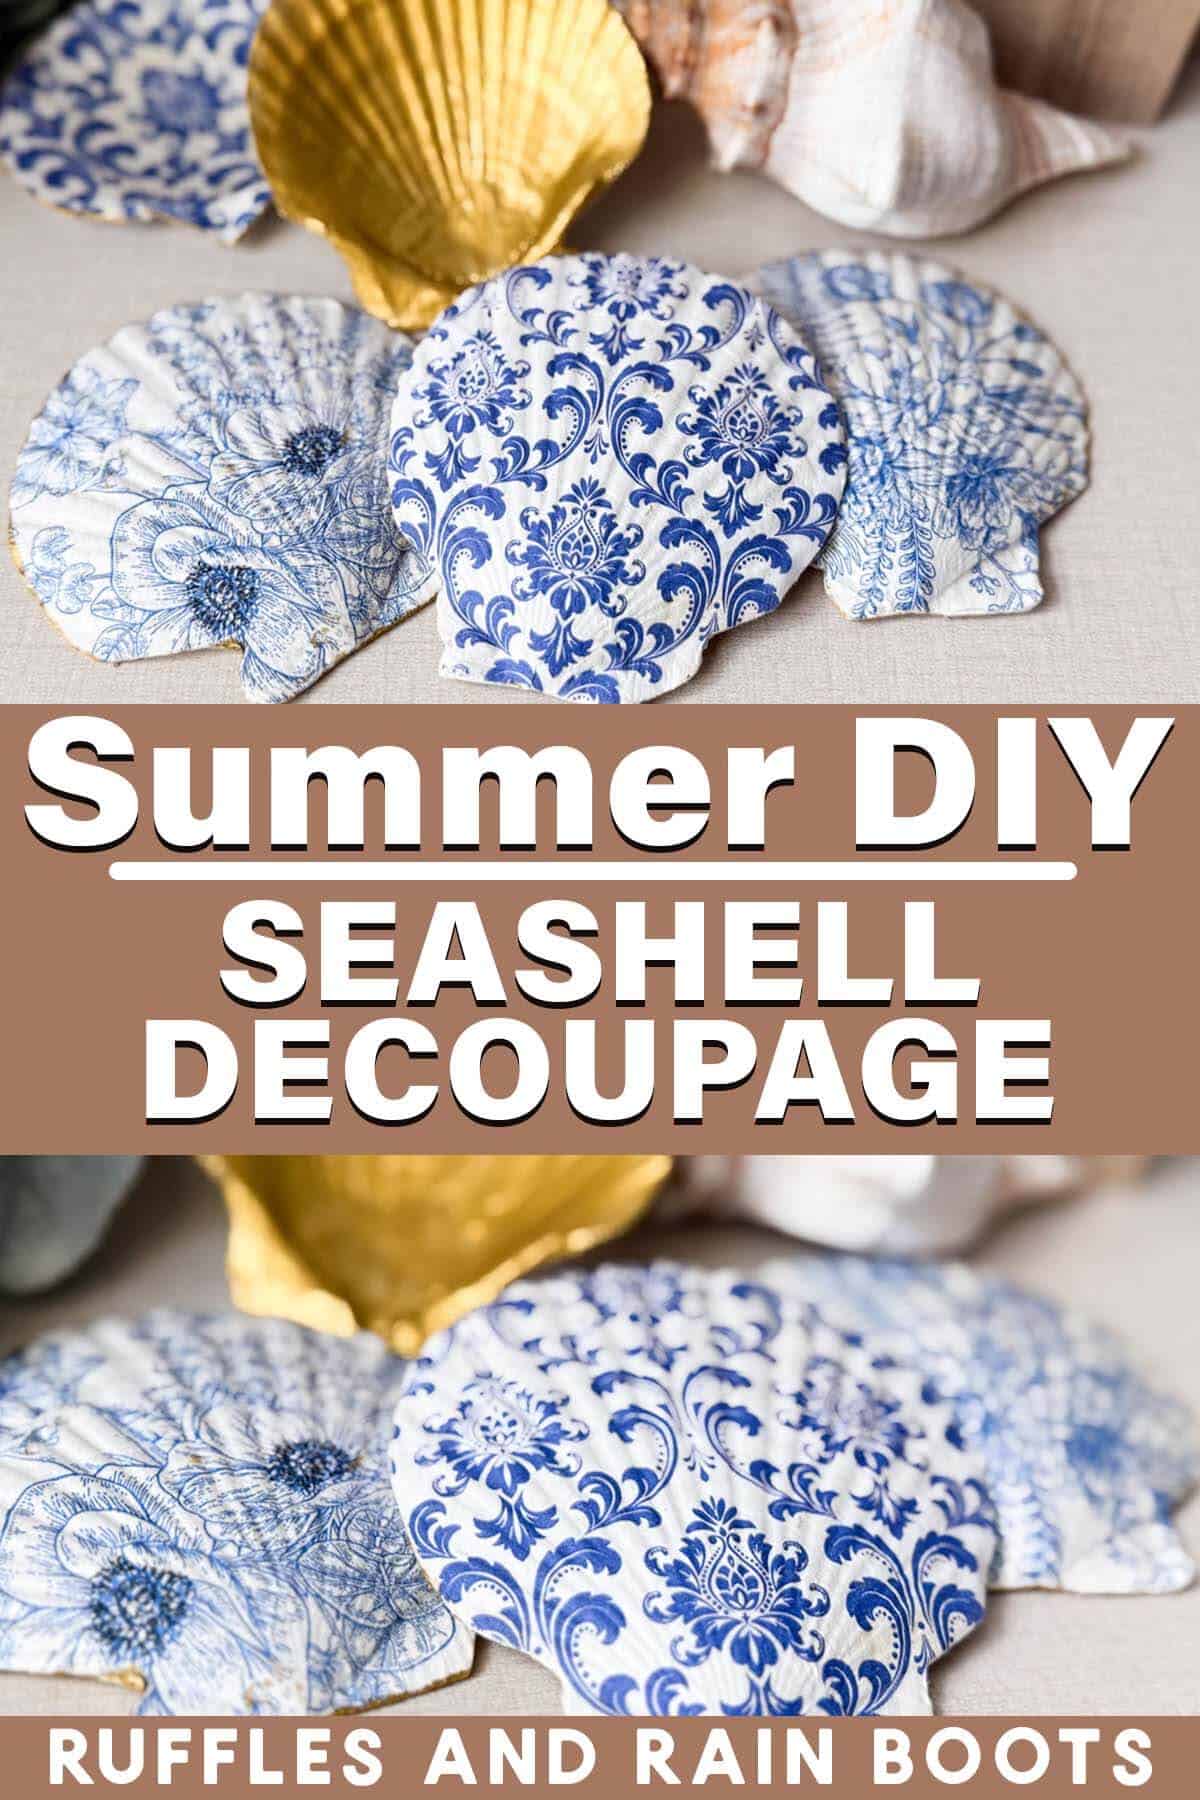
How to Decoupage Seashells for Summer
If you are desperate for a quick and easy summer craft idea, learn how to decoupage seashells. This is a fun craft for a hot afternoon – grab the kids and some friends.
RELATED READING:
As an Amazon Associate, I could earn from qualifying purchases. There could be affiliate links within this article.
What You'll Find On This Page
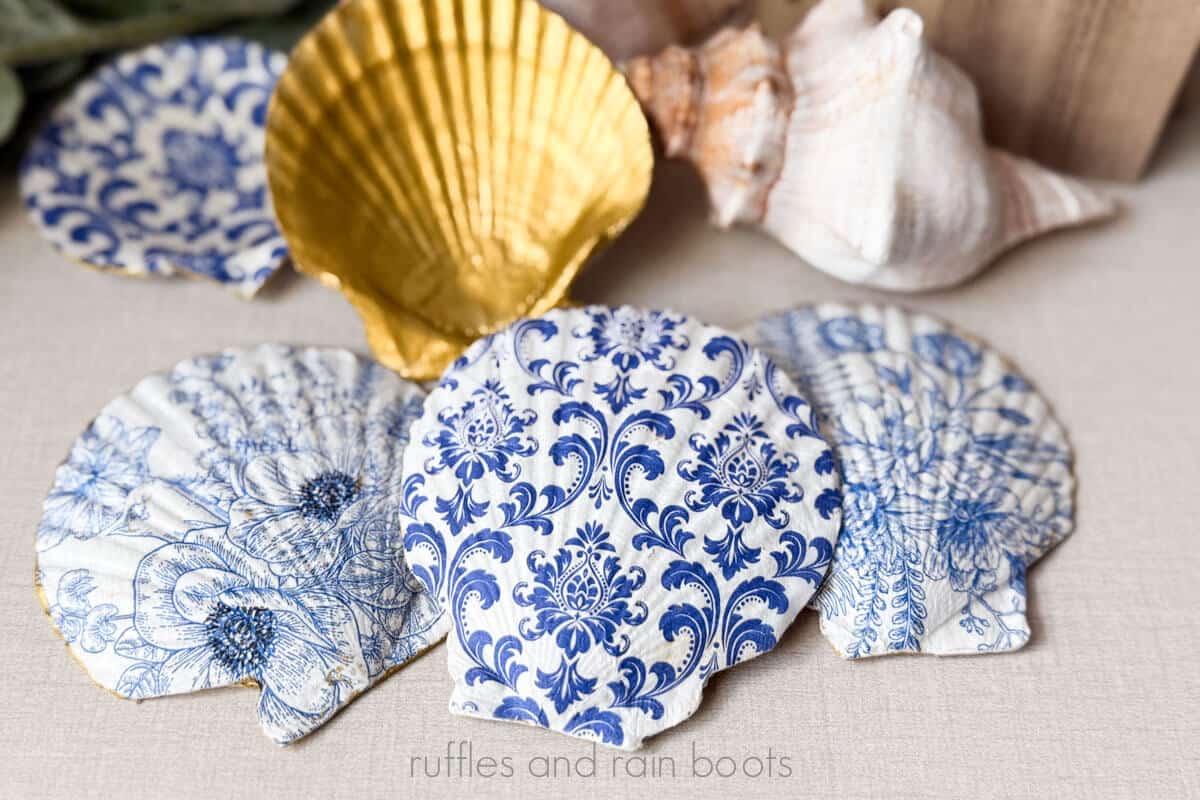
Summer Seashells with Decoupage
Here at Ruffles and Rain Boots, I’ve been finding some amazing things in my organizing my craft room. I tell you, it seems when we moved in, I just threw stuff in to get the boxes unpacked and it’s a mess.
When I found these seashells, I knew exactly the look I wanted: a white and blue, light, chinoiserie-inspired feel.
What You Will Need
I used napkins for this easy craft idea, but you can also use a patterned tissue paper. The tissue paper might bleed when top-sealing, so you might consider a spray sealant.
- medium-sized seashells (painted or unpainted)
- napkins (this is the blue and white pack I picked up)
- ModPodge (I used matte) and a small brush
- sanding stick, sponge, or paper

Summer Decoupage Video Tutorial
If you’re a visual learner, watch the easy how to decoupage seashells video tutorial. It’s about 5 minutes and shows a couple of techniques. While you’re there, be sure to subscribe – we have a lot of fun on the channel.

How to Make This Summer Seashell Craft
First, paint the seashells white for any napkin patterns with larger areas of blank space. Let dry.
Remove all extra ply layers from the napkin to be left with only the patterned piece. You may cut it down to size for the shells but be sure to leave overhang because the napkin will need to cover the raise / dip in the center of the shell.

Coat one side of the shell with ModPodge and gently place the napkin atop. Be sure to lightly press the napkin into the ridges and alongside the edges of the shell. Let dry.
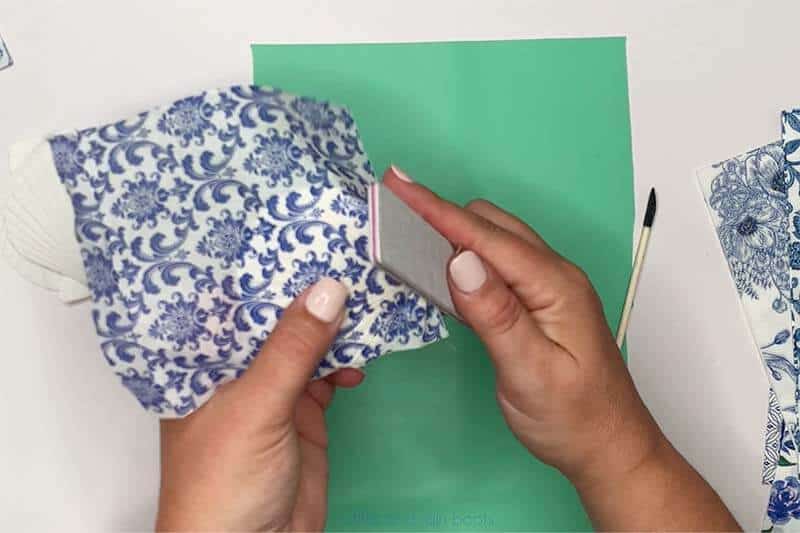
Once dry, use a sanding sponge, nail file, or sand paper to remove the paper. Sand in a downward motion and use a soft touch as the shells can chip.
After you’ve applied the napkins and let the dry, cover the print with a coat of ModPodge. Optionally, you can paint the inside, as well, just be sure to seal that, too.

Your decoupage shells are done! Display them in a bowl, on a shelf, or glue them to a garland for a summer banner.
More Crafts You Might Like
- x
- u
- z
Please Save or Share This Fun Summer Craft Idea
Your shares are how this site grows and I am sincerely grateful. Please save this decoupage DIY to an easy crafts pin board or share it with a crafty group on Facebook.
Meet the Creator
Hi there, I’m Sarah Nenni-Daher. I’m a crafty gal and always have at least 14 projects going at once. I am a crafter, designer, DIYer, and pattern maker. I share my creations here and in the Ruffles and Rain Boots® Shop.
Here at Ruffles and Rain Boots®, you’ll find DIY gnomes, crafts, gifts, cupcakes, laser crafts, and so much more. I love sharing video tutorials over on YouTube and chatting with other crafters in my Facebook groups. We’d love to have you!