
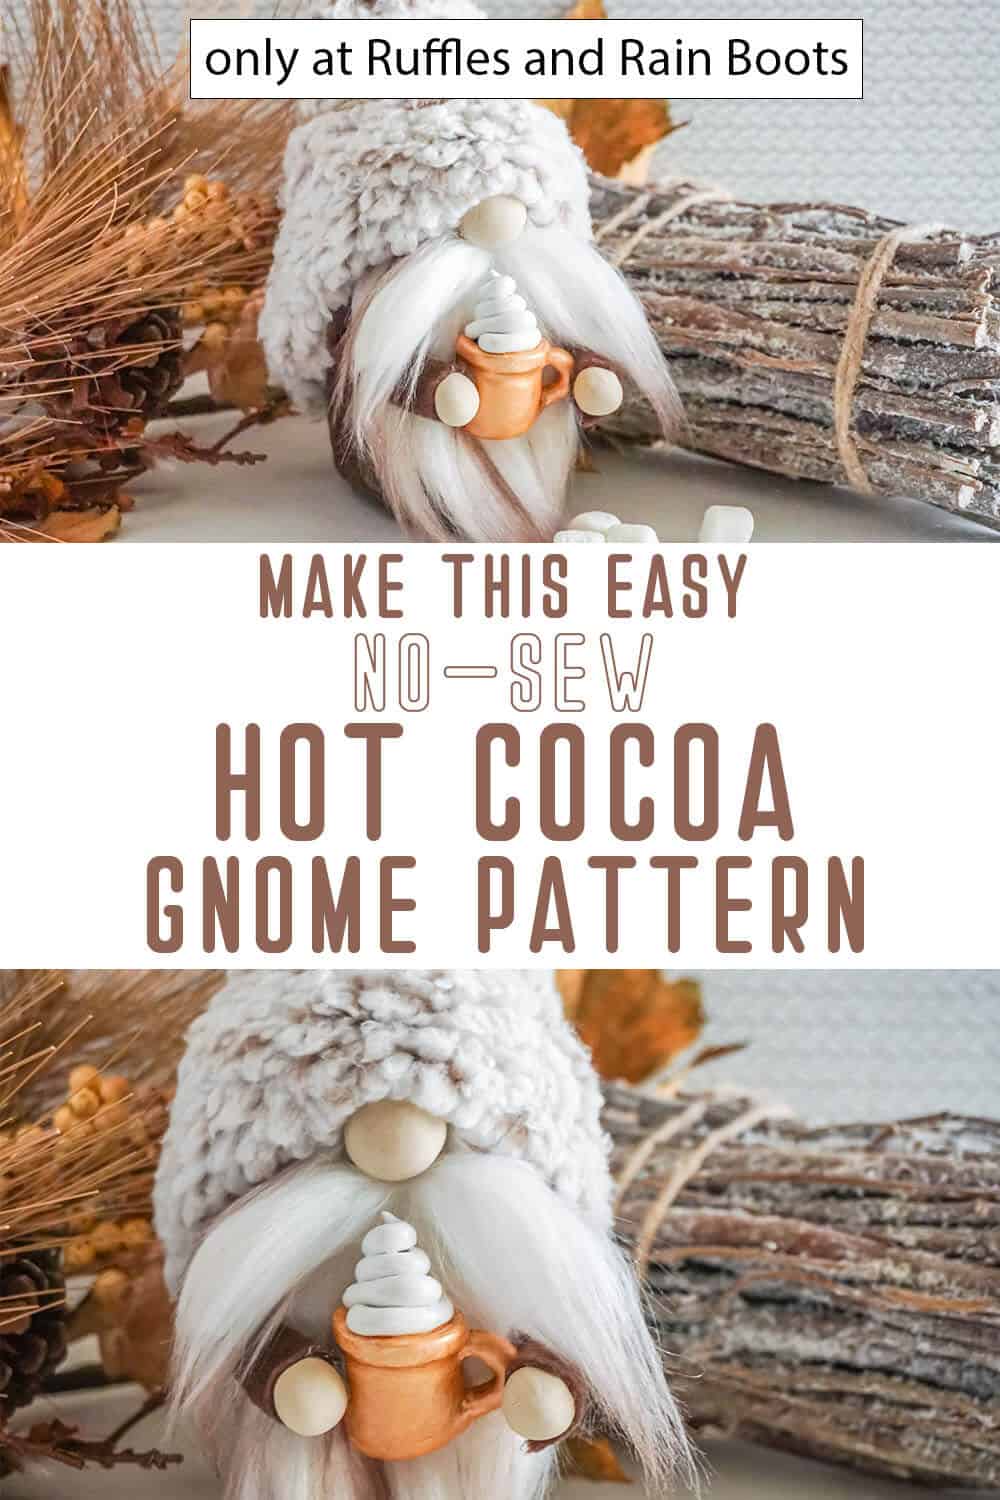
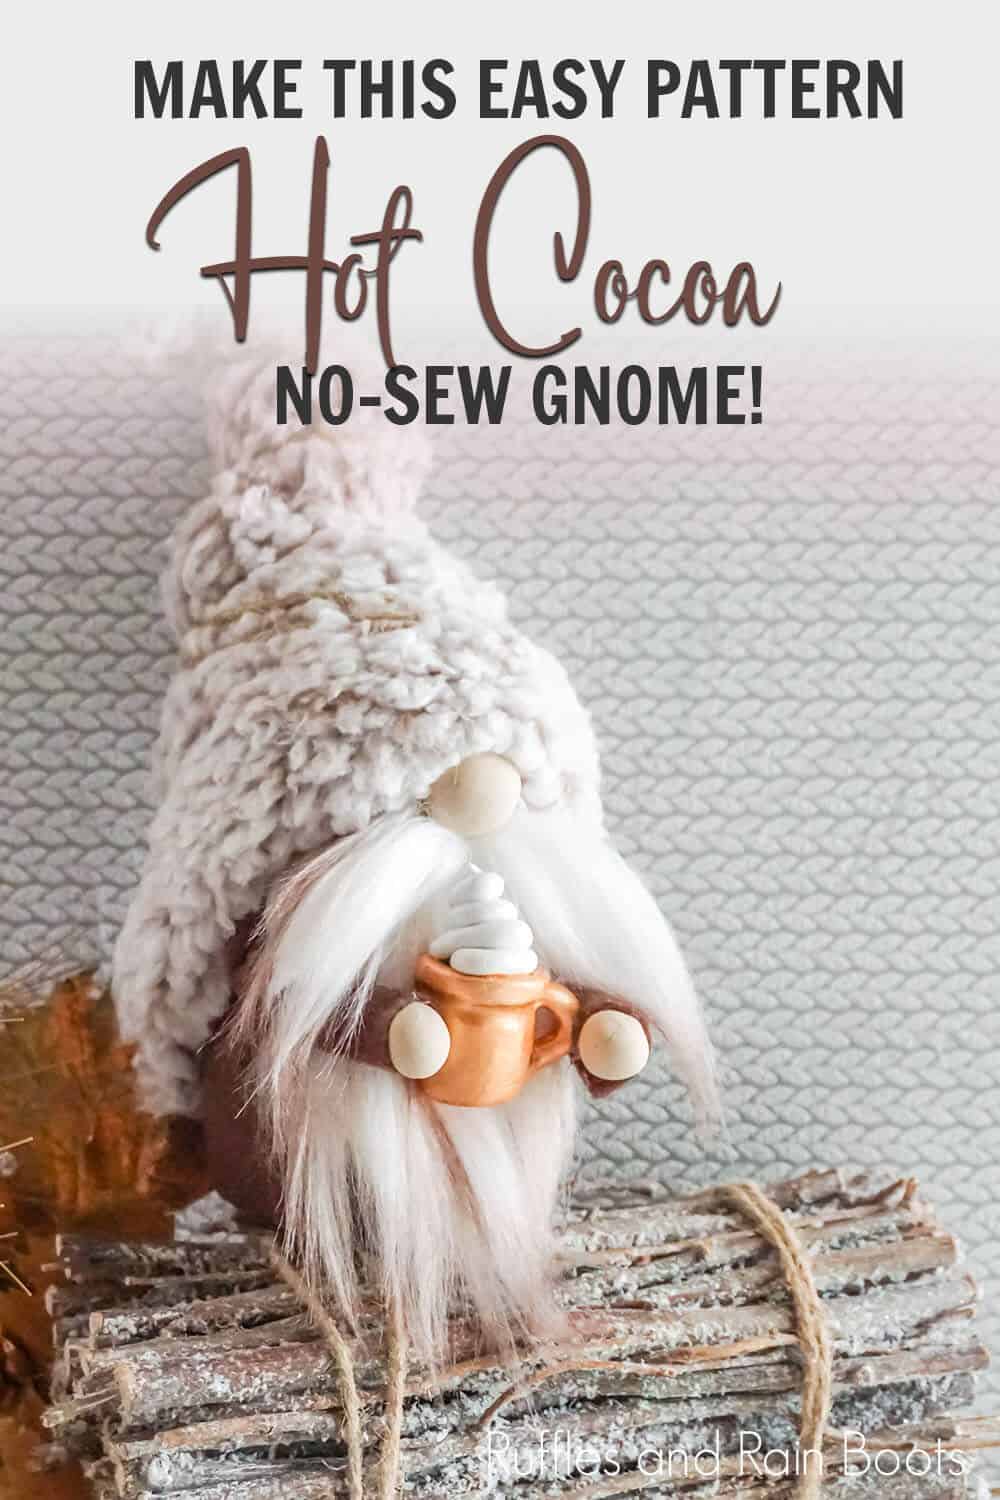
This Fun Hot Cocoa Gnome Pattern is Fast and Adorable
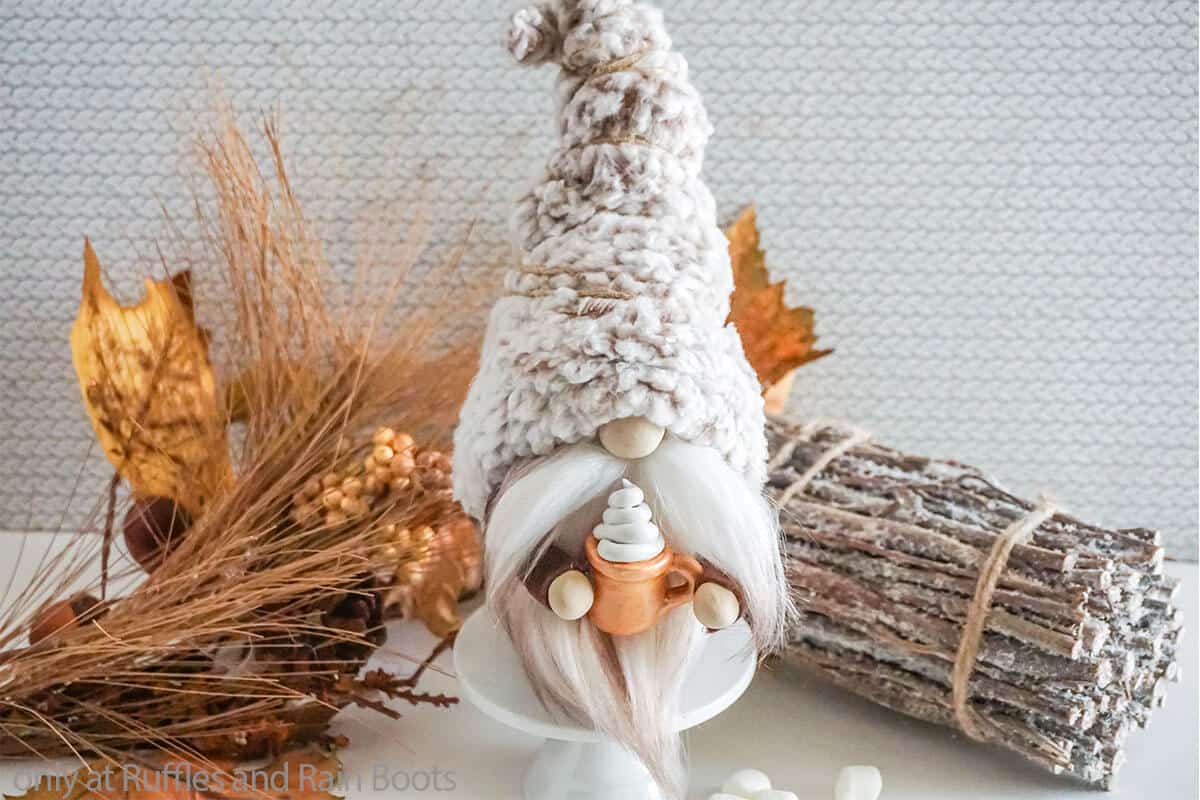
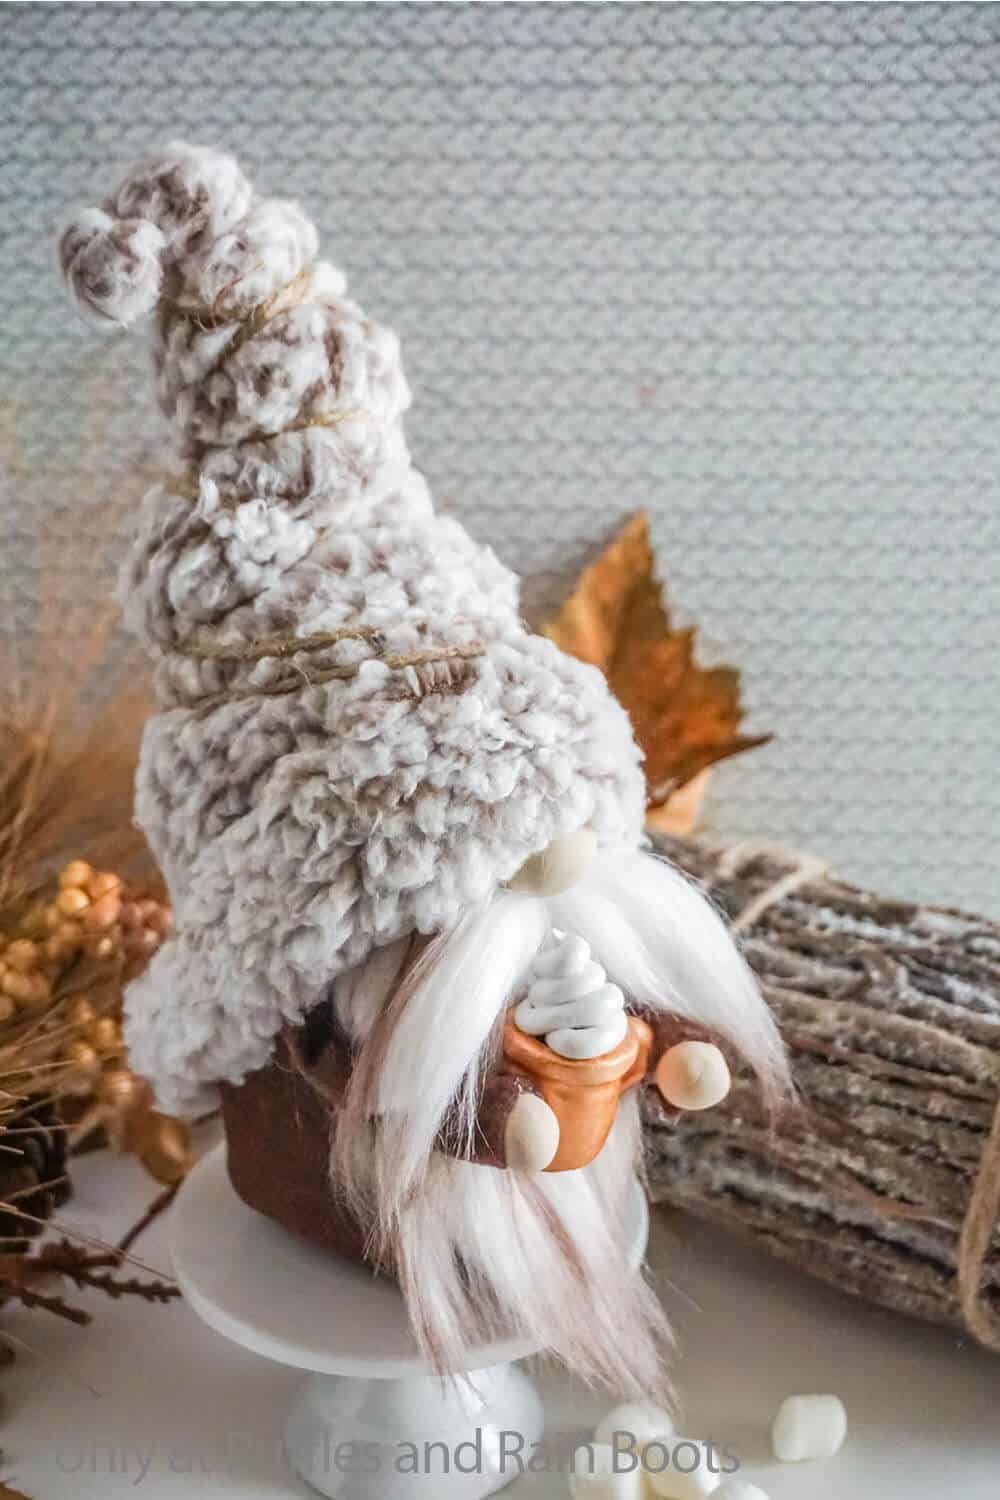
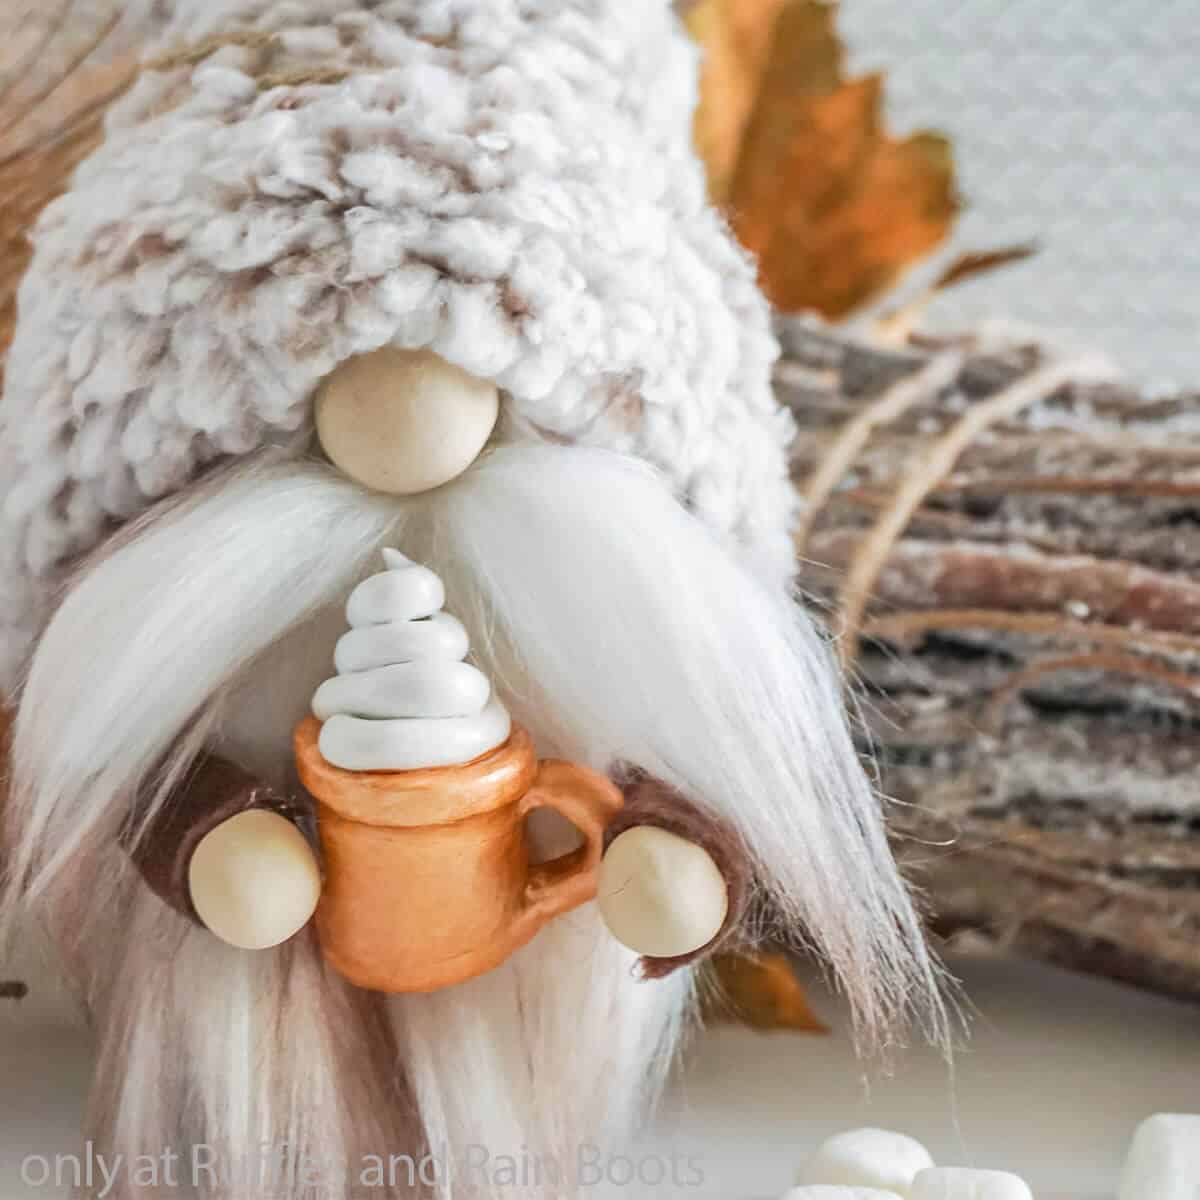
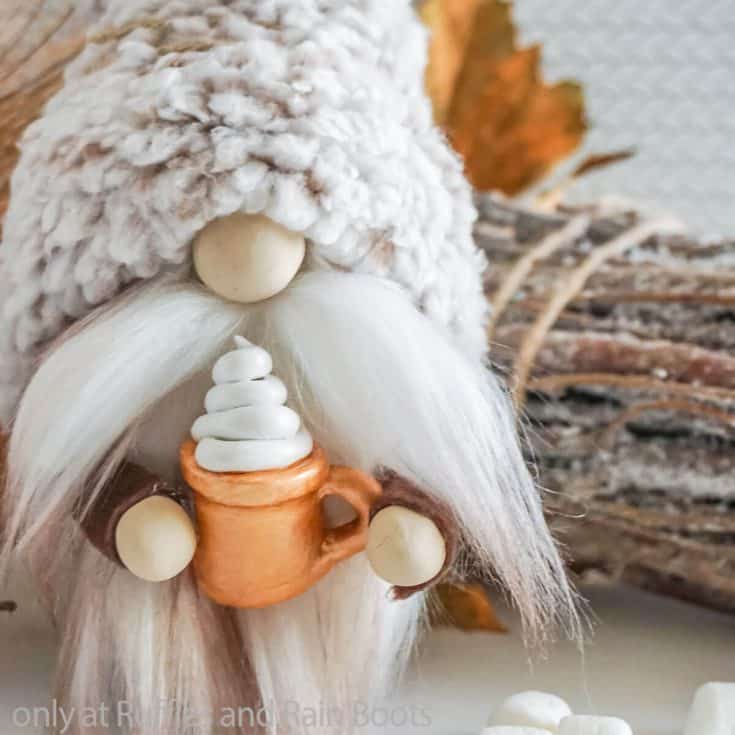
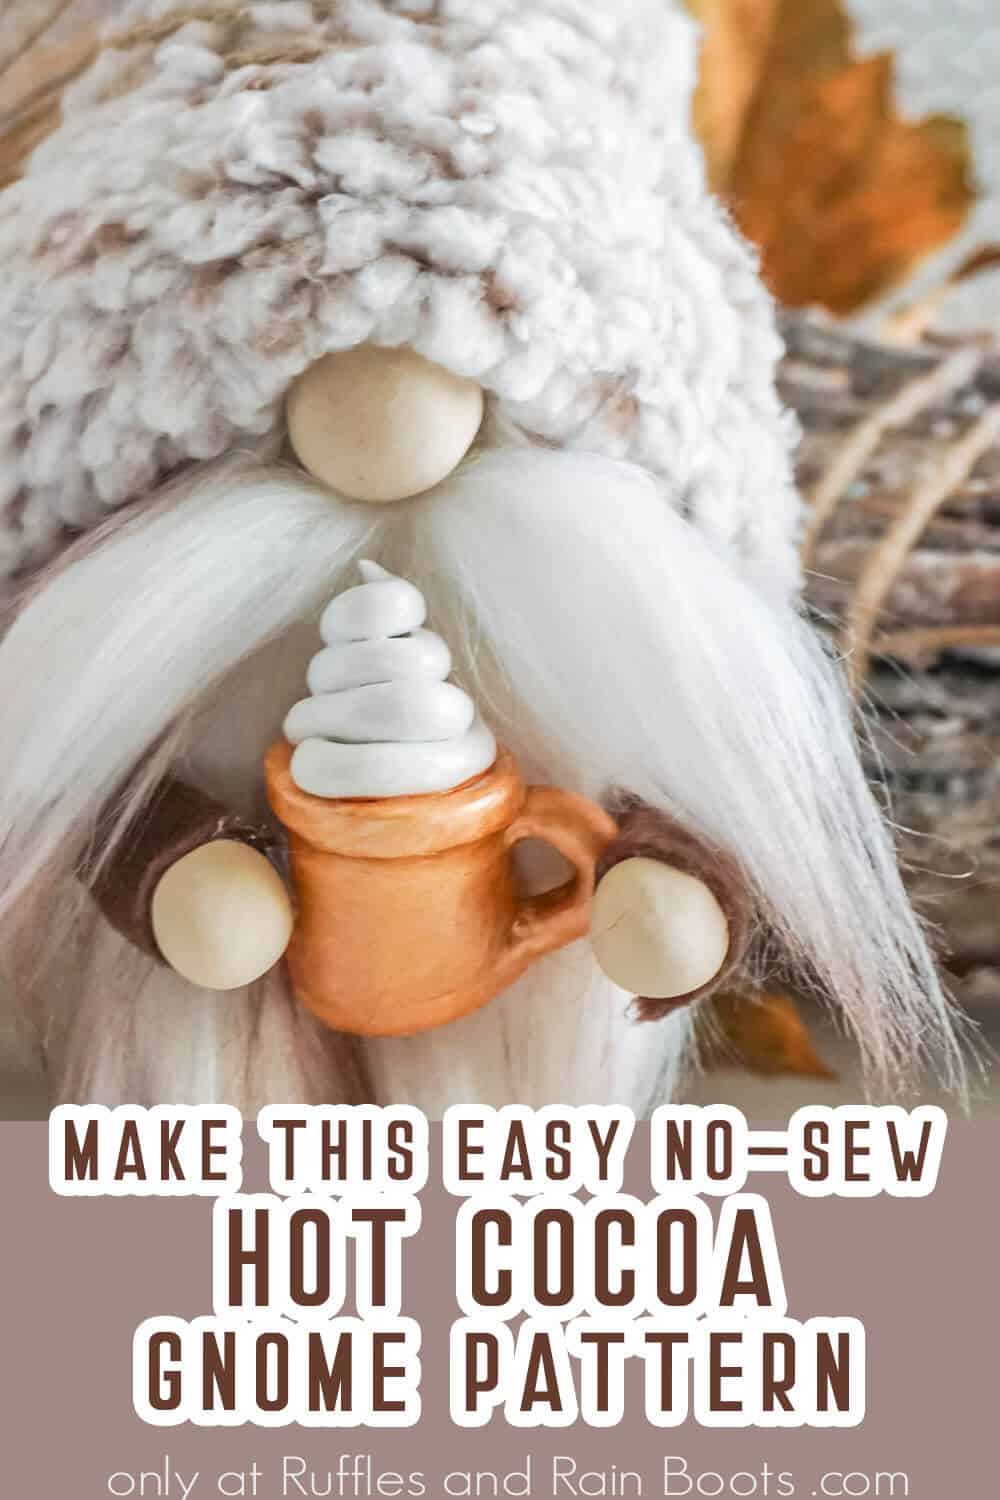
Easy and fast, you can make this hot cocoa gnome pattern with just a few snips, a little hot glue and add a wee mug for so much charm! I’ll even show you how to make his copper mug and whipped cream topping.
For this craft you’ll need a bit of fluffy fabric (it has a cozy feel), some fur (I’ll show you how to color it), and basic craft supplies. Let’s get started with this gnome holding a hot cocoa!
What You'll Find On This Page
Hot Cocoa Gnome Pattern
Here at Ruffles and Rain Boots, I love coming up with unique and fun gnome types that I haven’t seen anywhere else. Not trying to toot my own horn, but if I can come up with something I’ve not seen, I get all giddy and particularly proud. This adorable no-sew gnome pattern is all that and a wee copper mug – like who would have thought?!
RELATED READING: DIY CHRISTMAS GNOME PATTERN
I just can’t get over this twisty hat (looks like a swirl of whipped cream on top of his wee head) and the fun ombre beard I painted in just a few minutes. It all just comes together so nicely, making a no-sew gnome I really love. Grab your scissors and let’s get started.
No Time to Make This Now? Save or Share It for Later
Need to gather some supplies? Save this to your favorite gnome crafts pin board or share it on Facebook with a group or on your timeline. When you’re ready to start, it will be easy to find.
As an Amazon Associate, I can earn from qualifying purchases. This article could contain affiliate links.
Tips to Make a No-Sew Gnome with a Mug
- Start by grabbing this easy no-sew gnome pattern to make my easy no-sew Tucked Gnome (one of my most popular gnome patterns). It’s a great pattern for beginners, easy, and keeps the number of cuts down to the bare necessity to make a quality, elegant gnome. And, if you’d like to really reduce your cutting time and effort, or you plan to undertake making multiple hot cocoa gnomes at the same time, you can get both the pattern AND cut files for Cricut or Silhouette!
- One the best parts about gnomes are the noses. I generally like to make my gnome noses using some kind of round, beige object that looks good on that specific gnome. Sometimes it’s wooden beads or balls, but my favorite lately has been using hand-made clay balls, so I can size them and color them on the fly to match my design.
- I usually like to make my various gnome beards from the longer-pile, nicer faux fabric furs you can find on the big rolls at your local craft stores, as opposed to the cheaper sheets of fur you can find in the crafting section with felt sheets.
- In the gnome with a cocoa mug video tutorial, I show you how easy it is to lightly add color to a gnome beard. Let me say: there is no way to prevent color transfer over time (you are attempting to color plastic, after all), but this is a great way to add color without having to worry to much about it.
How to Color a Gnome Beard and Cut It Correctly
For this particular gnome, I wanted to try a new trick that I am kind of excited about: coloring faux fur with alcohol inks! Many times over the past few years, I have made painted gnome beards a few times. But, the down-side was how long it could take for the painted beards to dry. The cool thing with alcohol inks is that they dry almost instantly when you just do a light coat by dry-brushing like this hot cocoa gnome. No waiting around for a day or two and really no need to make a big mess. So cool!
If you’ve never had an occasion to cut faux fur or craft fur before, take a few minutes to check out my quick video on how to cut faux fur the right way. You’ll learn something about cutting faux fur that will work anytime you want to cut faux fur (not just for gnomes). While you’re on the channel, be sure to subscribe to my channel so you get all the best gnome video tutorials!
How Do I Make this Hot Cocoa Gnome Pattern?
Below is the written and printable tutorial. If you’re making a DIY gnomes playlist on YouTube, here is my gnome with hot cocoa mug video tutorial.
While you’re there, be sure to subscribe to the channel. We have a lot of fun with gnomes, quick crafts, and seasonal decor DIYs.
Hot Cocoa Gnome Pattern
Such a fast and fun gnome, this is truly unique and adorable. You can make this hot cocoa gnome in just a few minutes - and customize his color scheme if you'd prefer a red and white gnome for Christmas or a pure white one for the winter!
Materials
- 1/4 yard Brown Felt Fabric
- 1/4 yard Brown/White Sherpa Fleece Fabric
- 1/8 yard White Mongolian Faux Fur
- 1 Small Clay Balls or Wood Beads for Noses
- 2 Extra Small Clay Balls or Wood Beads for Hands
- Poly Beads
- Small Amount of Poly-Fill
- 1 8-inch length of Floral Wire
- Twine
- Brown Alcohol Ink
- Copper Acrylic Paint
- Craft Sealant
Tools
- Hot Glue Gun and Glue
- Razor Blade or Craft Knife
- Scissors
- Wire Cutters
- Paintbrushes
- Small Bowl
- Comb
- Rubbing Alcohol, optional
Instructions
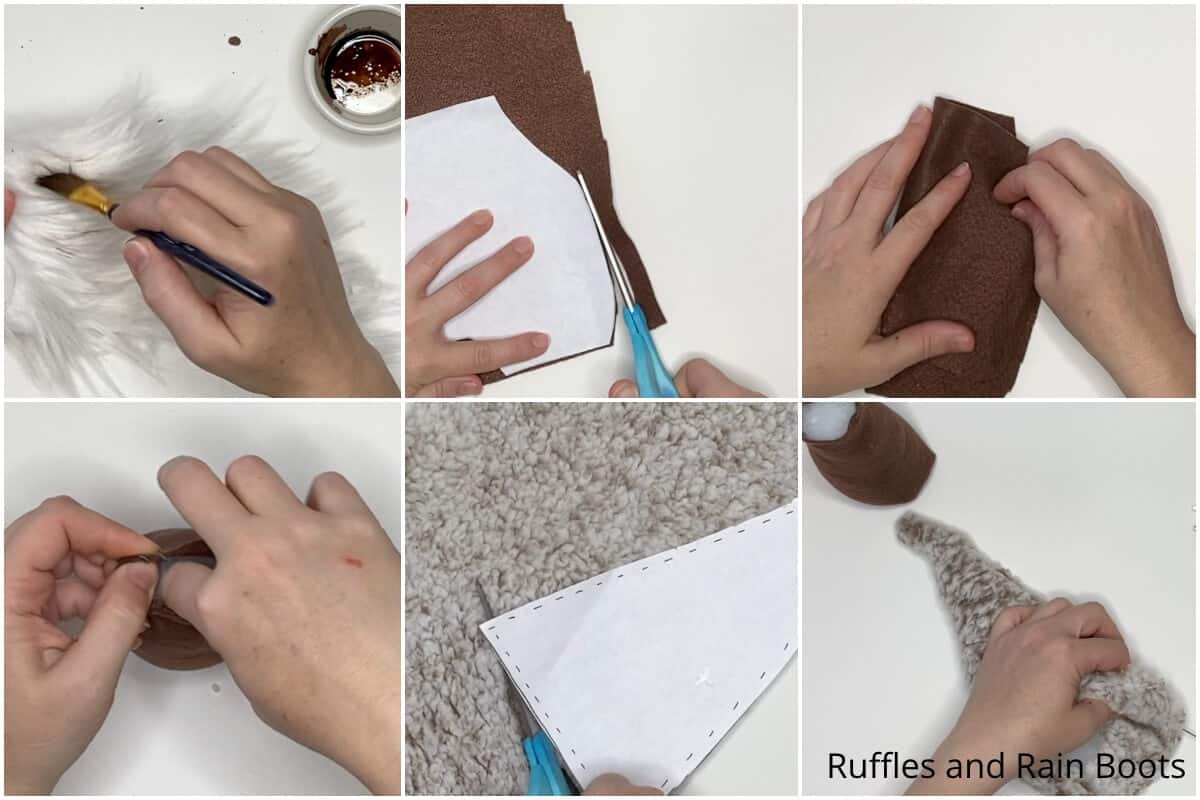
- Start by painting your beard. Cut a large section of white Mongolian fur, slightly overly-larger than you want your beard, so you have some room to work. Place about 1 tbsp of the brown alcohol ink into your small bowl then dry brush just the top layer of your white faux fur. Then comb the faux fur to smooth out the coloring and strands that may have stuck together. Note that the ink will dry a little lighter than when you initially brush it on, so it's ok to go a little heavier than you initially intend. Although the alcohol ink will dry almost immediately, still set the faux fur aside just the same, while you prepare the gnome body
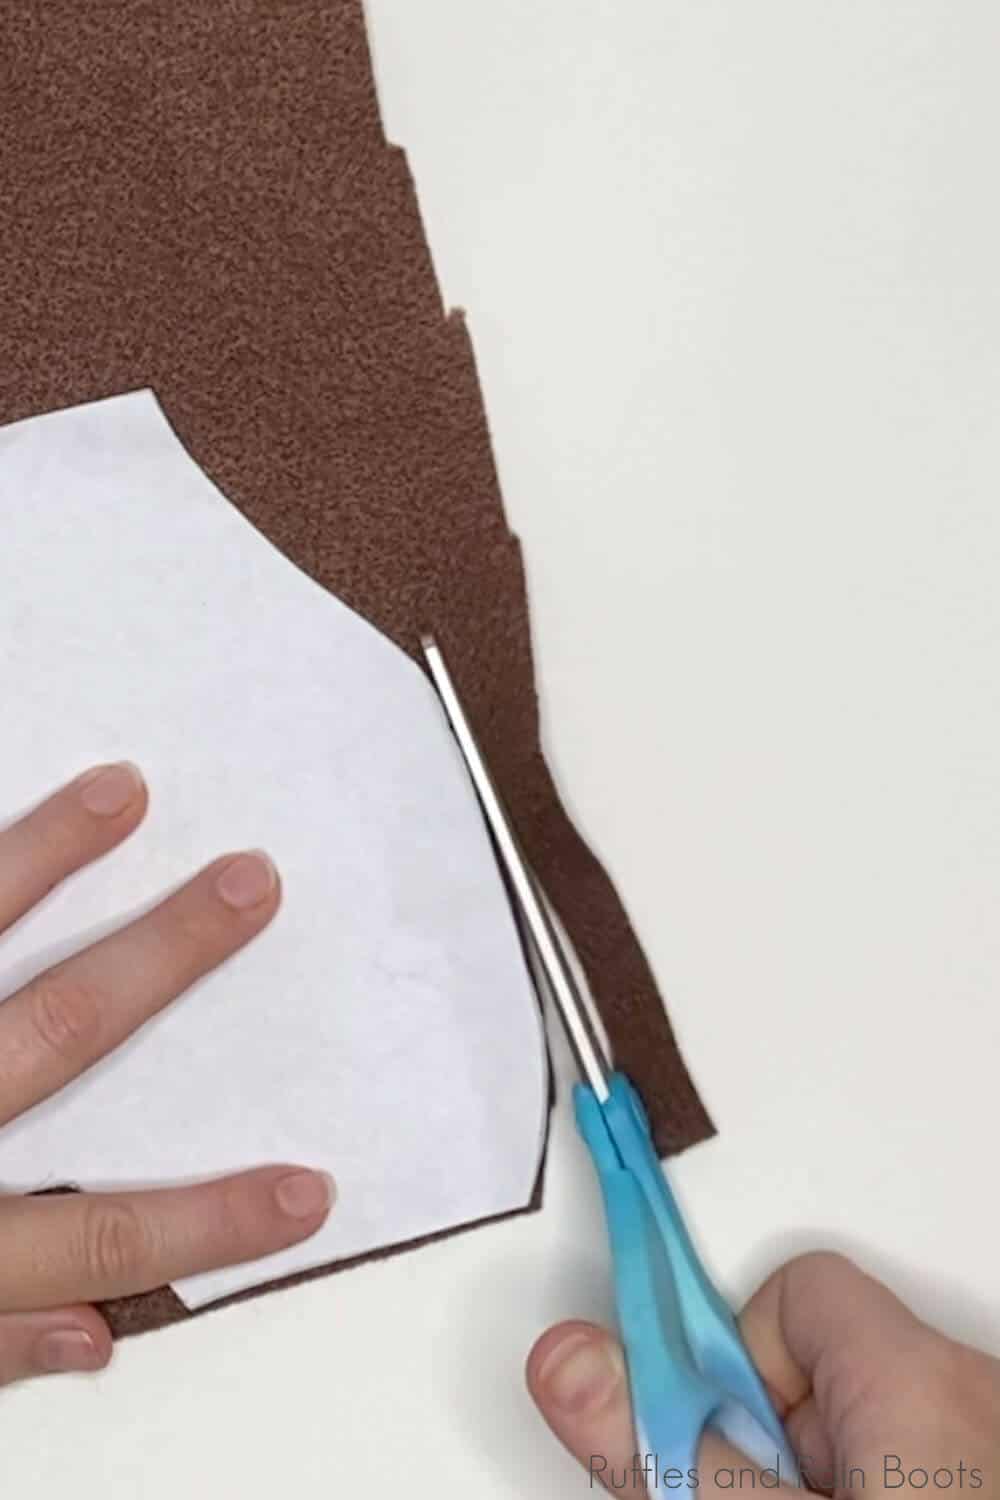
- To make the gnome, trace and cut out one large gnome body shape from the brown felt fabric. Fold the gnome body shape in half and run a hot glue hem along the open side. Fold the bottom flap of the gnome body shape over and close the bottom of the gnome with hot glue. Allow the glue to dry fully.

- Turn the gnome body right-side out, then fill the gnome body with 1-2 cups of Poly Beads. Tuck a small portion of Poly-Fill into the top of the gnome body to hold the Poly-Beads inside.
- Fold the sherpa fleece fabric over to cut one hat shape with one of the long sides along the fold-line in the fabric. With your hot glue gun, run a hem along open side of the hat piece. Allow glue to dry completely.
- Fill the tip of the hat a little with a small amount of Poly-Fill if you want a pointy hat; if you want a floppy hat, just put a tiny amount of Poly-Fill in the hat. To make the hat bendy and shapeable, hot glue a floral wire into the hat by bending the end over to make a small loop (so the wire won't poke through the fleece) then hot gluing the wire into the hat along the seam. Trim the wire to end just inside the bottom of the hat and bend this end of the wire over to make a small loop, then hot glue this in place as well. Fold the bottom 1-2 inches of the hat up to create a thick brim, then fit the hat onto the gnome's body to check the fit.

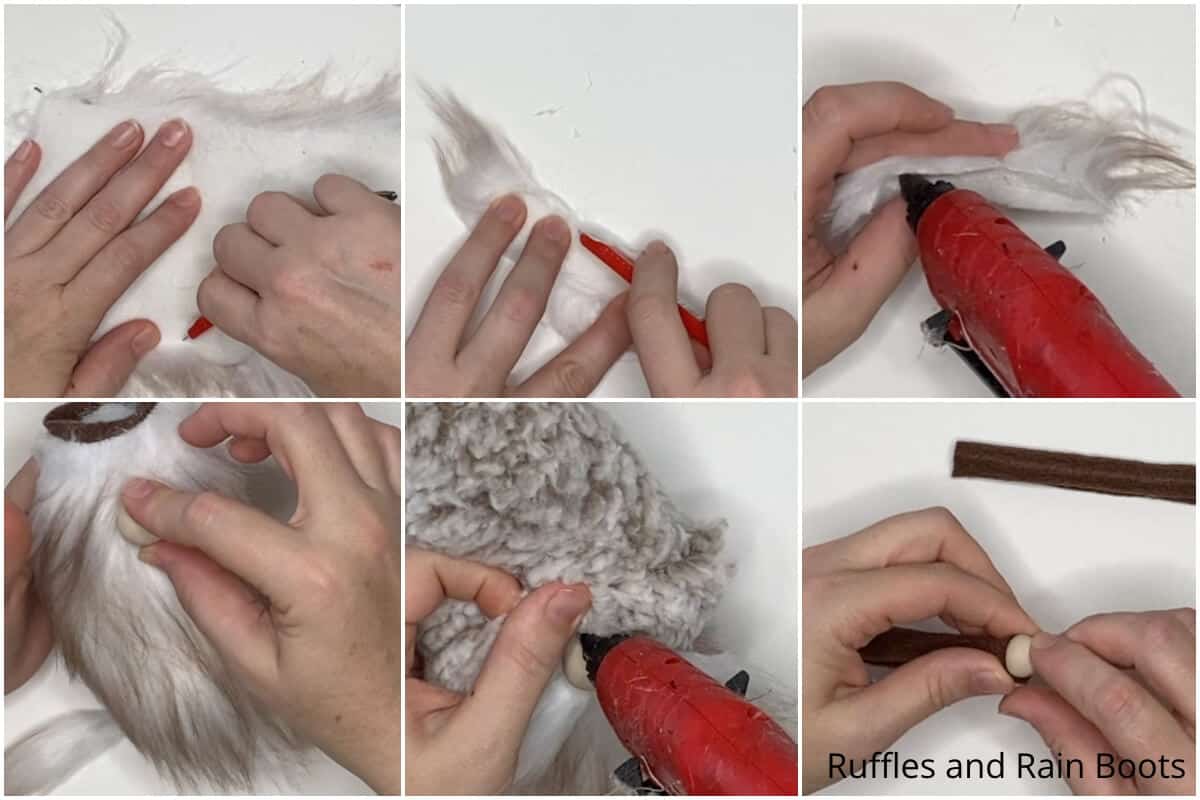
- Cut out the beard shape from the Mongolian fur by turning the fur over and cutting only the fabric with the razor blade or craft knife.
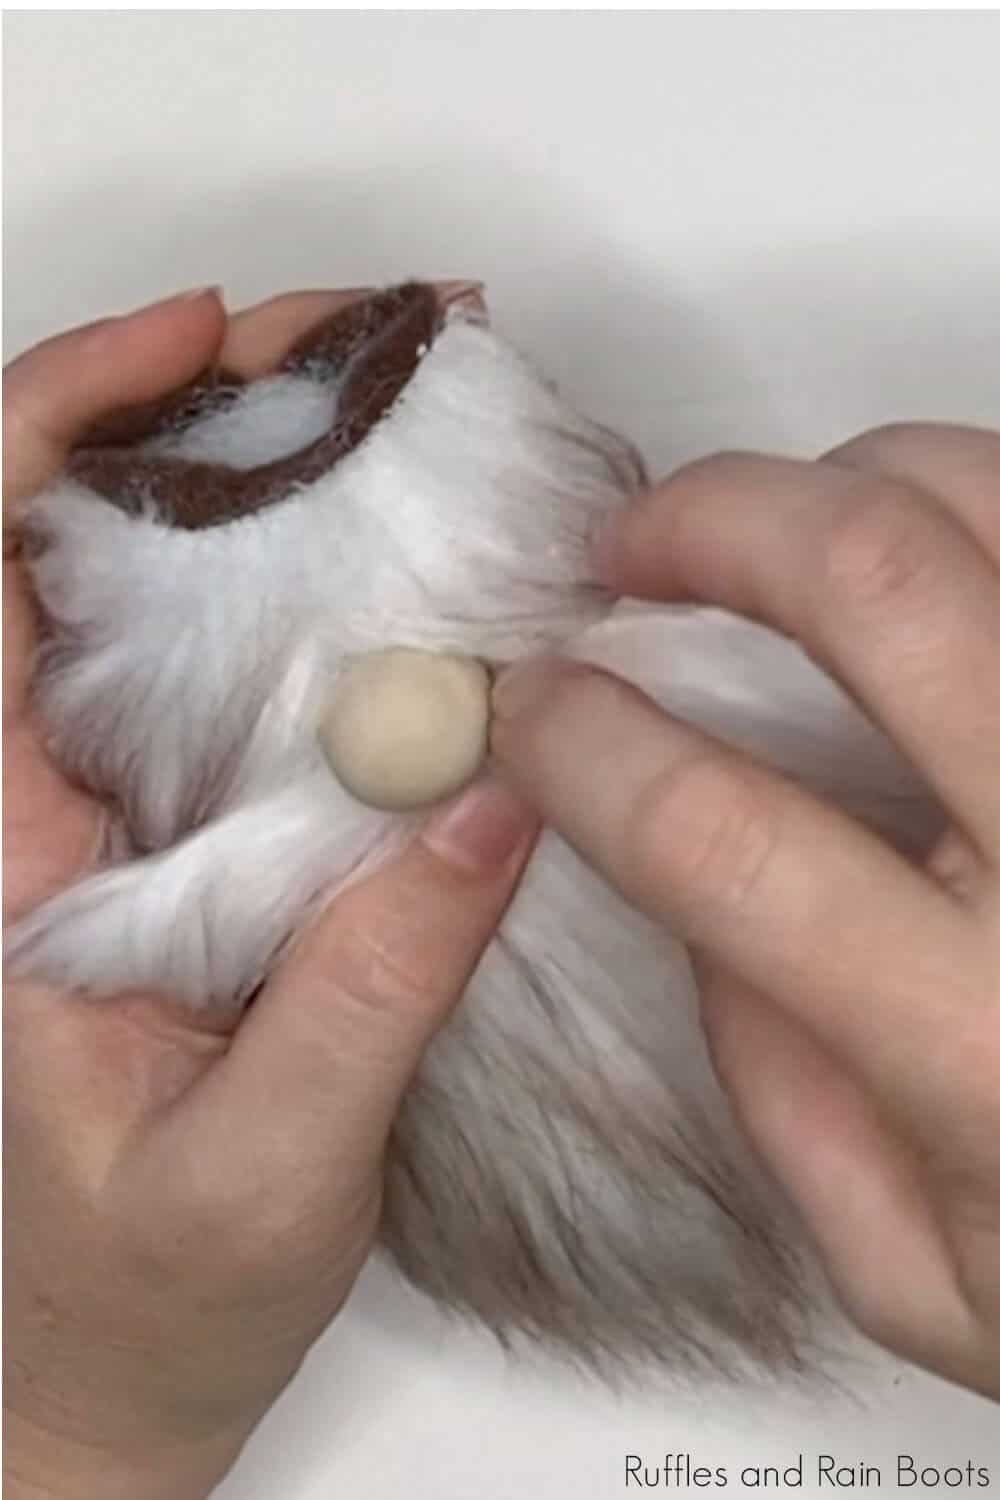
- Affix the beard to the gnome by hot gluing the beard to the body, about 2 inches below the edge of the gnome body. Hot glue the nose in place about 1-inch below the top of the beard by parting the fur down to the fabric backing and adding a generous dollop of hot glue.
- Make a mustache by cutting your leftover faux fur into a 1-inch tall by 3-4 inch wide rectangle, then split the fur down the middle. Glue the two sides of the fabric backing together, then hot glue the center of the mustache just below the nose, tucking it up under the nose as much as possible.
- Place the hat on top of the gnome's head, tucking it down over the top of the nose. Hot glue the hat in place in the back and sides in just a couple of places--not the whole way around, then one little dot on the nose to make a wrinkle (this is the best part).
- Wrap twine around the hat of the gnome, working snugly, but not so tightly as to deform the hat shape. hot glue this in place with a knot at the end.
- Cut out two arm shapes from the brown felt. Place a line of hot glue down one long side of the arms and hem it. Fill each arm with a small length of floral wire, to make the arm bendy. Slip the arm up into the hat on the side and hot glue it in place. Hot glue the hands in place on the ends of the arms.
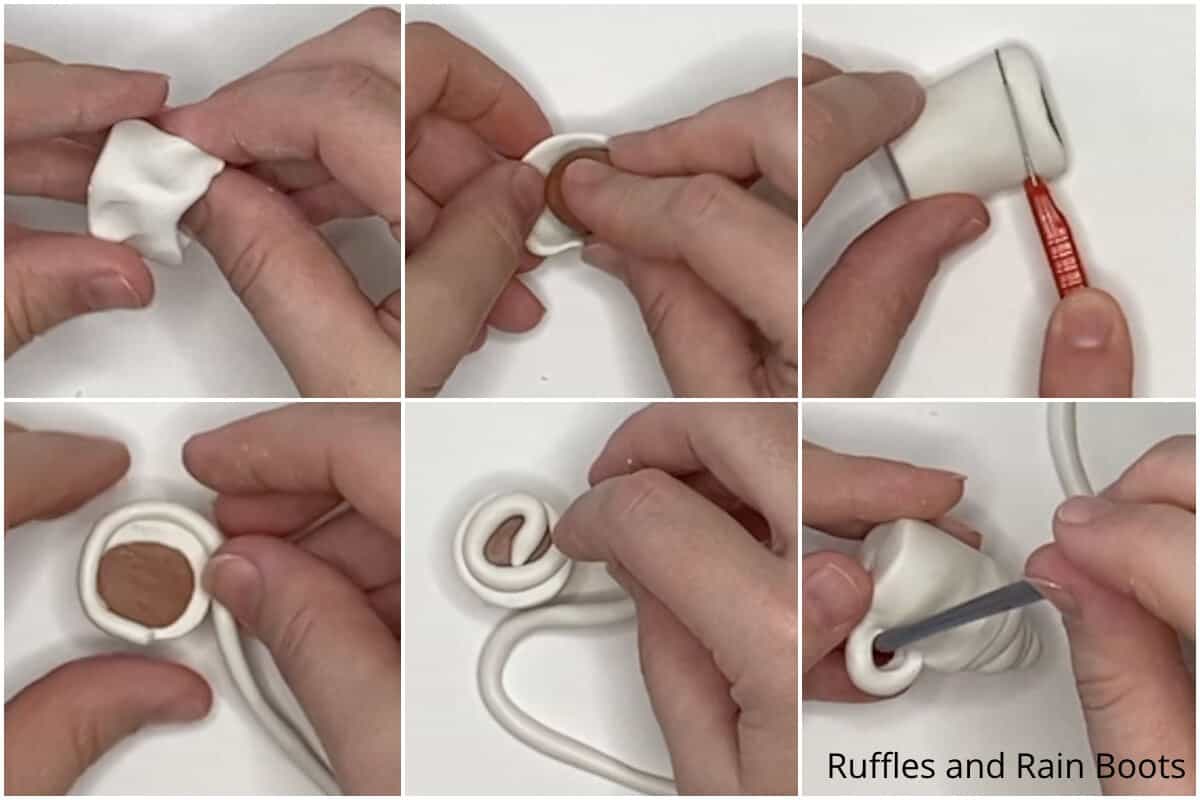
- To make the coffee mug, start by rolling a 1-inch by 1/2-inch section of white clay into a cylinder and, press a small depression into the top of the cylinder, making it slightly wider at the top with a depression. Press a rounded lump of brown clay into the depression in the cup.
- Smooth the coffee cup and coffee to your heart's content. Then, using your craft knife, cut off the top edge of the cup. Smooth the coffee cup a little more to clean up the cut.
- Make a rim by making a 3-4 inch long snake about 1/8 to 1/3 inch thick, then wrap this around the top of the coffee mug. Smooth this by rolling it on your work surface a little to clean up that rim.
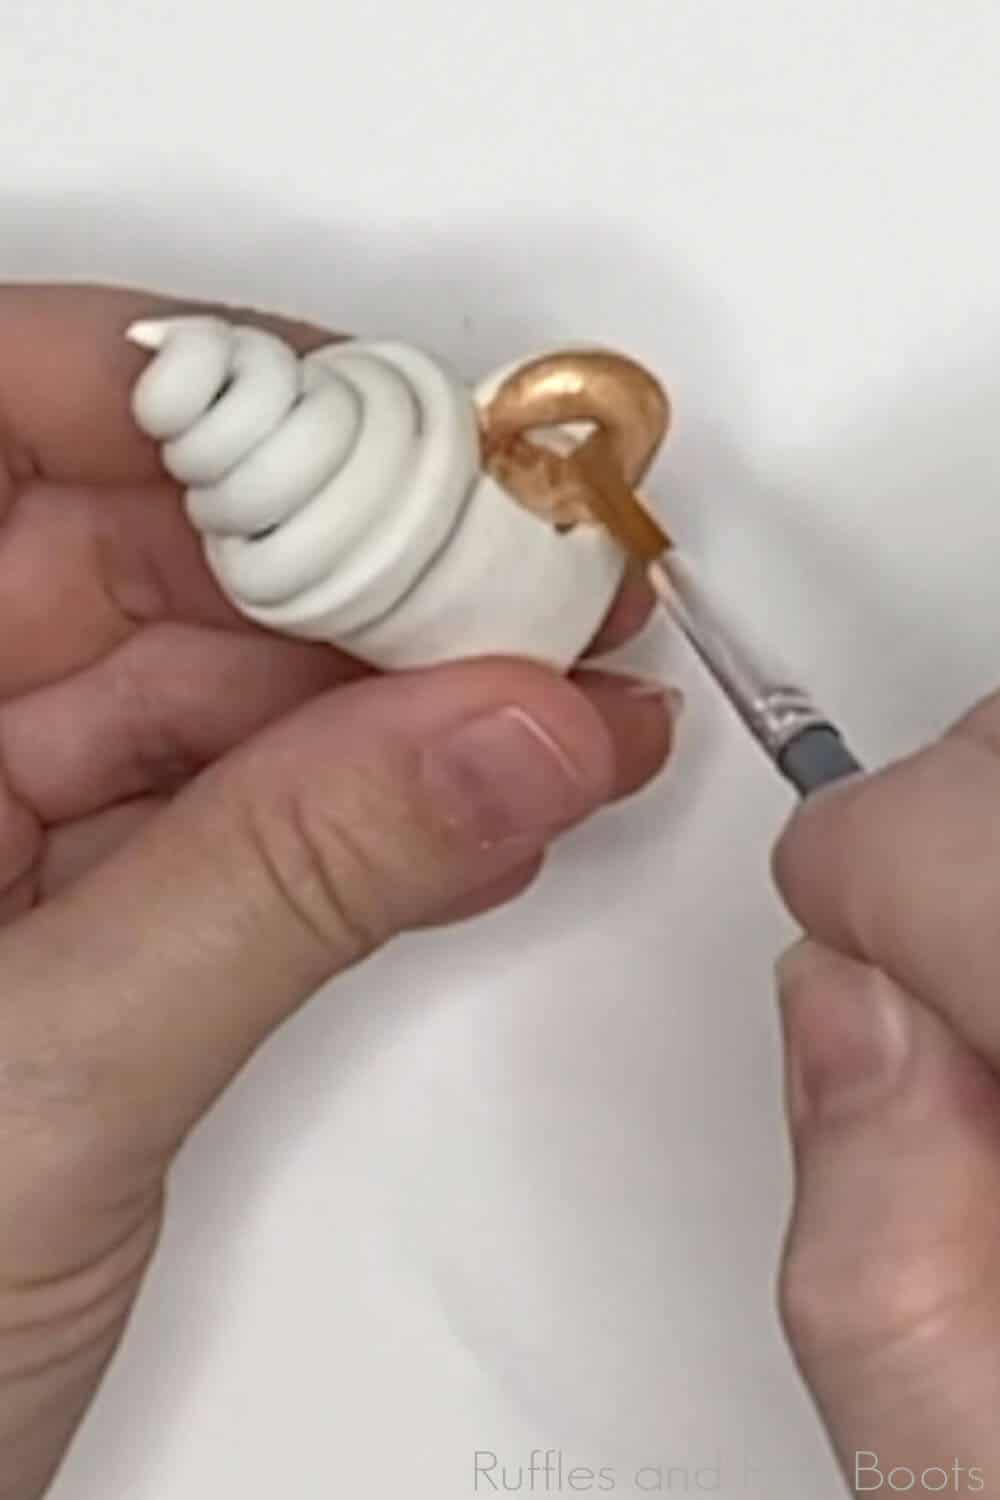
- Make whipped topping (it's hot cocoa after all) by making a 3-4 inch long snake about 1/3 to 1/4 inch thick, then wrap this around in a coil on the top of the coffee mug.
- Make a handle by making a 1 1/2 inch long snake about 1/3 to 1/4 inch thick, then affixing both ends to the side of the mug vertically.
- To give the mug a beaten copper mug look, you can roll the side of your paintbrush handle along the clay in various places to give it that worn edge.
- To remove any fingerprints or rough spots, you can brush the mug with rubbing alcohol with a paintbrush.
- Bake the coffee cup per the clay package's directions. Allow the mug to cool fully.
- Paint the mug with the copper paint and allow it to dry completely before sealing with craft sealant.
- Bring the hands together and hot glue one on each side of the coffee cup. Then it's time to enjoy your completed gnome!
Notes
This gnome stands 10-inches (ish, depending on how twisty you make your hat, of course).
For more fun no-sew patterns for gnomes, visit Ruffles and Rain Boots (we have lots...).
More No-Sew Gnome Tutorials You Might Like
- Buffalo Check Sock Gnome – Literally one of the most adorable gnomes I’ve ever made, this little guy has an elegant pumpkin on his hat that just deserves to be enjoyed.
- Dollar Tree Pumpkin Gnome (with feet!) – Make this pumpkin gnome with or without feet for one of the cutest fall gnomes ever.
- Sock Gnome with a Coffee Cup – One of my more popular gnomes, it was the first little guy I made with a mug and oooh, he’s so cute!
Please Save or Share This
Your shares are how this site grows and I am sincerely grateful. Know a friend who’d like this? Please share it with a crafty group Facebook or save it to your favorite holiday crafts pin board.

Hello! Do you have a link for the Sherpa fleece? I cant find it anywhere.
Thank you,
Tina
Here it is on Joann’s website.
https://www.joann.com/solid-sherpa-faux-fur-fabric/zprd_17763343a.html
If you would like to order on Amazon, search “sherpa fleece by the yard.”