
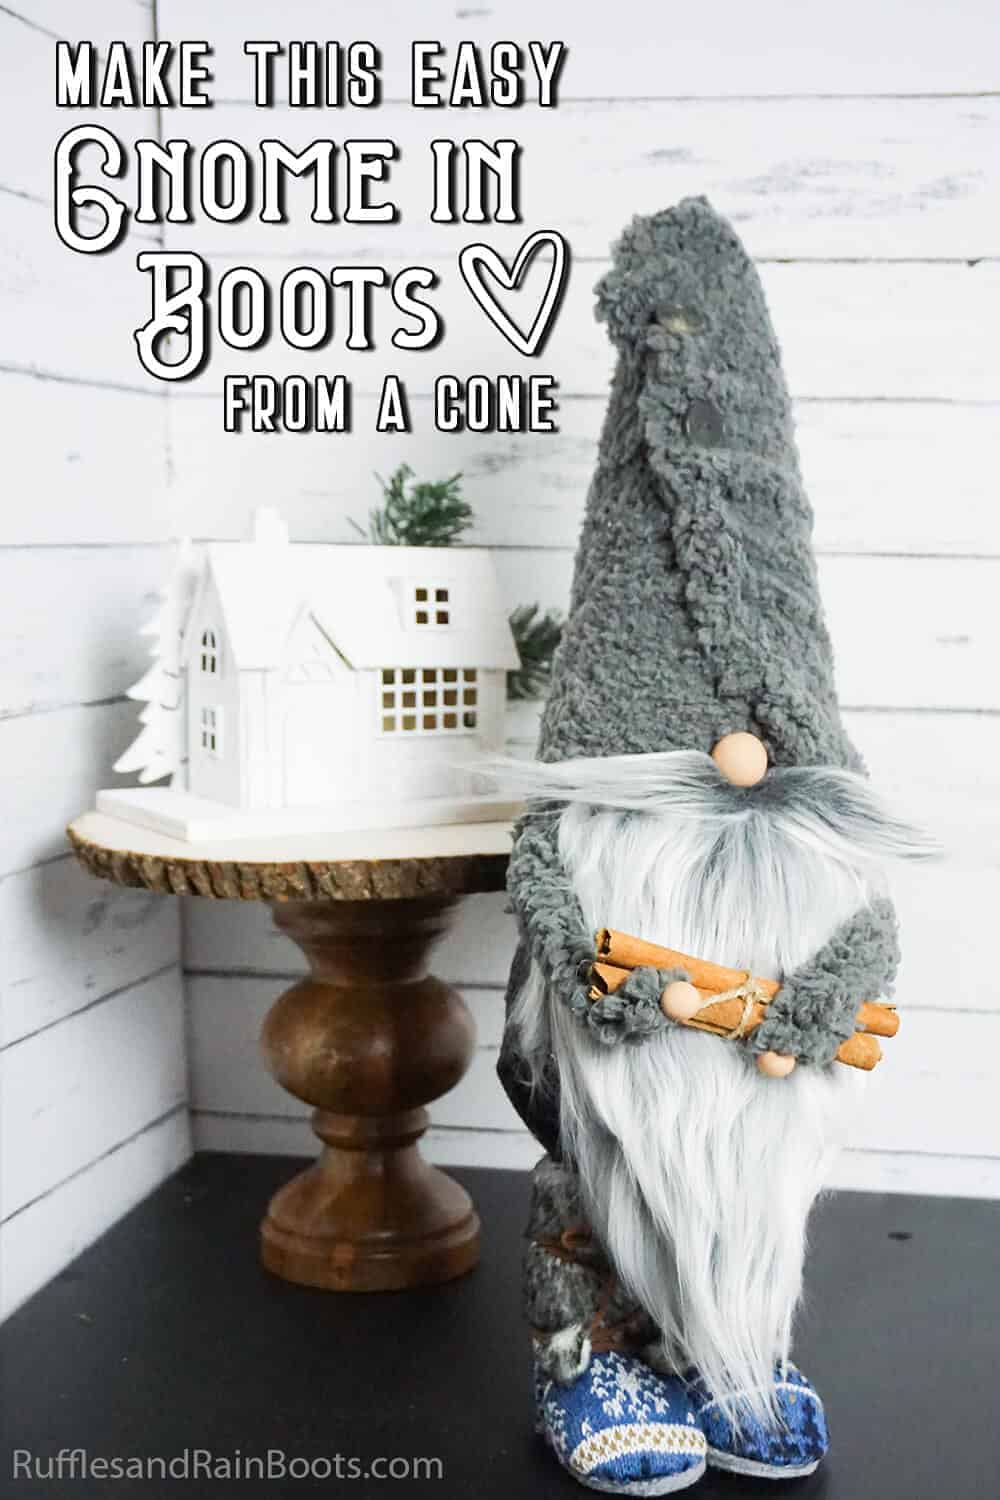
How to Make a Gnome with Boots – Styrofoam Cone Gnome
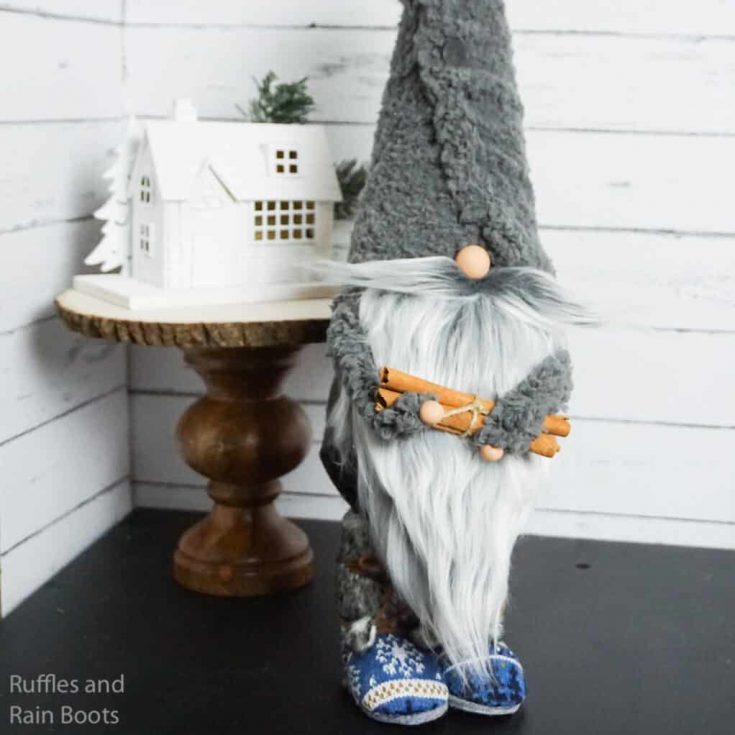
This is the easiest gnome with boots I’ve ever made! And because it’s a gnome made with a cone, it comes together quickly. He’s definitely one to love and add to your home.
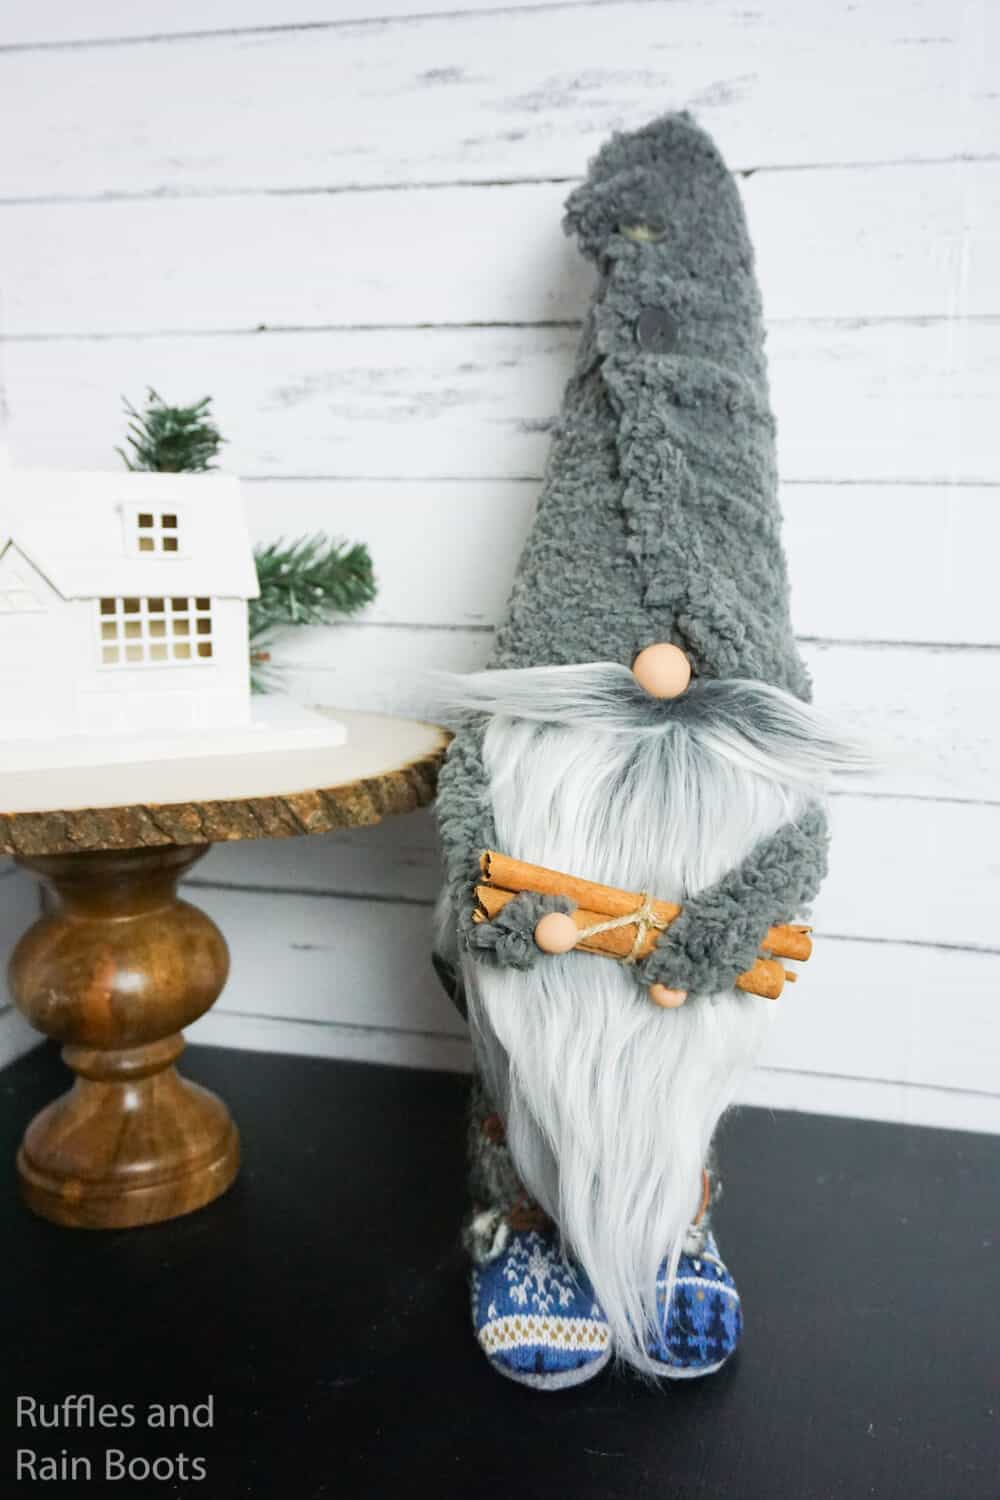
You will need a cone, some fabric, a bit of frosted gray Mongolian faux fur, and my secret: gnome boot ornaments. Head to the Dollar Tree, craft stores, and even Target to pick up a pair to make this winter or Christmas gnome in no time.

What You'll Find On This Page
How to Make a Gnome with Boots
Here at Ruffles and Rain Boots, I am a bit obsessed with gnomes. You just never know when you’ll need to gift a little tomte to a friend or decorate a shelf with a set of gnome friends. The mood just strikes and you have to do it.
This is such a simple gnome tutorial, really, but the result is this gorgeous heirloom piece gnome that I plan to gift this holiday season. And honestly, I use two cheat items that make this DIY gnome come together so quickly, you’re going to want to make TONS!
RELATED READING: BEST CHRISTMAS GNOME TUTORIALS
DIY Christmas Gnome Tutorials
If you’re looking for the best DIY Christmas gnome tutorials, you have come to the right place. Check out all of my favorite tomte tutorials for the holidays!
No Time to Make This Now? Save or Share for Later
Too busy to make this now or waiting on fabric? Save this to your favorite winter crafts pin board or share it on Facebook. Either way will make it easy to find when you’re ready to begin crafting.
As an Amazon Associate, I can earn from qualifying purchases. There could be affiliate links within this article.
Tips to Make a Styrofoam Cone Gnome
- I found my little blue boots at the craft store, so look there or at craft stores online during the holidays. I found these adorable red boots that you can grab if you are out-of-season or don’t have a craft store close by.
- I’ve found TONS of Dollar Tree supplies that work, too – they even have little boot ornaments you can use for this exact holiday decoration!
- If you want to make the gnome boots with Styrofoam balls, Easter eggs, and any other number of items I figured out how to repurpose, you can get the gnome boot patterns here.
- Generally, I end up making my gnome noses from whatever is on hand. Sometimes it’s wood beads, sometimes buttons. But for this gnome project, it was polymer clay. My point is use what you have.
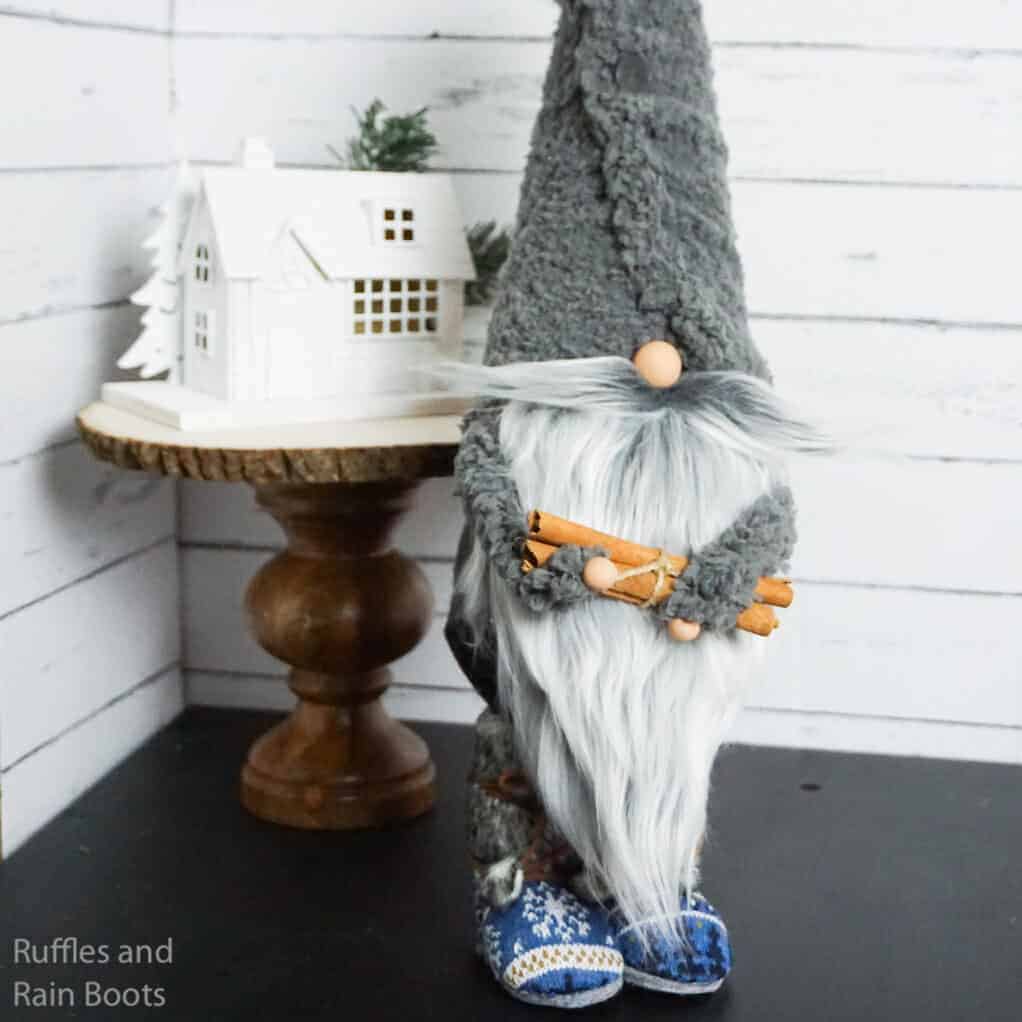
- Grab a bauble for the gnome to hold. It doesn’t have to be anything big, just something which fits your theme. I used a bundle of cinnamon sticks, but a pinecone, cocoa mug, or even a little friend would be great for a Christmas decoration.
- I made this entire handmade gnome a no-sew pattern by using hot glue to make all my hems. You could absolutely use a sewing machine – whatever you’re most comfortable with.
- If you’ve never cut faux fur before, do not use scissors. Flip the fur over and cut the fabric only with an Exacto knife in a triangle.
- There are a few ways to make a gnome mustache from faux fur. I’ll show you one below, but check out my YouTube channel for so many others.
How to Make a Standing Gnome with Boots
This is a quick and easy tutorial home decor gnome’s written and printable version is below. If you’re a visual learner like I am, head over and watch the standing gnome with boots video tutorial here on YouTube.
While you’re there, be sure to join us by subscribing to the channel. It’s a fun time with easy tutorials – gnomes and much more!
First, with your exacto knife or razor blade, cut a flat place on one side of your foam ball.
Glue the flat place on the ball to the bottom of the cone. If you would like to, you can add a bamboo skewer or toothpick between the two to hold them in place until the hot glue seals.
With a small portion of polyfill, wrap the join of the ball and cone shape and hot glue in place, if desired.
Roll the charcoal felt around the cone/ball shape to determine the size.
Trim the charcoal felt to fit around the cone/ball.
Hot glue the felt in place on the cone part of the cone/ball.
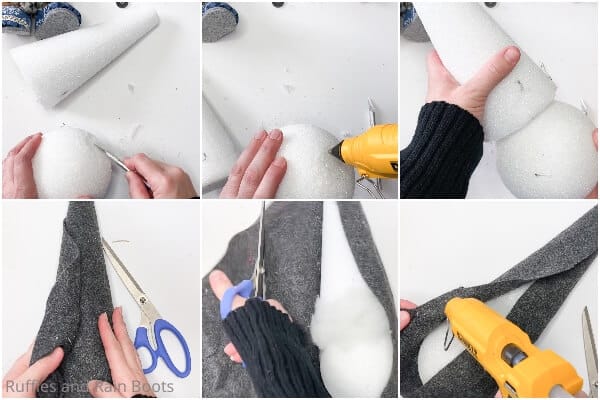
Wrap and fold the loose ends of the felt around the ball and hot glue them in place, covering the ball of the cone/ball.
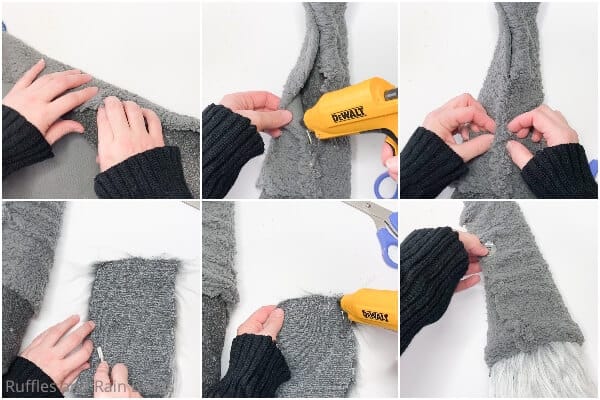
Wrap the top of the cone with the grey fleece to determine the size.
Trim the grey fleece to fit the cone, with about 3/4-inch overlap.
Hot glue the two edges of the fleece together, wrong-side to wrong-side, ruching and pinching the fabric as you go to make it have this fun “outtie” seam.
Brush out your Mongolian faux fur with the comb and cut it in a large “u” shape to fit the length of the gnome from the brim hat to just above where the boots will be. Cut the fabric backing only on the back of the fur, using your exacto knife or razor blade to make sure you get the full effect of the fur’s drape.
Hot glue the beard onto the body, just above where you want the brim of the hat to sit. Hot glue the two buttons to the hat and adjust the seam to run asymmetrically across the head in a jaunty, fun way.
Cut a 3-inch long by 1-inch wide rectangle of the Mongolian faux fur.
Split the fur in the center and brush it outward on both sides, forming a mustache.
Place a line of hot glue in the center of the fabric backing of the fur and pinch it closed. This will make your mustache thicker and more defined.
Glue the mustache to the face, just below the brim of the hat.
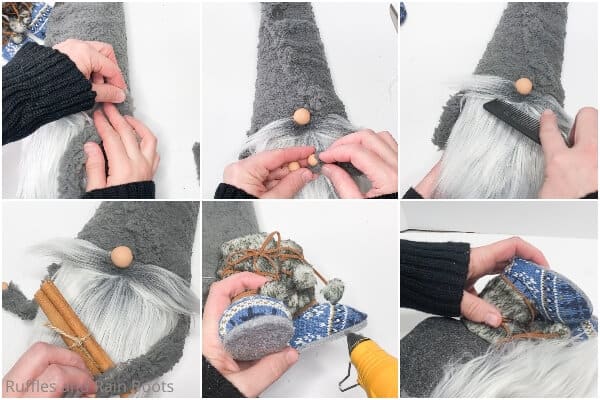
Hot glue the nose on top of the mustache.
Pull the hat down onto the nose to make a fun wrinkle (this is the best part) and glue the brim in place.
Pull the back of the hat down in the back to as far as you can get it and hot glue it in place.
Cut two rectangles of fleece fabric 1 inch wide by 6 inches long.
Place a line of hot glue down the back of the fleece fabric rectangle and fold it closed, forming an arm. Repeat with the second arm.
Tuck each arm up into the hat about 1 inch behind the beard.
Hot glue the arms in place under the hat.
Glue the hands on the end of each arm.
Comb the beard one more time.
Place the bauble in the arms and hot glue in place. Stuff the boots with polyfill.
Place the two boots together and determine the points at which they touch when they are side-by-side.
Hot glue the boots together at the places they touch.
Place the gnome on top of the boots and see where the base touches the boots.
Place hot glue on top of the boots where the bottom of the gnome will sit.
Allow this hot glue to dry completely and enjoy your gnome!
More Easy Gnomes You Might Like
- How to Make a Gnome with a Face (3 Ways!) – If you love the little gnomes, but want one with eyes, well, this is my take!
- How to Make a Gnome Family with Cones – I had a friend I wanted to gift a gnome to, and then it turned into a whole little gnome family! So cute–and easy.
- 5-Minute Sweater Hat Gnome – There is not a faster gnome to make. This one comes together in 5 minutes, seriously.
- DIY Garden Gnome – If you’re accidentally here and looking for garden gnome DIYs, check out this amazing
Please Share or Save This
Your shares are how this site grows and I am sincerely grateful. Know a friend who’d like this or want to help out the site? Please share this to a crafty group on Facebook or save it to your favorite easy DIY crafts pin board.

Gnome with Boots
You are not going to find an easier way to make a gnome with boots. So simple, you're going to love making him as much as you love having him at the door!
Materials
- 1 12-inch Styrofoam Cone
- 1 4-inch Styrofoam Ball
- 1 Set 3-inch Boot Ornaments
- 3 Clay Beads, Wood Beads or Other Nose
- 2 Buttons
- 1/4 yard Grey Fleece Fabric
- 1/4 yard Charcoal Felt
- 1/4 yard Mongolian Faux Fur
- 1 Bauble to Hold (I used Cinnamon Sticks)
- Bamboo Skewer or Toothpick, optional
- Polyfill (Small Amount)
Tools
- Scissors
- Hot Glue Gun & Glue
- Exacto Knife or Razor Blade
- Comb
Instructions
- With your exacto knife or razor blade, cut a flat place on one side of your foam ball.
- Glue the flat place on the ball to the bottom of the cone. If you would like to, you can add a bamboo skewer or toothpick between the two to hold them in place until the hot glue seals.
- With a small portion of polyfill, wrap the join of the ball and cone shape and hot glue in place, if desired.
- Roll the charcoal felt around the cone/ball shape to determine the size.
- Trim the charcoal felt to fit around the cone/ball.
- Hot glue the felt in place on the cone part of the cone/ball.
- Wrap and fold the loose ends of the felt around the ball and hot glue them in place, covering the ball of the cone/ball.
- Wrap the top of the cone with the grey fleece to determine the size.
- Trim the grey fleece to fit the cone, with about 3/4-inch overlap.
- Hot glue the two edges of the fleece together, wrong-side to wrong-side, ruching and pinching the fabric as you go to make it have this fun "outtie" seam.
- Brush out your Mongolian faux fur with the comb and cut it in a large "u" shape to fit the length of the gnome from the brim hat to just above where the boots will be. Cut the fabric backing only on the back of the fur, using your exacto knife or razor blade to make sure you get the full effect of the fur's drape.
- Hot glue the beard onto the body, just above where you want the brim of the hat to sit.
- Hot glue the two buttons to the hat and adjust the seam to run asymmetrically across the head in a jaunty, fun way.
- Cut a 3-inch long by 1-inch wide rectangle of the Mongolian faux fur.
- Split the fur in the center and brush it outward on both sides, forming a mustache.
- Place a line of hot glue in the center of the fabric backing of the fur and pinch it closed. This will make your mustache thicker and more defined.
- Glue the mustache to the face, just below the brim of the hat.
- Hot glue the nose on top of the mustache.
- Pull the hat down onto the nose to make a fun wrinkle (this is the best part) and glue the brim in place.
- Pull the back of the hat down in the back to as far as you can get it and hot glue it in place.
- Cut two rectangles of fleece fabric 1 inch wide by 6 inches long.
- Place a line of hot glue down the back of the fleece fabric rectangle and fold it closed, forming an arm. Repeat with the second arm.
- Tuck each arm up into the hat about 1 inch behind the beard.
- Hot glue the arms in place under the hat.
- Glue the hands on the end of each arm.
- Comb the beard one more time.
- Place the bauble in the arms and hot glue in place.
- Stuff the boots with polyfill.
- Place the two boots together and determine the points at which they touch when they are side-by-side.
- Hot glue the boots together at the places they touch.
- Place the gnome on top of the boots and see where the base touches the boots.
- Place hot glue on top of the boots where the bottom of the gnome will sit.
- Allow this hot glue to dry completely and enjoy your gnome!
Notes
For more (a lot more) awesome gnome tutorials, visit Ruffles and Rain Boots. You know you want to.
Recommended Products
As an Amazon Associate and member of other affiliate programs, I earn from qualifying purchases.


Meet the Creator
Hi there, I’m Sarah Nenni-Daher. I’m a crafty gal and always have at least 14 projects going at once. I am a crafter, designer, DIYer, and pattern maker. I share my creations here and in the Ruffles and Rain Boots® Shop.
Here at Ruffles and Rain Boots®, you’ll find DIY gnomes, crafts, gifts, cupcakes, laser crafts, and so much more. I love sharing video tutorials over on YouTube and chatting with other crafters in my Facebook groups. We’d love to have you!