
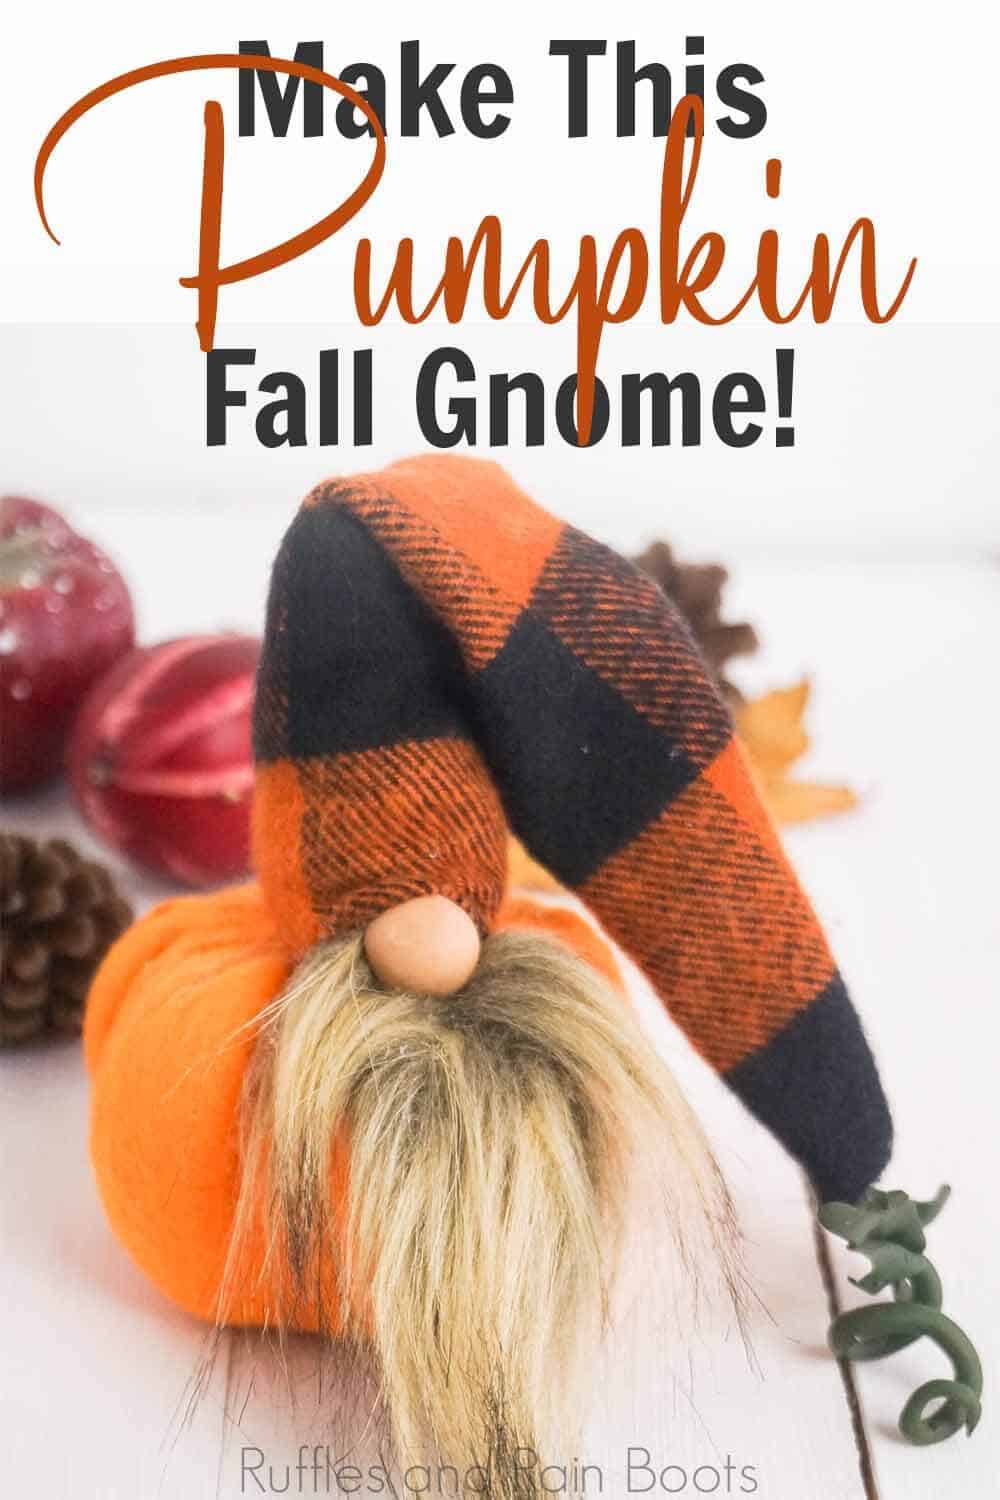
This Pumpkin Gnome is so Cute – I want to Make a Pie from Him!
If you love tomte and don’t have one, make this fall pumpkin gnome. He is just perfect for Halloween, Thanksgiving, or to embrace Autumn fully.
Pumpkin Gnome
Here at Ruffles and Rain Boots, we absolutely adore making gnomes. They are one of my favorite ways to add little accents to tiered trays, mantles, and wreaths. And I love giving them as gifts. I’ve made it a goal this year to have at least one gnome for each holiday, large or small. Aaaaaand that morphed into making a gnome for each season, not just each holiday.
RELATED READING: THE BEST CHRISTMAS GNOME TUTORIALS AND VIDEOS
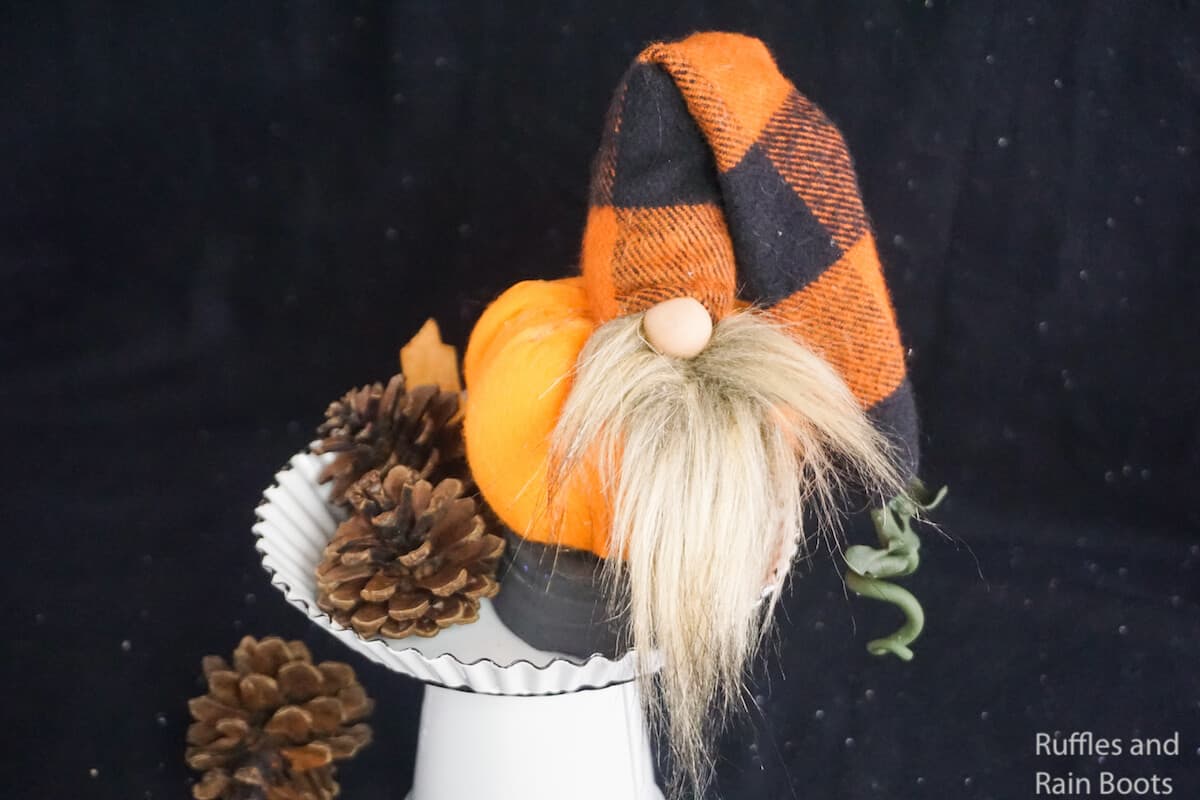
That’s why I made this ridiculously cute pumpkin gnome. Not only is he a pumpkin-shaped gnome, but he’s also got this adorable little vine twist dangling from his hat! I can’t get over this fall gnome and if you’re ready to bring a so-cute-I-want-to-take-a-bite-out-of-it gnome, well, let’s get started.
No Time to Make This Now? Pin it for Later
You’re busy, I get it. Pin this to your favorite DIY gnomes board on Pinterest and it’ll be here for when you’re ready.

Tips to Make This Fall Gnome
- Click here to download the free nisse pattern for this adorable fall gnome. You could probably do it yourself without a pattern, but why try?!
- Be careful using a high-temp hot glue gun to make this fall gnome as it will melt the foam ball. If you can, use a low-temp one or craft glue.
- If you think the hat is too small, don’t panic. It’s supposed to sit ON TOP of the pumpkin, not over the edges. I know this is kind of unusual, but because of the shape of the pumpkin, and the tomte body being so much wider than his little “head,” I went off-script for how to make gnomes and tomten.
How Do I Make this Pumpkin Gnome?
I’m so glad you asked. Below is our written tutorial and if you have any questions, please ask them in the comments section below.
Pumpkin Gnome

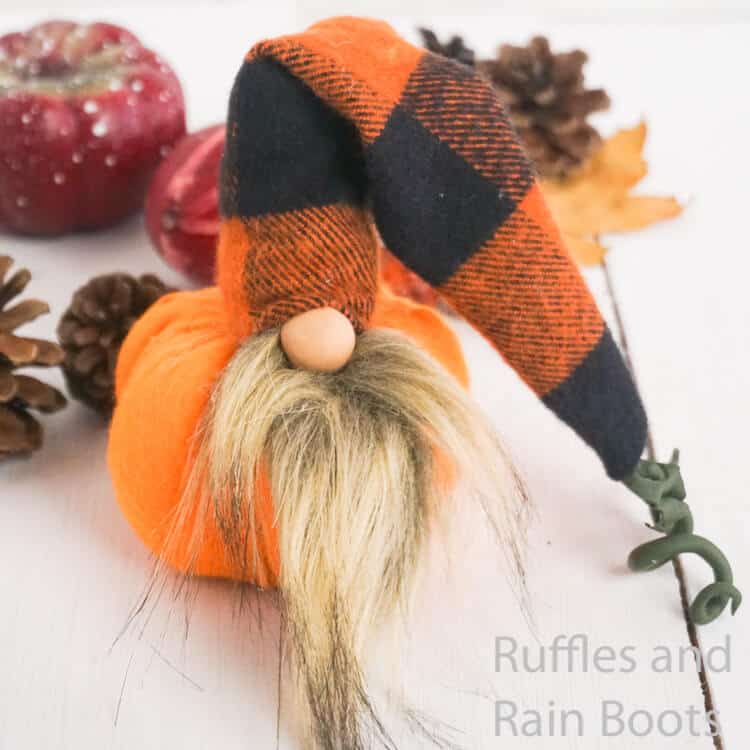
This pumpkin gnome is a perfect way to decorate for fall, Halloween, or Thanksgiving.
Materials
- Small Portion of Polymer Clay in green, black, light brown and white
- Small Portion of Aluminum Foil
- Small Portion of Polyfill
- Medium-Sized Foam Ball
- Orange Craft Felt
- 1/8 yd Orange Buffalo Check Flannel
- Brown Mongolian Fur
- Free Printable Template
Tools
- Hot Glue Gun
- Scissors
- Exacto Knife
- Oven
Instructions
- To start your pumpkin gnome, make your gnome's nose by mixing 1/2 dime-sized portion of white polymer clay with 1/4 portion of light brown polymer clay.
- Roll this light beige clay into a neat ball. Set aside.
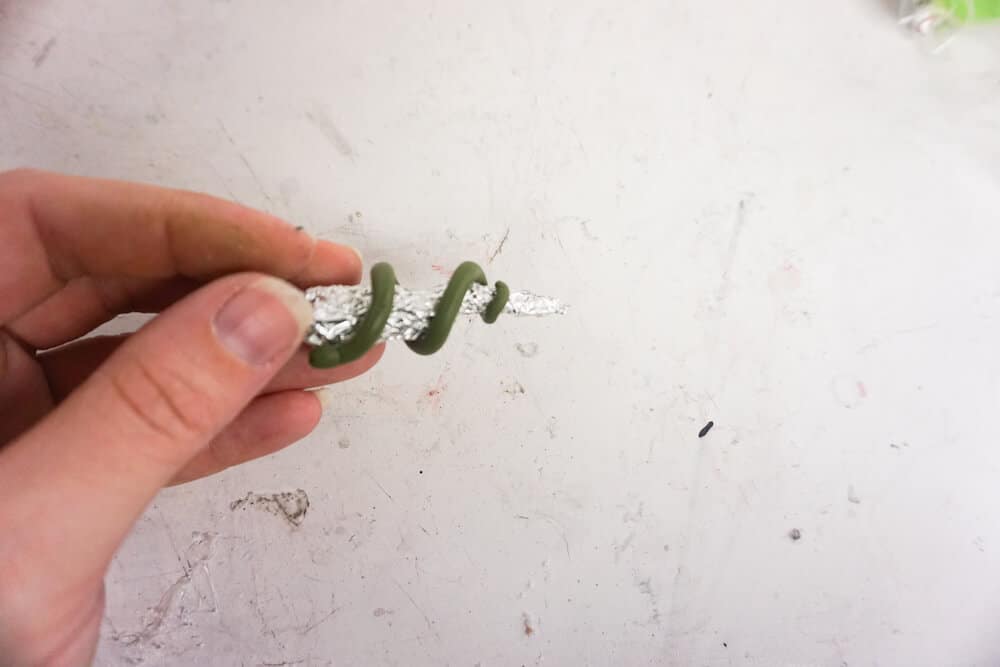
- Make the pumpkin vine by mixing 1/4 dime-sized portion of green polymer clay with a tiny bit of black polymer clay. Break off about 1/4 of the polymer clay and set it aside.
- Roll this dark green clay into a thin "snake". Curl this thin snake into a spiral around a tube of aluminum foil. Set aside.
- With the small portion of dark green polymer clay you set aside earlier, smash it into two leaf-shaped portions and attach them to the base of the spiral snake.

- Bake gnome nose and pumpkin vine per your clay's package directions. Allow it to cool before handling.
- Cut the following pieces: 1 hat shape from the buffalo check fabric (I decided I preferred a slouchy hat, so I just cut a large triangle, but I left the small hat I initially designed on the pattern so you can use it if you like); 1 triangle from the brown Mongolian fur; 1 tiny rectangle from the brown Mongolian fur; 8 oval shapes from the orange craft felt.
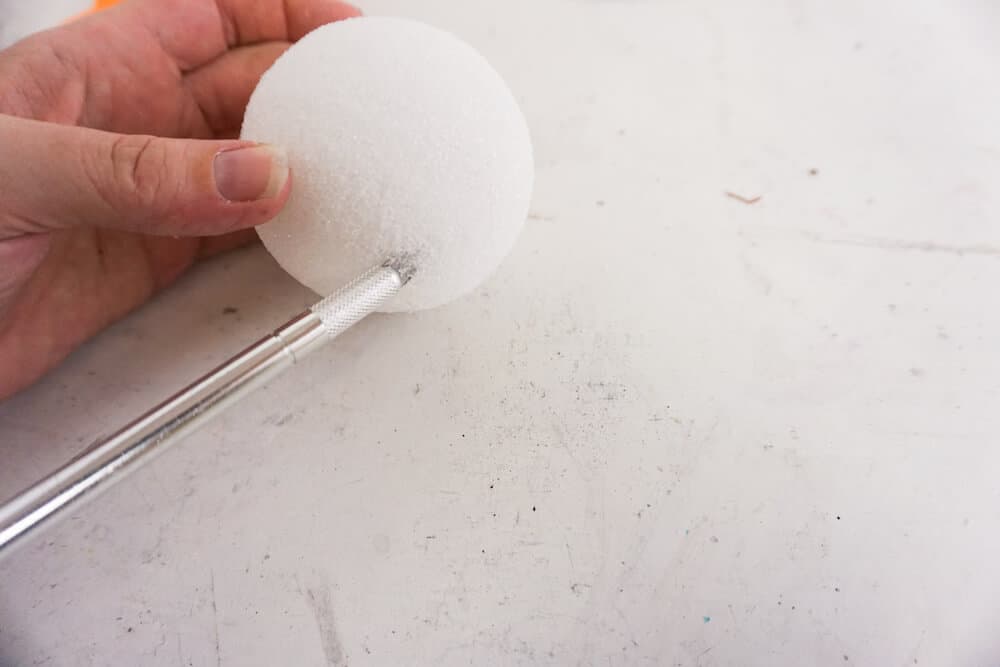
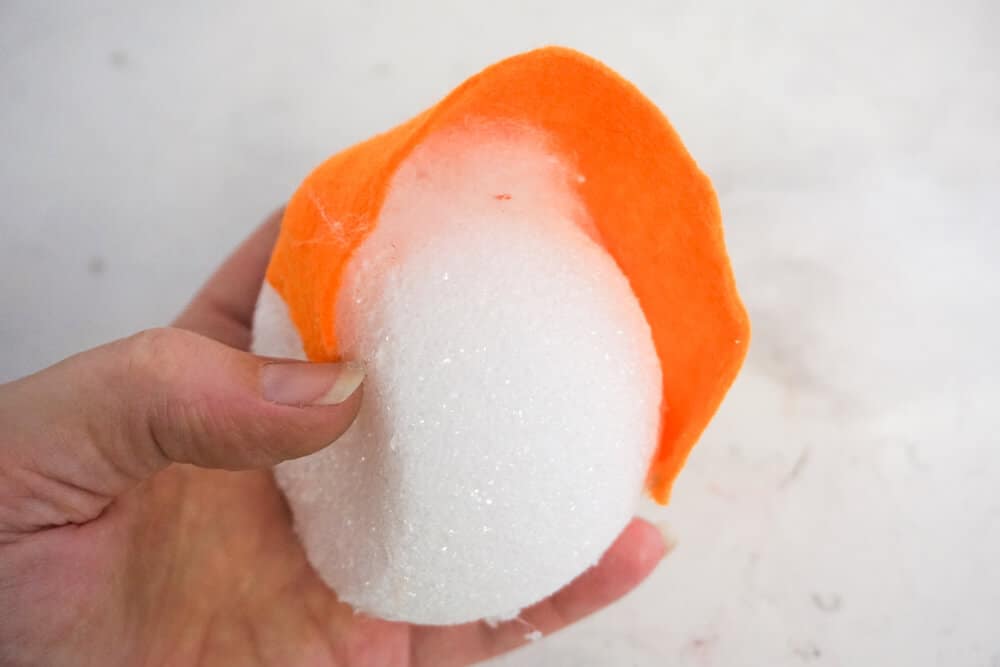
- With the Exacto knife, cut off the top and bottom 1/8-inch of the foam ball.
- Begin making your pumpkin by gluing on the orange oval shapes to the side of the foam ball. Start at a point on one end and only glued one side down.
- Then, stuff some polyfill (just a tiny amount) under the felt on top of the foam ball, and then glued down the other side of the felt oval.
- Trim excess on the bottom side of the pumpkin and glue the next panel on.
- Prepare your hat by either gluing the two portions of the hat shapes from the template together or by gluing the two sides of your large triangle together if you are making a slouchy hat like mine.
- Fill the bottom 2-3-inches of the hat's base with polyfill.
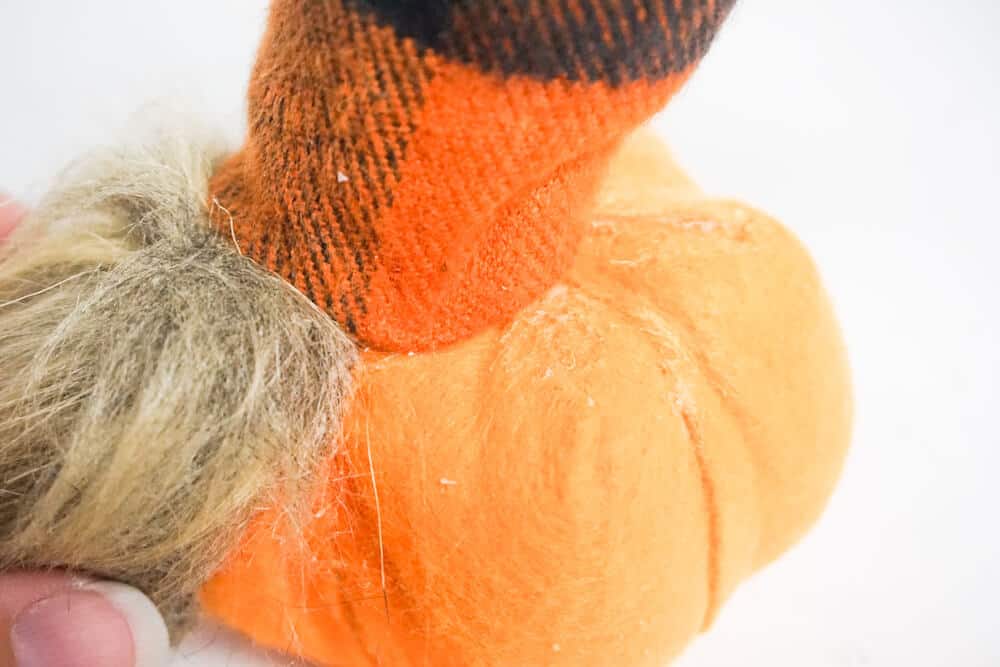
- Glue the beard on the pumpkin, on one side. Attach the mustache on the top of the beard. Glue the nose on top of the mustache.
- Place the hat on top of the pumpkin and position it to wrinkle over the gnome's nose because that's so cute. Glue it in place. Attach the pumpkin vine to the tip of the hat with a dab of glue.


 Attach the pumpkin vine to the tip of the hat with a dab of glue.
Notes
For more fun DIY gnome tutorials, visit RufflesandRainBoots.come
More DIY Gnomes You Might Like
- Wooden Nesting Gnomes – These are literally the coolest little gnomes. They REALLY STACK! I love them so much. I want to make a million.
- DIY Farmhouse Gnome – I love this gnome so much that I dress him up in different hats. I’m bad.
- Fall Gnome Rock Painting – You can bring your gnome-obsession into kid’s crafts by introducing the gnomes to rocks. LOL!
Please Save This to Pinterest
Your shares are how this site grows and I am sincerely grateful. Know a friend who’d like this? Please share it on Facebook or save it to your favorite DIY gnomes board on Pinterest.

As far as Fall/Halloween decorations go … He might be the cutest little dude … ever!!!!