
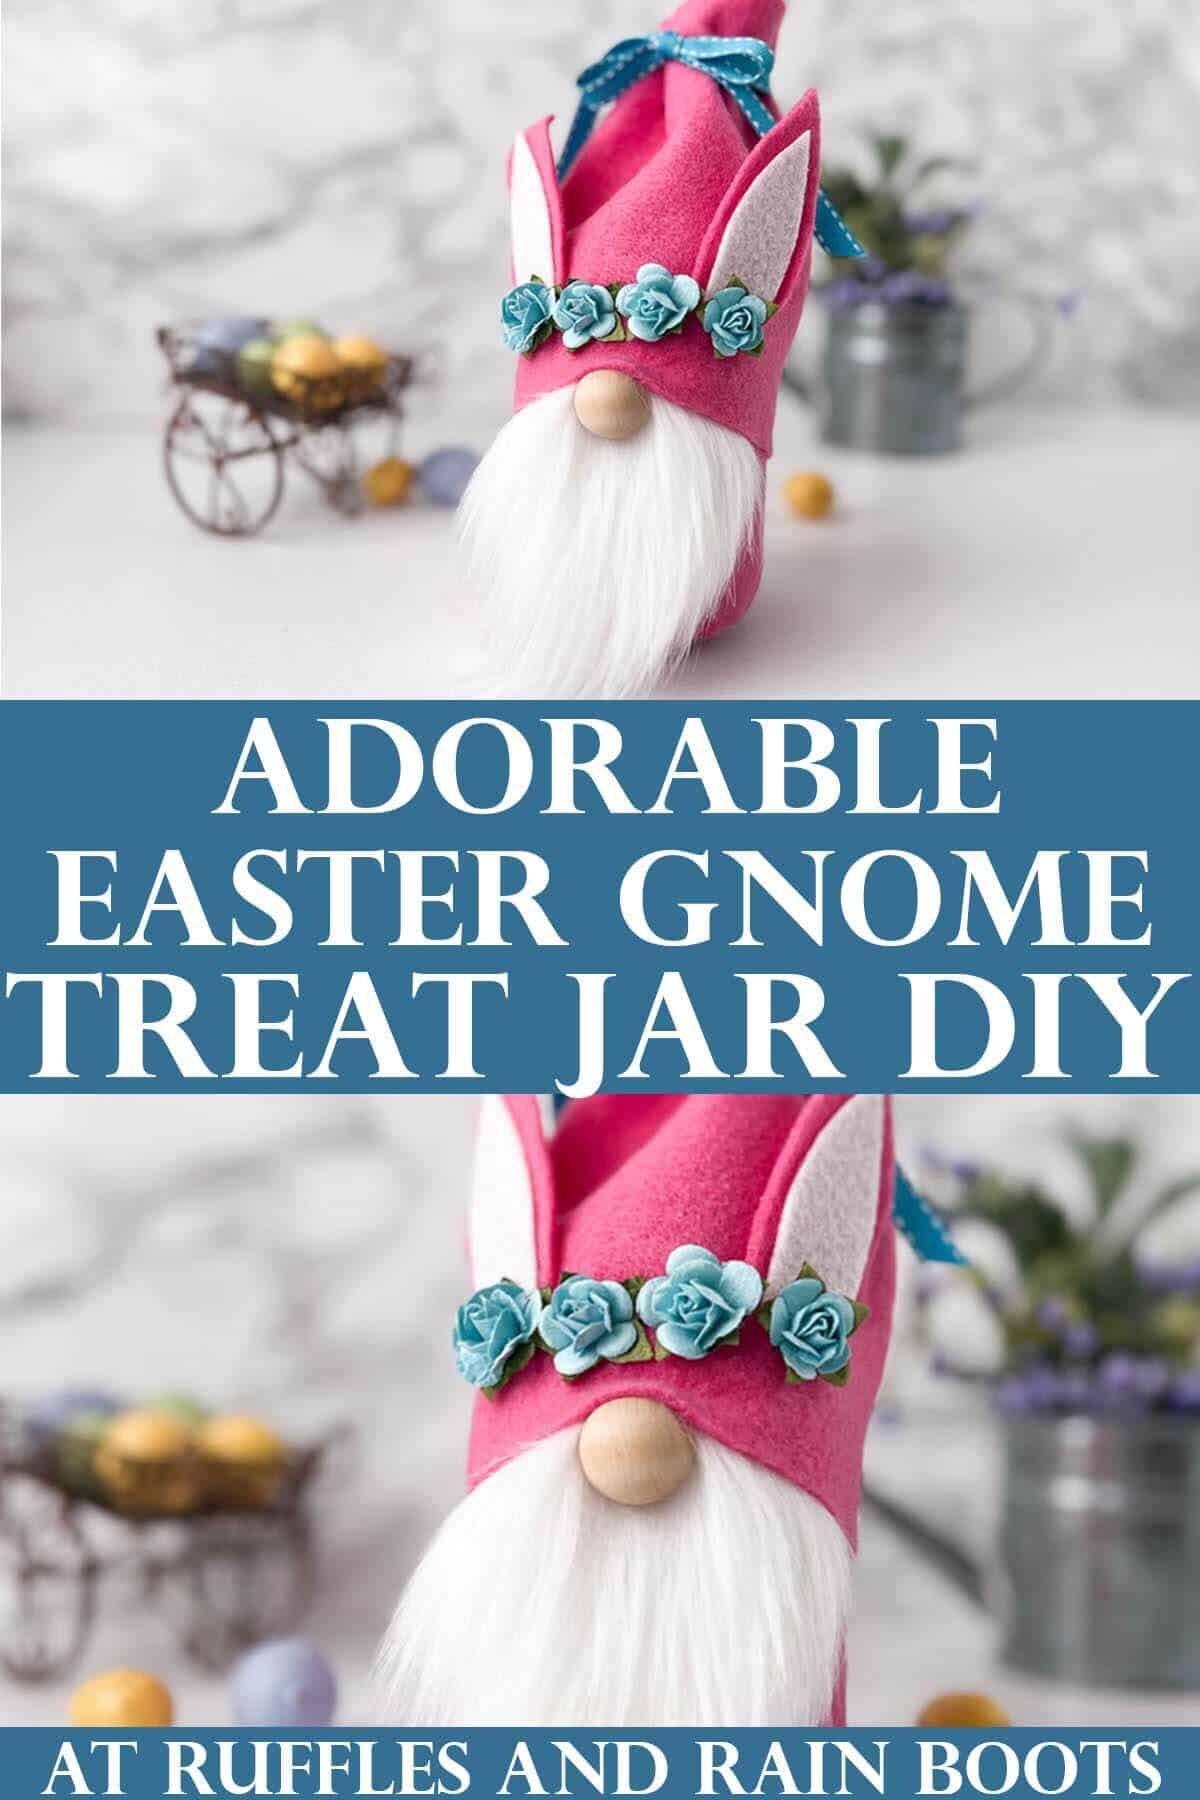
Easy DIY Gnome Treat Container
If you have a well-stocked craft room, check your supplies and make this adorable gnome treat container DIY. It’s easy to customize in any color or for any holiday or occasion.
You will need felt, a jar (plastic is recommended), a scrap of fur, and a piece of ribbon to make this adorable gnome jar DIY. This easy project has a free tutorial, video instruction, and tips on sizing to any container.
RELATED READING: Gnome Treat Jar Topper (5 Minute Craft)
What You'll Find On This Page
Gnome Treat Jar DIY
Here at Ruffles and Rain Boots, I’ve been making gnome candy holder DIY projects for years – ever since my little one started preschool… My, where has the time gone?
After moving from Washington state to Texas, I justified packing and taking the majority of my abundant craft supply horde stash by stating publicly I would use it. And this is another in the Use It or Lose It series. I made a gnome jar for Easter and an adorable Christmas gnome candy treat holder, too.
This is a quick project but be sure to read through the tips before starting. The felt you choose can make a pretty big difference.
No Time to Make This Now? Save or Share for Later
If you need to gather supplies, save this to a DIY projects pin board or share it with a crafty group on Facebook. Using the sharing buttons will make it easy for you to find when you’re ready to begin this easy gnome DIY.
As an Amazon Associate, I could earn from qualifying purchases. There could be affiliate links within this article.
Tips for Making This Easy Gnome Container Project
- Use premium felt to avoid seeing hot glue trails. Some of the thinner felt will show them. If all you have is the thinner felt, use a trim along the brim of the hat to hide it.
- Use ribbon around one half inch thick – any thinner and it will be tugging and any thicker bunches when pulling the hat closed.
- I have used faux fur for my treat jars. If you’re new to working with it, I have a quick and easy tutorial on how to cut faux fur.
- Options for beard materials aside from faux fur include brushed out yarn, moss, cotton mop heads from the dollar store, and even raffia.
- Options for gnome noses are wood balls, wood beads, pompoms, jingle bells, and even fabric stuffed with filling.
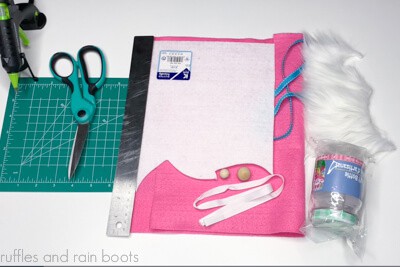
Materials and Supplies Needed to Make This DIY Gnome
Below are detailed instructions for the creation of this easy craft idea. If you are a visual learner, watch the full gnome treat container video tutorial here. While you’re there, subscribe – we have a lot of fun.
- a small jar (I used one from the Dollar Tree)
- felt (premium)
- faux fur
- ribbon
- wood ball or pom pom for a gnome nose
- scissors and an X-Acto knife
- glue gun and glue sticks
- ruler
- optional: decorations and stiff felt (for stand up details like the bunny ears)
RELATED READING: Make a Gnome Wrap to Fit Any Jar or Container (Super Cute)
Switch It Up
Use what you have in your craft room to create a birthday treat jar, Christmas gnome treat jar, or one for any other occasion! Below, you can see how I created this Christmas gnome candy jar with the same method.
imag
Step By Step Instructions for Gnome Treat Container
Below I will go through each step of the process but remember I have a full video tutorial for an Easter bunny gnome treat container DIY here. While you’re there, be sure to subscribe.
Leave this page open and follow each step below, using the comments section if you have any questions. To print this tutorial, scroll down to the end of this page.
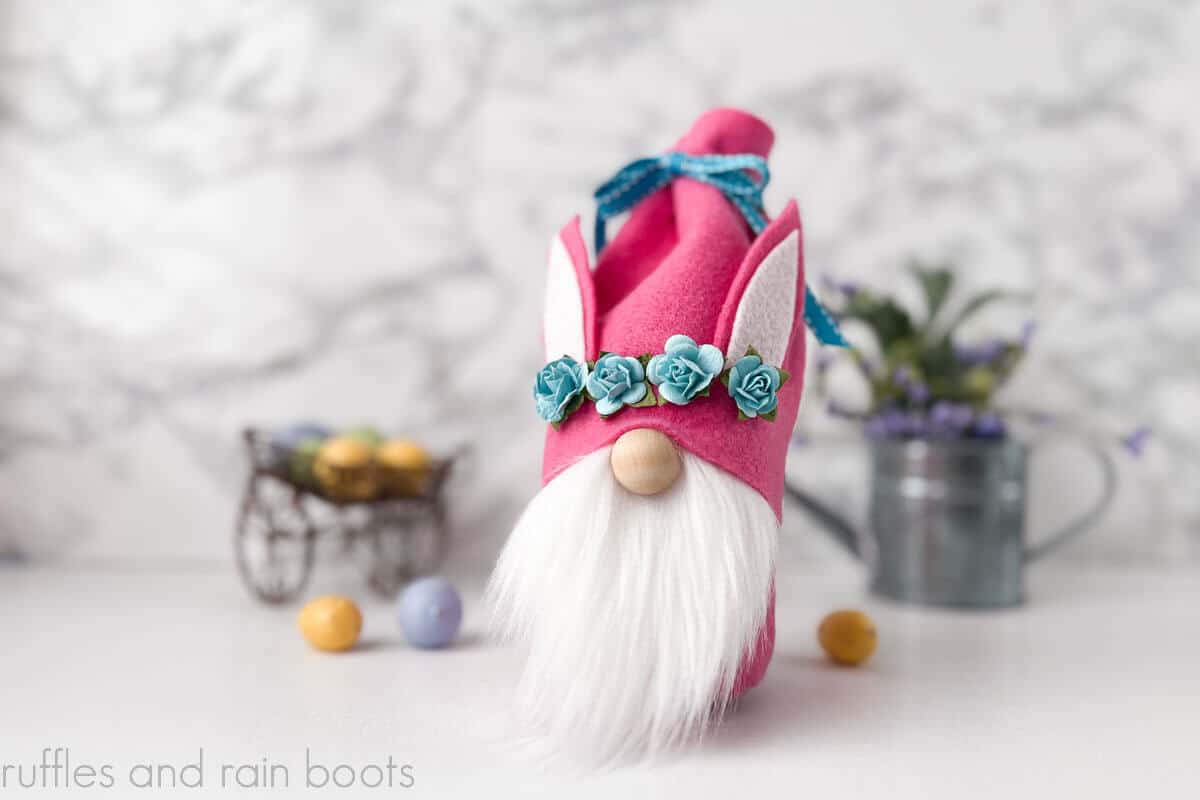
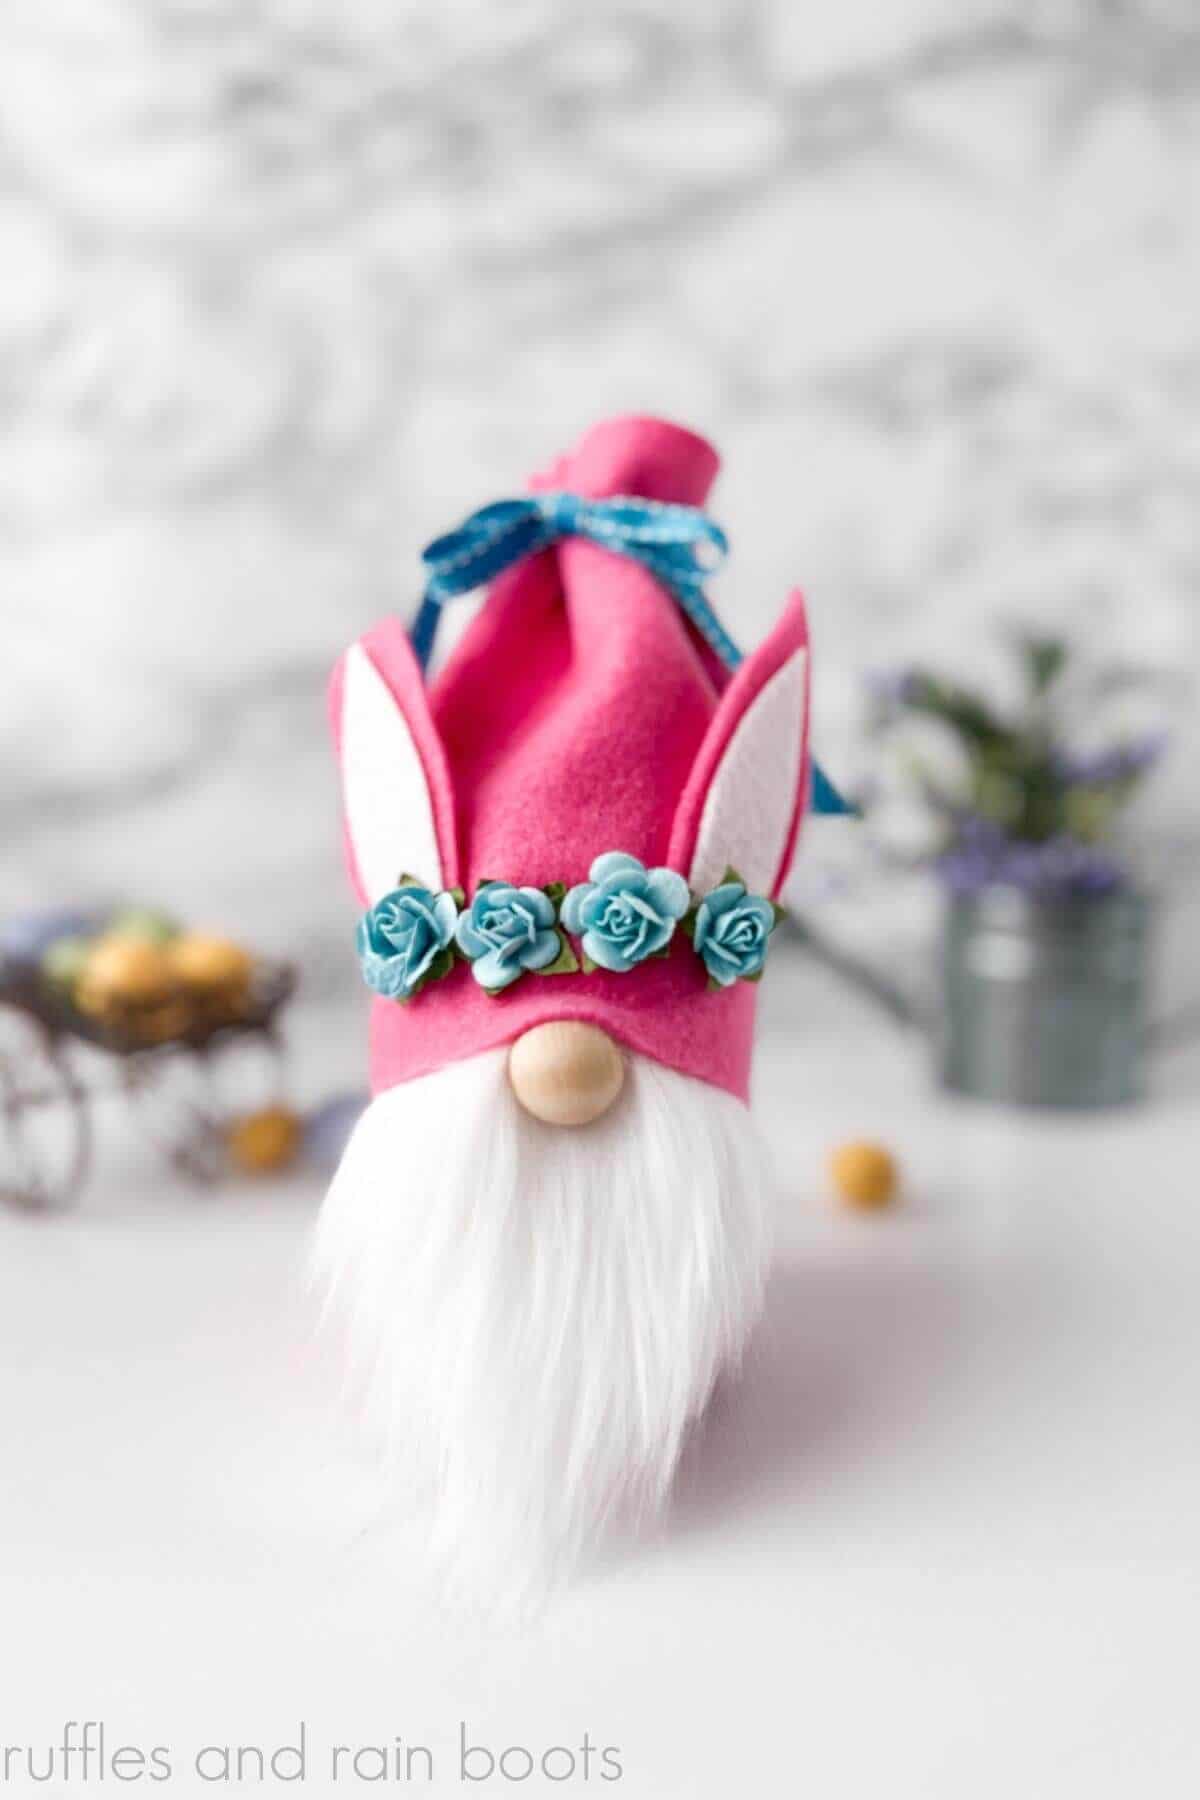
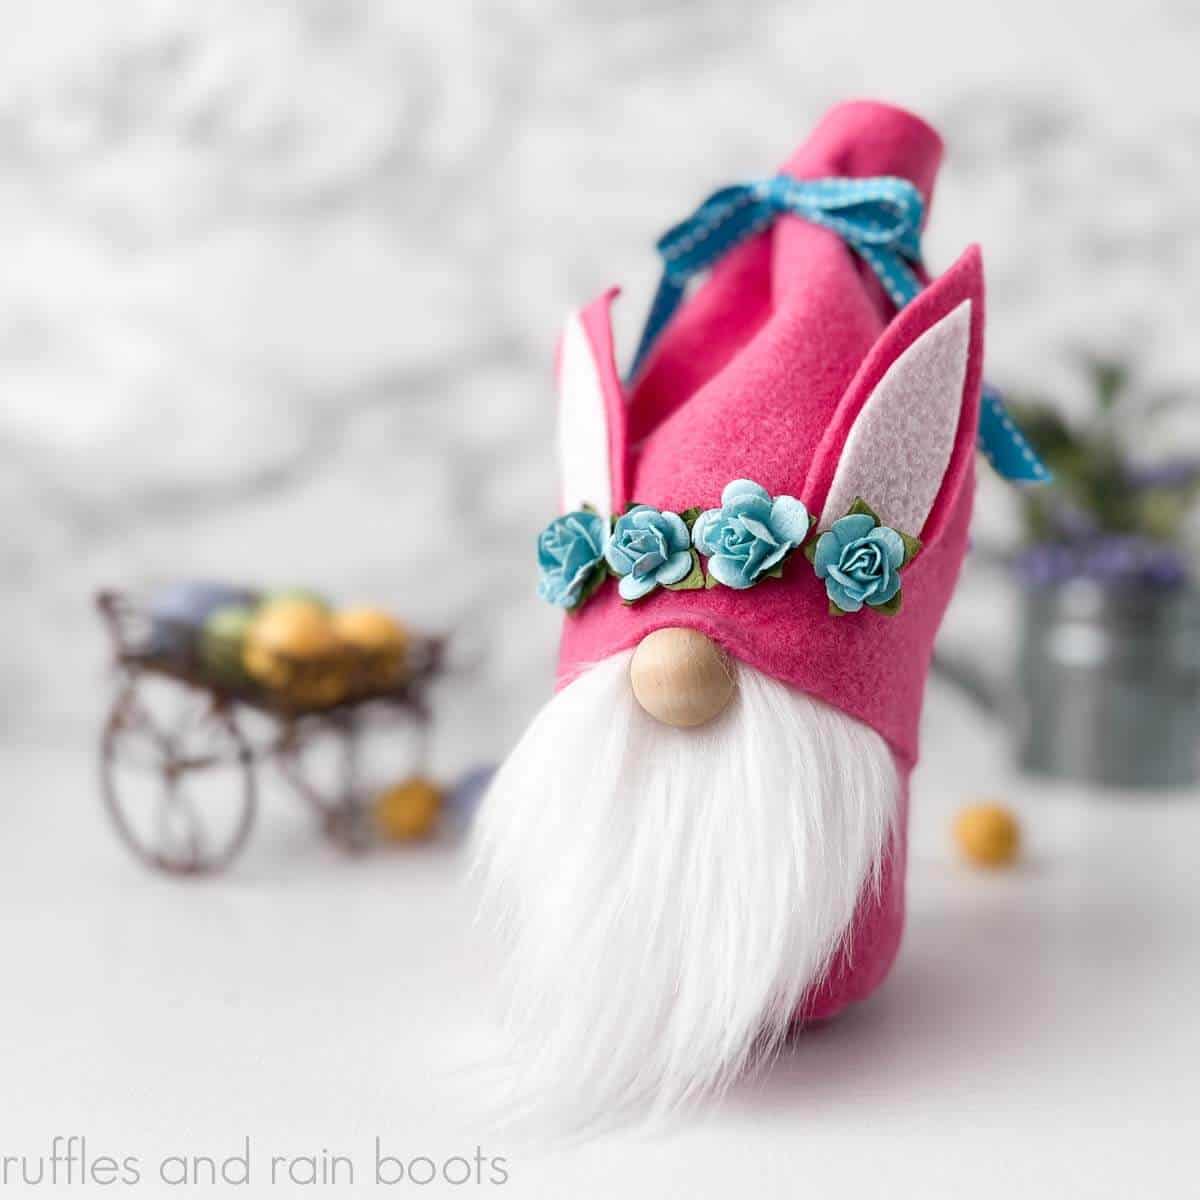
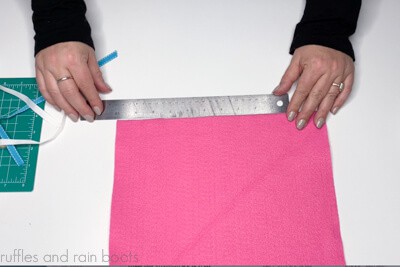
First, remove labels and the jar lid. To determine the hat width, cut a rectangle that fits around the jar, adding a one inch overlap. The hat’s height should be about 5.5 inches, so my measurement was 10 inches wide by 5.5 inches high.
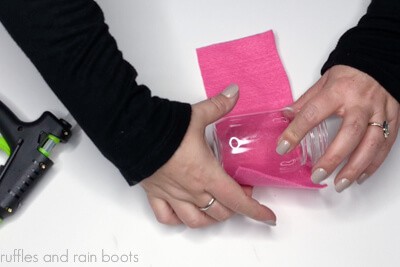
Next, determine whether you want to cover the jar. I opted to cover it on the Easter bunny gnome jar by wrapping it in the same felt I used for the hat. Secure it with glue, if using.
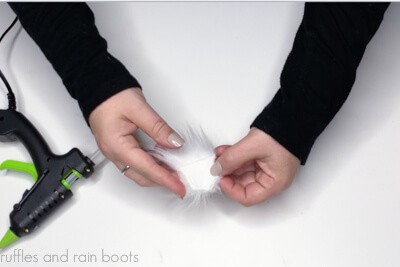
Cut a gnome beard from the faux fur using the X-Acto knife. If you’re new to cutting faux fur, draw on the fabric backing to ensure your cut is the shape you want. I used a V-shape that was 3 inches wide by 3 inches tall.
Glue it to the jar. Note: I covered the seam of the felt on the jar with mine so the back of the jar would be smooth for the bunny tail.
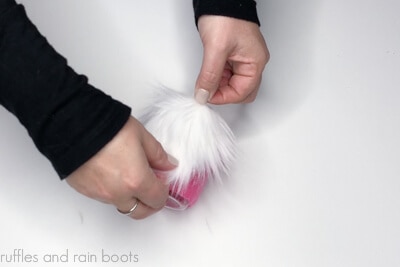
Split the fur to the fabric backing in the beard center. Glue on the gnome nose 3/4 to 1 inch down from the top edge of the fur. This will leave room for the hat to cover the beard’s upper edge.

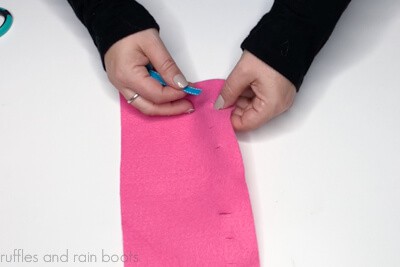
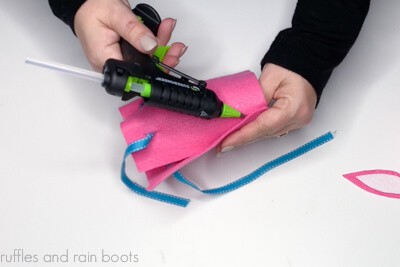
Fold down the one of the hat’s long edges about 1 inch. Cut small 1/4 inch slits along the fold, starting and ending about one inch away from either edge.

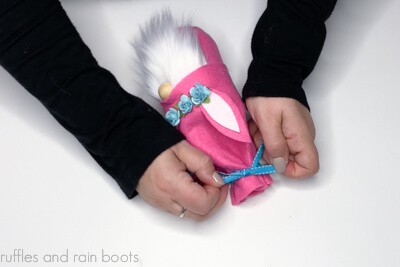
Run the ribbon through the hat. Start on the outside and end on the inside (note: this isn’t critical but it makes the hat assembly smoother).
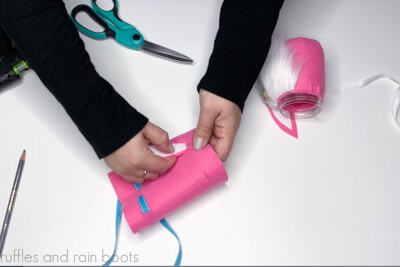
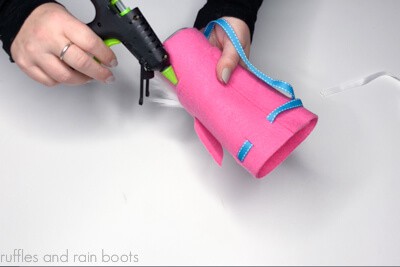
Test fit the hat over the jar and the gnome’s nose to identify where to glue it shut. Use hot glue to glue up the back seam (bottom to top).
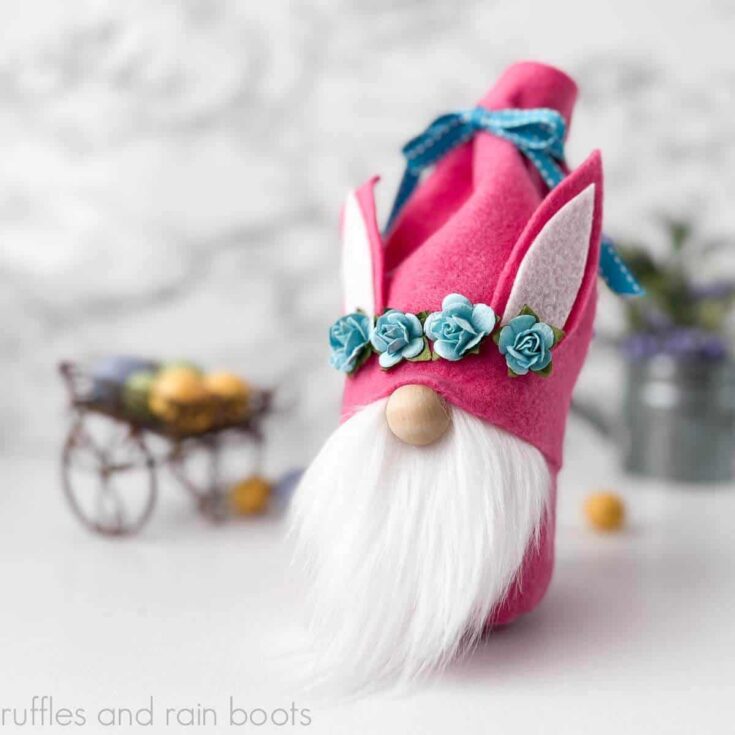
OPTIONAL BUNNY GNOME ADDITIONS: If you’re making a bunny gnome for Easter, cut two ear shapes from the hat felt scraps and two smaller ear shapes from the stiff felt. Then, slip on the hat and measure the placement of the ears and cut a small slit to tuck and glue in each ear.
Additionally, create a bunny tail. Cut one inch of faux fur and glue the corner points in. Press it together, roll it between your hands to fluff, and trim before gluing to the back of the jar.
Pull the hat onto the gnome jar body and secure the back and sides to join them. Add glue to the inside of the hat over the nose, if desired.
Decorate the gnome to fit your theme, fill it with candy or gifts, and pull tight. Tie it in a bow and it’s time for gifting!
More Easy Craft Ideas To Try
- Make a Gnome Cookie Jar – Use any large canister to create this adorable gnome DIY.
- Clay Gnome Jar Topper – If you have a bit of clay on hand, use it to make this fun and easy afternoon craft.
- Decoupage Gnome Jars – Have an old mason jar? Give it a quick and fun makeover with a napkin and turn it into a gift or decor piece.
Please Save or Share This Easy Gnome DIY
Your shares are how this site grows and I am sincerely grateful. Please save this to a simple projects pin board or share it with a crafty group on Facebook.
Easy Gnome Treat Container
Head to the dollar store to pick up a jar you can use to make this adorable gnome treat container. This easy craft project is done in about 10 minutes with felt, leftover ribbon scraps, a bit of faux fur, and a wood ball. Make this adorable gnome DIY for any holiday, occasion, or theme and watch the smiles as they open the hat to get the goodies.
Materials
- 1 Jar or Container
- Felt Sheet (I used premium felt 9x12 inch sheet)
- Faux Fur (small 3 inch square for the gnome beard)
- 18-20 inches ribbon
- Wood Ball, Pompom or Other Gnome Nose
- Optional: Stiff Felt Scraps (for bunny ears)
- Optional: Decorations (flowers, accessories)
Tools
- Glue Gun and Glue Sticks
- Scissors
- Ruler
- X-Acto Knife
Instructions
Basic Gnome Jar
- Measure around the jar (below the lid portion) and add one inch to the width. Cut a rectangle of felt that width and 5.5 inches high (mine was 10 x 5.5).
- Optional: cover the jar in the same felt by wrapping and gluing the felt directly to the jar under the lid portion or leave it as-is.
- Cut a V-shape beard 3 inches wide by 3 inches tall (at its highest point) using the X-Acto knife. Glue the beard to the jar (I covered the seam) just under the lid bands.
- Split the fur to the fabric-backing and glue on the wood ball one inch from the top of the felt and beard edge.
- Fold down the long side of the hat piece one inch and cut small one quarter inch slits from one side to another. Start and end the cuts about one inch in from the edges.
- Run the ribbon through the slits in the hat.
- Test fit the hat and glue up the back seam so that it fits over the top of the nose.
- Once the hat is assembled, glue the bottom inside of the hat to the jar to secure it well.
- Decorate, fill with candy or gifts, and pull the ribbon tight to close.
Bunny Gnome Add-Ons
- Cut ear shapes from the primary felt and smaller ear shapes from the stiff felt and then glue the smaller onto the larger. Cut small slits in the hat and glue in the ears. Decorate the middle, if desired.
- Cut a 1 x 1 inch square of faux fur for a bunny tail. Take each corner on the fabric-side of the fur and glue each corner to the center. Roll the pompom in your hands to fluff, trim, and glue onto the back of the jar.
Notes
If making many of these at once, do all like-tasks together to reduce time.
These gnome treat containers can be made for any holiday or occassion by varying the felt color, ribbon, or accessories.
Recommended Products
As an Amazon Associate and member of other affiliate programs, I earn from qualifying purchases.


Where is the pattern ?
The pattern was provided in instructions and measurements, as all jars will differ.