
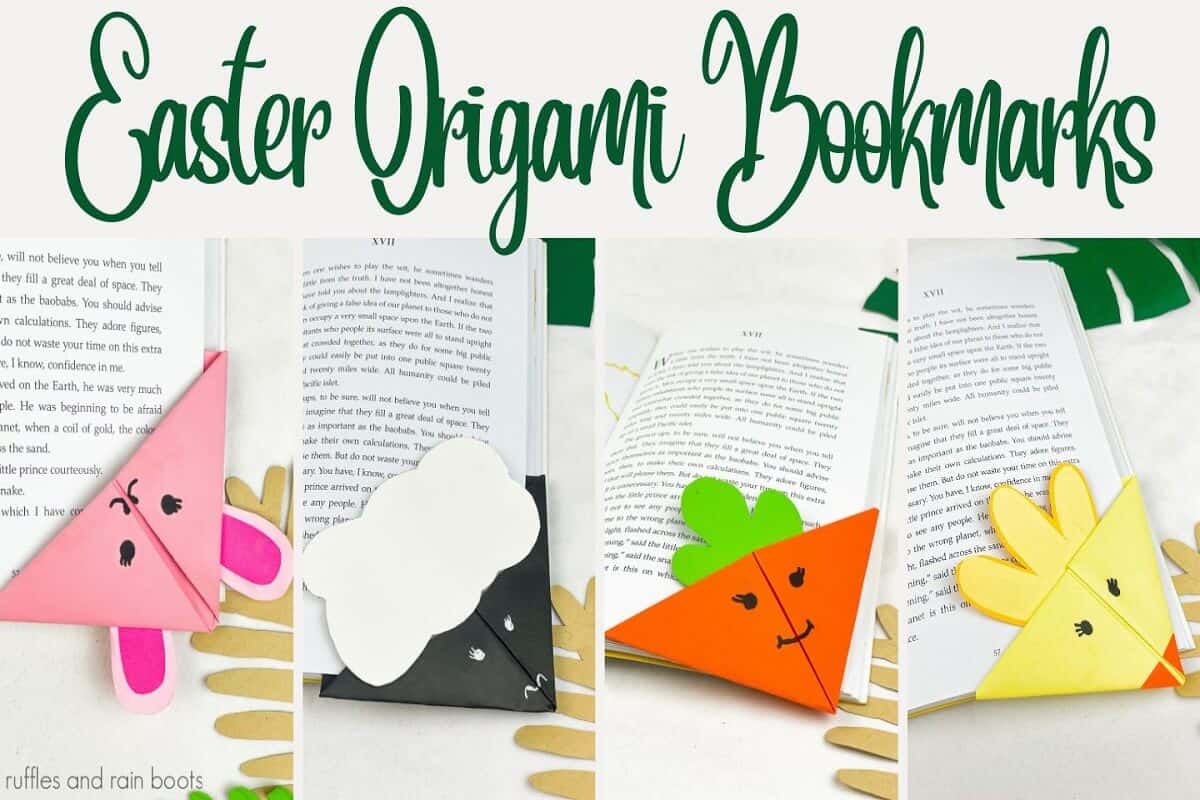
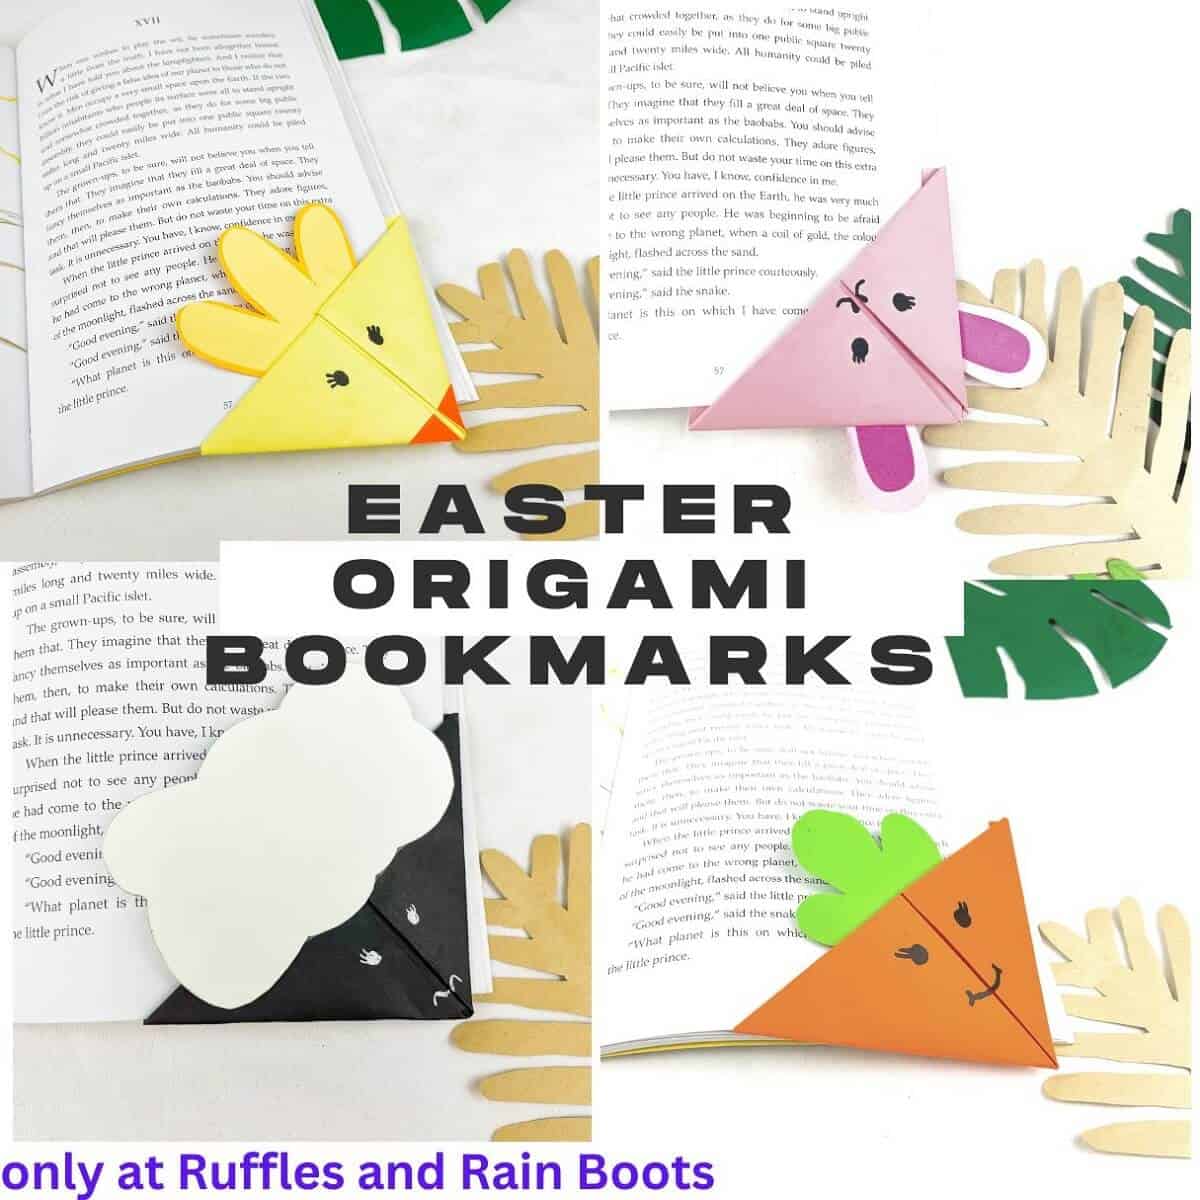
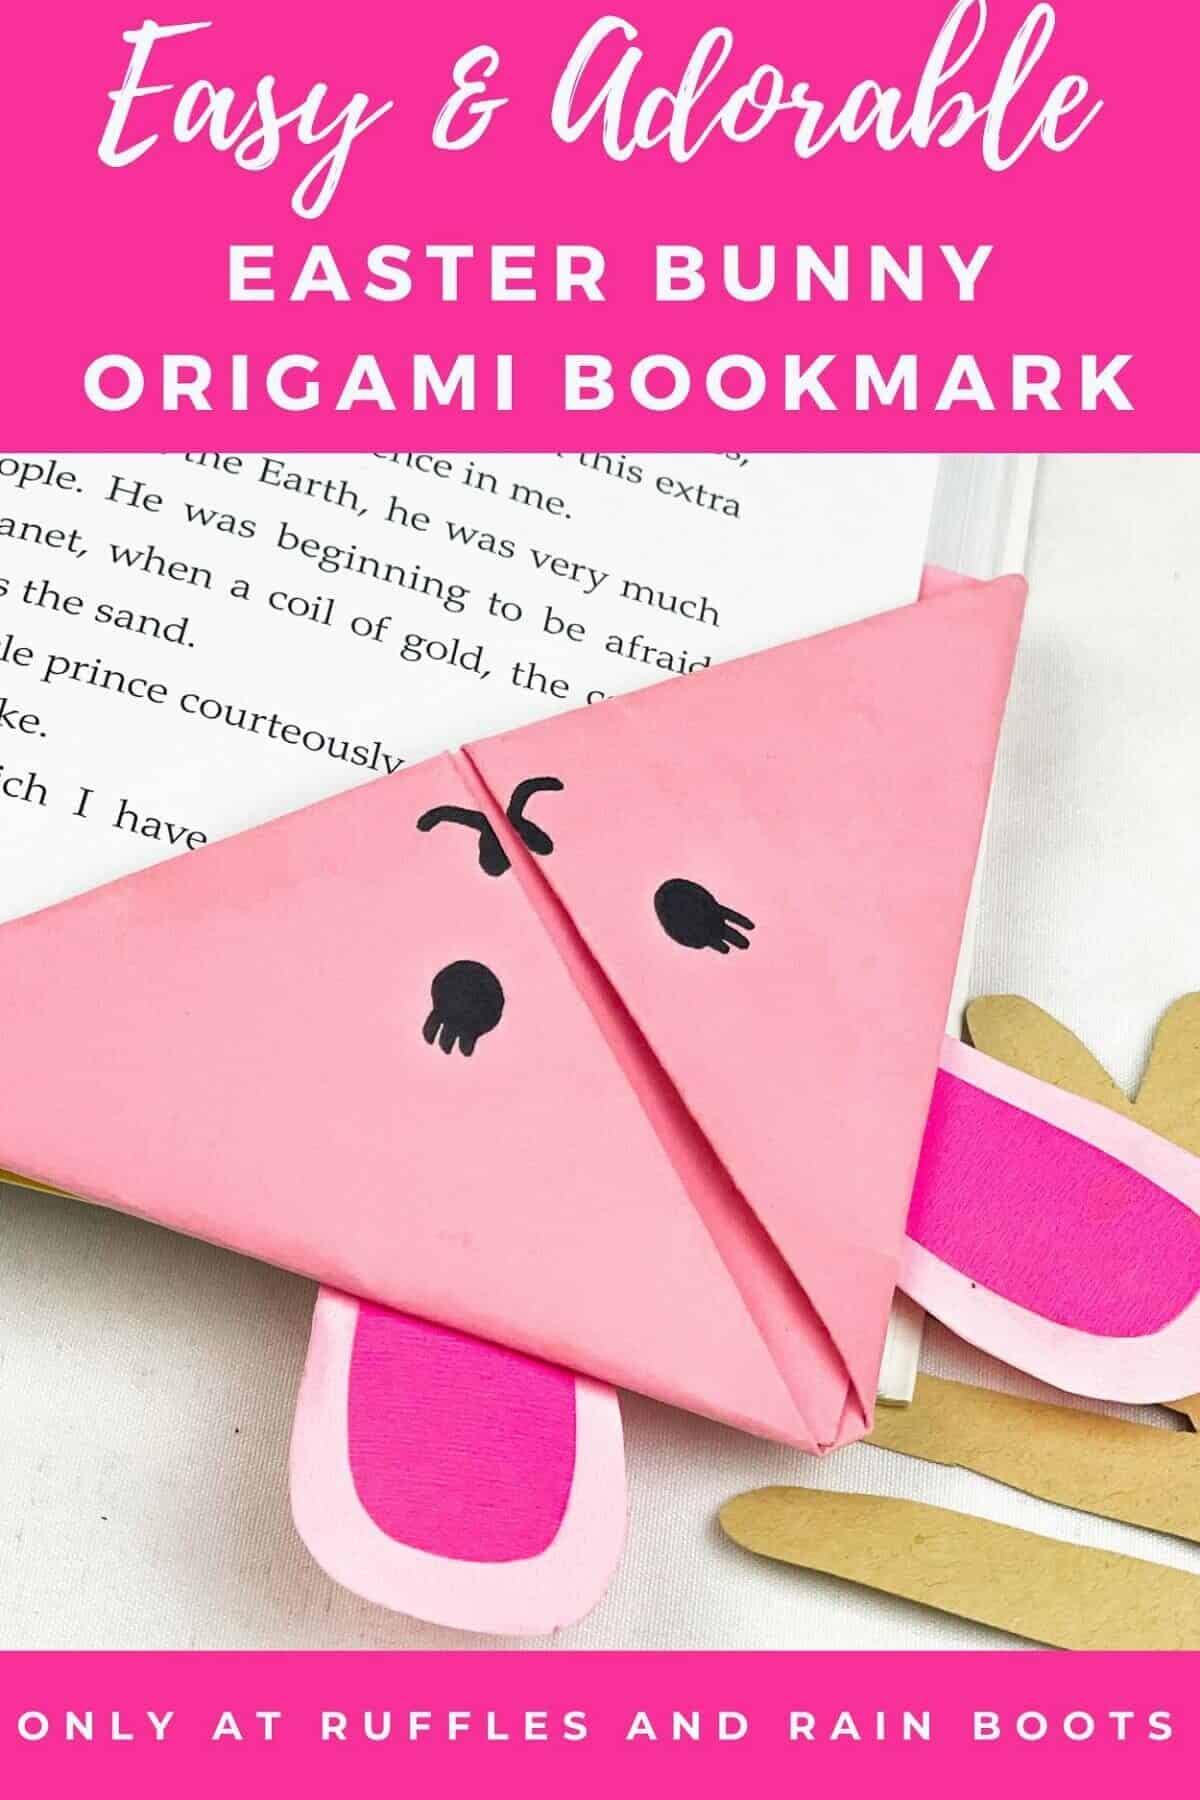
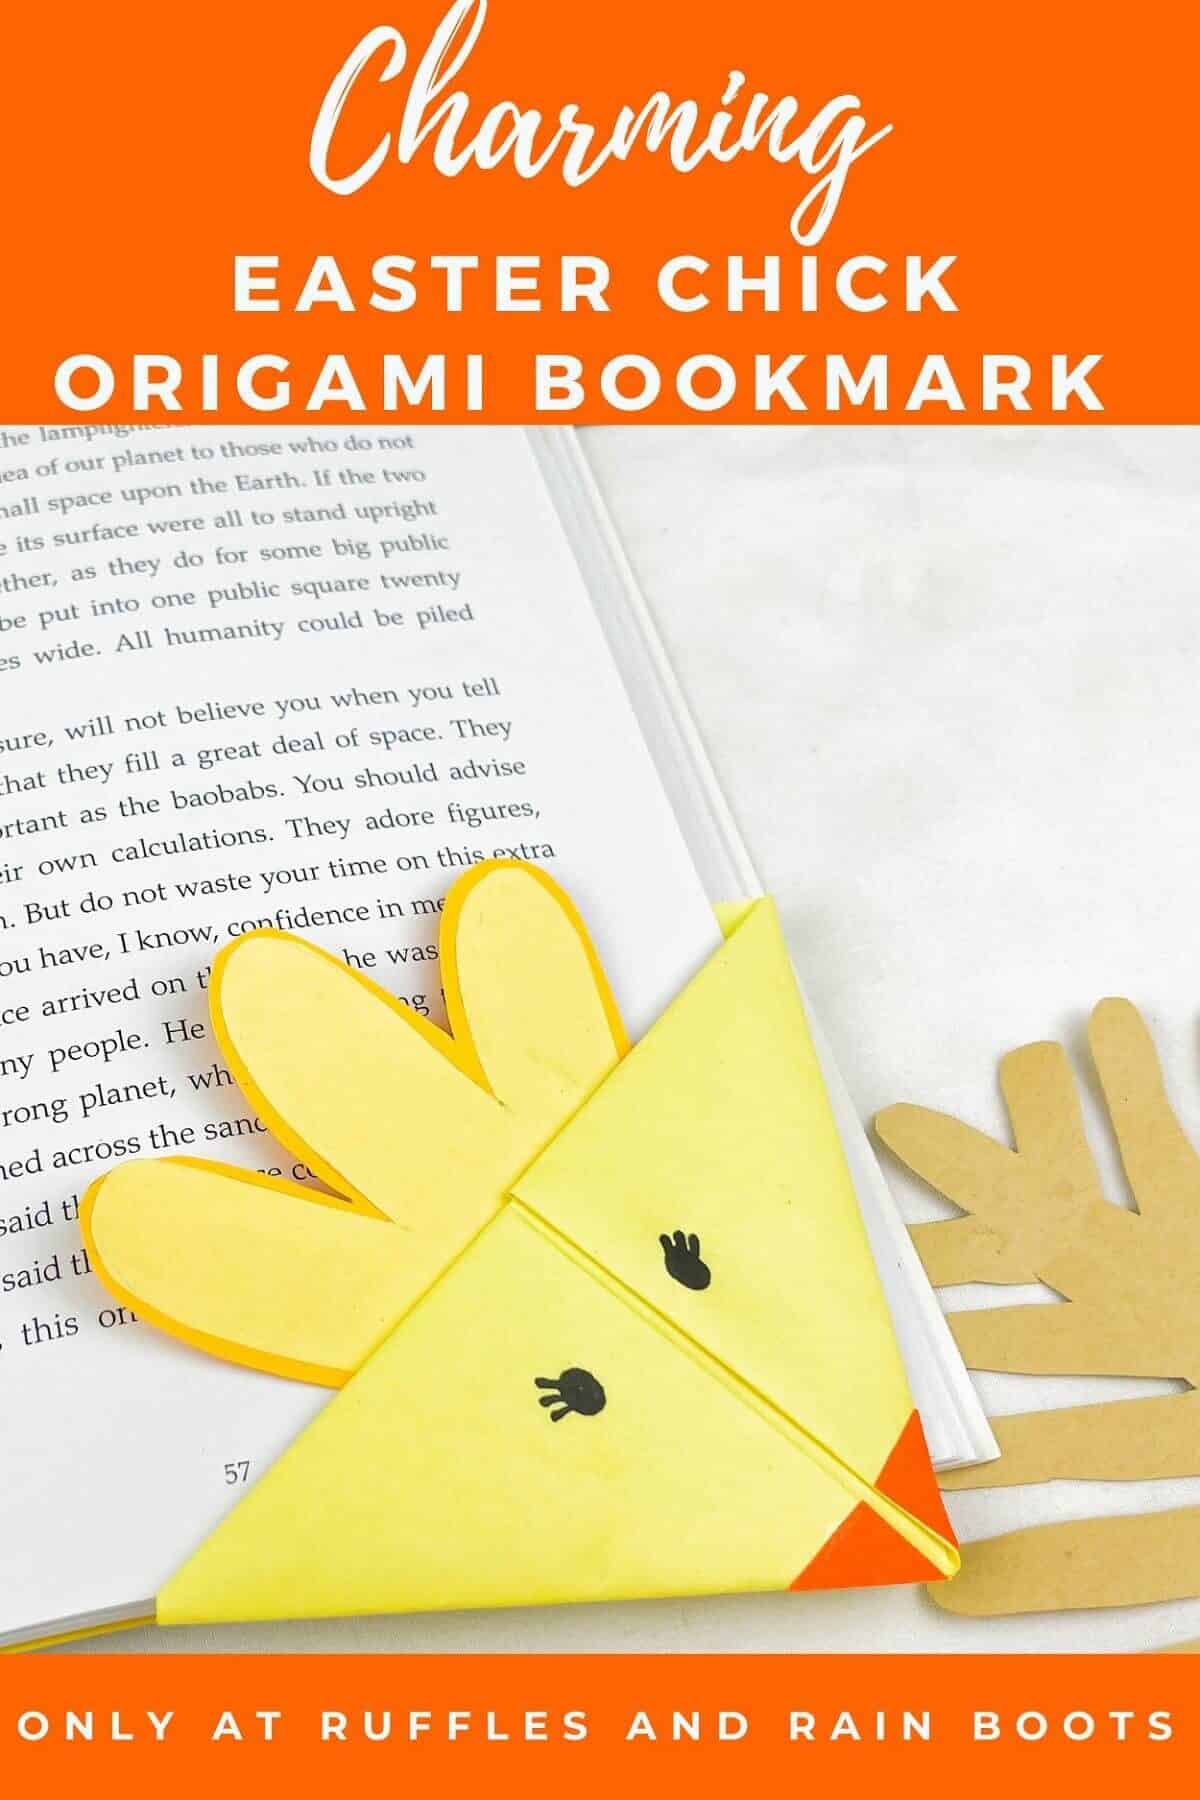
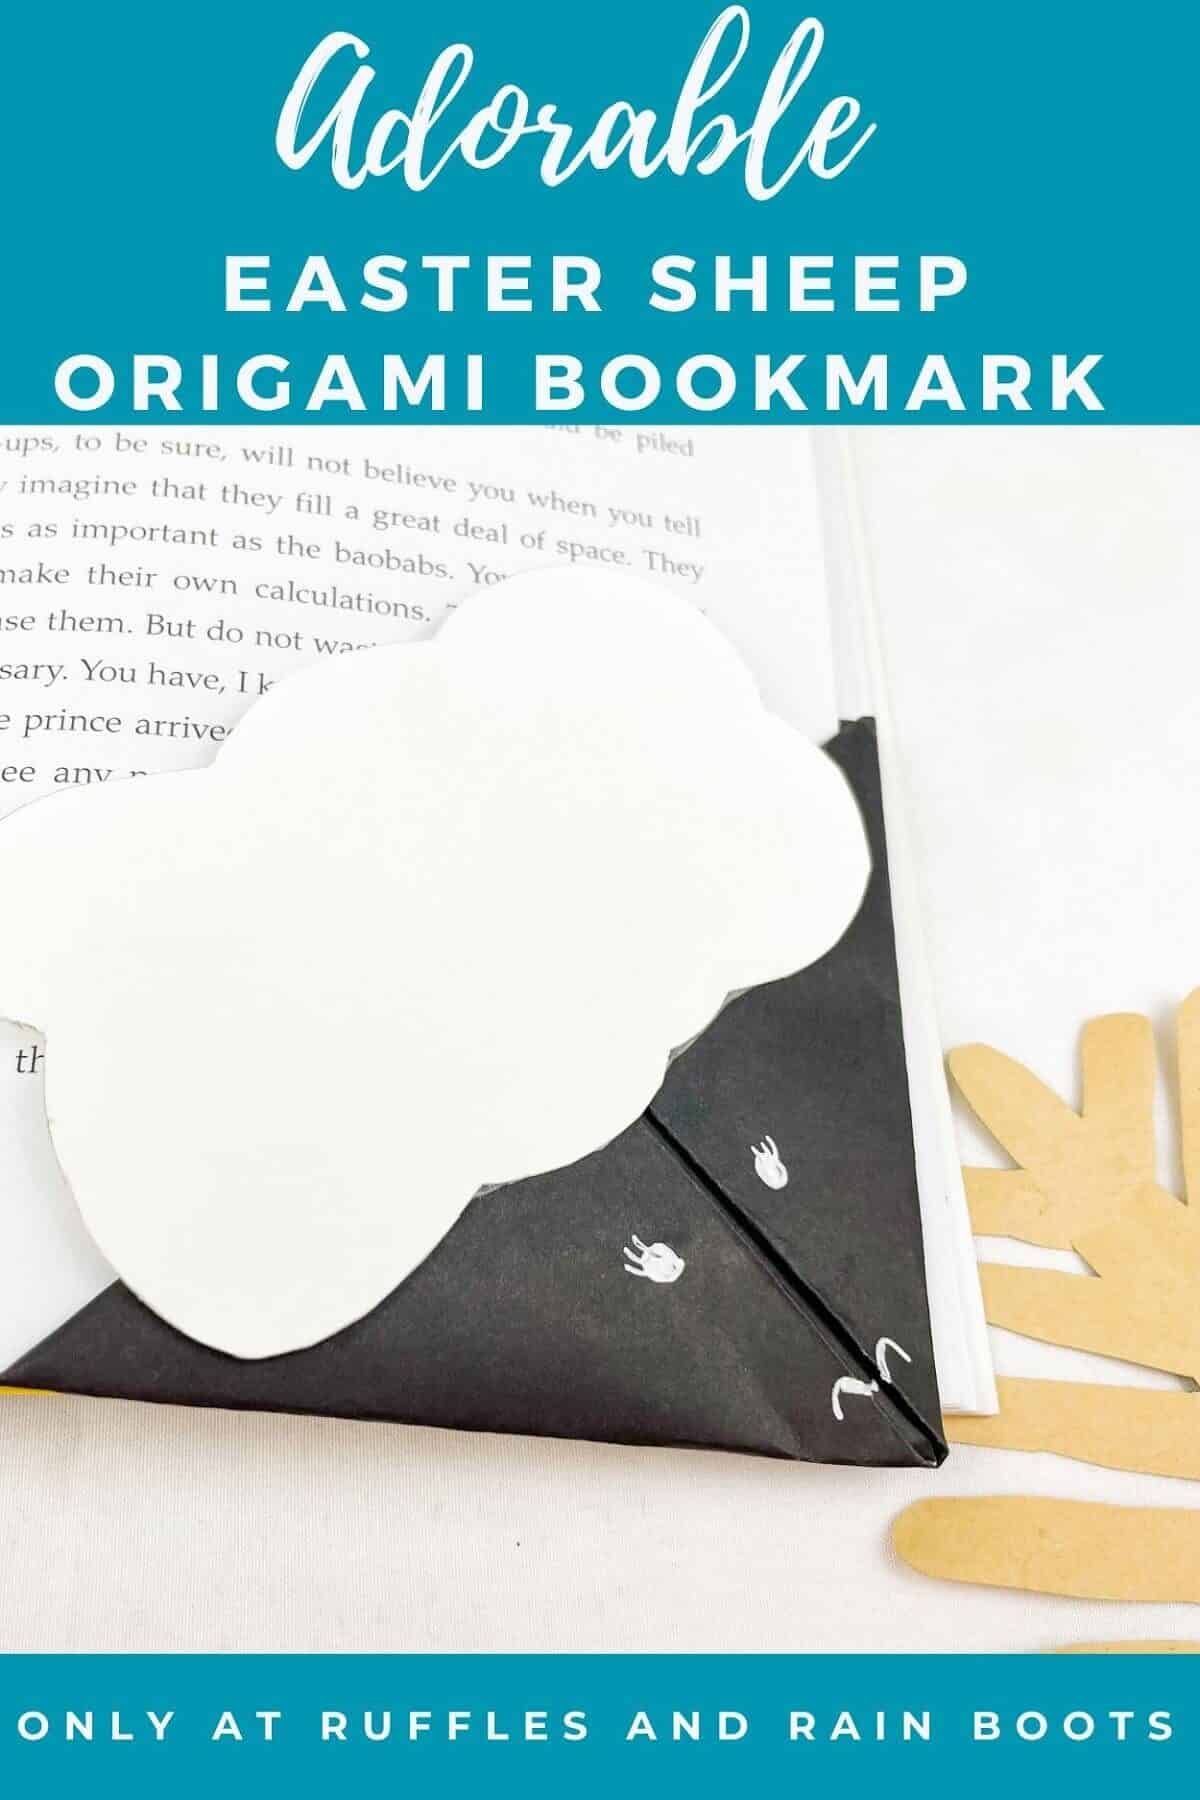
Easy Easter Paper Origami Bookmarks
These adorable easy Easter origami bookmarks will have everyone crafting and smiling. This is quiet activity the kids can do while waiting on dinner, in the car, or in a hotel room while you’re traveling.
RELATED READING: Spring Paper Flowers Free Printable Template and Craft
What You'll Find On This Page
Origami Bookmarks Craft
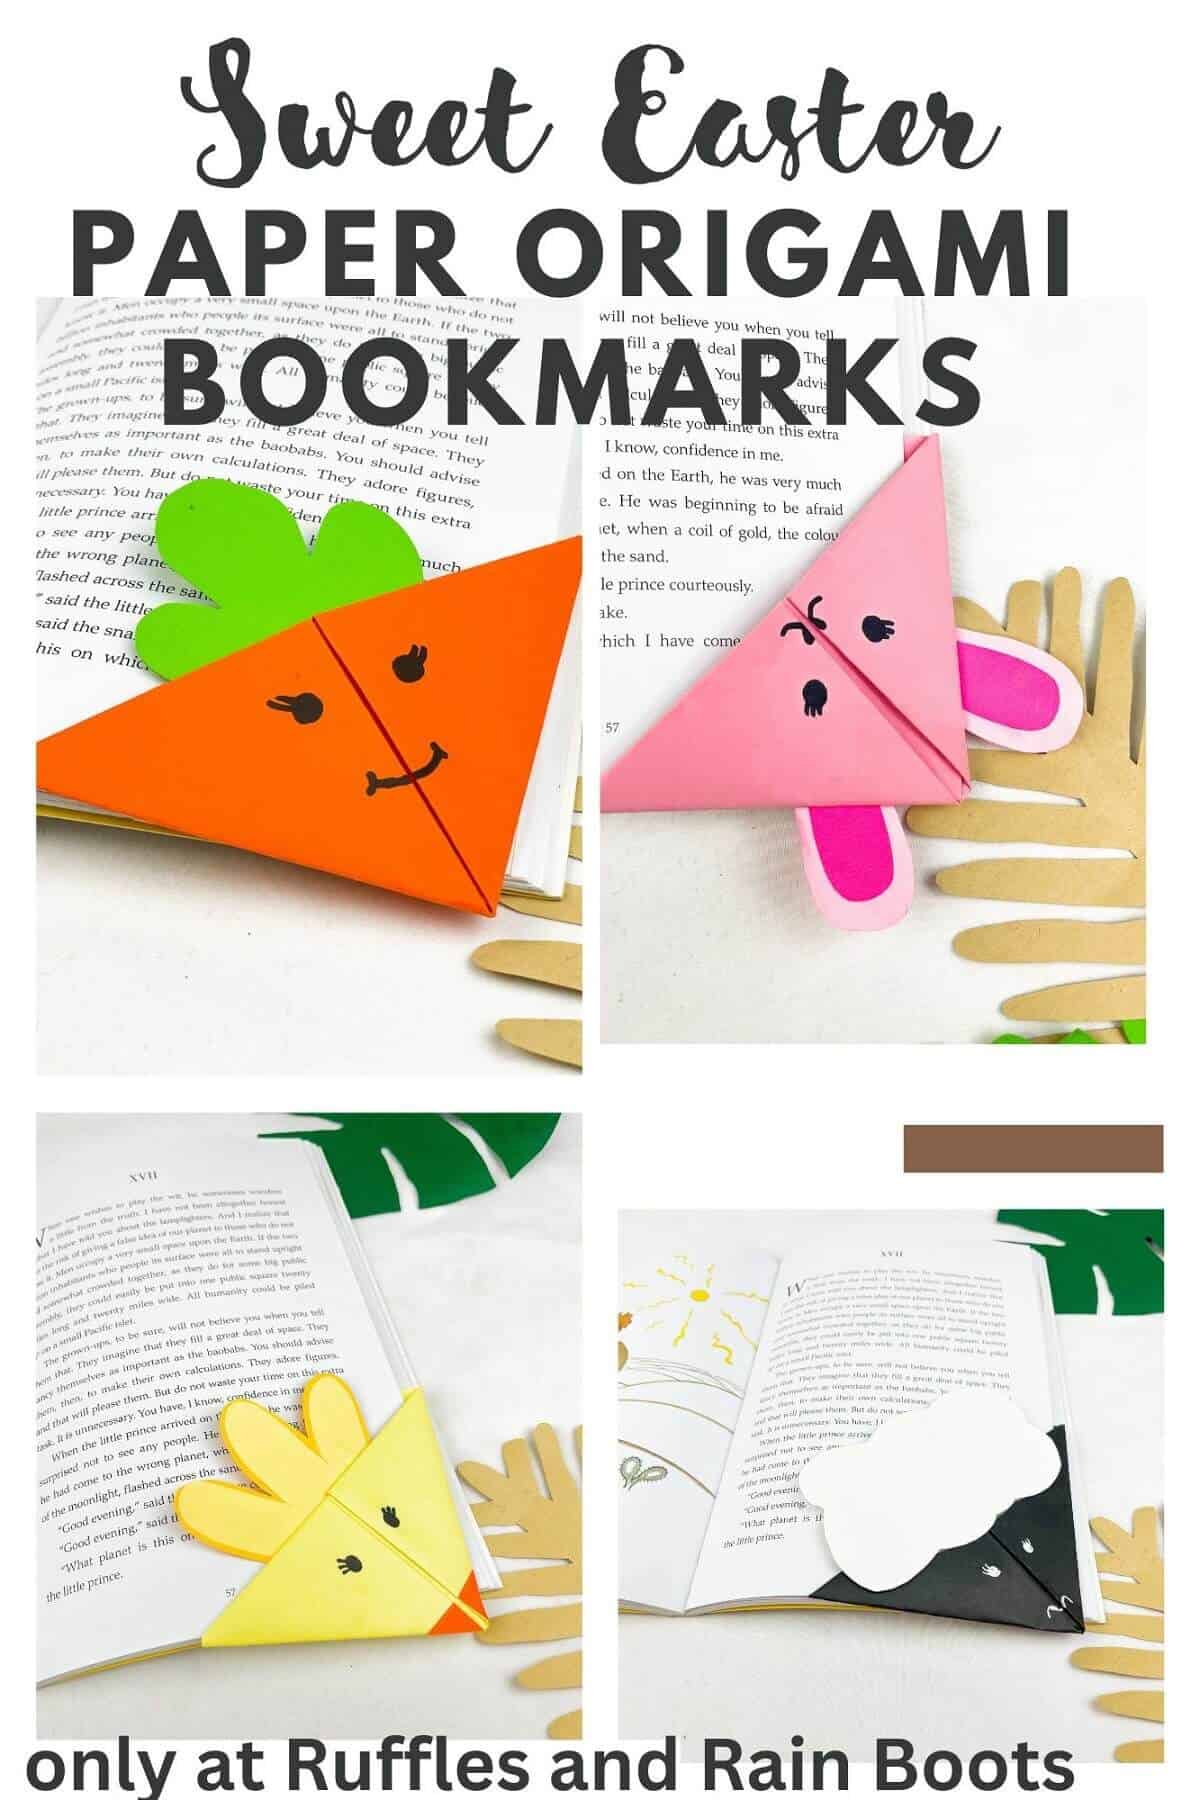
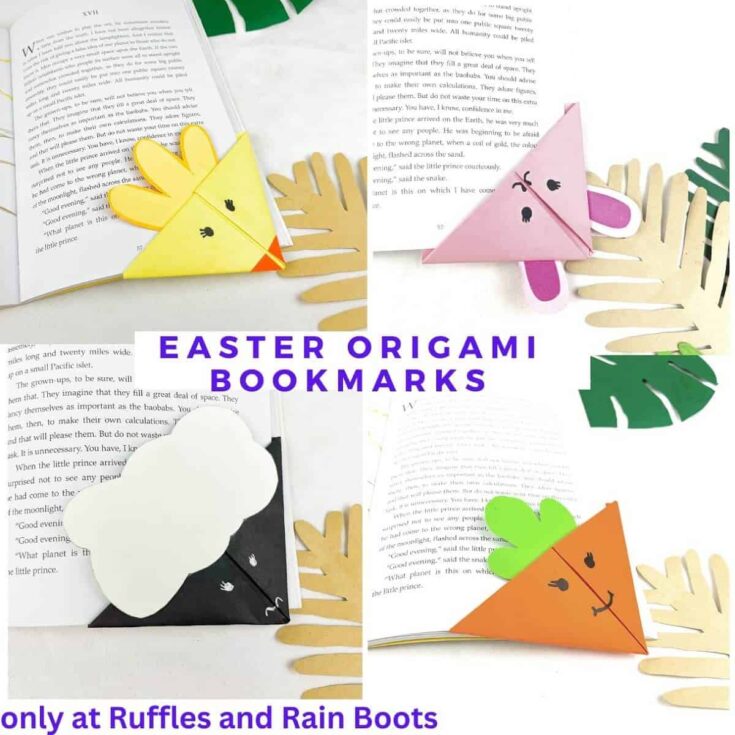
Here at Ruffles and Rain Boots, we are always on the lookout for fresh craft projects for kids. These folded paper bookmarks are a great project for kids of all ages and I’ll show you how to make Easter bookmarks four different ways!
Once you know the basic folds, the rest is all imagination! They are simple, cheap to make, and take just minutes. Everything you need to make several bookmarks is just a variety of colored paper, some scissors, tape or glue, and a marker or pen.
If you need to gather supplies for these origami corner bookmarks, save this to a paper craft pin board or share it on Facebook.
As an Amazon Associate, I may earn from qualifying purchases. There may be affiliate links within this article.
RELATED READING: Easter Egg Lacing Craft for Kids
Tips for Making Origami Bookmarks for Kids
- When working with paper crafting, be sure to have clean, dry hands.
- If you want to be exact, use a ruler and pencil to make sure you get clean, straight lines and a perfect square. But honestly, it’s not necessary because you can fold the paper and use the guidelines.
- Take your time when folding these basic origami bookmarks. These make a great calm-down craft.
- You do not need a thicker paper like card stock. It could be hard to get the folds. If you have construction paper, however, that will work.
RELATED READING: Twine Wrapped Easter Eggs (Dollar Tree Craft)
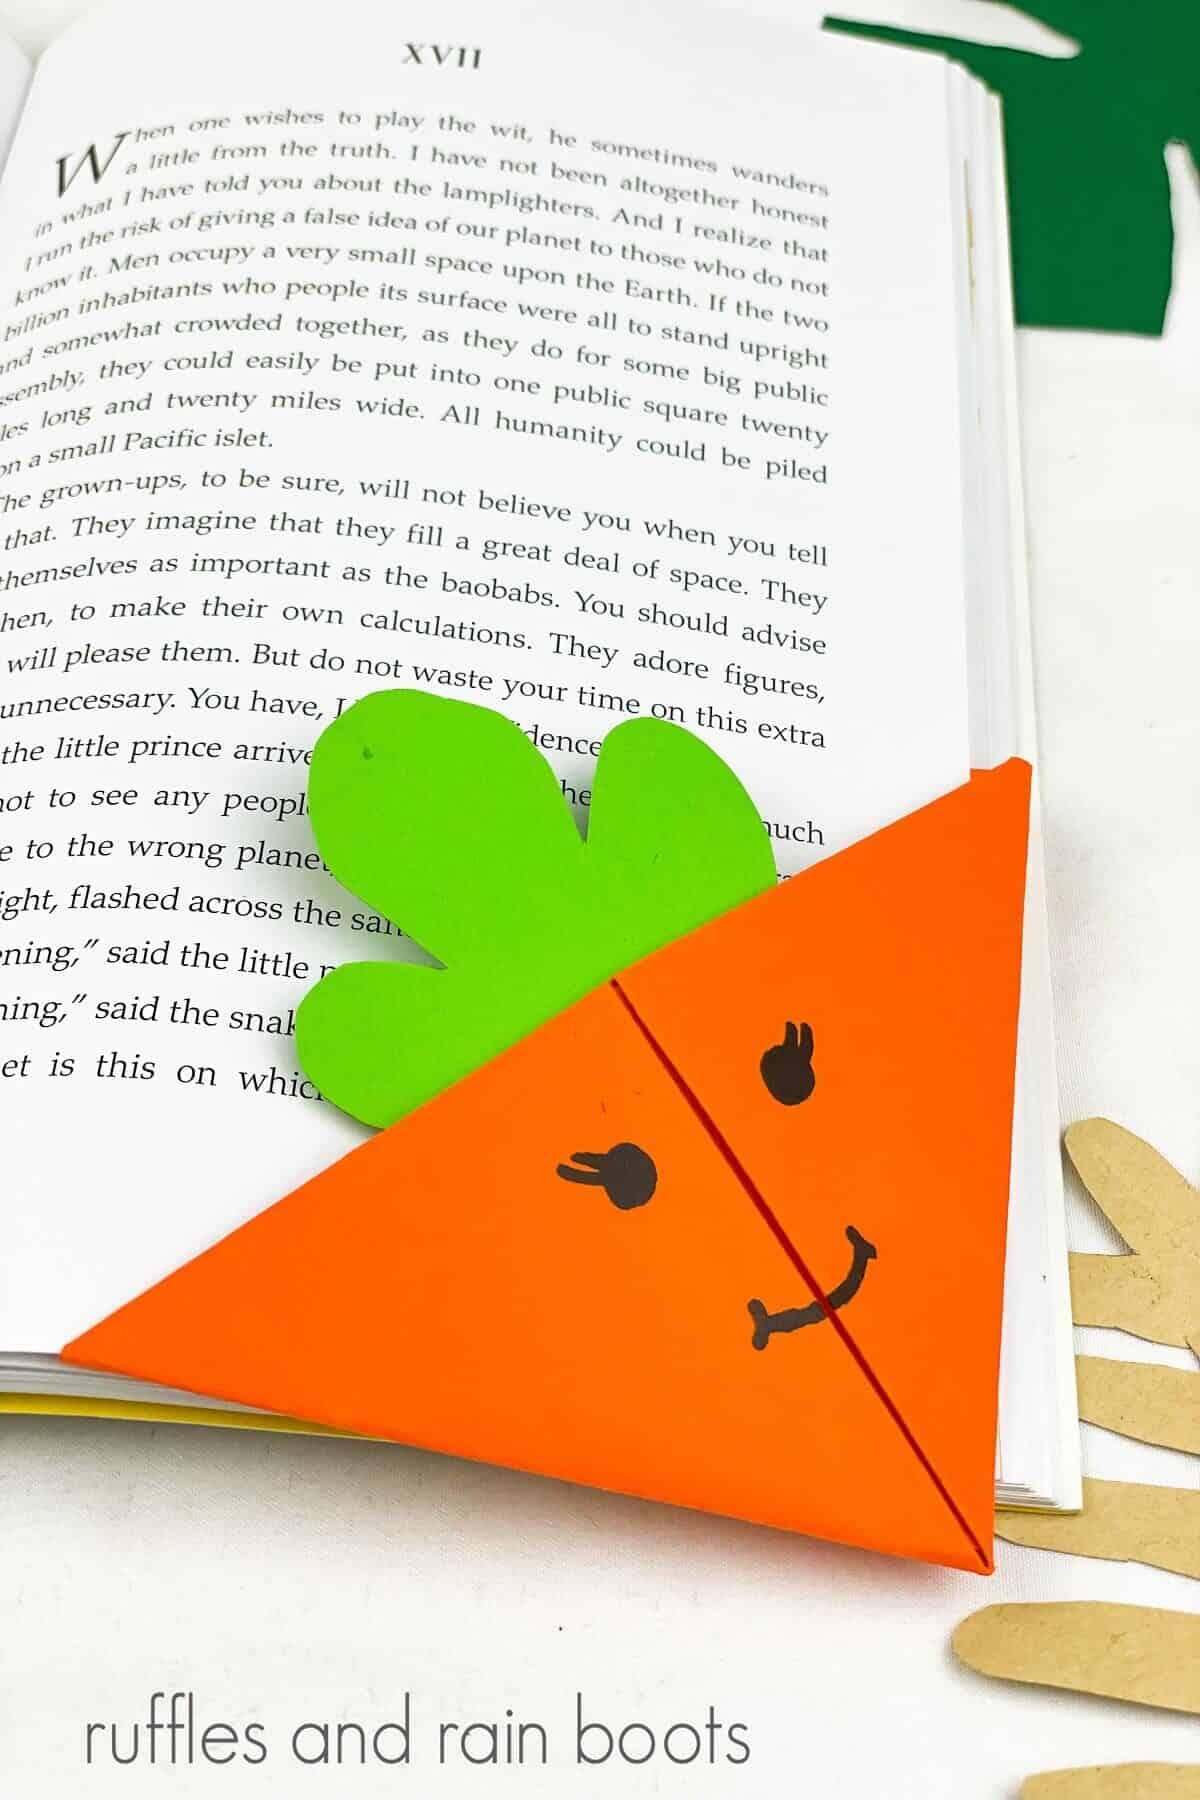
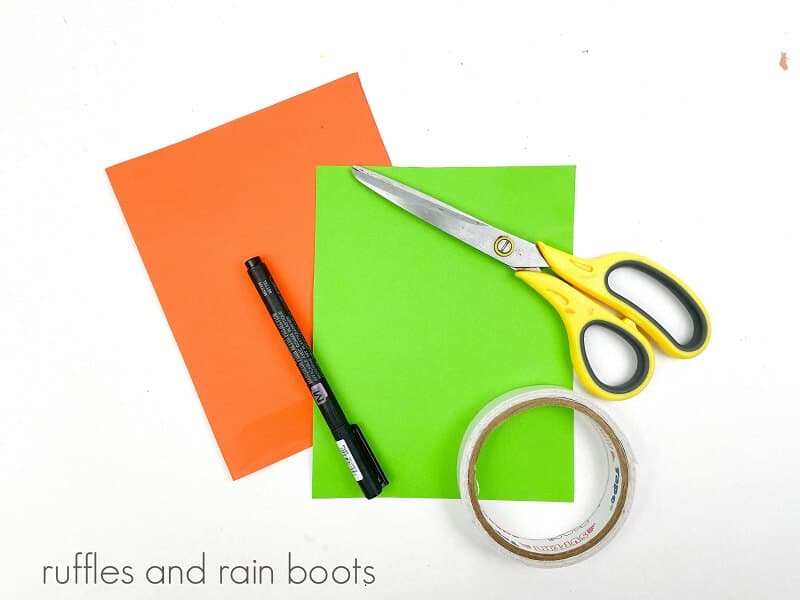
Supplies for a Paper Carrot Bookmark
- Green and orange origami or construction paper
- Scissors
- Black or white marker
- Glue or Double-Sided Tape
How to Make an Origami Carrot Bookmark
Each step for this craft is detailed below so it’s easy to follow. Keep this page open while you are creating your adorable Easter paper origami bookmarks. If you would rather have a printable how-to, scroll down and select the print button.

Cut a 6×6 square. If you have a rectangle piece of paper, fold the bottom right edge upward so it aligns with the left edge and cut at the top. Unfold and you will have a square.
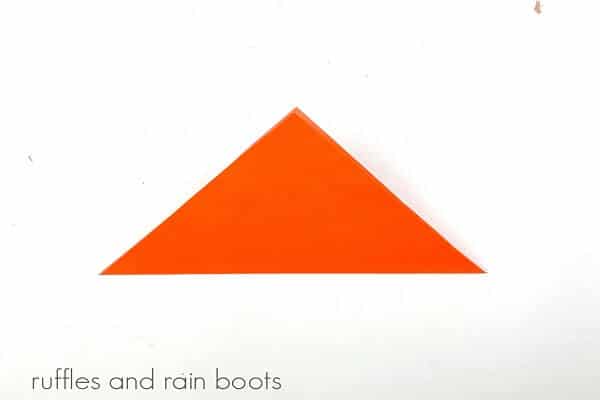
Fold the paper in half diagonally, forming a triangle.
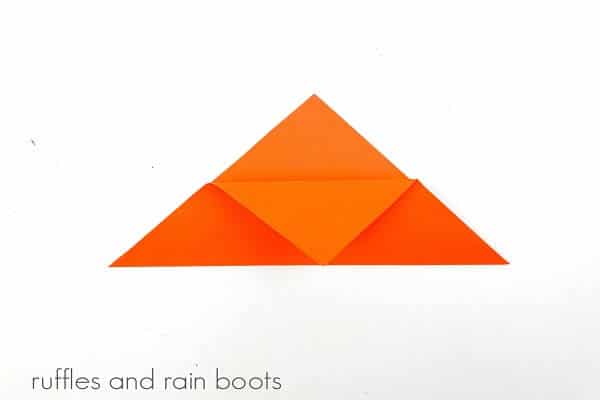
Fold the front right bottom corner up so that it aligns with the top corner.
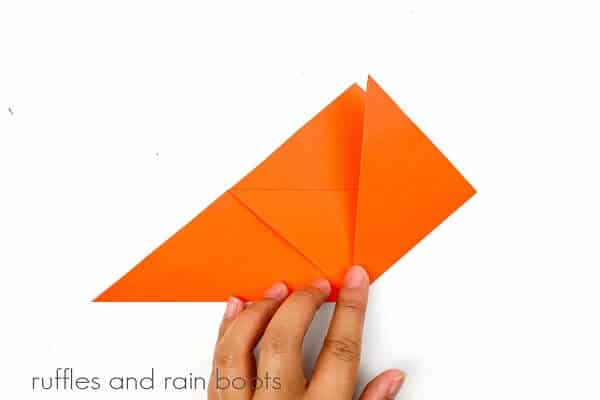
Fold both sides up. Fold the bottom left corner up to the same point to form a diamond.
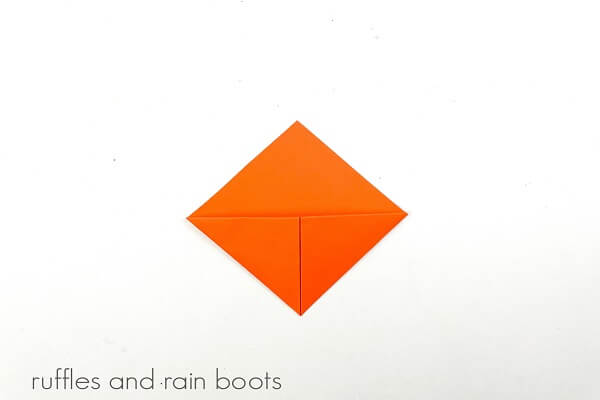
Tuck the left and right corners inside the pocket. It will form a little pouch.
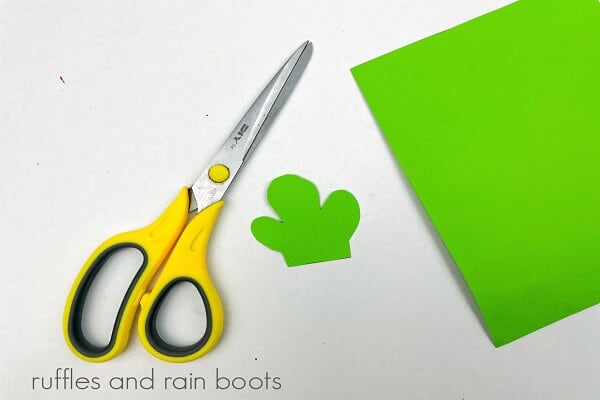
Cut out carrot leaves out of green paper. You can also use yarn, twine, or ribbon to make the leaves.
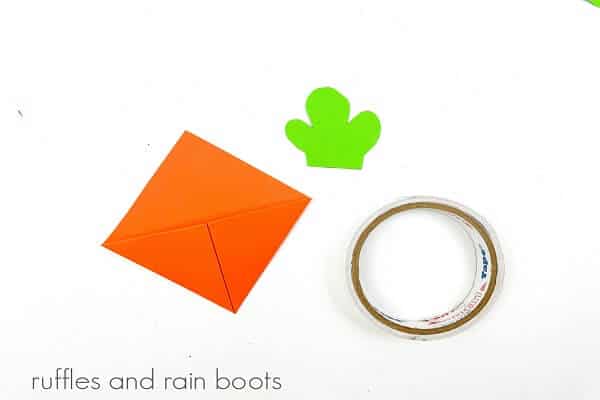
Glue or tape the leaves to the inside of the bookmark’s pocket.
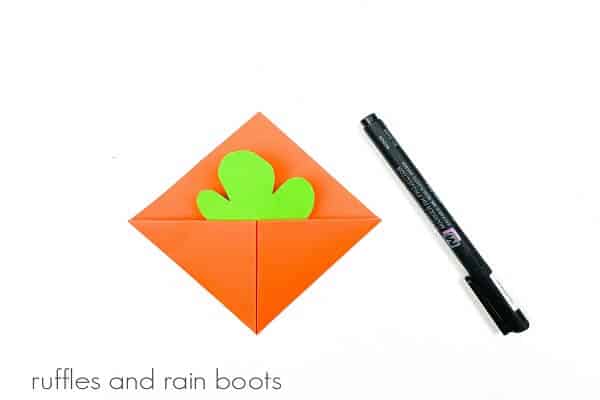
Draw eyes and a smiling mouth on the outside of the bookmark. I used two small circles for the eyes and added eyelashes.
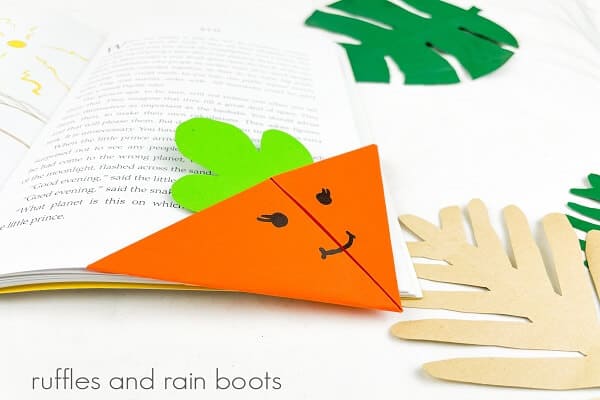
To use the origami bookmark, tuck the corner of the page into the pocket.
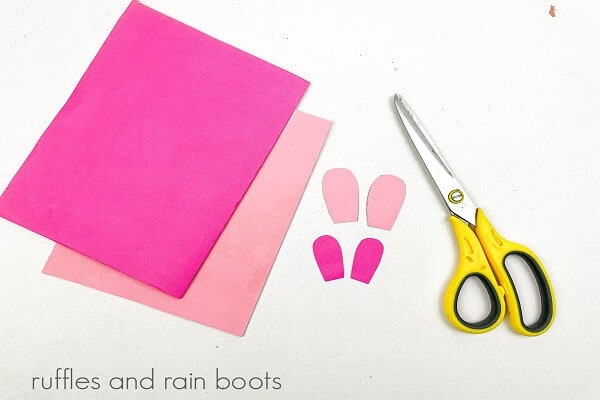
Supplies for the Bunny Corner Bookmark for Easter
- Light pink and dark pink paper
- Scissors
- Glue or Double-Sided Tape
- Black marker
How to Make an Origami Bunny Bookmark
Follow the folding steps identified above using the light pink paper. Turn the entire piece upside down so the pocket is facing down.
Cut two bunny ears from the light pink paper. Cut two smaller ear shapes from the dark pink.
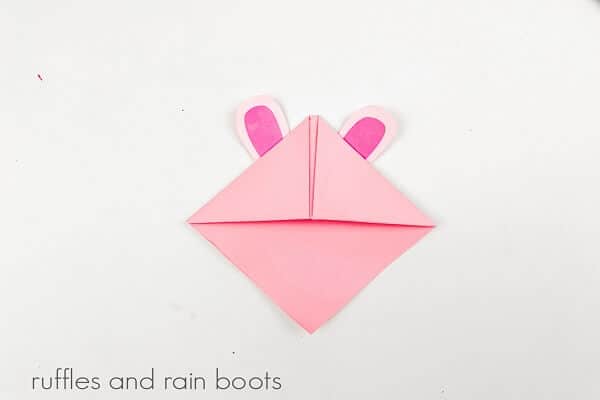
Glue the dark pink pieces onto the light pink pieces. Tape or glue them onto the back of the bookmark.
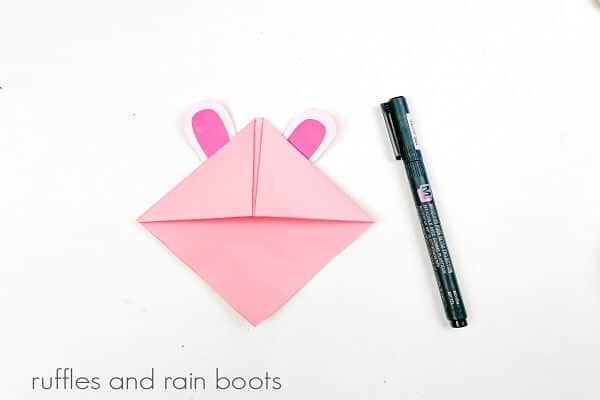
Draw eyes and a mouth and nose. Now you are ready to use the cute bunny rabbit bookmark.
Materials Needed to Make an Easter Chick Bookmark
For this Easter corner bookmark, we will need:
- Light yellow, medium yellow, and orange paper
- Glue or Double-Sided Tape
- Scissors
- Black Pen or Marker

How to Make an Easy Origami Chick Bookmark
Follow the folding steps above with the light yellow paper. The pocket should be facing up.
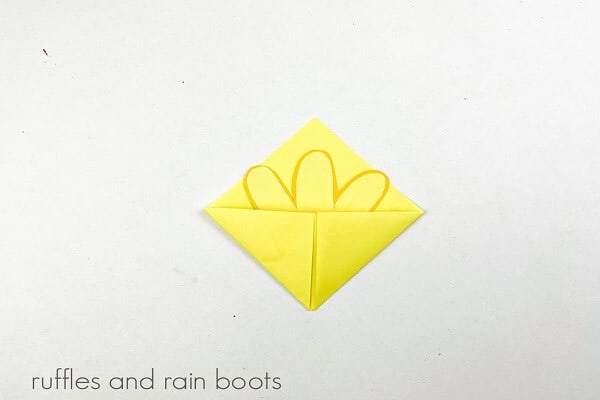
At this step, cut the chick feathers from the light yellow paper and cut them from the darker yellow paper just a bit larger. Attach them to the inside of the bookmark’s pocket.
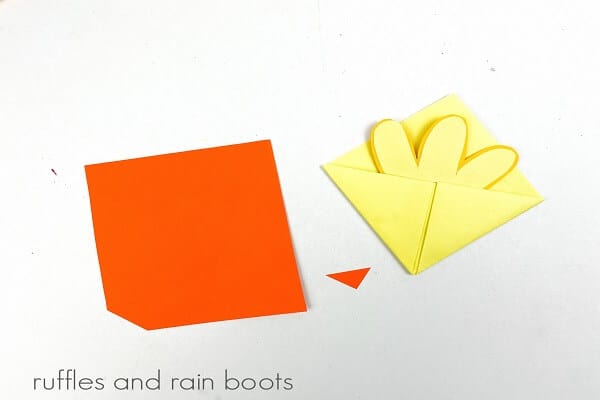
Cut the beak from the orange paper. I cut a single triangle and then cut that in half. That way, I was able to attach each piece to either side of the fold.
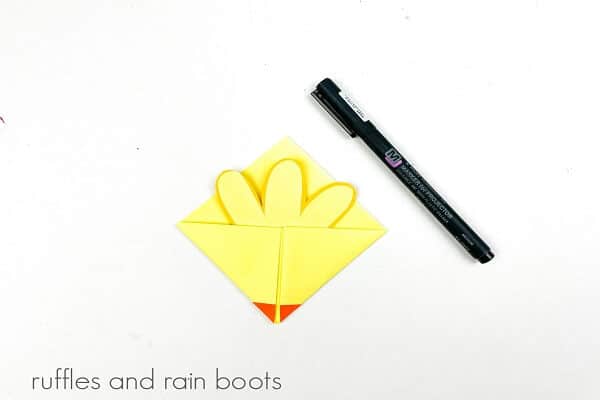
Draw the eyes. This charming Easter chick bookmark is ready to save your page!
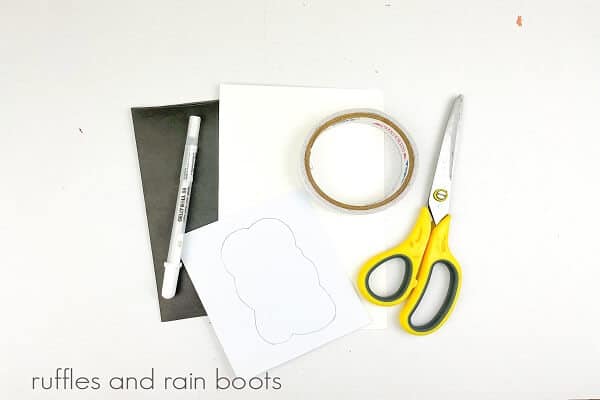
Here are the Supplies for the Easter Sheep Bookmark
- White and black paper
- Glue or Double-Sided Tape
- Scissors
- White Pen or Marker
How to Make an Origami Black Sheep Bookmark
Follow the steps from the carrot instructions for folding the paper. The pocket wil be facing up.
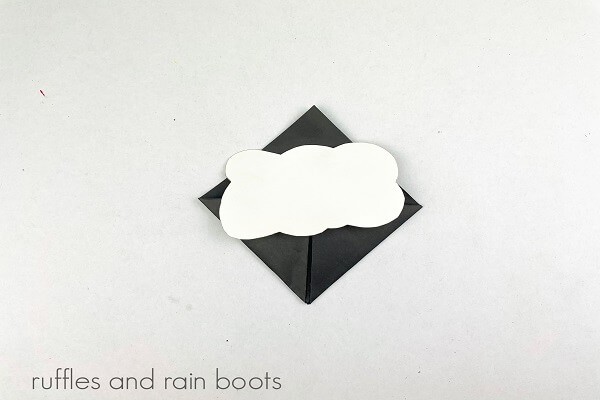
Cut the sheep’s wool from the white paper and attach it to the front of the bookmark. I cut a cloud-like shape to keep it easy for all ages.
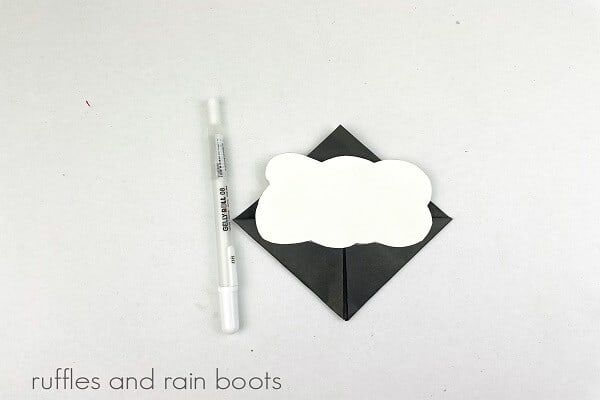
Draw the eyes, nose, and mouth with the white marker onto the black paper. The adorable sheep paper bookmark is done.
More Easter Recipes and Crafts You May Like
- DIY Bunny Coasters: A Dollar Tree Easter Craft: Make room on your side table for these sweet and show-stopping bunny coasters made from rope.
- Easy Easter Bunny Hot Cocoa Bombs: These are so much fun to make and use.
- Yarn Wrapped Buffalo Check Easter Eggs: These easy Buffalo check Easter eggs are quick to make and there are so many ways to customize them.
- Easy Easter Fudge for a Festive Treat!: Fast and fun, this Easter fudge recipe is a treat.
Please Save or Share
Your shares are how this site grows and I sincerely appreciate it. Please save this origami paper craft project to your favorite craft pin board or share it on Facebook.
Easy Easter Paper Origami Bookmark
You are going to love these adorable easy Easter Paper Origami Bookmarks! They are the perfect craft project for kids of all ages.
Materials
- Green, Orange, Dark and Light Pink, Black, White, and Yellow Construction Paper or Cardstock
- Black and white marker
Tools
- Scissors
- Glue or Double Sided Tape
Instructions
- Cut a piece of orange cardstock to form a 6×6 square.
- Fold the paper in half diagonally to form a triangle.
- Fold the front sheet of paper down so the tip touches the bottom of the triangle.
- Fold both sides up to meet the tip of the triangle, forming a pocket.
- Tuck the corners inside the pocket.
- Cut out carrot leaves out of green paper.
- Glue or tape the leaves to the inside of the bookmark.
- Draw ears and a mouth on the bottom outside of the bookmark.
- Now you are ready to use your bookmark!
How to Make an Origami Bunny Bookmark
Follow the folding steps with pink paper. Cut two bunny ears from the light pink paper. Cut two smaller ear shapes from the dark pink. Glue the dark pink pieces onto the light pink pieces. Tape or glue them onto the back of the bookmark. Draw eyes and a mouth and a nose with the black marker.
How to Make an Origami Chick Bookmark
Follow the folding steps with yellow paper. Cut the chick feathers from the yellow paper and attach them to the inside of the bookmark. Cut the beak from the orange paper and attach it to the bookmark. Draw the eyes with the black marker.
How to Make an Origami Black Sheep Bookmark
Follow the folding steps with black paper. Cut the sheep's wool from the white paper and attach it to the front of the bookmark. Draw the eyes, nose, and mouth with the white marker.
Meet the Creator
Hi there, I’m Sarah Nenni-Daher. I’m a crafty gal and always have at least 14 projects going at once. I am a crafter, designer, DIYer, and pattern maker. I share my creations here and in the Ruffles and Rain Boots® Shop.
Here at Ruffles and Rain Boots®, you’ll find DIY gnomes, crafts, gifts, cupcakes, laser crafts, and so much more. I love sharing video tutorials over on YouTube and chatting with other crafters in my Facebook groups. We’d love to have you!