
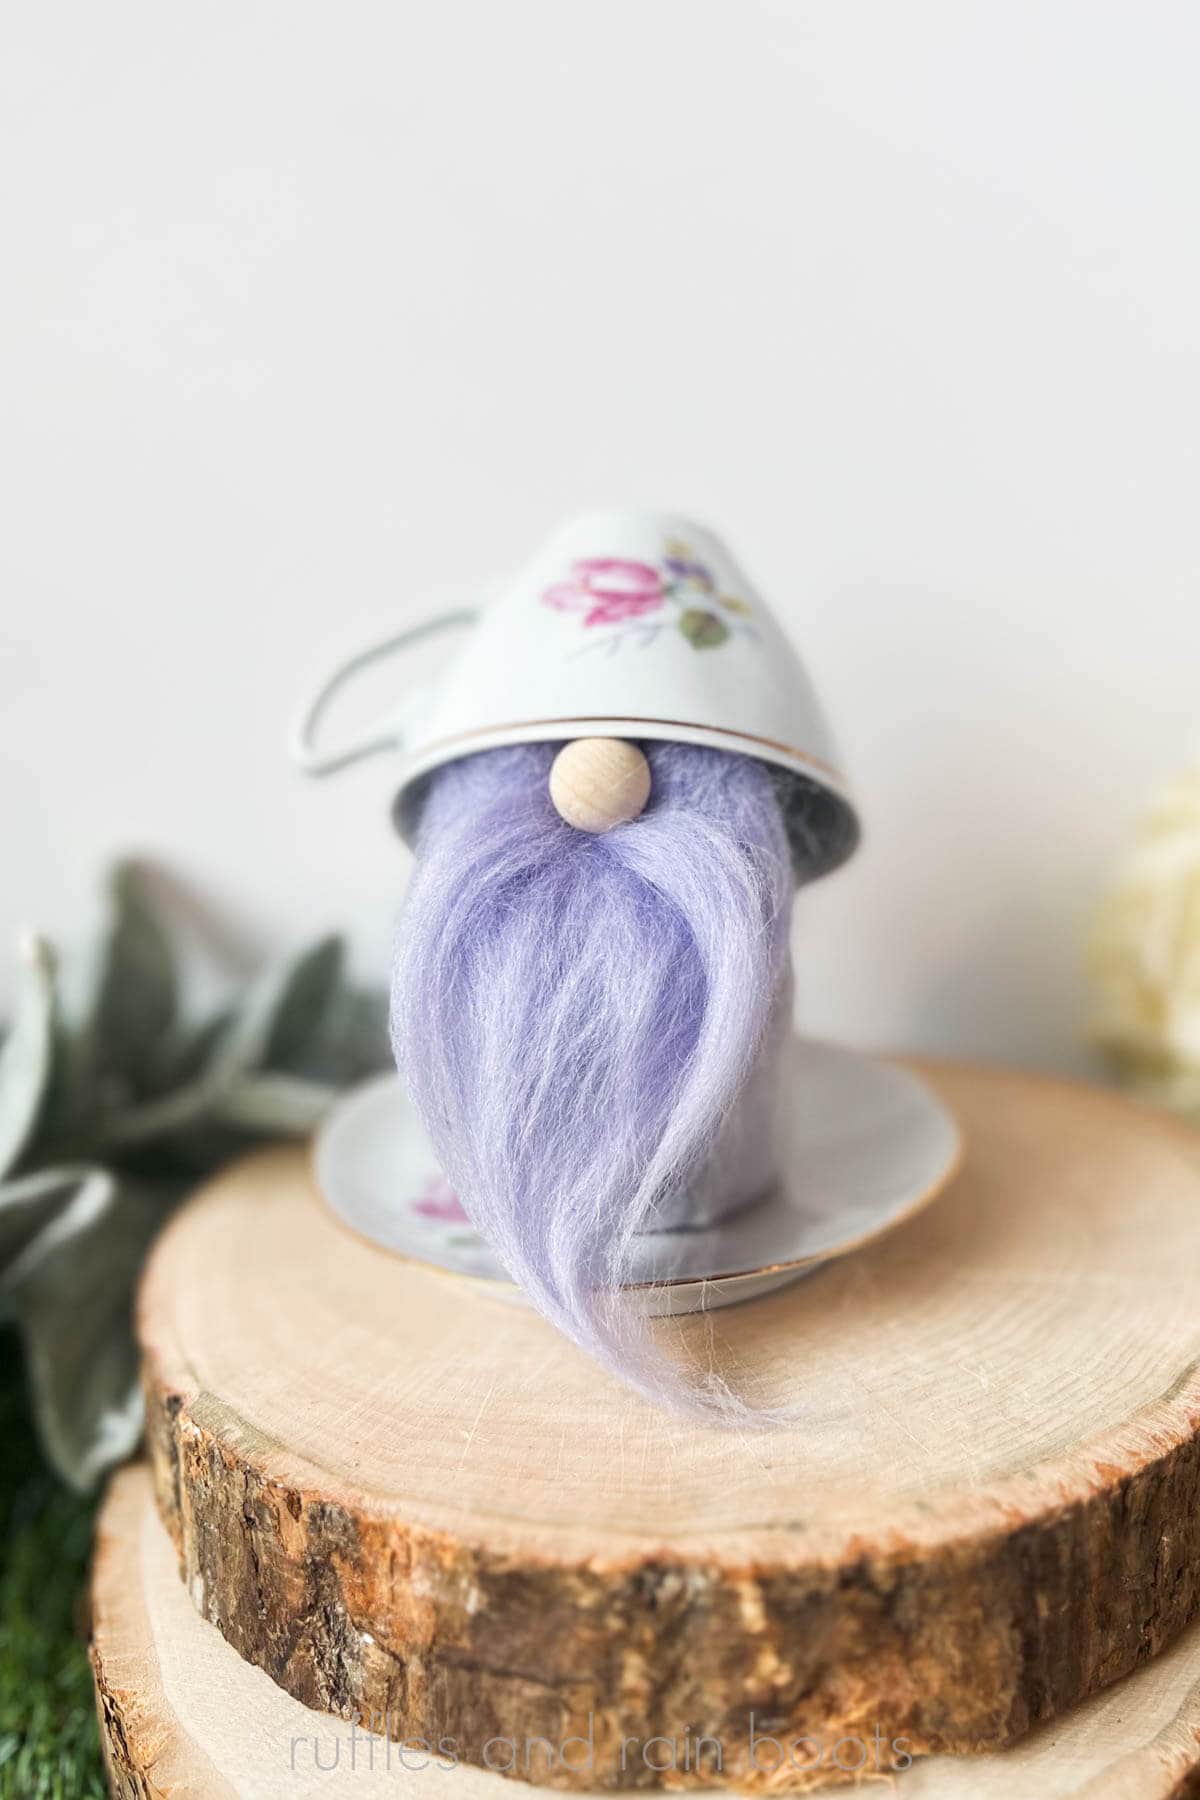
DIY Teacup Gnome Thrift Store Craft
This 10 minute DIY teacup gnome is a perfect afternoon craft. Head to the thrift store and gather up a cup and saucer to get started.
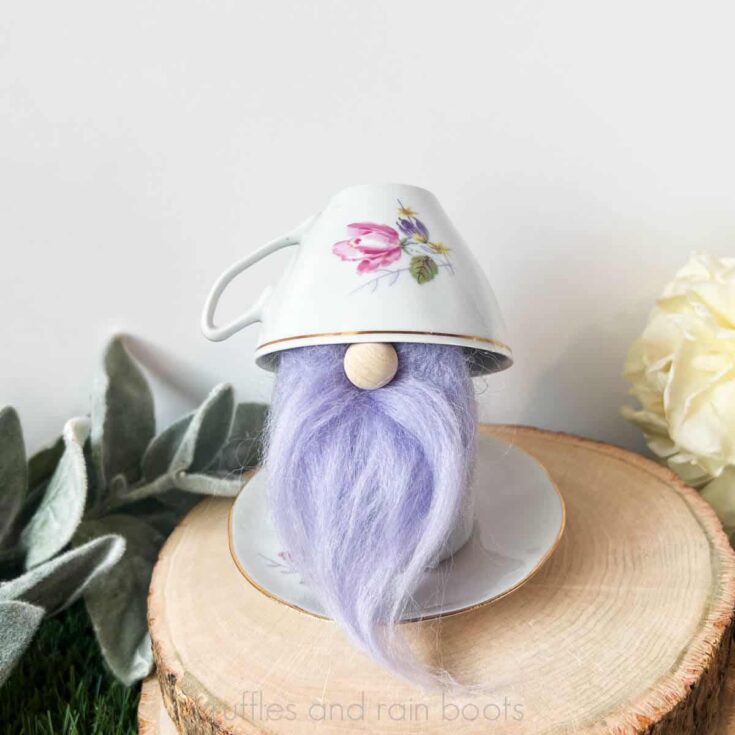
In this easy tutorial, you’ll learn how to turn teacups into the cutest little gnomes. Add flowers or other decorations to make it your own.

RELATED READING: Make This Cute Teapot Gnome Craft
What You'll Find On This Page
Teacup Gnome Craft Thrift Store Makeover
Here at Ruffles and Rain Boots, I’m still unpacking from our move and I found this adorable, dainty, miniature teacup and saucer from a thrift store trip. This little pair was calling me to add some Spring color to my decor.
In this easy and quick tutorial, you’ll use basic craft supplies to create this Spring gnome. It’s a fun craft for a rainy afternoon or if you just need a colorful pick-me-up.
If you want to make this but can’t get started right now, save this to a DIY Spring crafts pin board or share it on Facebook. Either way will make it easy to find when you’re ready to begin.
As an Amazon Associate, I could earn from qualifying purchases. There could be affiliate links within this article.
RELATED READING: DIY Garden Gnome – A Spring Sewing Project
Materials and Suggested Alternatives
I’m a big fan of using what you have on hand, even if you don’t have a well-stocked craft room. Below are the materials I used with a few ideas for other pieces to be subbed in.
Teacup and Saucer – Okay, so admittedly, there aren’t a lot of substitutions here but you could use a mini espresso cup and saucer.
Miniature Jar – In the video tutorial, I provide a few options like a Styrofoam® egg or cone from the dollar store. You could also use a few inches cut off a pool noodle or a learn how to make a sock gnome base.
Wool Roving – I used wool roving for the beard but faux fur works, too. If you have yarn, brush it out and it makes a great gnome beard. For more ideas, scan through this list in my “how to make a gnome beard” article.
Wood Round / Half Round – You can use anything for a gnome nose: wood ball, a bead, a pompom, pantyhose stuffed with Poly-Fil, an ornament, or even a button! Dig in the couch cushions for treasure. :)
RELATED READING: Topiary Gnome DIY with Moss and Flowers
Teacup Gnome DIY Video Tutorial
Each of the steps and instructions is listed below, but if you’re a visual learner, watch the DIY teacup gnome video tutorial. It’s less than 10 minutes, has a lot of funny commentary (if I do say so myself), and is fun to craft along with.
While you’re there, be sure to subscribe. I do like sharing my ideas and hearing how you would change them up.

How to Make a Teacup Gnome Step by Step Instructions
Keep this page open and follow along with the steps. Use the comments section (or visit me here on Facebook) if you have any questions.
First, remove any thrift store price stickers and goo. Then wash and dry the teacup and saucer.
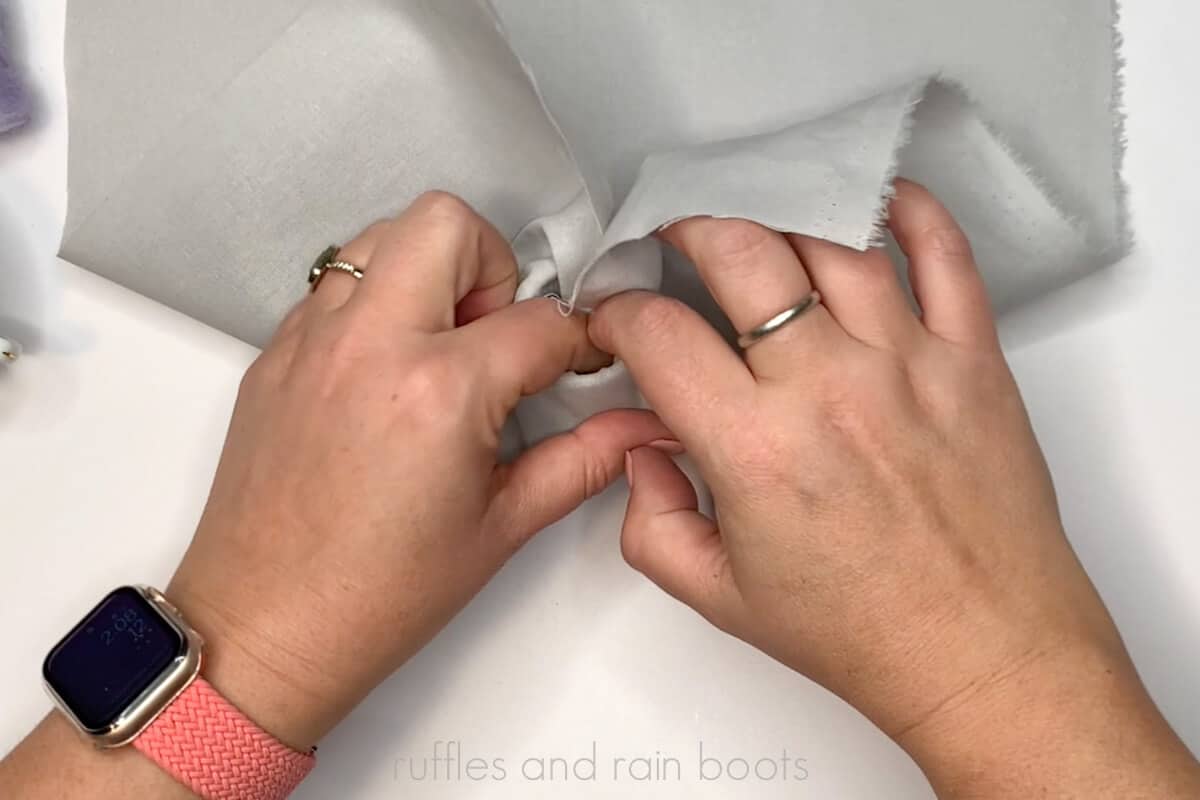
Next, create the base. I used a piece of cotton (a fat quarter from the craft store) to cover a small jar, tucking in the ends and pleating any material which could be seen.
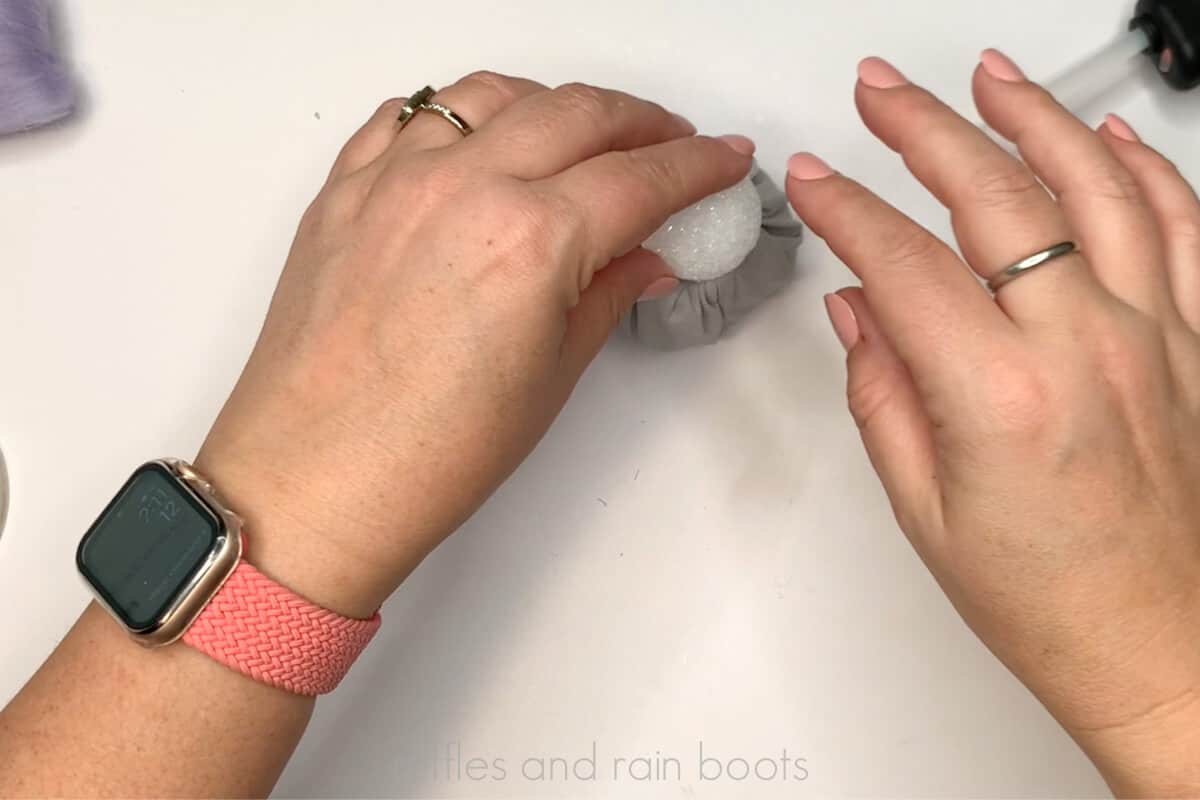
To create a stable place for the teacup to rest, I used a small foam ball and glued it to the top of the jar. This will allow me to tip back the teacup to show off the gnome’s face.
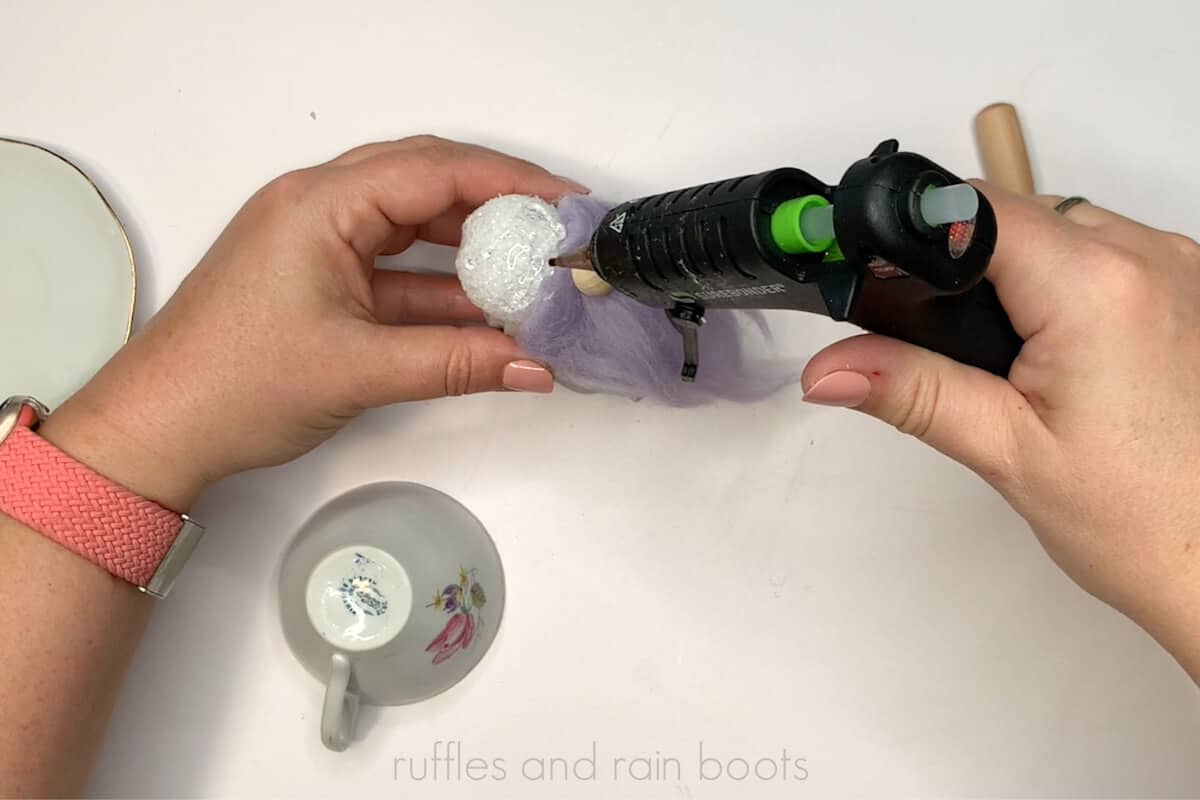
Pull off some wool roving, folding the top under to form a stable base to attach to the jar. I added a wisp of roving for a mustache, too. Glue the beard to the front of the jar. Next, glue on the nose after positioning the upside down teacup to get the proper placement.

Finally, glue on the teacup upside down to the foam ball. Hold until secure and then place the gnome onto the saucer for display.
More DIY Gnome Tutorials You Might Like
- Elegant DIY Butterfly Gnome – Grab a few craft store butterflies and and you’ll have this beautiful, sweet butterfly gnome for spring or summer decor.
- Easy Clay Pot Gnome – Check out that hat, the brim, and those flowers!
- Dollar Tree Wood Gnome – Use dollar store vinyl and a wood scrap to make this cute set of gnomes.
Please Save or Share This Spring Gnome DIY Tutorial
Your shares are how this site grows and I am sincerely grateful. Please save this cute teacup gnome to a Spring DIY pin board or share it with a crafty group on Facebook.

DIY Teacup Gnome
Create a sweet and elegant teacup gnome using this easy 10 minute tutorial. With basic craft supplies and a thrift store find, this no-sew gnome comes together quickly and is ready for display in no time.
Materials
- Small jar (no lid needed)
- Cotton Fabric
- Small Styrofoam Ball
- 1/2 inch Wood Round
- Wool Roving or Small Piece of Faux Fur
- Teacup and Saucer
Tools
- Scissors
- Hot Glue Gun
- Optional, Iron or Heat Press for Fabric
Instructions
- Clean the teacup and saucer and let completely dry.
- Cut a piece of the cotton cloth so that all of sides can be covered and the ends tuck into the jar. Press the small piece of cotton fabric, if desired, before pleating the sides.
- Use hot glue to affix the small ball to the jar, sitting atop the opening with the stuffed fabric.
- Rip off wool roving to size or cut the faux fur into a gnome beard. Glue it to the front of the jar. Optional: add a wisp of roving or fur to form a mustache. Glue on the nose directly to the roving.
- Affix the teacup upside down on the top of the ball with hot glue. Place the teacup gnome on the saucer and decorate or display.
Notes
Check out hundreds of free gnome tutorials and gnome patterns at Ruffles and Rain Boots.
Meet the Creator
Hi there, I’m Sarah Nenni-Daher. I’m a crafty gal and always have at least 14 projects going at once. I am a crafter, designer, DIYer, and pattern maker. I share my creations here and in the Ruffles and Rain Boots® Shop.
Here at Ruffles and Rain Boots®, you’ll find DIY gnomes, crafts, gifts, cupcakes, laser crafts, and so much more. I love sharing video tutorials over on YouTube and chatting with other crafters in my Facebook groups. We’d love to have you!