
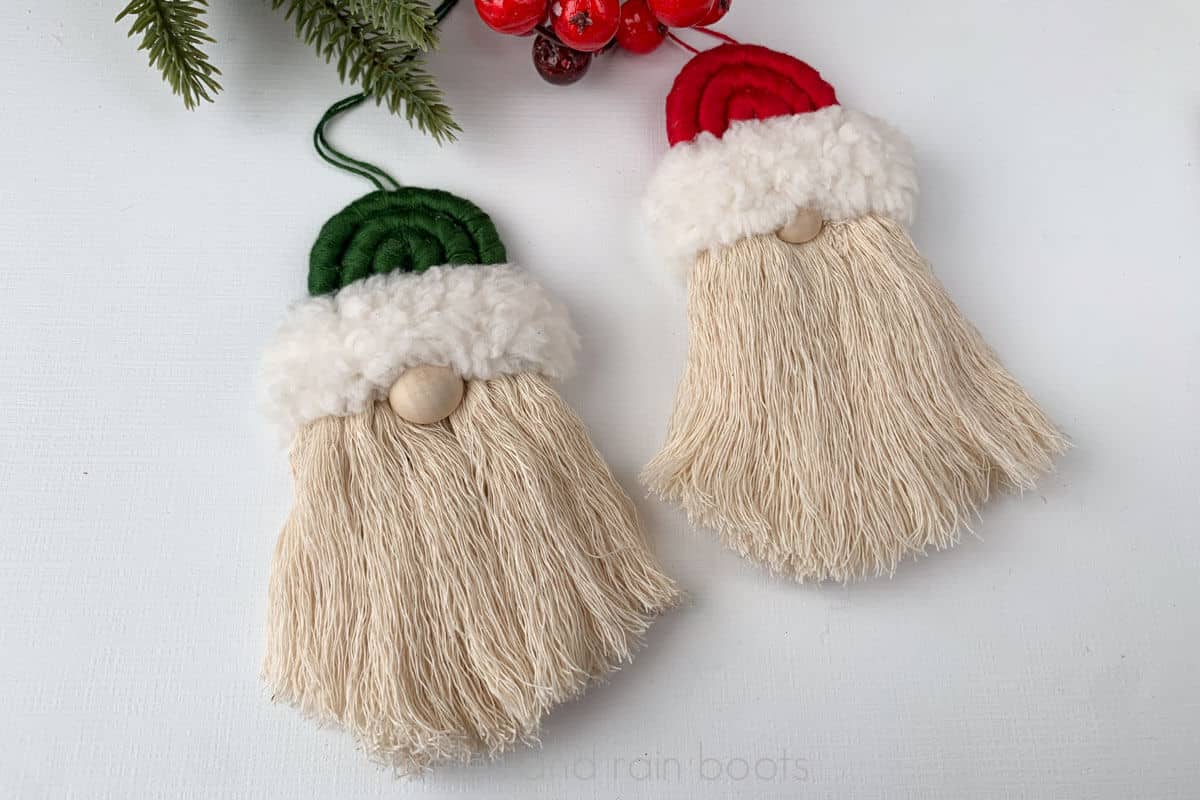
DIY Wrapped Rope Santa Ornament
This beginner, wrapped rope Santa ornament is a fun holiday craft. You don’t have to even know a single macrame knot to get started!
To make this adorable Santa or gnome ornament, grab some macrame rope (not cord), embroidery thread, and a nose. Follow this easy written tutorial or watch the Santa ornament video tutorial.
RELATED READING: Make These Easy Rope Gnome Ornaments (Quick DIY)
What You'll Find On This Page
DIY Wrapped Santa Ornament Using Rope
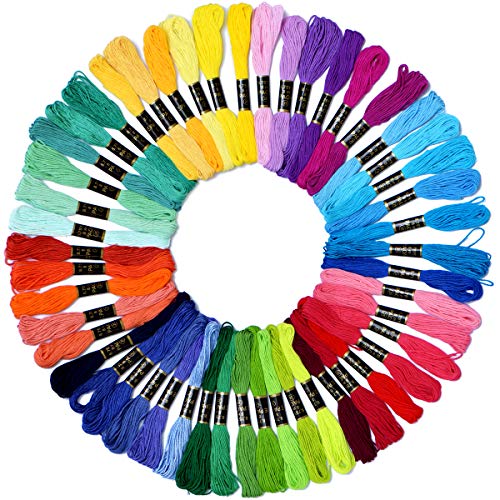
Here at Ruffles and Rain Boots, I’ve amassed quite the collection of embroidery thread… Skeins upon skeins of all colors of the rainbow appeared (out of nowhere) when I packed up my craft room before moving to Texas.
I figured it was time to do some crafts with all that thread. I started with this gnome string art, then made a unicorn string art, and finished off a bit more with this Baby Yoda string art (Grogu never looked so cute).
But, I still have more embroidery thread so let’s use it with this easy Christmas ornament idea.
If you like this mini macrame project idea but can’t get started right now, save this page to a DIY holiday crafts pin board or share it to Facebook. Either will make it easy to find when you’re ready to begin.

As an Amazon Associate, I could earn from qualifying purchases. There could be affiliate links within this article.
Materials Needed for This Santa Christmas Ornament
Obviously, you’re going to need some embroidery thread. Using my measurements, you will use about 1.5 skeins for each ornament. There are some beautiful embroidery thread kits or you can buy them individually at the craft store.
One thing you might want to buy online is the rope. Too big and you’ll run through too much thread; too small and you’ll be wrapping until you get a cramp. I picked up this rope in “rice white” in the smallest length.
Here is a quick list of what the supplies you’ll need:
- 33 inches (total) of rope
- 1.5 skeins of embroidery thread
- 1/2 inch wooden bead or flat back for a nose
- trim (Sherpa fleece, ribbon, or yarn)
Note: if you choose a different thickness of rope, the amount of embroidery thread will change.
Beginner Macrame DIY Gnome or Santa Ornament Video Tutorial
If you’re a visual learner, I have made a wrapped rope Santa ornament video tutorial that details the steps for this fun Christmas craft. While you’re there, be sure to subscribe.

RELATED READING: Macrame Gnome in a Hat Ornament (So Cute)
Ways to Use and Display These DIY Santa or Gnome Hangers
You might think these are the perfect ornament – and they are! But here are a few more ways to get some use out of this fun wrapped rope craft.
- Package Tie – Decorate a small package with this big fella.
- Wreath Decoration – Use one or more of these tied to a simple evergreen or magnolia wreath to up the “WOW factor.
- Door Hanger – These adorable gnomes or Santas are an easy way to decorate interior doors. Create a longer hanger, add a few small jingle bells, and display away.

How to Make This Macrame Gnome Ornament
To make this quick macrame project idea, keep this page open and follow along. I’ve included pictures here, but it does show each step a little more clearly in the video linked above.
If you prefer to print off this tutorial without images, scroll to the bottom of the page. You will see a print button.
First, use the scissors to cut rope into the following lengths: 12 inches, 11 inches, 10 inches.
Lay the shortest piece folded in half. Fold the middle length around it (lining up the ends) and follow up with the longest. It should look like a rainbow.

Use the ruler to measure from the top, rounded portion to the height you want for the colored portion of the hat. Mine was just over 2 inches. Mark the rope at this measurement with a pencil or light marker with dots all the way across. These are the starting and stopping points of the embroidery thread.

Lay one inch of embroidery thread between the marks on the shortest piece facing toward the opposite end. Wrap the embroidery thread to cover.
Please refer to the video or the images to make this step clear. This will hide the start of the wrapping.
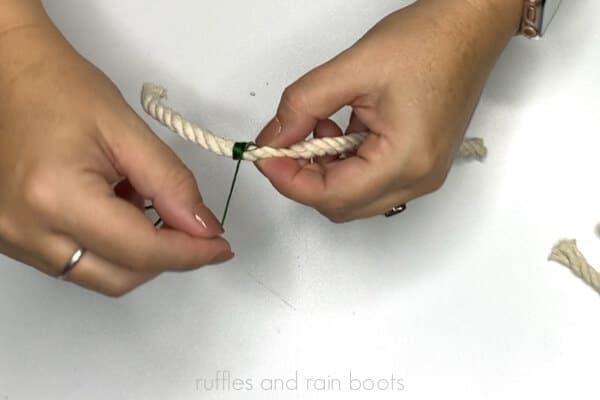
Wrap the rope completely in between the marks. Bend the rope and smoosh the threads down to avoid any blanks spaces when the rope is bent into shape.

NOTE: You can use the masking tape to wrap up the ends of the rope to make it easier and faster to wrap the embroidery thread.
When you have reached the end position, tie off a knot. Repeat the process for the middle and longest length ropes.
Use a hot glue gun or a needle and thread to join the three lengths or rope together. If using hot glue, hold the pieces in place until the glue sets. If using a needle and more of the same embroidery thread as I did, join the bottoms and tops.

Add a hanger of embroidery thread by using the needle to punch through the back of the middle and longest ropes. Tie it off.
Cut a piece of Sherpa fleece, ribbon, or chunky yarn to cover the join of the embroidery thread and rope, starting at the back. Glue the nose to the rope and glue on the trim over and around it.

Unfurl the rope below the trim and brush out with the slicker brush or a comb. Trim with scissors or a rotary cutter into a v-shape or a rounded u-shape for a beard.

More Crafts You Might Like
- DIY Rope Gnome Ornaments – Using only macrame cord and a small wood bead, you can make the cutest little holiday hangers.
- Dollar Tree Macrame Gnome Ornament – Pick up some shower curtain rings and a cotton mop and you’re well on your way to being done with this cute DIY.
- Rope Ghost DIY for Halloween – This isn’t your spooky kind of Halloween decor because he’s just too cute!
- Adorable Rope Jack-O-Lanterns – Another Dollar Tree craft idea for fall and Halloween are these dressed up rope pumpkins.

Please Save or Share This Craft Idea with Rope
Your shares are how this site grows and I am sincerely grateful. Please save this to a DIY ornaments pin board or share it with a crafty group on Facebook.

Macrame Santa Ornament

Make this DIY Macrame Santa Ornament using a bit of rope, embroidery thread, and this free tutorial. Full video tutorial and instructions are included. This craft is good for adults, tweens, and older kids. Hang this adorable Christmas ornament idea on the tree or use this gnome ornament as a package tie decoration or on a wreath!
Materials
- Rope (33 inches)
- Embroidery Thread (1.5 per Ornament)
- Sherpa Fleece (or Yarn or Ribbon) for Trim
- 1/2 inch Wood Bead, Ball, or Other Nose
- Masking Tape
Tools
- Ruler
- Scissors and/or Rotary Cutter
- Needle, Optional
- Cutting Mat, Optional
- Hot Glue and Glue Gun
- Pencil or Light Marker
- Slicker Brush or a Comb
Instructions
- Cut rope into the following lengths: 12 inches, 11 inches, 10 inches.
- Lay the shortest piece folded in half. Fold the middle length around it (lining up the ends) and follow up with the longest. It should look like a rainbow.
- Use the ruler to measure from the top, rounded portion to the height you want for the colored portion of the hat. Mine was just over 2 inches. Mark the rope at this measurement with a pencil or light marker with dots all the way across. These are the starting and stopping points of the embroidery thread.
- Lay one inch of embroidery thread between the marks on the shortest piece facing toward the opposite end. Wrap the embroidery thread to cover. Please refer to the video or the images to make this step clear. This will hide the start of the wrapping.
- Wrap the rope completely in between the marks. Bend the rope and smoosh the threads down to avoid any blanks spaces when the rope is bent into shape.
NOTE: You can use the masking tape to wrap up the ends of the rope to make it easier and faster to wrap the embroidery thread. - When you have reached the end position, tie off a knot.
- Repeat for the middle and longest length ropes.
- Use a hot glue gun or a needle and thread to join the three lengths of rope together. If using hot glue, hold the pieces in place until the glue sets. If using a needle and more of the same embroidery thread as I did, join the bottoms and tops only on the backside to hide the knots.
- Add a hanger of embroidery thread by using the needle to punch through the back of the middle and longest ropes. Tie off.
- Cut a piece of Sherpa fleece, ribbon, or chunky yarn to cover the join of the embroidery thread and rope.
- Glue the nose to the rope and glue on the trim over and around it.
- Unfurl the rope below the trim and brush out with the slicker brush or a comb. Trim with scissors or a rotary cutter into a v-shape or a rounded u-shape for a beard.
Recommended Products
As an Amazon Associate and member of other affiliate programs, I earn from qualifying purchases.

Meet the Creator
Hi there, I’m Sarah Nenni-Daher. I’m a crafty gal and always have at least 14 projects going at once. I am a crafter, designer, DIYer, and pattern maker. I share my creations here and in the Ruffles and Rain Boots® Shop.
Here at Ruffles and Rain Boots®, you’ll find DIY gnomes, crafts, gifts, cupcakes, laser crafts, and so much more. I love sharing video tutorials over on YouTube and chatting with other crafters in my Facebook groups. We’d love to have you!