
How to Make Rope Gnome Ornaments
Learn how to make rope gnome ornaments using only a few basic craft supplies you can pick up at the store. These Christmas ornaments are beautiful – they look like those you’d find at a high end store!
And because the design is so simple, you can make these as large or as small as you would like. These macrame gnome ornaments would be perfect on a Christmas tree or a package tie.

RELATED READING: Make Any or All of These DIY Gnome Ornaments
What You'll Find On This Page
DIY Macrame Gnome Ornaments
Here at Ruffles and Rain Boots, I’m known for sharing Christmas gnomes and gnome patterns. Over the past year, I’ve been leaning into macrame as a quiet craft to add to my skill set.
I’m no expert, but easy crafts like these help me to practice while creating adorable DIYs. Whether you want this for beach gnome decor or for Christmas, this macrame craft idea is a winner for all skill levels.
If you love this project but need to gather supplies, save this fun macrame project for beginners to a crafts pin board or share it on Facebook. Either way will make it easy to find when you’re ready to begin.

As an Amazon Associate, I could earn from qualifying purchases. There could be affiliate links within this article.
Tips for Making These Christmas Ornaments
- Always use some painter’s or artist’s tape to keep the cuts from unraveling. Cut in the center of the tape so both sides are protected.
- Use hot glue sparingly. Macrame cord holds knots well – the cotton rope is great at gripping and we don’t want any glue to show through.
- Use a flat back or half wood ball, a wooden bead, or a pompom for a nose. You can even needle felt small spheres with left over roving.
- It is best to cut macrame cord (any size) with very sharp scissors.
- When creating the hat, I prefer to just cover the top of the beard for a very full beard. For a more streamlined, thin beard, use a longer tail on the hanger piece and wrap lower on the brushed out beard.

DIY Rope Gnome Ornament Video Tutorial
If you’re a visual learner like I am, I’ve got you covered. Watch the step by step rope gnome ornament video tutorial here.
While you’re there, please subscribe. We have a lot of fun on the channel!

RELATED READING: DIY This High End Macrame Gnome Tassel
Supplies You Will Need for This Macrame DIY
Below are what I used, but check your stash. If you have a medium heavy or heavy weight yarn, those will work for this project, as well.
- 5 mm (or 6 mm) Macrame Cord
- 3 mm Macrame Cord
- 1/4 inch Wood Half Round or Wood Bead
- Brush or Comb
- Painter’s or Artist’s Tape
- Small Hot Glue Gun and Glue Sticks
- Sharp Scissors
- Optional: Cutting Mat and Rotary Cutter

How to Make Macrame Gnome Ornaments
Below is the step by step written tutorial. Keep this page open and follow along. If you prefer a printable version without images, scroll to the bottom of this page.
Using the thicker macrame cord, create a knotted loop that is no less than 3 inches in height to make an ornament hanger or to tie onto packages (you can make a larger hanger). Make sure there is a tail to the knotted portion to hide under the hat and avoid the knot coming undone.
Leave a long tail (minimum 14 inches, but 16 is good) and be sure it is taped to avoid the macrame cord unraveling when cut.

Next, using the thicker macrame cord, wrap 8 times around your hand (four fingers). This should be 54 inches using 5 mm cord. Remove and lay on the table.

Using the thinner macrame cord (3 mm), cut at least a 16 inch piece to use to knot the bundle of cord made in the previous step AND to tie onto the bottom of the hanger made in step 1.

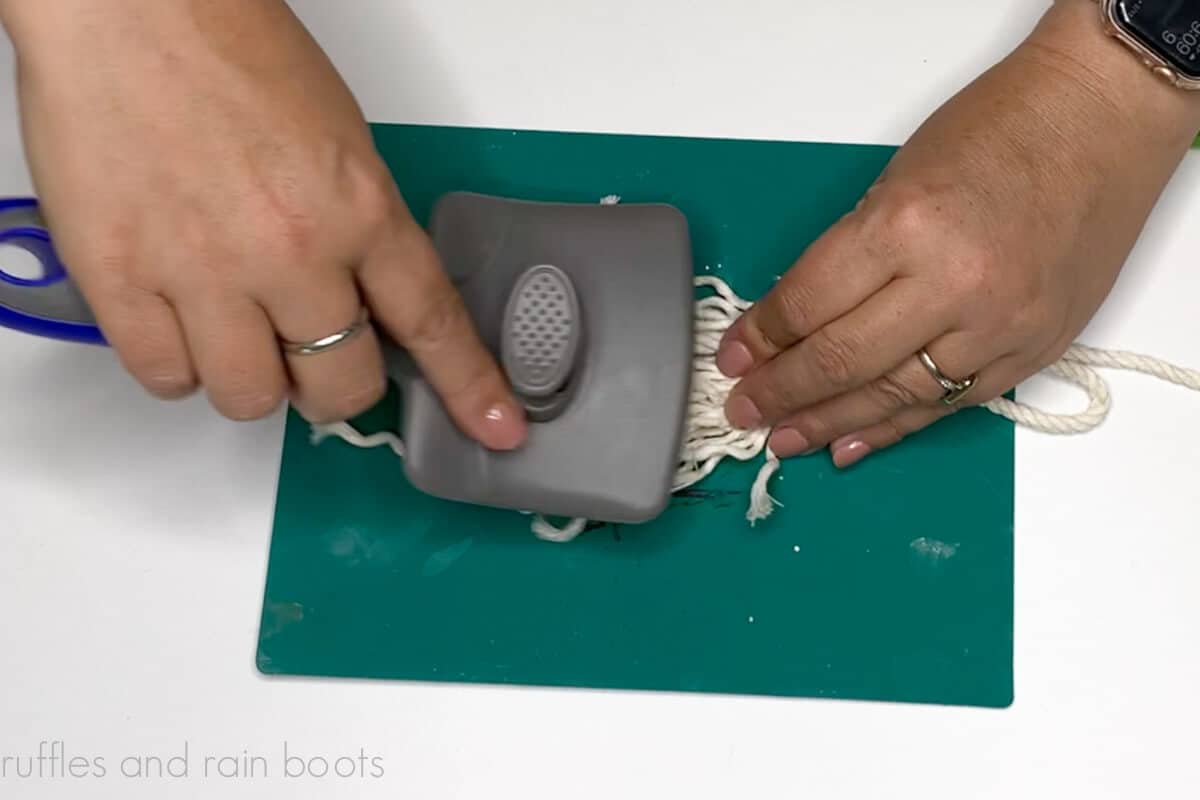
Next, with the hanger and hanger tail portion pushed aside, unravel and brush out the beard which is everything below the knot. It will look like a hot mess, but trust the process.
Using the hanger’s long tail, wrap it around the knot (starting just above it) and securing each layer with glue. Apply the glue to the underside of the layer above, adding a small amount of width to each layer. This becomes the hat and you can choose how many layers to add.
Note: do not add the final layer of the hat until the next step is completed.

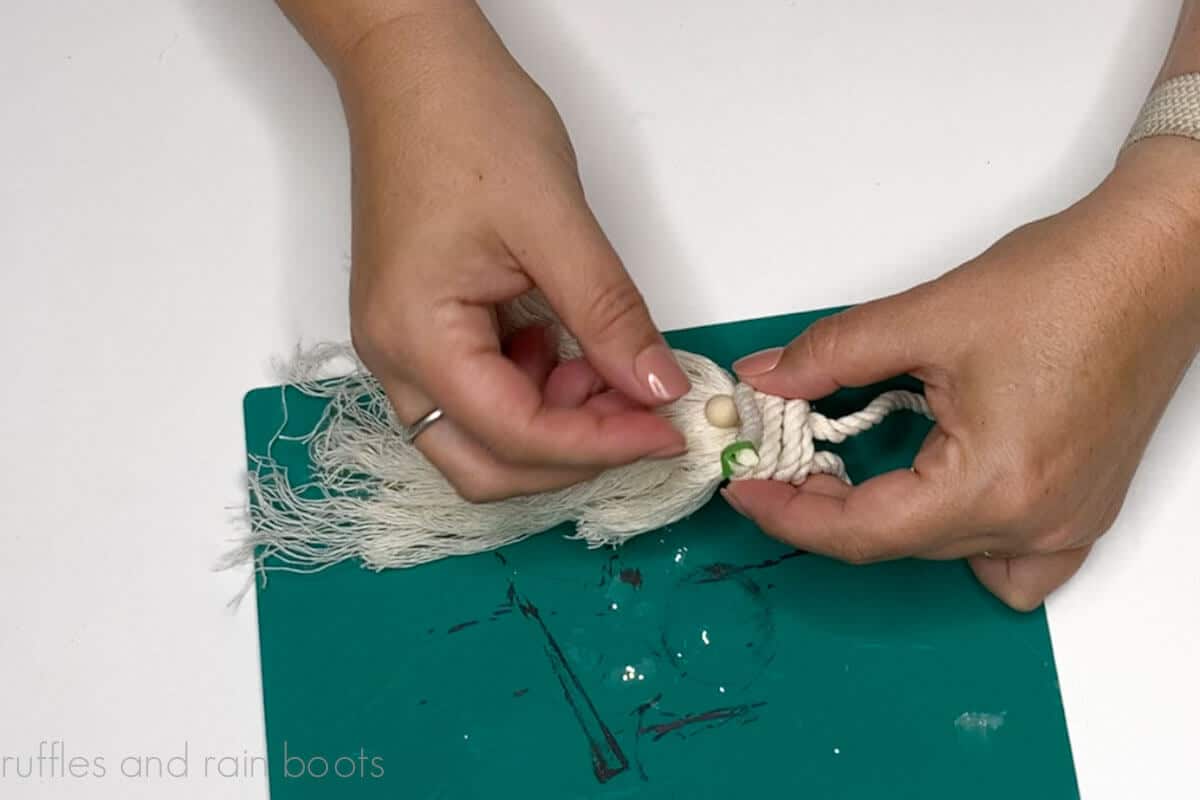
Where the final row of the hat will be, glue a 1/4 inch flat back wood round or a bead. Wrap the final layer of the hat, adding glue to secure the nose. Seal the end with glue to prevent unraveling after securing the final row.
Finally, trim the beard to your desired shape. I used painter’s tape to adhere the beard to a cutting mat and a rotary cutter to create a wide V-shape.

More Christmas Gnome Ornament Projects
- DIY Gnome Tassel – This quick and easy gnome craft makes a gorgeous ornament for a tree or to decorate.
- Easy Gnome Ornament for Christmas – If you want a beautiful way to use up scraps, make these.
- Pompom Gnome Ornaments – Use a bit of felt and some chunky yarn for a fun afternoon craft.
Please Save or Share This Easy Christmas Ornament Idea
Your shares are how this site grows and I am sincerely grateful. Please save this to a DIY ornaments pin board or share it with a crafty group on Facebook.

Rope Gnome Ornaments

Use this free tutorial to create rope gnome ornaments, complete with a fluffy gnome beard! This fun Christmas ornament is perfect for a craft idea to make and sell this holiday season, as they do not take a long time and only use a couple of supplies. This beginner macrame craft idea will use two macrame cord sizes, scissors, and glue for assembly. These rope gnomes are great for Christmas tree ornaments or package ties.
Materials
- 5 or 6 mm Macrame Cord
- 3 mm Macrame Cord
- 1/4 wood flat back round or wood bead
- Painter’s or Artist’s Tape (low tack tape)
Tools
- Small Hot Glue Gun and Glue Sticks
- Sharp Scissors
- Brush or Comb
- Optional: Cutting Mat and Rotary Cutter
Instructions
- Using the thicker macrame cord (5 mm), create a knotted loop that is no less than 3 inches in height to make an ornament hanger or to tie onto packages. You can make a larger hanger for doorknobs, swags, or other projects. Make sure there is a tail to the knotted portion to hide under the hat and avoid the knot coming undone.
Leave a long tail (minimum 14 inches, but 16 is better) and be sure it is taped to avoid the macrame cord unraveling. - Using the thicker macrame cord, wrap 8 times around your hand (four fingers). This should be 54 inches of 5 mm cord. Remove and lay on the table.
- Using the thinner macrame cord (3 mm) cut at least a 16 inch piece to use to knot the bundle of cord made in the previous step AND to tie onto the bottom of the hanger made in step 1.
- With the hanger and hanger tail portion pushed aside, unravel and brush out the beard which is everything below the knot. It will look like a hot macrame mess, but trust the process.
- Using the hanger’s long tail, wrap it around the knot (starting just above it) and securing each layer with glue. Apply the glue to the underside of the layer above, adding a small amount of width to each layer. This becomes the hat and you can choose how many layers to add.
Note: do not add the final layer of the hat until step 6 is completed. - Where the final row of the hat will be, glue a 1/4 inch flat back wood round or a bead. Wrap the final layer of the hat, adding glue to secure the nose. Seal the ends with glue to prevent unraveling.
- Optional: Lay the ornament on a cutting mat, secure it with tape, and use a rotary cutter to shape the beard.
Notes
Use some painter’s or artist’s tape to keep the cuts from unraveling. Cut in the center of the tape so both sides are protected.
Macrame cord holds knots well, so use glue sparingly. The cotton rope is great at gripping and we don’t want any glue to show through.
Meet the Creator
Hi there, I’m Sarah Nenni-Daher. I’m a crafty gal and always have at least 14 projects going at once. I am a crafter, designer, DIYer, and pattern maker. I share my creations here and in the Ruffles and Rain Boots® Shop.
Here at Ruffles and Rain Boots®, you’ll find DIY gnomes, crafts, gifts, cupcakes, laser crafts, and so much more. I love sharing video tutorials over on YouTube and chatting with other crafters in my Facebook groups. We’d love to have you!