
DIY Wine Charms and Free SVG
Learn how to DIY wine charms with a laser using this free bundle of book club SVG designs. I will share the tips and tricks I used to get a dark, easy to read laser engrave and how to keep the designs from smudging.
This tutorial is for new laser project ideas seekers, no matter which laser set up you have. These files and instructions will work for xTool M1, Glowforge Aura, and other laser cutters and engravers and include a commercial license so you can sell physical products.
RELATED READING: xTool M1 – A Beginner’s Guide to a Craft Laser
Note: These SVG files can be used with all lasers (diode, CO2, etc.) and with Cricut, Silhouette, and other blade cutting machines. Download link is below.
As an Amazon Associate, I could earn from qualifying purchases. There could be affiliate links within this article.
What You'll Find On This Page
Laser Cut Wine Charms – A Laser Craft for Beginners
Here at Ruffles and Rain Boots, I’ve been creating with the xTool M1 laser for a few months now. It’s been a pretty fun experience to test all of the features and functions as someone new to laser cutting and engraving.
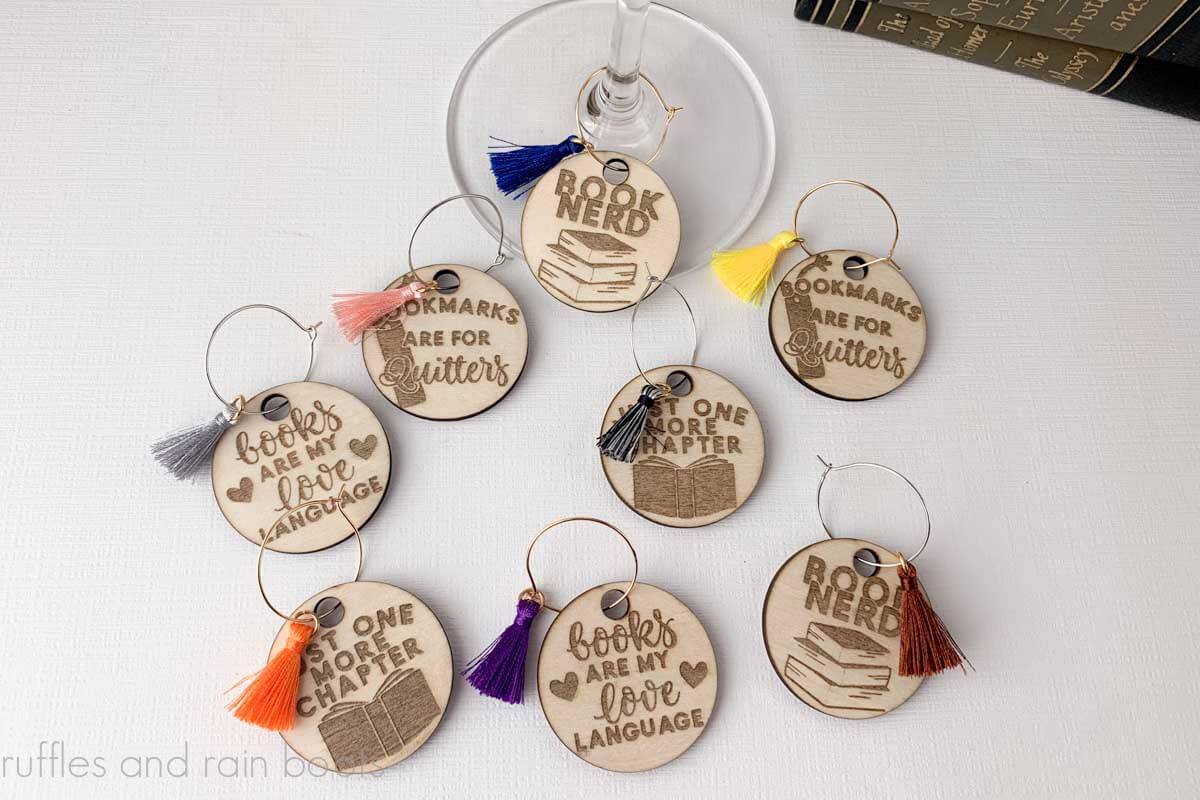
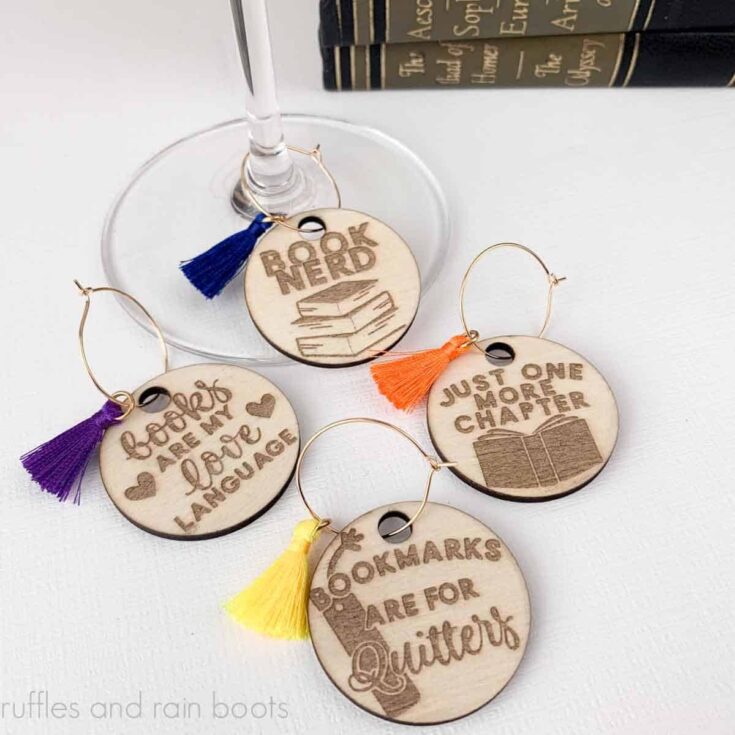
For this beginner laser project idea, I chose to create a set of wine glass charms I could give to my mother for she and her book club friends to enjoy each week. It was a great way to get familiar with a couple of functions and processes with a small project.
RELATED READING: How to Make a Wood Door Sign with a Laser
Laser Functions Used in This xTool M1 Project Idea
You will utilize a few of the processes your laser machine can perform, as well as a couple of techniques when creating this set of wood wine charms with your laser:
- engrave wood with a laser
- cut soft wood with a laser
- reduce smudges on engraving projects
- sealing wood projects

Note: you do not have to use the xTool to create these wooden wine charms. Follow the same steps in order for any laser or follow this tutorial to learn How to Make a Keychain with Cricut.
Additionally, we will use a few accessories in this tutorial you might not be familiar with: air assist (any type for any laser) and a honeycomb base plate. Neither of these are necessary for this project to come out perfectly, so if you don’t have them, don’t fret. I do recommend the air assist for all wood projects.
If you love this project but need to gather supplies to make it, please save this to a laser project ideas pin board or share it on Facebook. Either will make the free book club cut files and instructions easy to find when you’re ready to begin.

Interested in Getting a Laser But Don’t Know Which One?
I own three types of lasers right now: CO2, diode, and fiber (infrared). Below are summaries of each and suggestions on materials. If you have questions, please ask! Not all lasers are right for those looking to start a business or side hustle. If that’s you, choose the P2 or the S1.
- xTool P Series – A fully-enclosed CO2 laser, perfect for cutting acrylic and wood. This is an unrestricted laser when it comes to acrylic, wood, slate, etc. and it’s my top choice.
- xTool S1 – The option I have is a 40 watt diode laser which cuts some acrylic, wood and does amazing engravings. This laser has some acrylic restrictions (no clear, mirror, translucent; primarily opaque) but powers through wood.
- xTool M1 ULTRA – The updated version of the ground-breaking xTool M1 shows up to the party with a printer (can print on wood), a laser, a set of blades, foil, and embossing, as well as a pen tool. Great for crafters!
- xTool F2 – This dual laser is portable! It’s the best-selling, landmark setting laser that contains a diode and an infrared laser. It’s perfect to take to shows, markets, and events.
- WeCreat Vista – This is a fun tool to have if you’d like to work primarily with tumblers or wood. The patented FlipLaser design turns the laser head 90 degrees, allowing you a great tumbler engraving experience.
RELATED READING: Glowforge Aura vs xTool M1 – Which is Better?
How to Make Laser Wine Charms with xTool M1 Laser
For this tutorial, I will be using the xTool M1 laser (10W) and xTool Creative Space. As I am a visual learner, I’ve prepared the entire step by step process below as a written tutorial (and printable) and also created a DIY wood wine charms video tutorial.
Keep this page open and follow along with each step or watch the full laser tutorial video. Use the comments section to ask any questions or share any tips!
Connect the xTool M1 laser cutting machine to your computer, open XCS, and import the SVG set or XCS file. Note: the link to the free book club cut files are at the bottom of this page.

Insert and secure the basswood into the xTool M1 with the honeycomb base. Note: you can use the standard base plate but elevate the wood on the prisms.
Close the laser cover and refresh the image. Size the wine charms and position the SVG cuts into place.

Select cut or engrave and cut for the designs you have selected. It helps to move all score lines to one layer one all cuts to another. If you’re using the XCS file, this is set for you but double check as software updates occur frequently.
Select “Open Plane” if using the honeycomb or “Laser flat” if using the standard base plate. Select 3mm basswood and auto-measure (or distance). Note: if auto-measure isn’t working for you, position the material so that the red laser dot hits a full portion of the material.
Settings: I used the reference setting on this pass and was happy with the result. Slightly increase the power for a darker engrave.

Frame the sized wine charms, adjusting the material or design if it isn’t within specs. Select start and stare at the machine through the safety glass until done. Just kidding, but don’t walk away.
Turn on the air assist (I used about 75% of the dial) and air purifier, if using. First, the machine will engrave each design and this is the longest part, as engraving is the slowest task.

Next, the machine will cut and I find this part fascinating to watch. I had no scorching or flares during the cuts of these simple designs.

In order to avoid smudging, TAPE OVER the engraved portions of the wooden wine charms. Pop out each of the designs and clean up the edges with tape and a lint-free cloth, as shown in the video.

Turn off air assist and the purifier, if using. Remove the and the scrap material from the M1 laser. Note: I like to clean out my laser when removing the project to avoid any issues when I start another one later.
Seal each charm. I use Krylon’s matte sealer spray to seal the wood on both sides. You can also use a foam brush and a thin layer of ModPodge. Note: image below is of my Christmas wine charm set.
Note: if painting, use a small paintbrush for the color and clean off any extra paint as you go. Let a couple of coats dry and then seal both sides.

Slip the wood onto the wire hanger, add a tassel, close and you’re done with these wine charms made with a laser and wood.

More Free SVG Bundles You Might Like
- 31 Days of Free Christmas SVG Files – This is a very popular set of fun, modern Christmas cut files to be used for decor, gifts, and even products to sell.
- Free Baseball SVG Bundle – This fun set of baseball designs is perfect for customization or baseball booster ideas.
- Free Antisocial Butterfly SVG Bundle – You’ll laugh, I promise.
- Free Football Mom SVG Bundle – From t-shirts to tumblers, these designs will show off mom’s pride.
Please Save or Share This Laser Projects to Sell Craft
Have you joined the Laser Group on Facebook yet? It’s a welcoming, friendly, and open space to get ideas, ask questions, and learn from our peers.
Your shares are how this site grows and I am sincerely grateful. Please use the sharing buttons to save this to a DIY laser crafts pin board or share it to a laser crafts Facebook group.
How to Download the Free Book Club SVG Bundle
The round cut file designs in this free book club SVG bundle will work for wine charms, bookmarks (separate the layers), t-shirts, cards, and so much more.
Each file created in this bundle comes with a free commercial use license – it’s very generous! Add it to your cart and checkout with a zero balance. If you want to browse and add anything to your cart, here is a 30% off coupon for any SVG or sublimation single file or bundle: BecauseWhyNot
These free designs are in a zip file. Double click the file to open it but if that doesn’t work, use a browser to search “how to open a zip file on [your device].”
These designs cannot be uploaded to any print on demand service (Amazon Merch, Redbubble, etc.). All rights remain with Ruffles and Rain Boots, SND Developments, LLC.
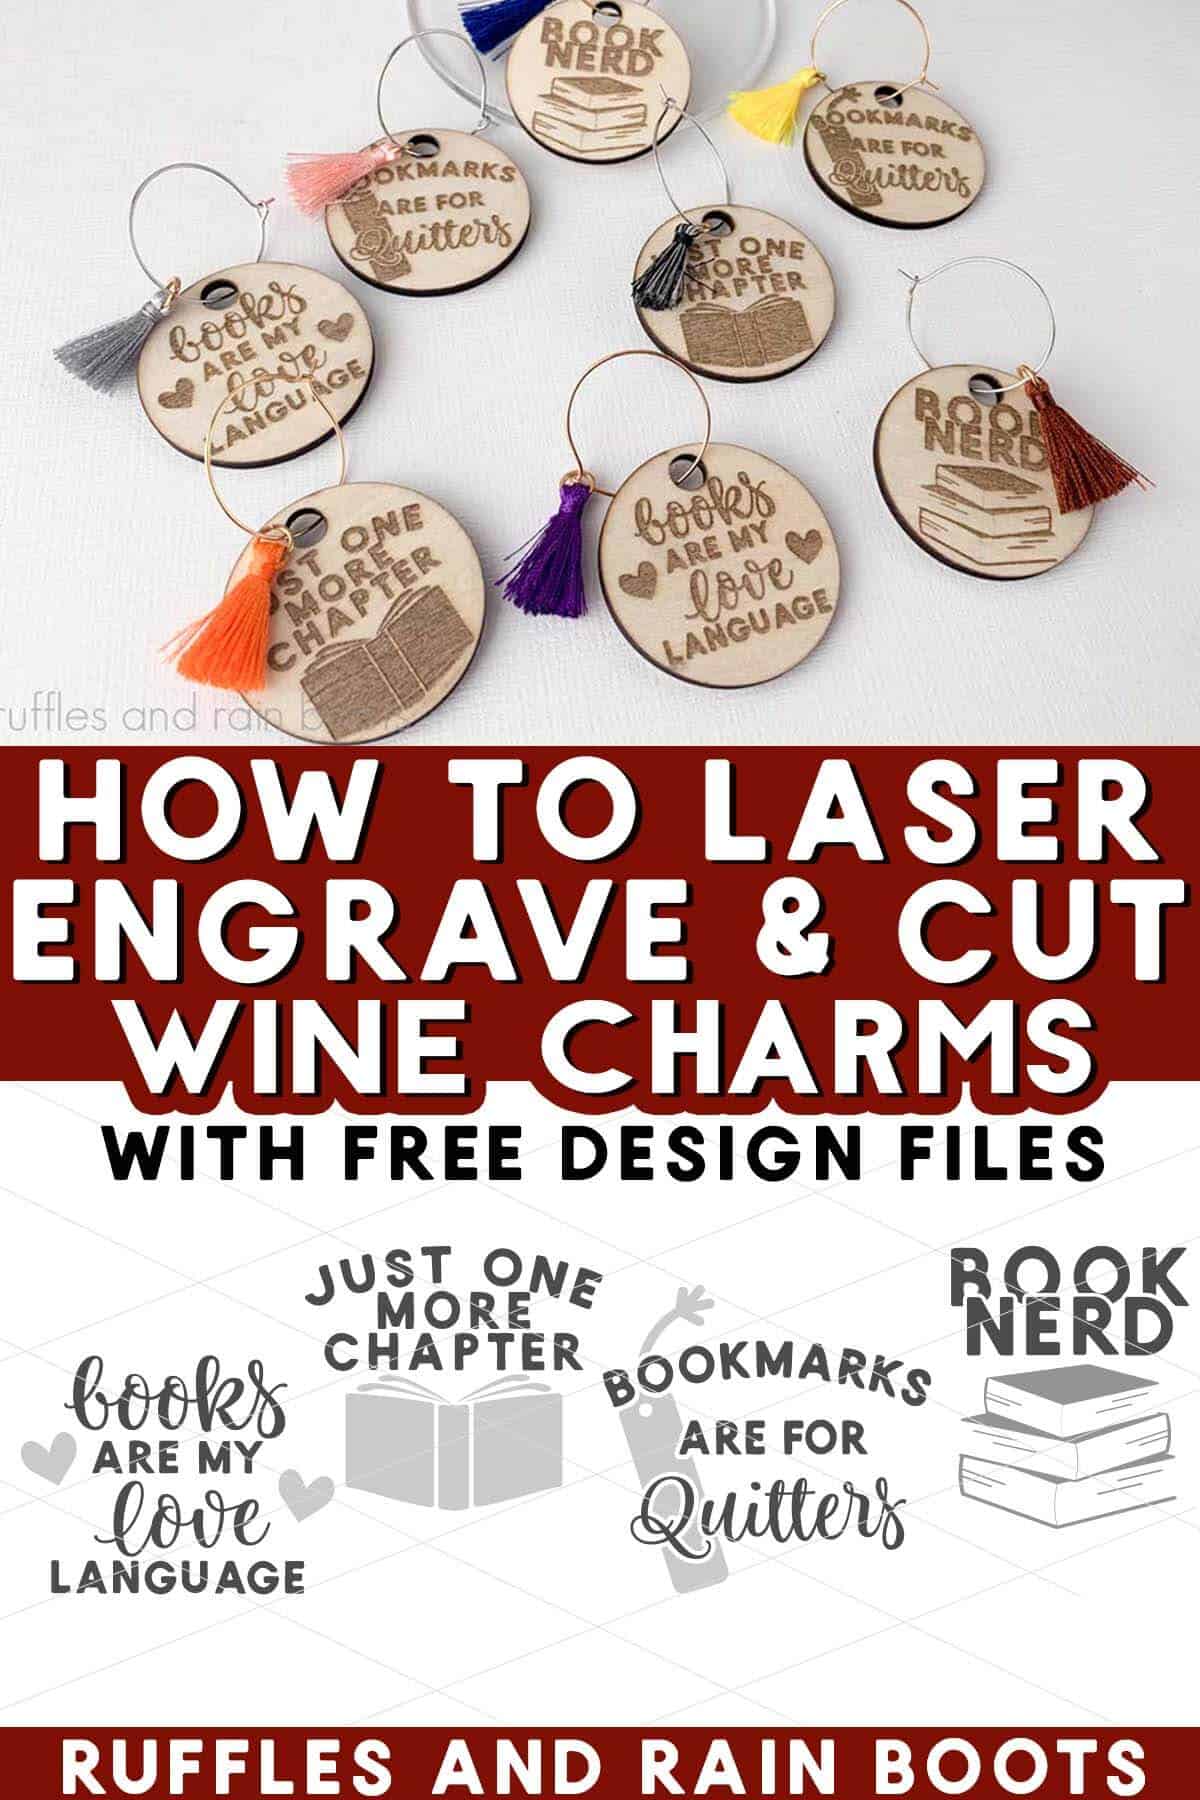
DIY Laser Cut Wine Charms (Free SVG)
Use this free book club SVG bundle to create DIY wine charms, keychains, t-shirts, cards, and more. These designs are used in this free laser tutorial for a beginner laser project idea for cutting and engraving. I will use the xTool M1 to create a project that you can make and sell in your small business, but you can use any laser.
Materials
- Basswood
- Wine Charms with Tassels
- Free Book Club SVG Bundle
- Sealant or ModPodge
- Blue Tape, Painter's Tape, or Masking Tape
Tools
- xTool M1 / M1 Ultra
- Honeycomb (optional) or Base + Prisms
- Optional but Recommended, air assist
- Paintbrush
- Cleaning Rag or Sandpaper
Instructions
- Connect the laser to your computer, open the software (I am using XCS), and import the SVG set. Note: XCS users can import the file.
- Insert and secure the basswood into the laser, preferably with the honeycomb base. Note: you can use a standard base plate but elevate the wood.
- Close the laser cover and refresh the image, if applicable. Size the wine charms and position the SVG cuts into place.
- Select cut or engrave for the designs. Note: it helps to move all score lines to one layer one all cuts to another.
- Select “Open Plane” if using the honeycomb or “Laser flat” if using the standard base plate and triangle prisms to elevate the wood. Select 3mm basswood and auto-measure. Reposition, if necessary.
Note: if auto-measure isn’t working for you, position the material so that the red laser dot hits a full portion of the material. - Frame the sized wine charms, adjusting the material or design if it isn’t within specs. Select start and remain near the laser while it completes the engraving and cuts.
- Once the charms have been engraved and/or cut, remove them by TAPING over the engraving to avoid smudging. Pop out each of the designs and clean up with tape and a lint-free cloth, as shown in the video.
Remove them and the scrap material from the M1 laser. Note: I like to clean out my laser when removing the project to avoid any issues when I start another one later. - Seal each charm. I used Krylon's matte sealer spray to seal the wood on both sides. You can also use a foam brush and a thin layer of ModPodge.
Note: if painting, use a small paintbrush or a baby wipe and clean off any extra paint as you go. Let a couple of coats dry and seal both sides. - Slip the wood onto the wire hanger, add a tassel, close it up and you’re done with these wine charms made with your laser!
Notes
Settings for the xTool M1: Reference settings for cutting work well for basswood (be sure to auto-measure).
Engraving Settings: Increased to achieve a darker engrave for the second set, however, it wasn't a noticeable difference.
Meet the Creator
Hi there, I’m Sarah Nenni-Daher. I’m a crafty gal and always have at least 14 projects going at once. I am a crafter, designer, DIYer, and pattern maker. I share my creations here and in the Ruffles and Rain Boots® Shop.
Here at Ruffles and Rain Boots®, you’ll find DIY gnomes, crafts, gifts, cupcakes, laser crafts, and so much more. I love sharing video tutorials over on YouTube and chatting with other crafters in my Facebook groups. We’d love to have you!