
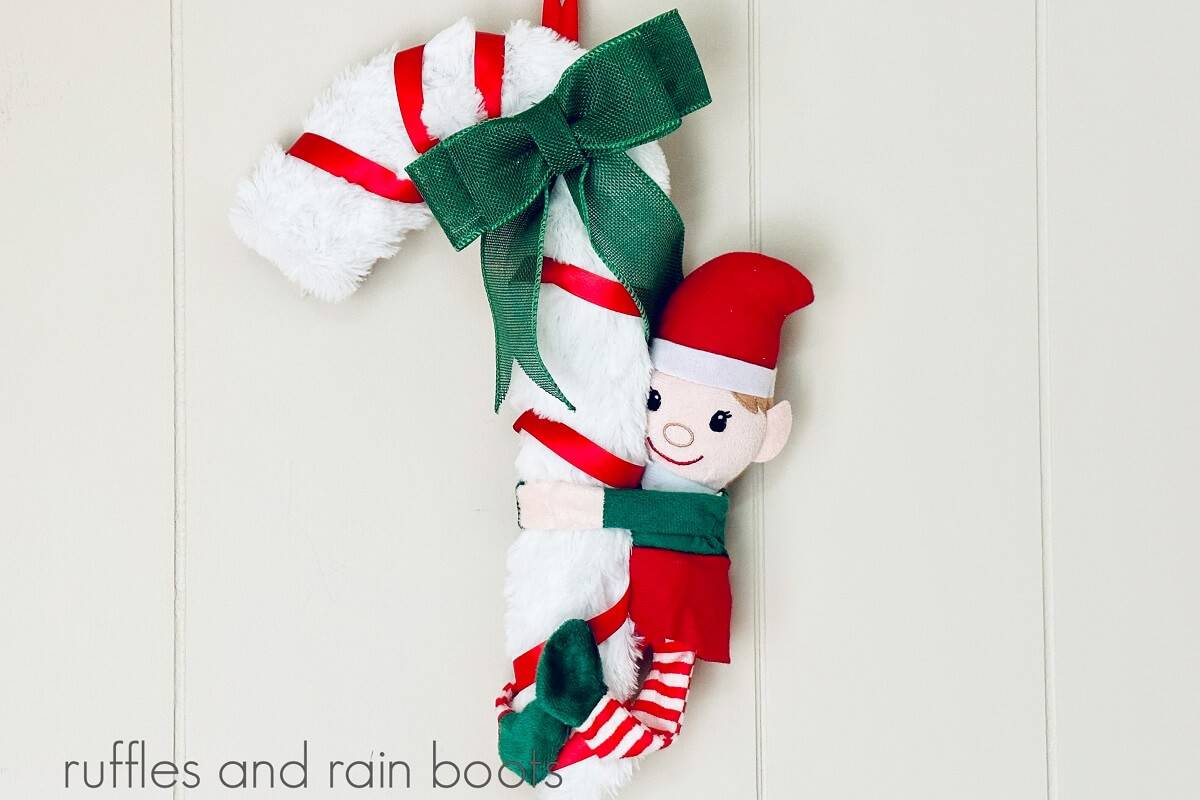
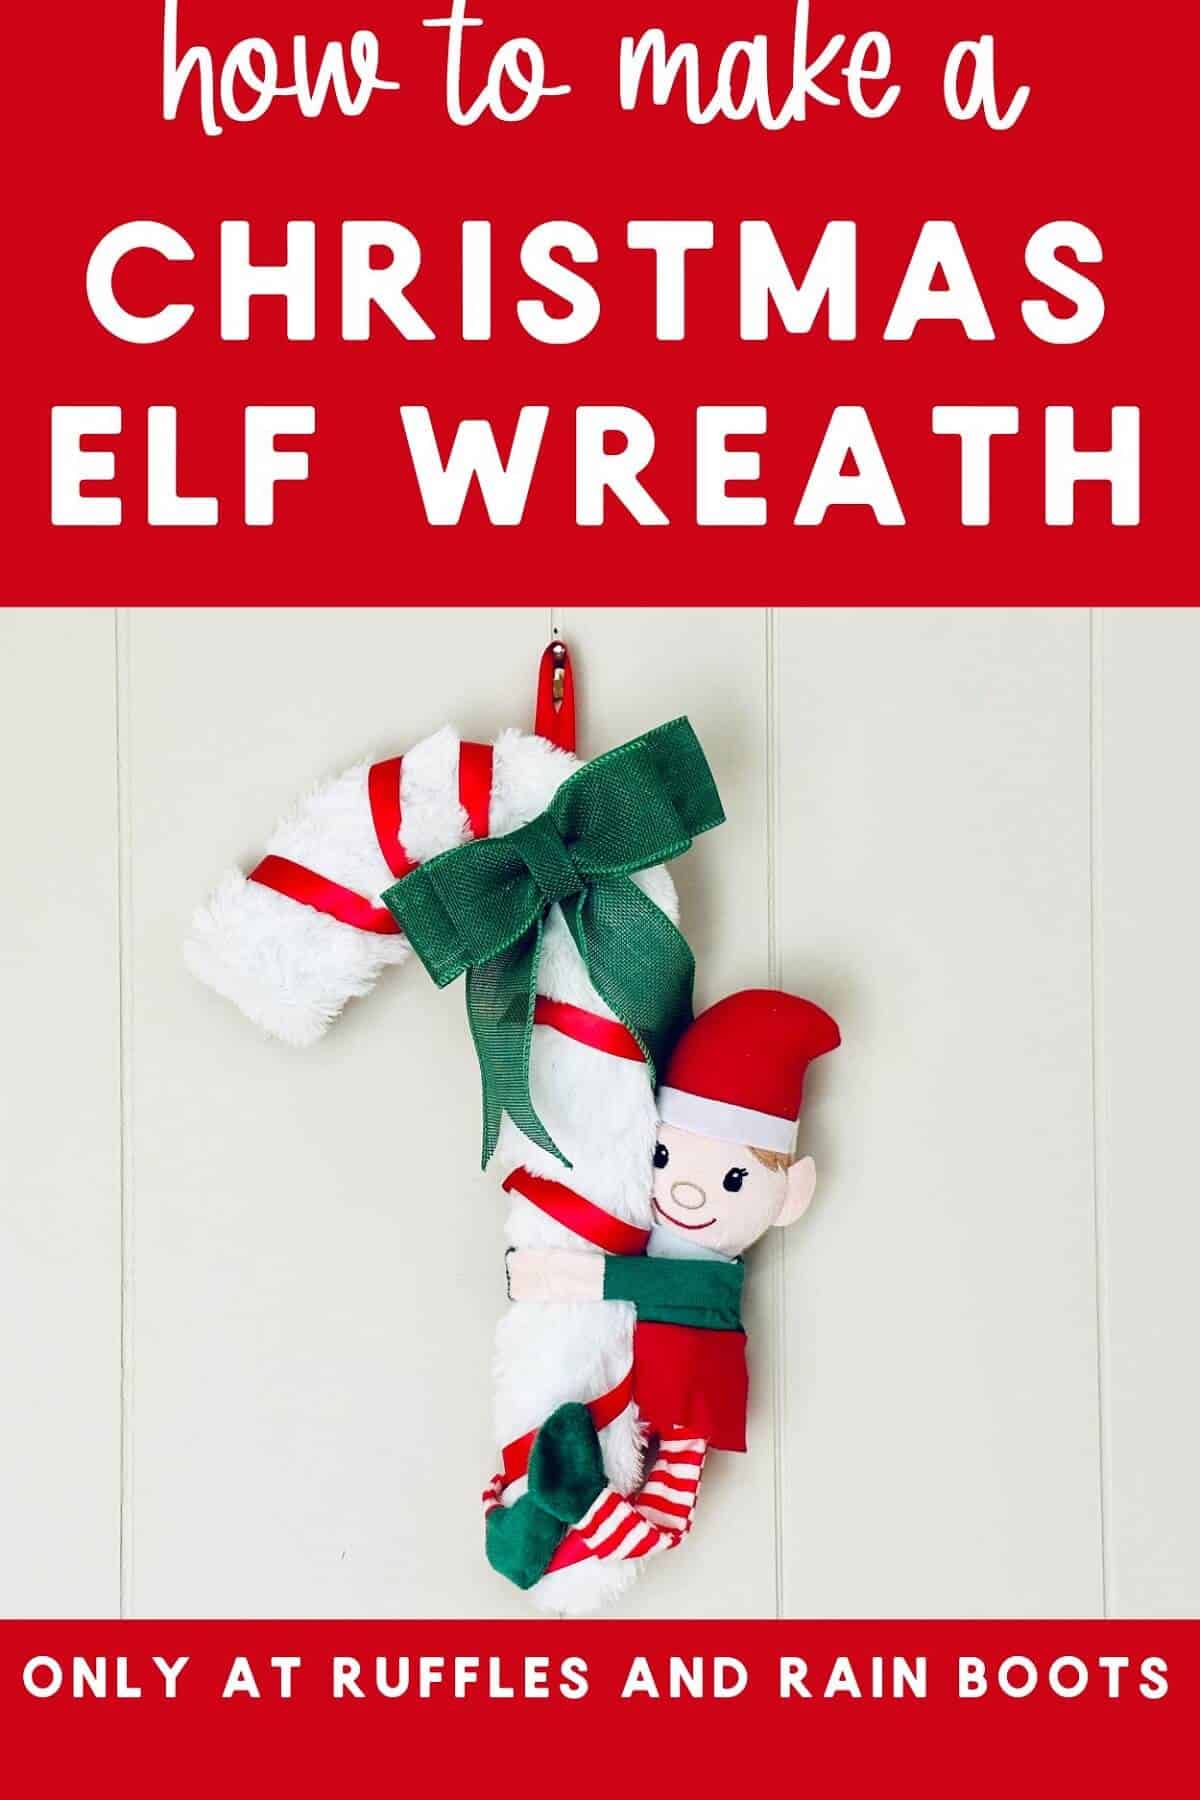
DIY Dollar Tree Christmas Elf Wreath
This DIY Dollar Tree Christmas Elf wreath is SO cute and easy. When we saw the candy cane-shaped wreath form, it all came together!
We made this adorable elf wreath from supplies from our local dollar store, but check your holiday decorations bins to see if you can use anything in there for a frugal Christmas craft idea.
RELATED READING: DIY Dollar Tree Elf Decor – From a cutting board to a cutie!
What You'll Find On This Page
Dollar Tree Elf Wreath For Christmas
Here at Ruffles and Rain Boots, I love saving money, especially during the holidays. But that doesn’t mean I’m not going to craft my way through the season.
This little elf door hanger was a quick way to capitalize on those inexpensive wreath forms from the dollar store. Never pass those up – there are tons of things we can create.
If you need to run to the Dollar Tree for materials for this craft, bookmark this page so it’s easy to return to when you are ready to create your Christmas elf wreath.

As an Amazon Associate, I could earn from qualifying purchases. There may be affiliate links within this article.
RELATED READING: How to Make a Bow for Wreaths
Easy Christmas DIY
This will only cost you about $4, so it makes a very, very inexpensive craft night with the girls idea. You can also set this up for a family Christmas craft idea – everyone will love it!
When I saw this elf plushie, I knew he would be the perfect size to be seen but not make the wreath too heavy. There are a ton of holiday plush cuties at the dollar stores, so go wild.
My daughter is old enough to use a hot glue gun, so she made her own version of this. If your is safe with a high-temperature glue gun, they can make this, too.
RELATED READING: Dollar Tree Santa Christmas Crafts
Tips For Making A Christmas Elf Wreath
- In order to avoid the fur shedding, be sure to cut along the seam on the scarf.
- We used a 5/8″ satin finished ribbon for the candy cane stripes and to create a loop for hanging, but any ribbon will do.
- If you prefer, instead of making the bow, buy one of the multi-packs from the dollar stores.
- When gluing the fur scarf around the wreath form, wrap one side under the other, creating a seam in the back. This will keep the form safely tucked inside the material.
Supplies For A DIY Dollar Tree Christmas Elf Wreath
Below are the supplies we used to make this Christmas Elf Wreath. Before you head to the store for materials, see what you have on hand in your craft bin. For information on cutting fur, please read the tips section above.
- Large Candy Cane Wreath Form
- White Faux Fur Scarf
- Stuffed Elf Plushie
- Hot Glue Gun and Glue Sticks
- Green Burlap Ribbon
- Red Satin Ribbon
- Scissors

How To Make A Dollar Tree Wreath
Each step for this craft is detailed below so it’s easy to follow. Keep this page open while you are creating your candy cane-shaped Christmas Wreath. If you would rather have a printable how-to, scroll down and choose the print button.

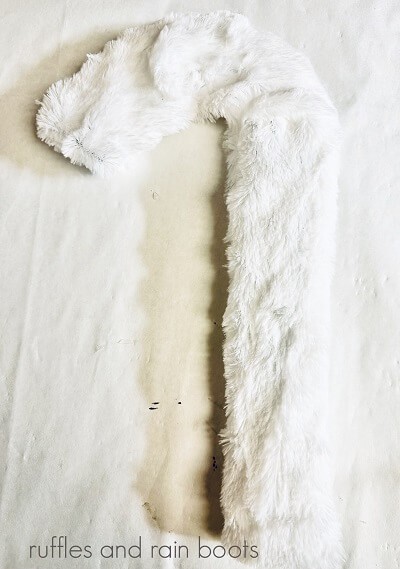
Cut the scarf where the seams meet. This allows for an opening to insert the candy cane wreath form.

Place the candy cane wreath form inside the scarf, pulling it all the way through so that the curved end of the wreath form has the finished seam on it.

Pull the excess fabric to the backside of the wreath form.
Glue it so that the front side is flush against the wreath form.

Hot glue the elf to the wreath form.

Cut three lengths of the burlap: 2 long and one shorter. Fold the first long ribbon into thirds, pinching the center section. Repeat the same process with the second long piece of burlap. Hold those sections on top of each other.

Fold the shorter piece widthwise into thirds, gluing it over the middle section, covering the fold.

Cut a piece of ribbon approximately 8″ long and attach it to the backside of the bow, making the tails of the bow. Cut the ends at an angle.

Add some hot glue to the backside of the wreath and add the red ribbon on the top. Next, wrap the ribbon around the wreath, adding hot glue as you go. This gives you the candy cane effect. Cut a small piece of ribbon to make a loop in the back to hang the wreath.

Hot glue the bow to the top part of the wreath.
Notes For Making A DIY Christmas Wreath
- If you cannot find a faux fur scarf at your Dollar Tree, you can use a large piece of faux fur from the local craft store or a rectangle scarf online at Amazon.
- We found the candy cane wreath form at the Dollar Tree. If you have trouble locating one for yourself, check with Joann or Amazon.
- We used an elf plush for our wreath we found and thought it looked just adorable. You can use any holiday plush like a teddy bear, a Santa, a reindeer, or a gingerbread man or woman.
- If you have issues with your plushie facing forward on the wreath form, you can use a bit of hot glue on the side of the wreath, securing the head in place.
- We showed holiday greenery picks in our supplies picture, but we decided a more minimal look was what we wanted. If you want to spruce your wreath up a bit, feel free to use these in your project.
More Christmas Crafts You May Like
- Buffalo Check Christmas Truck for Cricut: This free Christmas truck SVG is great for so many projects.
- DIY Christmas Tree Gnomes: Make this adorable holiday gnome with a few simple supplies and about 30 minutes.
- Toilet Paper Christmas Gnome DIY: We made this gnome with inexpensive supplies from the local Dollar Tree (and you should, too).
- Christmas Paintbrush Gnome DIY: This reversible gnome is made from a paintbrush that has a vintage Santa on one side and a traditional Santa on the other.
Please Save or Share
Your shares are how this site grows and I sincerely appreciate it. Please save this Christmas wreath craft to your favorite holiday pin board or share it on Facebook.

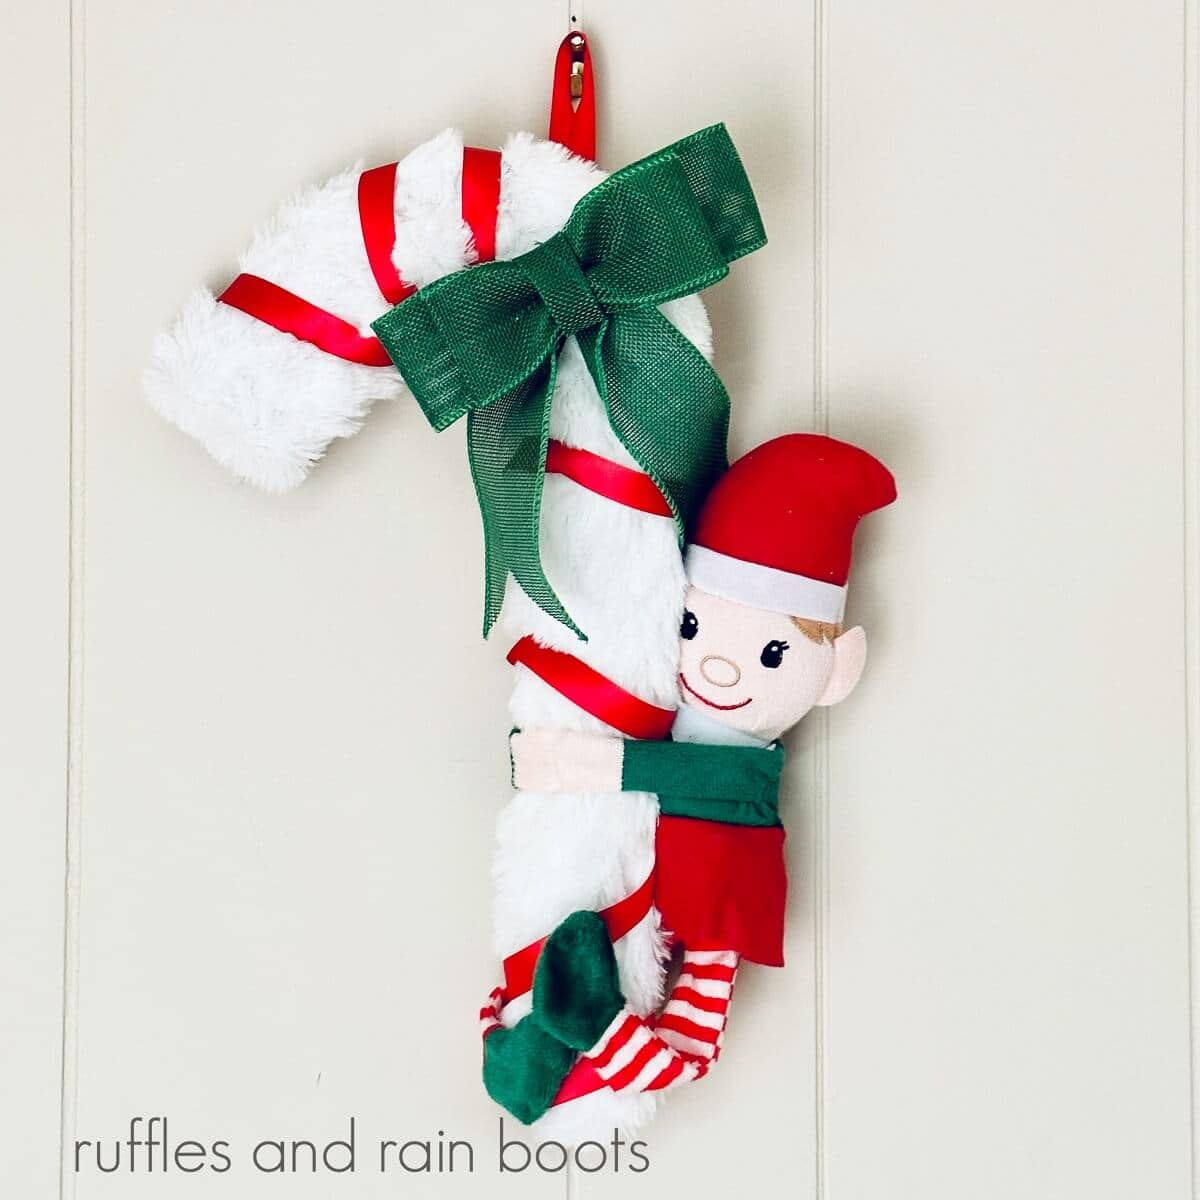
DIY Dollar Tree Christmas Elf Wreath

This DIY Dollar Tree Christmas elf wreath is the most fun addition to your holiday decorations collection. It is a super easy, inexpensive, and enjoyable Christmas craft project. We do suggest using a hot glue gun, but the younger kids can still feel included in other aspects of the tutorial. The older kids can easily make this cute elf wreath all on their own in about 30 minutes. Not one step of this DIY is complicated, making it user-friendly.
Materials
- Large Candy Cane Wreath Form
- White Faux Fur Scarf
- Stuffed Elf Plushie
- Green Burlap Ribbon
- Red Satin Ribbon
Tools
- Hot Glue Gun and Glue sticks
- Scissors
Instructions
- Cut the scarf where the seams meet. This allows for an opening to insert the candy cane wreath form.
- Place the candy cane wreath form inside the scarf, pulling it all the way through so that the curved end of the wreath form has the finished seam on it.
- Pull the excess fabric to the backside of the wreath form
- Glue it so that the front side is flush against the wreath form.
- Hot glue the elf to the wreath form.
- Cut three lengths of the burlap: 2 long and one shorter. Fold the first long ribbon into thirds, pinching the center section. Repeat the same process with the second long piece of burlap. Hold those sections on top of each other.
- Fold the shorter piece widthwise into thirds, gluing it over the middle section, covering the fold.
- Cut a piece of ribbon and attach it to the backside, making the tails of the bow. Cut the ends at an angle.
- Add some hot glue to the backside of the wreath and add the red ribbon on the top. Next, wrap the ribbon around the wreath, adding hot glue as you go. Cut a small piece of ribbon to make a loop in the back to hang the wreath.
- Hot glue the bow to the top part of the wreath.
Meet the Creator
Hi there, I’m Sarah Nenni-Daher. I’m a crafty gal and always have at least 14 projects going at once. I am a crafter, designer, DIYer, and pattern maker. I share my creations here and in the Ruffles and Rain Boots® Shop.
Here at Ruffles and Rain Boots®, you’ll find DIY gnomes, crafts, gifts, cupcakes, laser crafts, and so much more. I love sharing video tutorials over on YouTube and chatting with other crafters in my Facebook groups. We’d love to have you!