
Christmas Paintbrush Gnome DIY
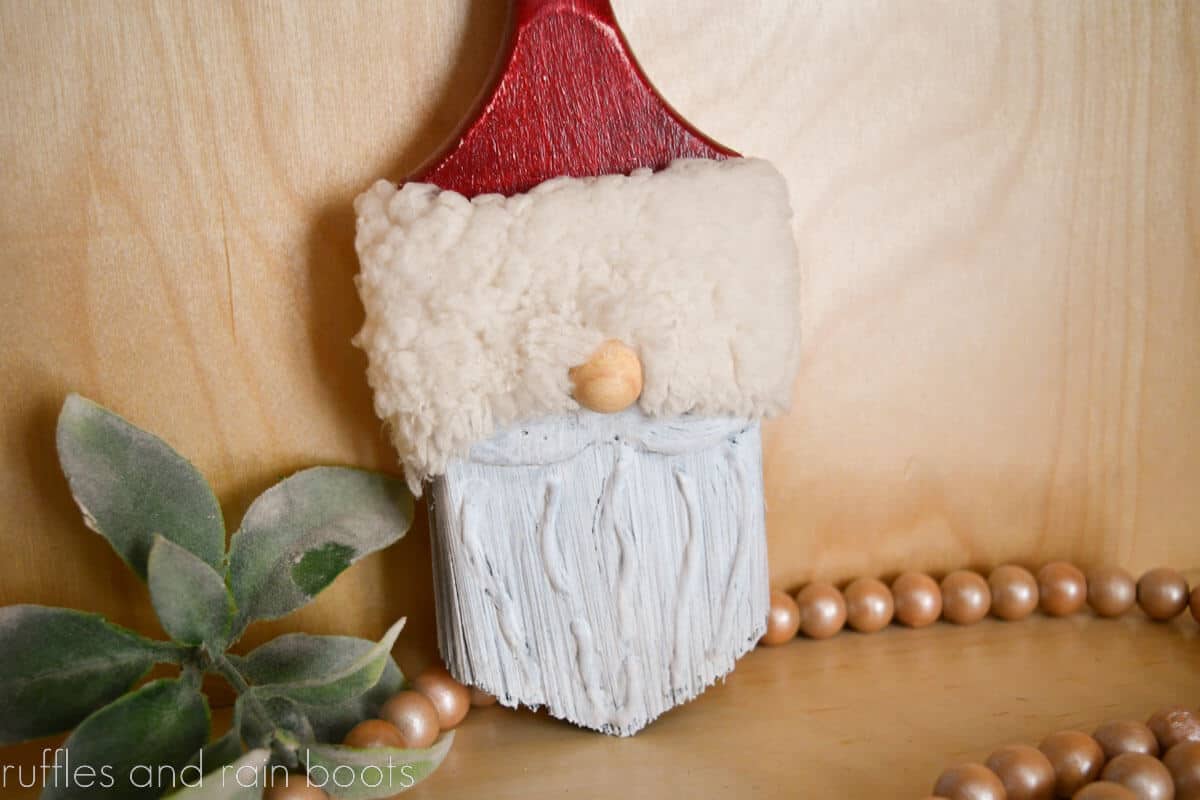
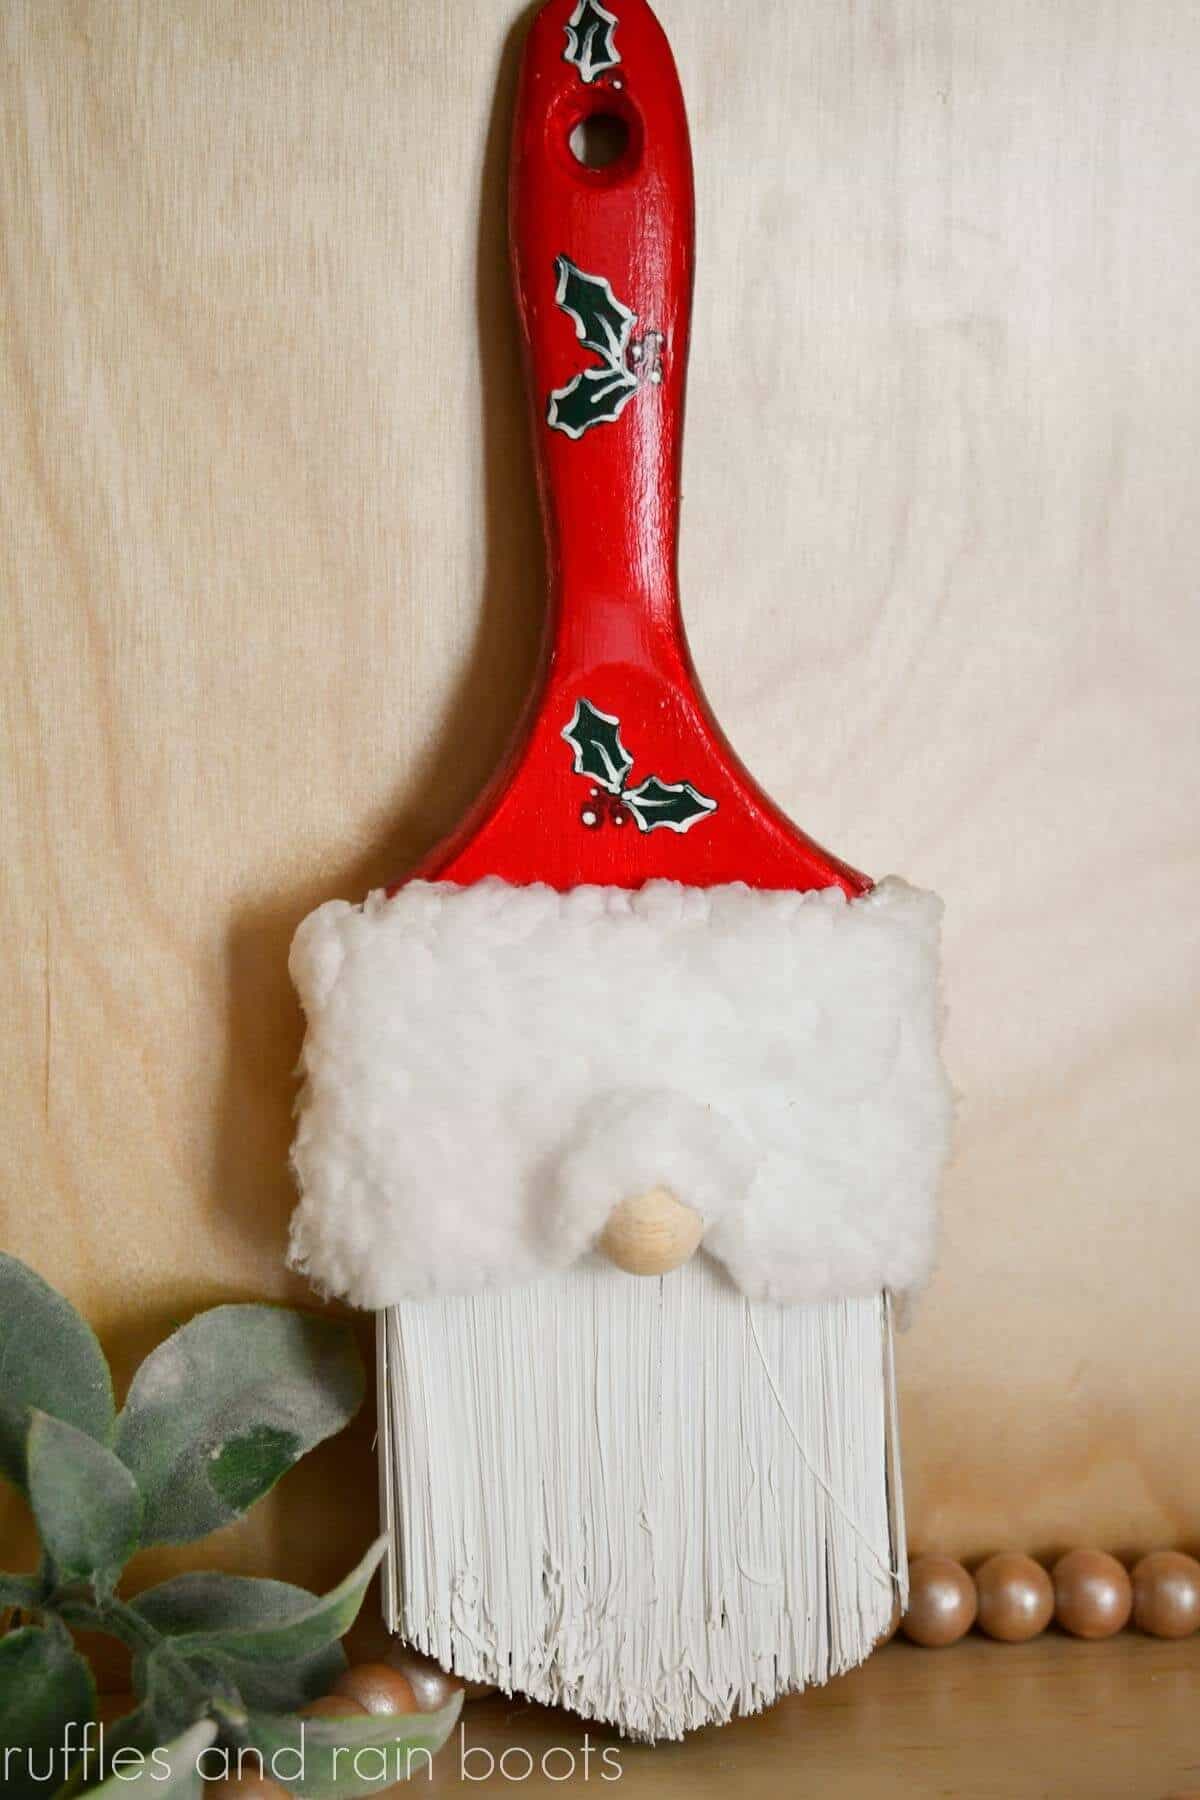
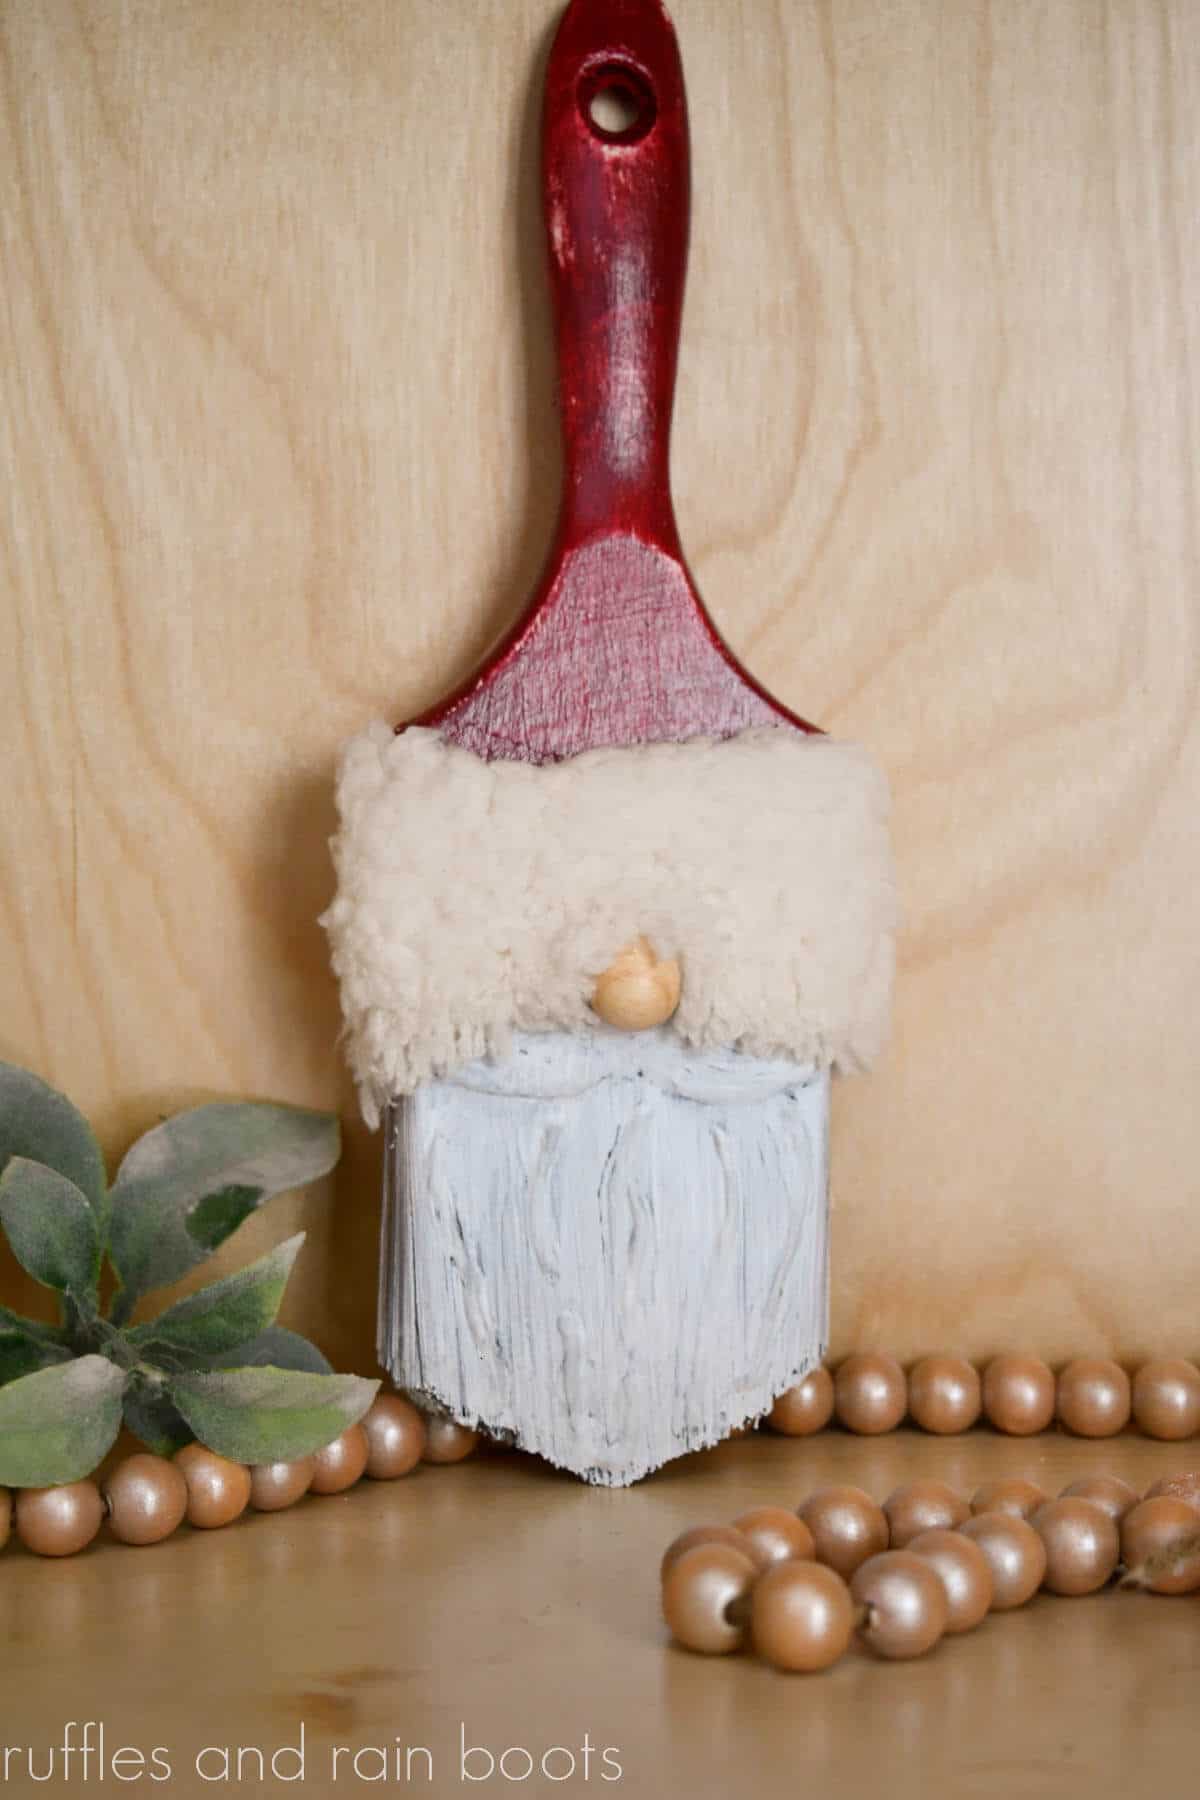
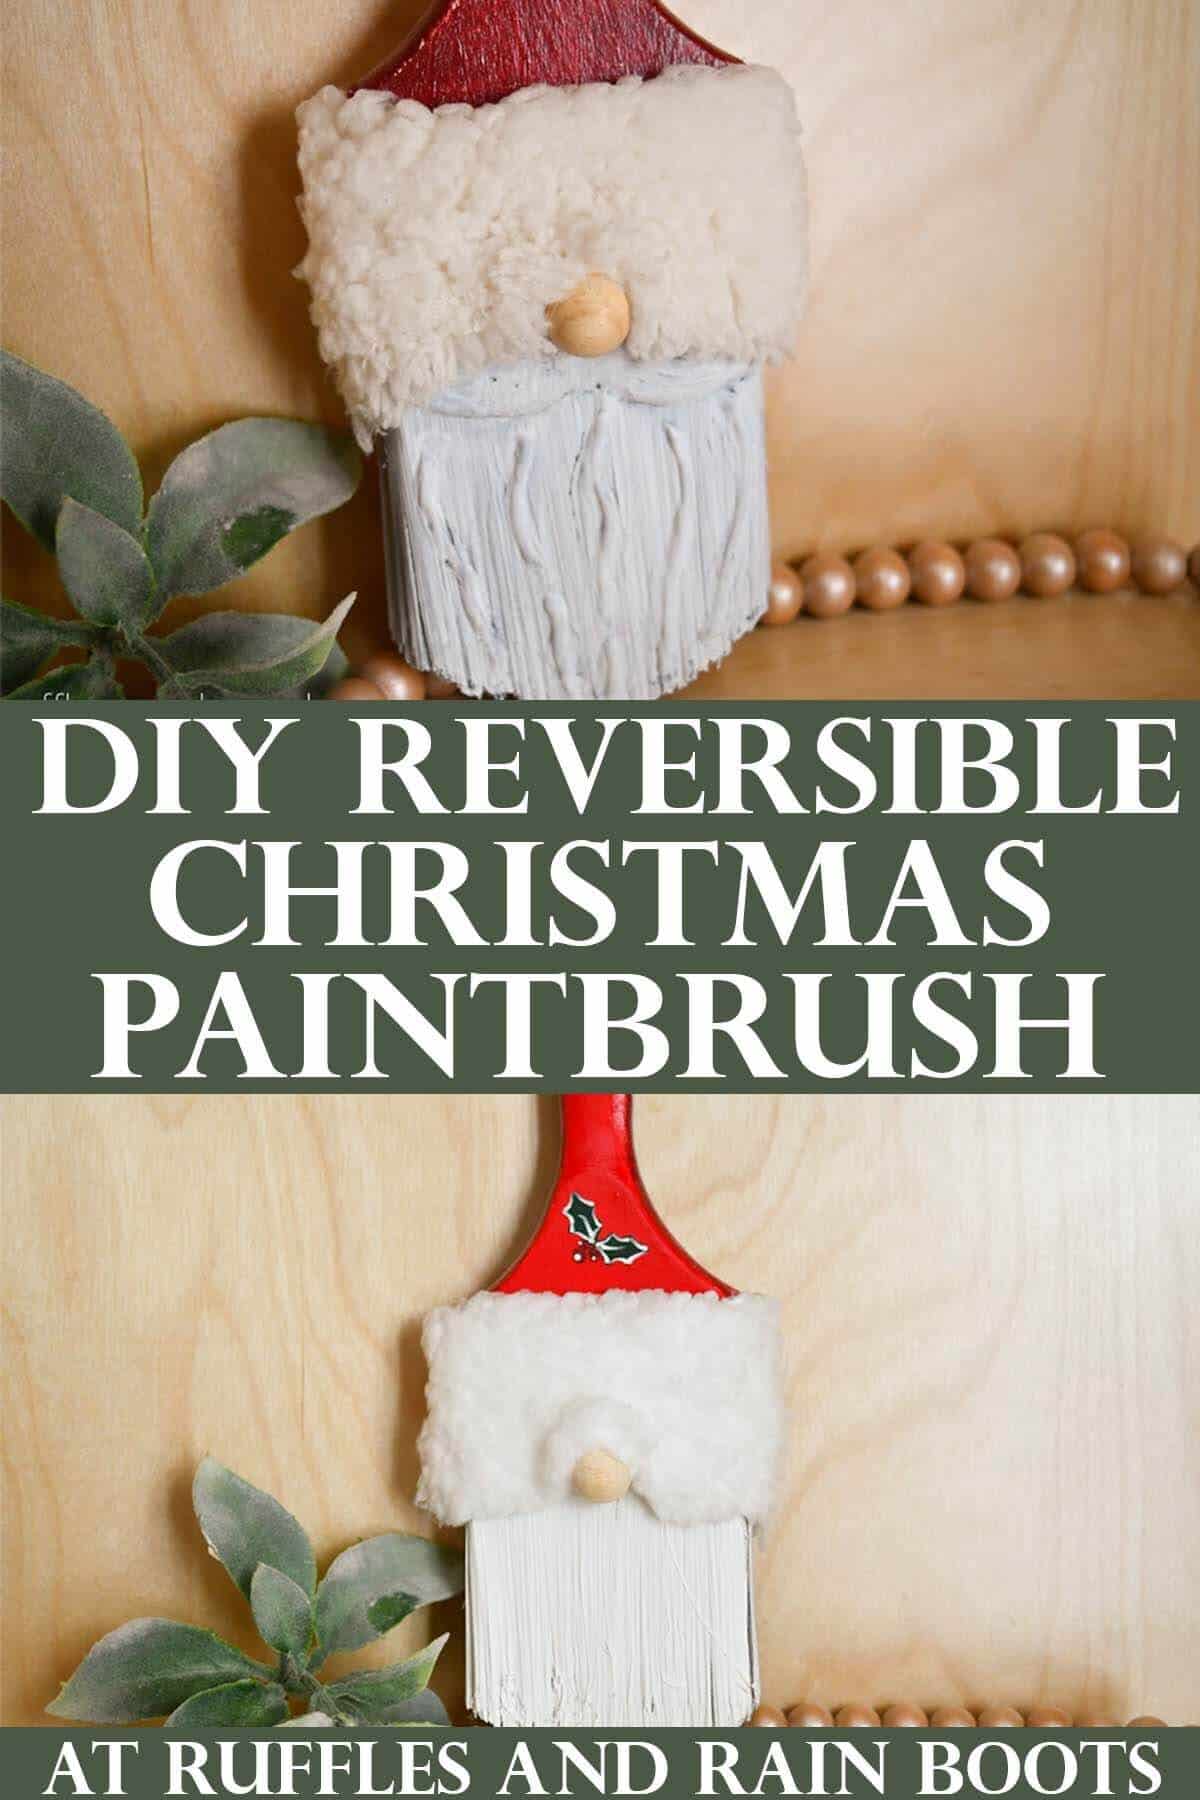
This adorable Christmas gnome made with a paintbrush is so easy to put together and uses some fun techniques for adding depth. The Christmas paintbrush gnome is reversible: one side vintage and one side traditional.
For this easy holiday craft idea you will need a paintbrush, paint, a wood bead, and a bit of fleece. There are some optional extra supplies you might want to add on but gather those and you’re ready to start this easy craft.
RELATED READING: DIY Christmas Gnomes – Ideas for Everyone
What You'll Find On This Page
Christmas Gnome Made With a Paintbrush
Here at Ruffles and Rain Boots, it’s no secret that I love gnomes. As one of the first to start providing tutorials, I love challenging myself when I see some inspiration. Back at the start of this year, I saw a paintbrush gnome craft for kids (link below) and thought it was too cute.
But because I cannot copy someone else’s idea, I decided to add a different spin and NOT cover up that gorgeous canvas at our disposal – the brush handle. This can be decoupaged, painted, or even built up with puffy paint. The options are endless, but here’s my take on the paintbrush gnome.

Want to Start on This Later? Save or Share It Now
If you’re gathering ideas or supplies, use the sharing buttons to save this to a holiday crafts pin board or your Facebook timeline. The shares really help me out and either will make it easy to find when you’re ready to begin.
As an Amazon Associate, I could earn from qualifying purchases. There could be affiliate links within this article.
Tips for Making a Gnome from a Paintbrush
- Inexpensive paint or chip brushes can be found in your craft room (those ones you left paint on to dry accidentally), big box stores, and even the Dollar Tree. The 3 inch brush I’m using is one of theirs.
- Paint the entire thing, even the bristles, with a few coats of paint. The bristles will become stiff and, no matter their color, should be an opaque white.
- I used this gesso paint because it’s cost-effective when prepping for paint. You can use chalk paint, however, it’s more expensive.
- Painting the ferrule (the metal part of the brush which holds the bristles) is optional. I chose to paint it in case the fleece moved about.
- Sherpa fleece comes in SO MANY colors. For the vintage Santa gnome, I’m using an off white. For the traditional side of the paintbrush gnome, I used white. Just add hot glue along the top and bottom edge to be sure it doesn’t move.
- If you have an insane stash of small wooden beads (who doesn’t?), use them for this craft. The thick fleece will cover the holes and no one will be the wiser.
- Use a bit of ribbon or cut a piece of twine turn this into a gnome ornament and hang this on your Christmas tree or a door knob.
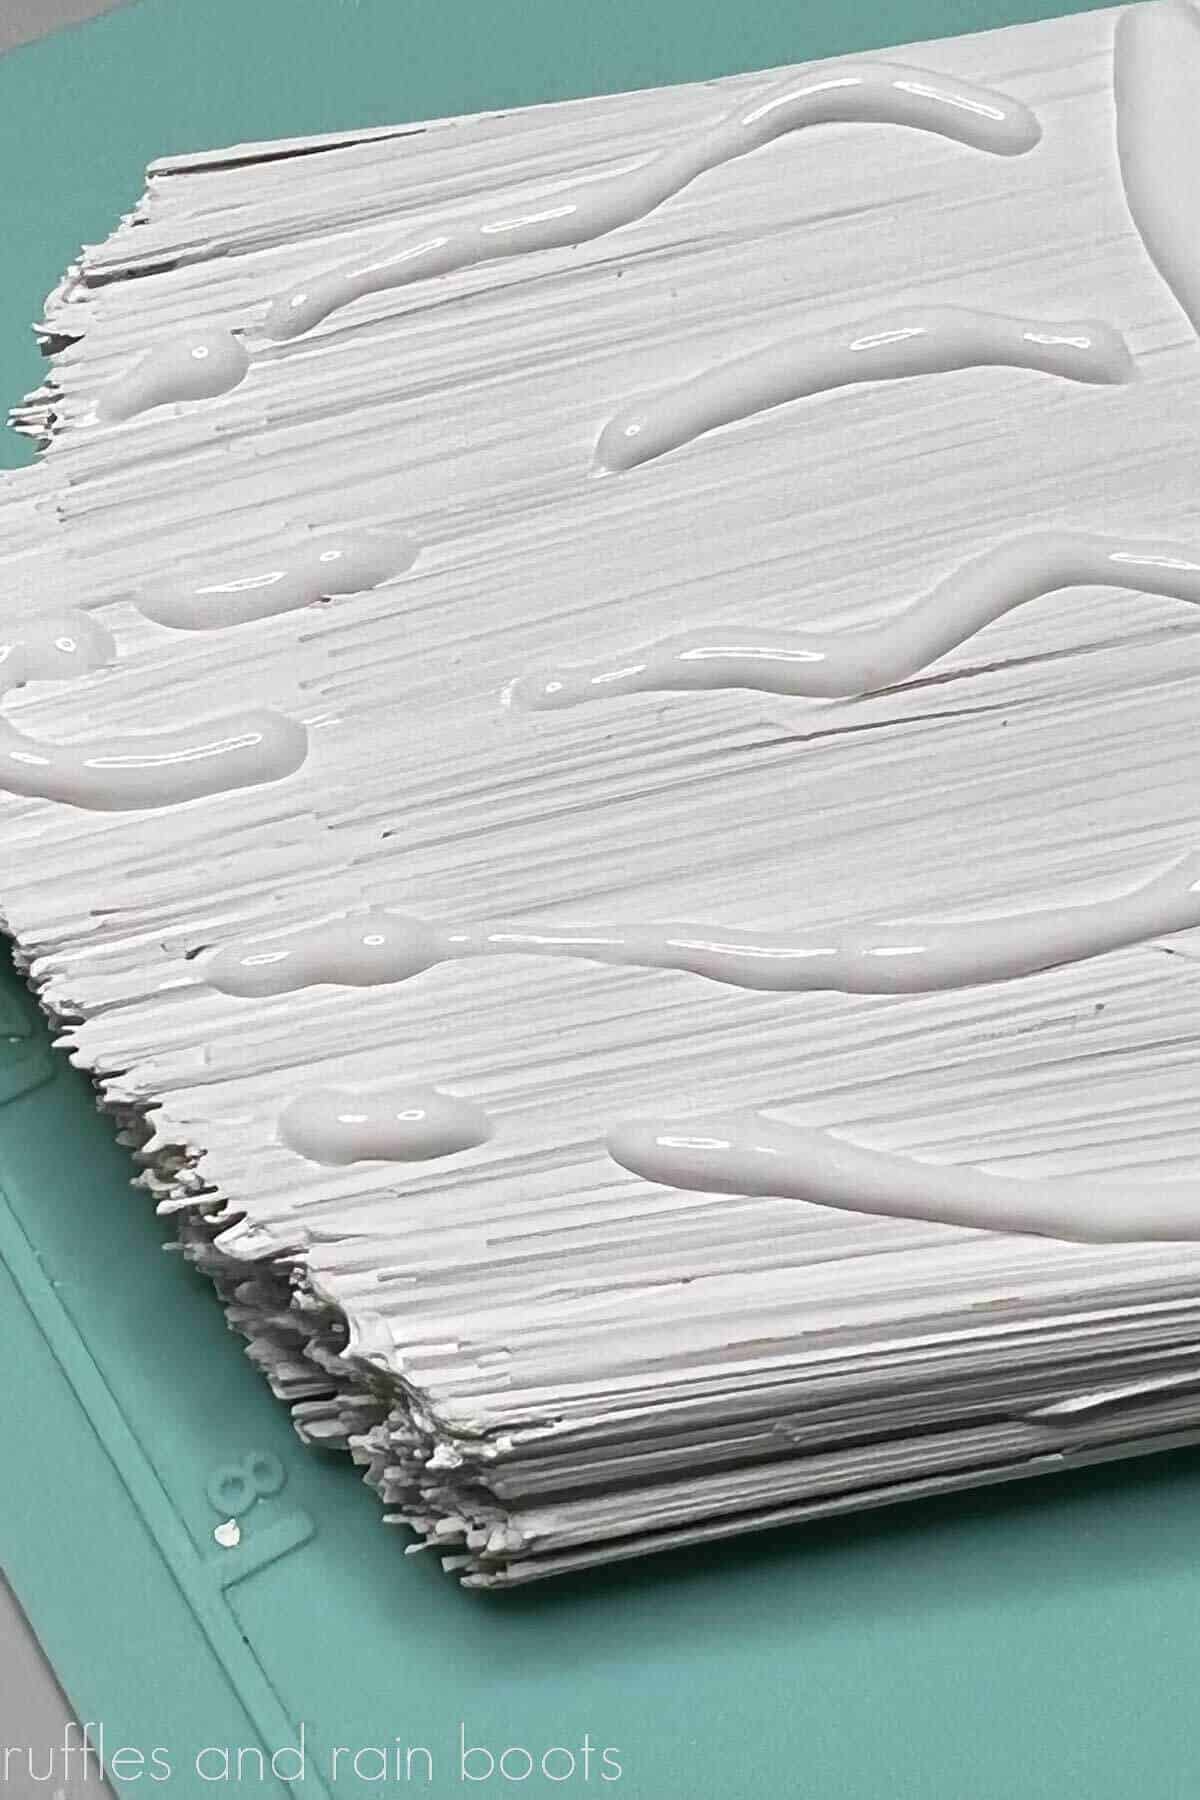
Optional Puffy Paint Gnome Beard Dimension
When I use puffy paint, I get a lot of questions so I’m going to answer them here. Puffy paint is found in the fabric painting section of the craft store. For something like this – in which the puffy paint is getting painted over – look for clearance colors.
Puffy paint will deflate a little bit overnight and you can add a second coat right on top of the first. Before painting over it, however, make sure it dries per the package instructions or you will get a gloopy mess.
How to Make a Christmas Paintbrush Gnome
Below is the step by step written tutorial for this easy paintbrush craft idea. Keep this page open and follow the instructions or use the print button to take it offline.
If you’re a visual learner, watch the quick Christmas paintbrush gnome video tutorial here on YouTube. While you’re there, subscribe – we have an awful lot of fun over there.
Christmas Paintbrush Gnomes

This adorable paintbrush gnome is styled for Christmas with a reversible look! One side is a vintage Santa gnome and the other is a traditional holly with a bold red. Make the base while watching television and have tons of fun decorating this easy holiday craft.
Materials
- paintbrush
- white acrylic paint (I used Gesso)
- holiday paint colors
- optional, black paint
- small wood beads
- white and cream Sherpa fleece
- optional, puffy fabric paint
- Liquitex Glossy Varnish
Tools
- scissors
- paintbrushes
- sanding block
- optional, wooden skewer
- hot glue gun and glue sticks
- optional, heat gun
Instructions
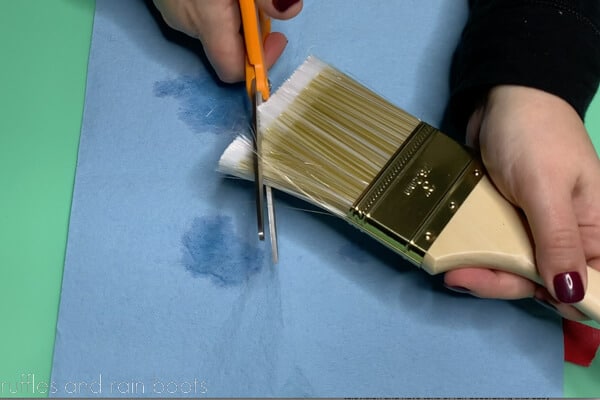
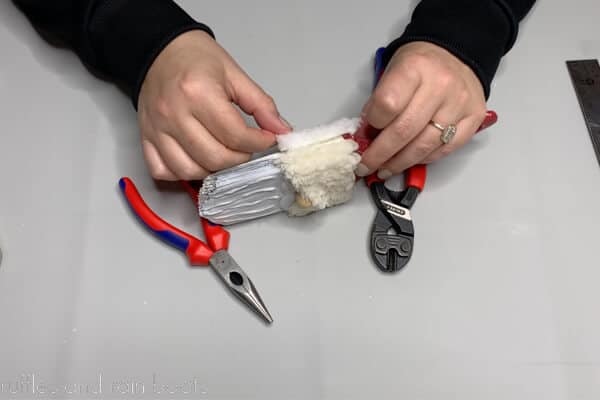
- Trim the beard using scissors into a V-shape, if desired. Clean up the mess before painting.

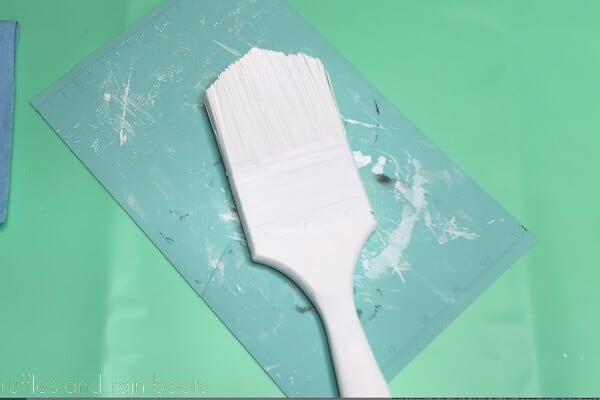
- Paint the entire brush and handle with white paint on both sides, taking care to really get the bottom and sides of the brushes, as they should be stiff when finished with all coats. Note that the brush portion should be stiff. I used three coats of paint, drying with the heat gun in between each. Note: I used an off white (Waverly Plaster) on the vintage side.
- Optional: use the puffy paint to create a mustache and beard. Let dry overnight and repeat if you would like a more pronounced difference.
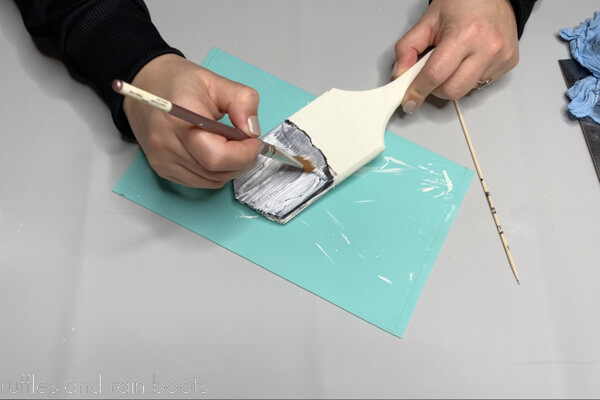
- Optional: color the beard below the ferring with a thin layer of black paint. Before completely dry, add white paint on top and brush through for dimension. Add more white to the beard to get the desired color.
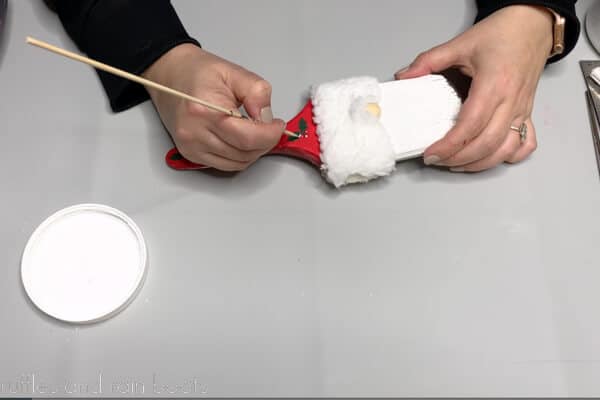
- Glue the noses onto each side, just at the bottom center of the ferrule (not on the brushes).
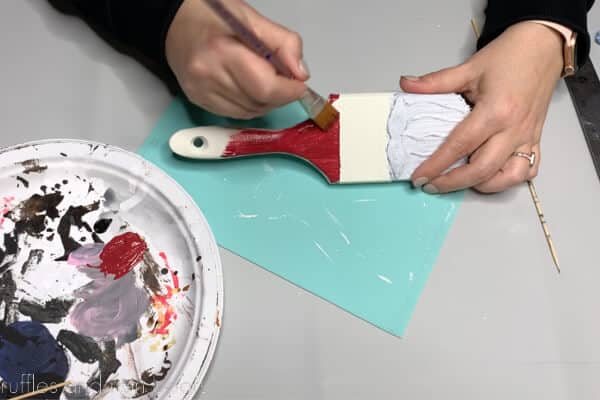
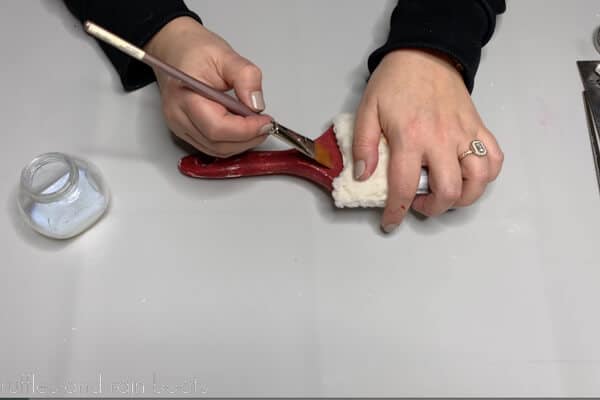
- Paint the handles. Vintage Side: mix black with a holiday red and paint the handle and side of the brush. Once dry, use a sanding block to rough edges and a bit of the brush handle to allow the cream paint to show through.
Traditional Side: paint the handle with red paint and let dry. Use green to add holly leaves, a darker red to add berries, and white to outline. Note: I used a wooden skewer to outline because I didn't have a very small paintbrush. - Add the fleece hat bands. For the vintage side, cut the off-white Sherpa fleece to fit the ferrule and glue it on from the sides, over the ferrule, and on top of the wooden nose. On the traditional side, cut the white Sherpa fleece and cover the ferrule in the same manner.
- To finish, paint on two coats of Liquitex glossy varnish to protect. Display your adorable paintbrush gnomes!

Notes
You do not have to cut the brush bottoms; leaving the brush intact still looks like a gnome.
Add a hanger for a quick door knob display or stack on a bookshelf to display.
Recommended Products
As an Amazon Associate and member of other affiliate programs, I earn from qualifying purchases.


More Holiday Gnome Crafts You Might Like
- Easy Lavender Gnome Sachet DIY – These make great gifts and are perfect to use up scraps of fur and felt.
- Mini Gnomes Made with Gloves – You are going to just ooh and ahh over how adorable and easy these tiny gnomes are to make.
- Paintbrush Gnome Craft for Kids – This easy DIY for the holidays makes the paintbrush gnome easy for all ages.
Please Save or Share This Fun Gnome DIY for Christmas
Your shares are how this site grows and I am sincerely grateful. Please save this to a holiday crafts pin board or share it with a crafty group on Facebook.
Meet the Creator
Hi there, I’m Sarah Nenni-Daher. I’m a crafty gal and always have at least 14 projects going at once. I am a crafter, designer, DIYer, and pattern maker. I share my creations here and in the Ruffles and Rain Boots® Shop.
Here at Ruffles and Rain Boots®, you’ll find DIY gnomes, crafts, gifts, cupcakes, laser crafts, and so much more. I love sharing video tutorials over on YouTube and chatting with other crafters in my Facebook groups. We’d love to have you!