
DIY Cupid Gnome: Pool Noodle Gnome Body
Friends, this DIY Cupid gnome was a long time coming. I’ve had the drawing for months but just wasn’t happy with the final product. Does that ever happen to you? You’re so excited to get something done but just can’t get it right?
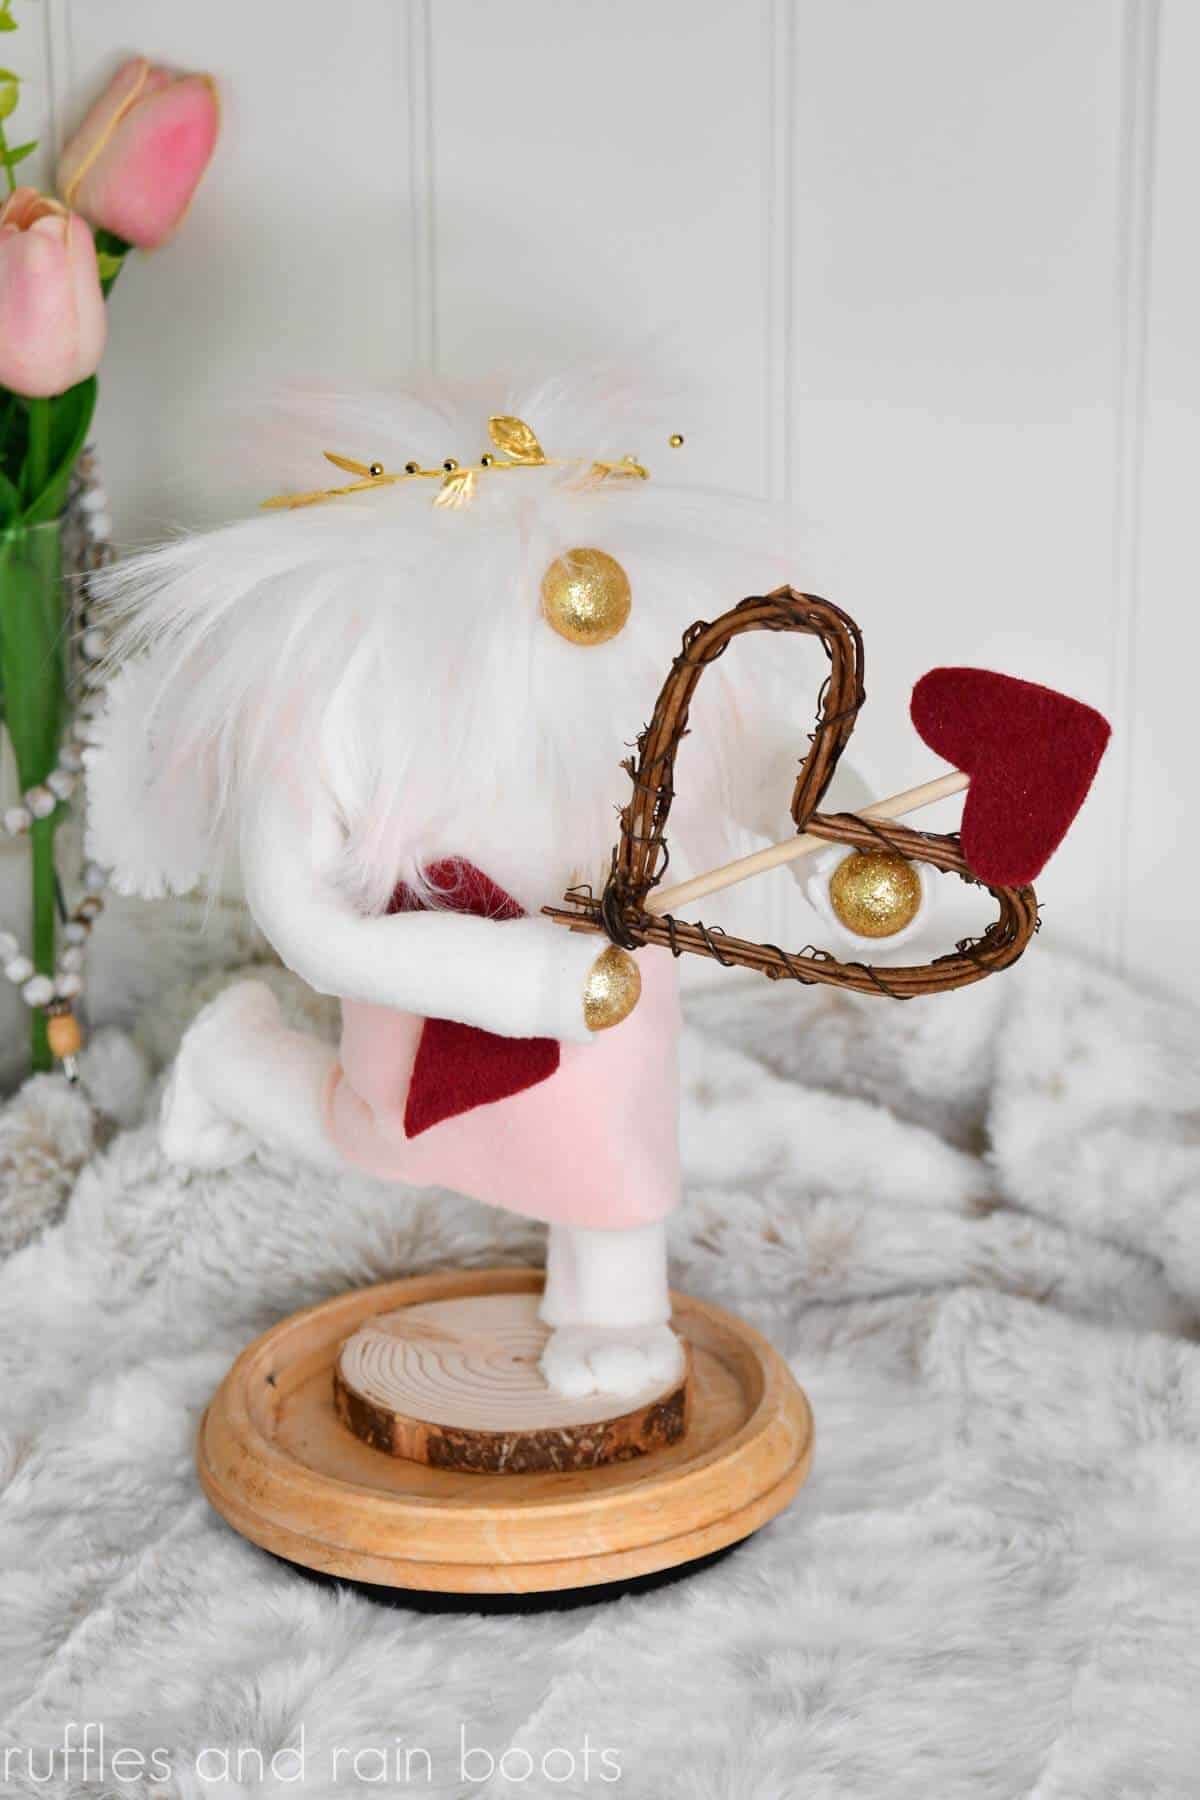
After a couple of months and eight gnomes, I am finally happy with a high-end, weighted pool noodle gnome body. This Cupid gnome DIY features a kick back leg and a wood ornament, but that it is not necessary – I just have to be a little bit extra sometimes.

What You'll Find On This Page
DIY Cupid Gnome
Here at Ruffles and Rain Boots, I’m a tinkerer and tester. I try new things without sharing them because I want to make sure they work and hold up to my standards.
In October of 2021, I had 15 requests in a single day to start making pool noodle gnome tutorials. Right then, I drew this Valentine’s Day gnome and set to work on finding the best way to use the pool noodle.
In addition to having full design control unimpeded by the body, I set goals that I needed to be proud to share it and to contribute something new to the maker community. But it was frustrating to say the least – everything was so light, tipped over when you merely walked by it, and just wasn’t up to my standards.
Many prototypes later and I’m happy with the body AND with presenting you with a fun kick-back leg and no sewing machine required! Psst: wouldn’t this be a great gift for a gnome fan? Oooh, I just love him – he looks so magical with the gold accents.
Alternatives for This Cupid Gnome DIY
I will share my entire process for making pool noodle gnomes bodies in detail soon, including tips and tricks that allow the final gnome to be solid and customized. For this gnome, however, I’m going to let the video do the explaining. Some things to keep in mind…
- You don’t have to kick back the leg. If you want two legs ending with feet and little bubbly toes, just put one dowel a half inch higher into the body and create both feet the way you make the one with the ornament hole.
- Cover the base. I had the idea that the base should be made into a cloud (cute idea, right?) but ran out of time. I would LOVE to see someone do this (share in the Facebook group here).
- Give Cupid a hat. Although I chose to make a crazy hair situation for my guy, you can make a slouchy hat in the same fleece as the wrap and sash. That would be adorable!
- Make a bow out of a popsicle stick. Heat water and let a popsicle stick (craft stick) soak in it until pliable. Place the wet stick into a bowl or glass to get the desired curve and leave to dry. String it by making a small hole on either end and tying some embroidery floss into it.
Make a Cupid Gnome DIY for Valentine’s Day
Below is my written tutorial (which is printable) but I suggest you watch the full DIY Cupid Gnome video tutorial here on the YouTube channel. You will see (and hear) things I just can’t write out in a way that works for everyone.
DIY Cupid Gnome with Pool Noodle Body
This adorable Cupid gnome is perfect for some Valentine's Day decor. Complete with a little bow and arrow, leg kicked back, and tiny wings, this guy takes you from the Dollar Tree into the clouds!
Materials
- pool noodle
- fleece in two colors (body and accent)
- dowels (mine were 7 inch and 6 inch)
- wood ornament (with pre-drilled hole)
- 14 gauge wire
- 2 inch Styrofoam ball (half)
- Poly-Fill
- small rocks, gravel, or other non-food weight item
- foam hair rollers (large and medium), optional
- faux fur (this is what I use)
- fuzzy pipe cleaner
- foam gold balls in two sizes (1 large, 2 medium, 1 small)
- grapevine heart
- felt scraps burgundy
- embroidery thread or sewing thread
- alcohol ink pen, optional
- gold leaf ribbon, optional
Tools
- hot glue gun
- Exacto knife
- pencil sharpener
- pliers to bend wire
- embroidery or sewing needle
Instructions
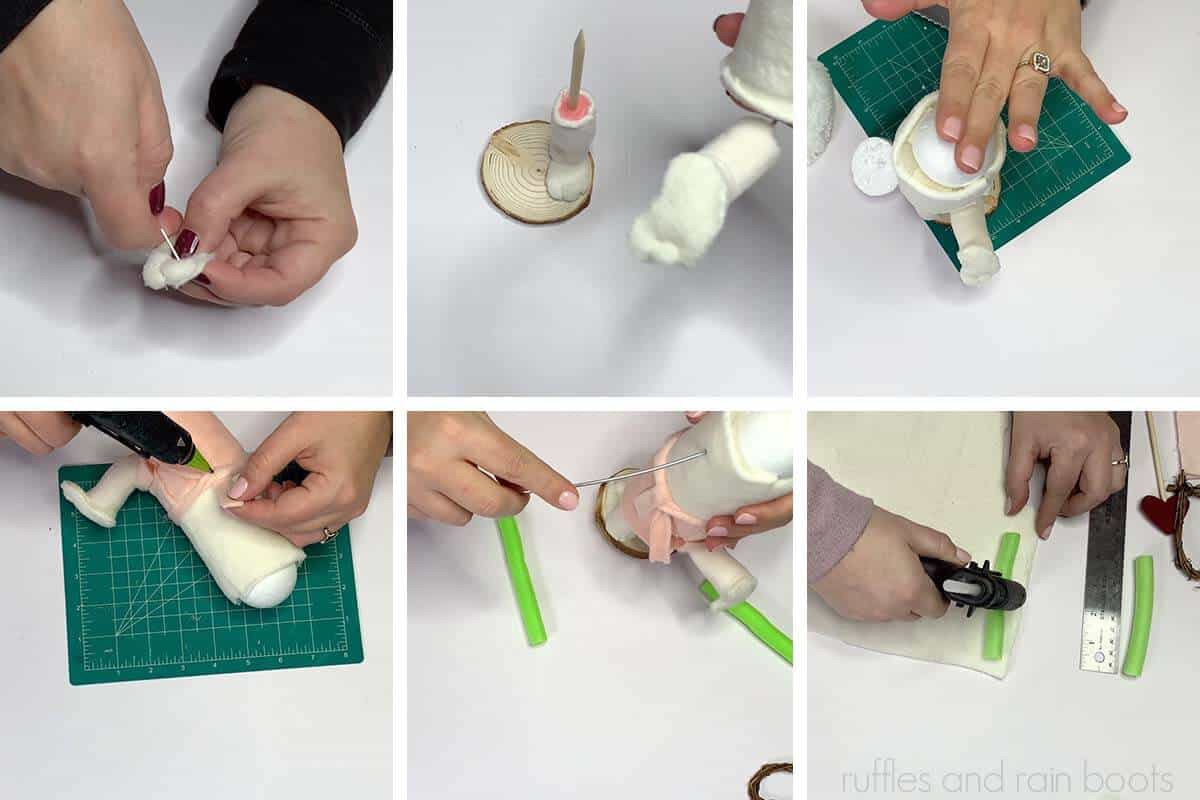
- Cut the pool noodle into a 4 inch section. Use masking tape to cover one end in an x-style, reinforcing the masking tape all the way around the body.
- Cut one dowel to 7 inches long, sharpen, and pierce into pool noodle on the opposite side of the masking tape. Place the dowel and body into the ornament and three inches of dowel should be showing.
- Use the 14 gauge wire to determine the length of wire (end bent over) you would like for your leg (should be three inches showing outside of the body).
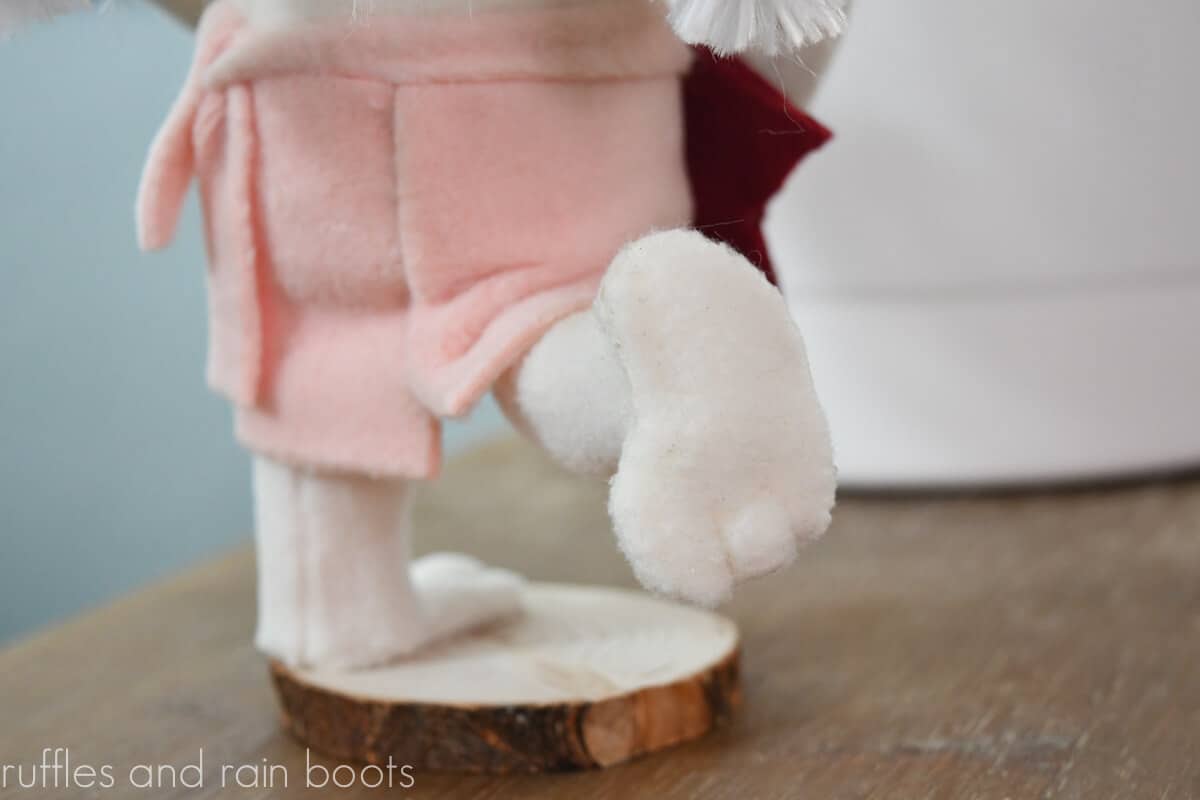
- Cut one pink hair roller in half (should have 2, 3-inch sections) and slip over each leg (one wood, one wire). If you are not using the rollers, wrap the dowel and wire in Poly-Fill when covering in step 6.
- Flip the pool noodle over so the legs are on top. Fill the opening with 2 inches of small rocks or other weight (no glue). For the bottom two inches, alternate glue and weight. Add the masking tape in an x-style with support.

- Wrap body in fleece to cover. Wrap each leg in fleece to cover (can do a knee with Poly-fill as I need or not).
- Cut foot shapes (I used a kidney bean shape) from the fleece matching the body. You will need two complete foot shapes for one foot and one complete and one front half only foot shape for the other.
- Glue the front edge of the wrong sides together of the full foot shapes, stuff with PolyF-ill, and then secure the back. Glue the front piece to the full foot shape for the other. Use the embroidery thread to sew toes (step by step instruction shown in the video).
- Glue the full foot to the bottom of the wired leg and the half to the ornament. Cut out the dowel space for the hole from the fleece. Glue in each completed leg (to the body) and into the ornament.
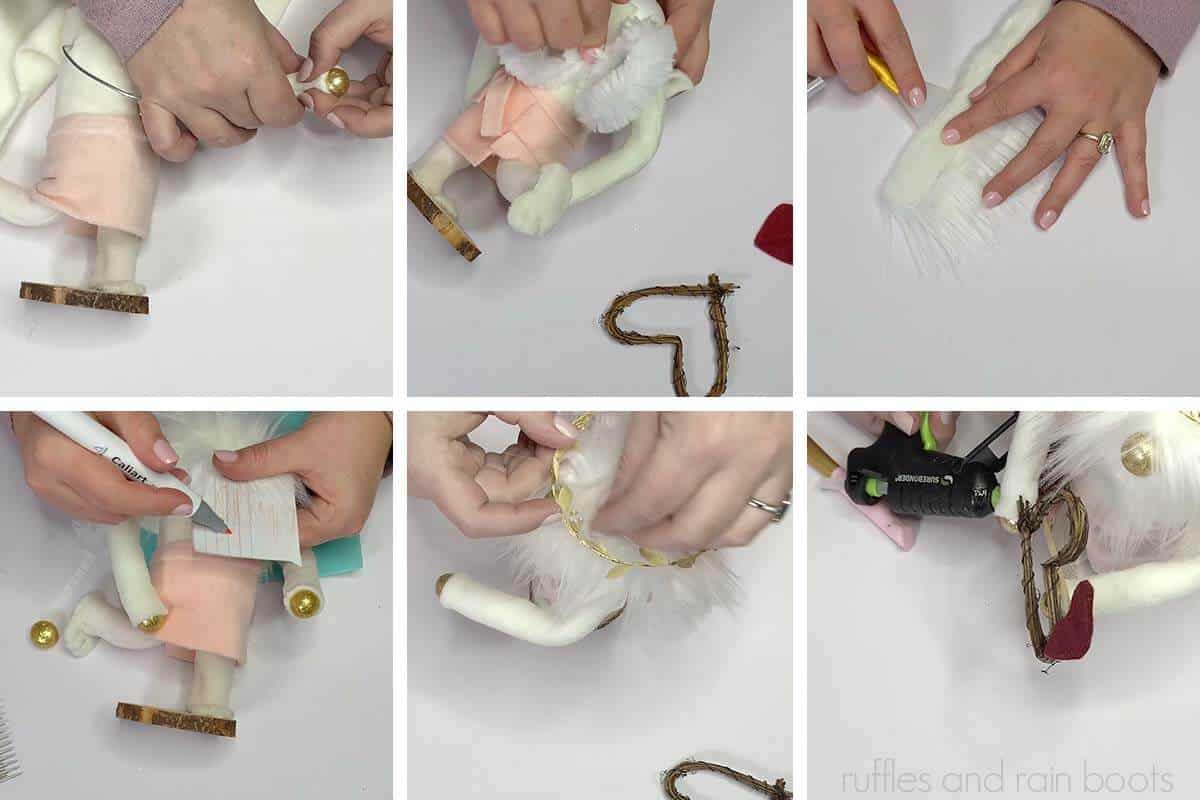
- Cut the 2-inch ball in half and glue one half to the top of the pool noodle to prep for the hair.
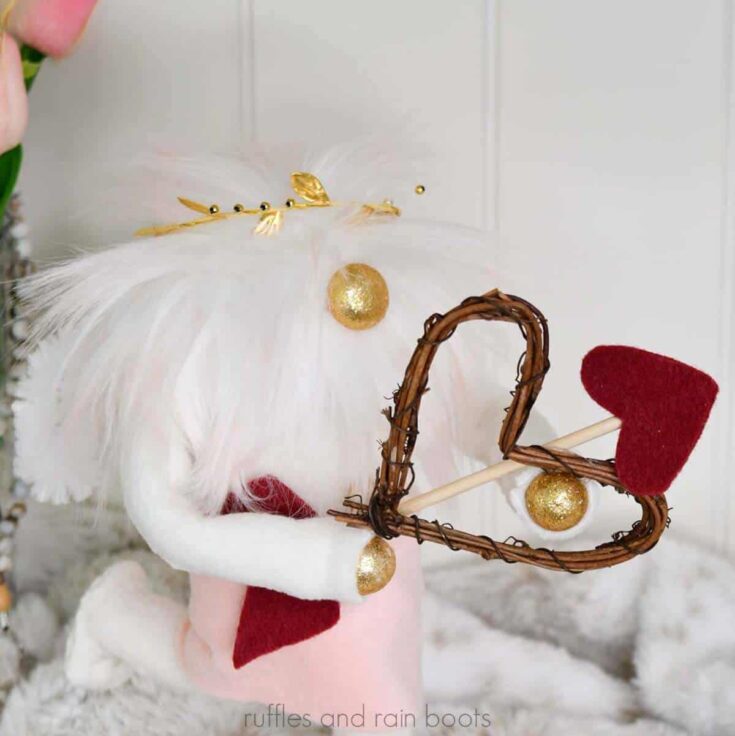
- Before creating the arms, create the bow and arrow by measuring your desired arm length for the bow. To create the arrow, cut two heart and two chevron pieces from the felt and glue a 6 inch dowel piece between them.
- If you want to add a belly button, cut the small foam ball in half and create a knot for the center using embroidery thread. Attach and set aside.
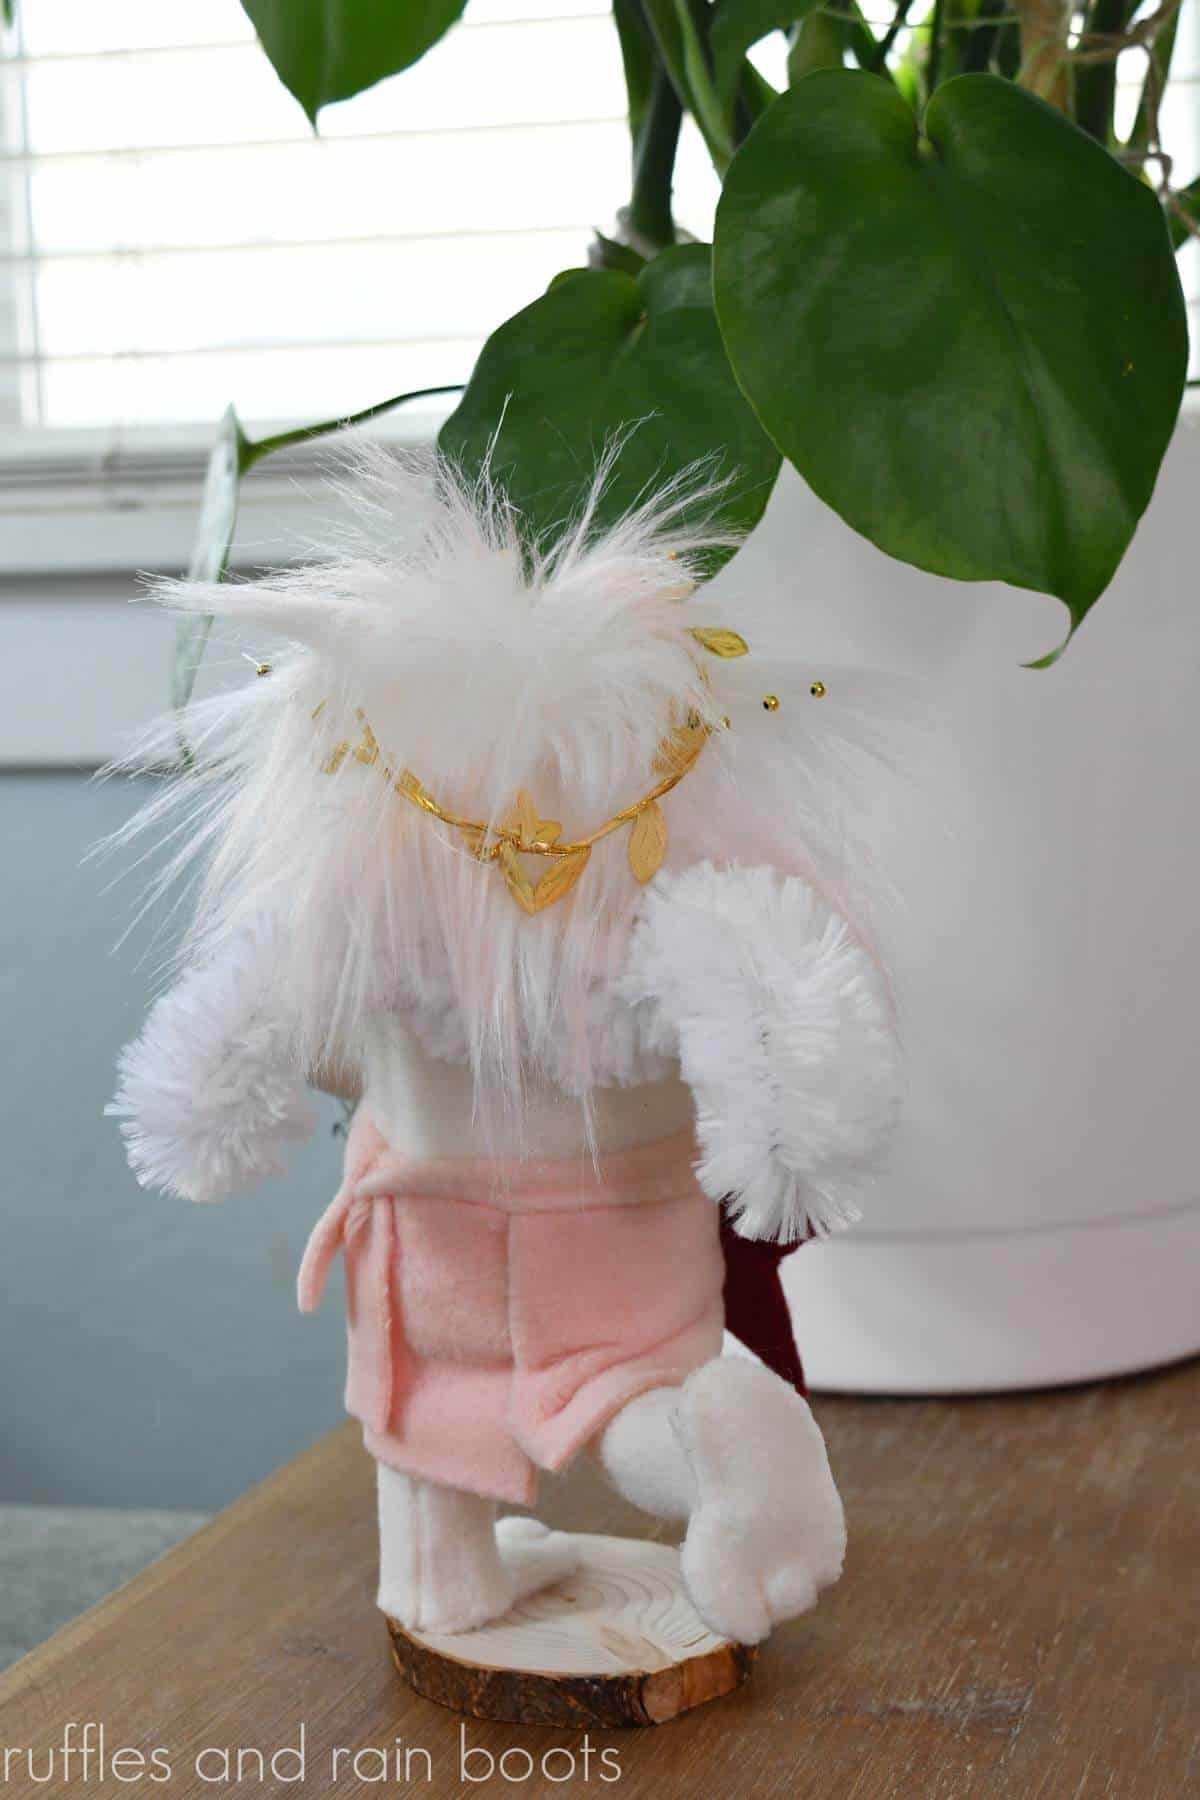
- In the second color fleece, cut 2.5 inches high by the width of your gnome and wrap the bottom inch of the pool noodle body. Cut a sash and attach it over the top edge of this piece and glue on the belly button just above.
- Use the wire to poke through where you would like the arms to be. Bend edges and cover with the medium sized foam rollers. Cover each arm in fleece, leaving at least 1/2 inch on either end unglued and hanging off. Slide onto the wire for the arms. Add gold foam balls for hands.
- Create wings by making two even loops and a one inch center horizontal bar, reinforced with a couple of wraps. Before cutting the pipe cleaner, create a 3/4 inch perpendicular piece to be inserted into the pool noodle and remove all fuzz from this piece. Use wire to poke a hole into the pool noodle, add glue, and glue the wings into the hole and to the back seam of the fleece. Bend the wings as shown in the video.
- Cut a round of fur with the Exacto knife to cover the ball (edges can be just shy of the noodle). Cut fur in 1.5 inch strip by the length of the width of your entire gnome with the arms. Fold down the top 1/4 inch of the fur strip to hide the fabric backing.
- Glue on the excess portion of the arms (NOT the roller) to the body. Wrap the fur around the entire top portion of the pool noodle. Color with alcohol ink markers, if desired.
- Split the fur to the fabric backing and glue the nose to be in line with the belly button. Add a leaf crown by forming a circle and placing it on the top of the head, pulling hair out to hold it in place.
- Secure the bow and arrow to the arms with hot glue.

Notes
The full video tutorial for this and many other gnomes is on the YouTube channel here: https://www.youtube.com/c/sarahnennidaher
Recommended Products
As an Amazon Associate and member of other affiliate programs, I earn from qualifying purchases.


More Gnomes You Might Like
- No Sew Valentine Gnome Couple – This adorable set bring the ooh’s and ahh’s!
- Valentine’s Day Sock Gnomes – Check out those amazing hats.
- Wood Block Gnome DIY – The sweetest pair of gnomes is waiting in your scrap pile.
- Gnome Puns and Gnome Sayings – Whether you’re making a sign, a gift tag, or a card, you can chuckle your way through these.
- Crochet Cupid Gnome Pattern and Tutorial – Let Lindsey show you how to make an adorable crocheted cutie.
Please Save or Share with Crafty Friends
Your shares are how this site grows and I am sincerely grateful. Please save this to a DIY pin board or share it to a crafty group on Facebook.


I LOVE THIS ONE.