
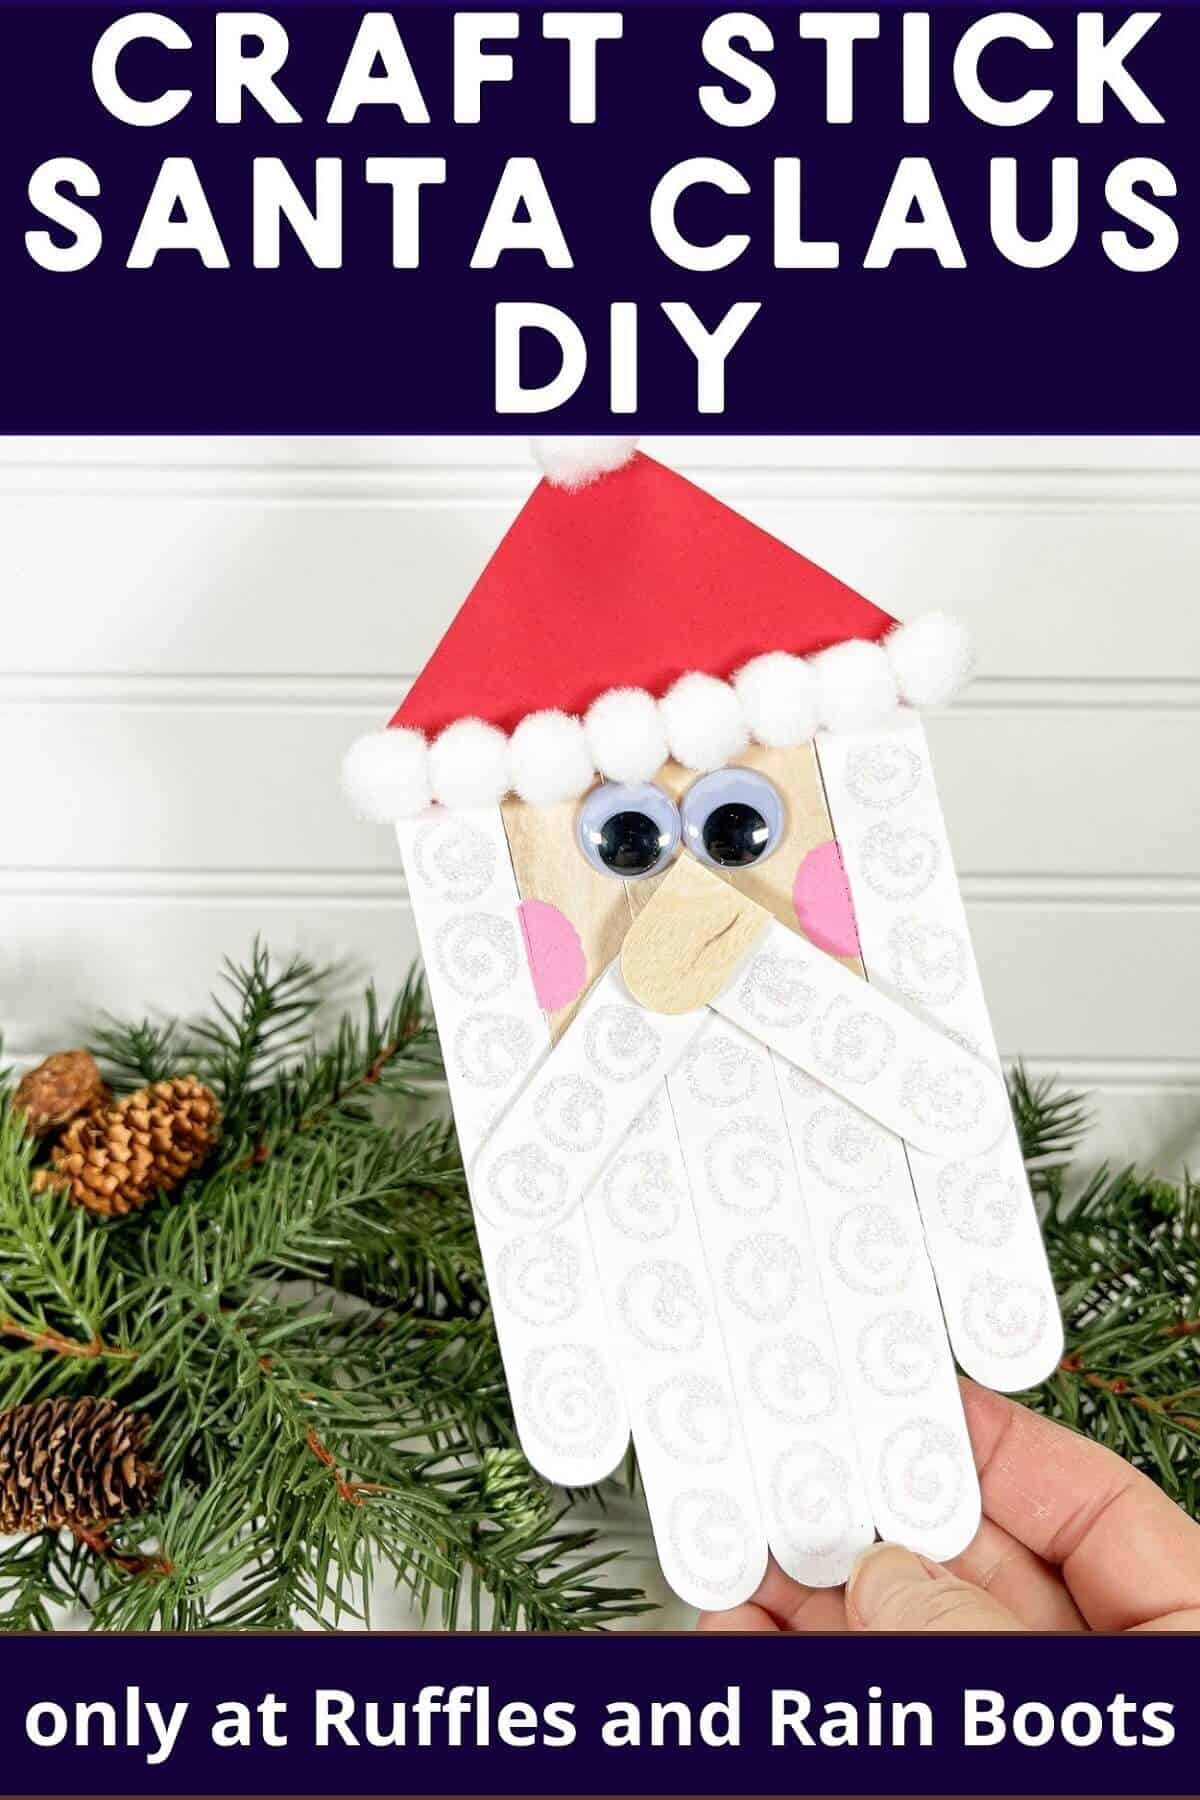
Dollar Tree Craft Stick Santa DIY
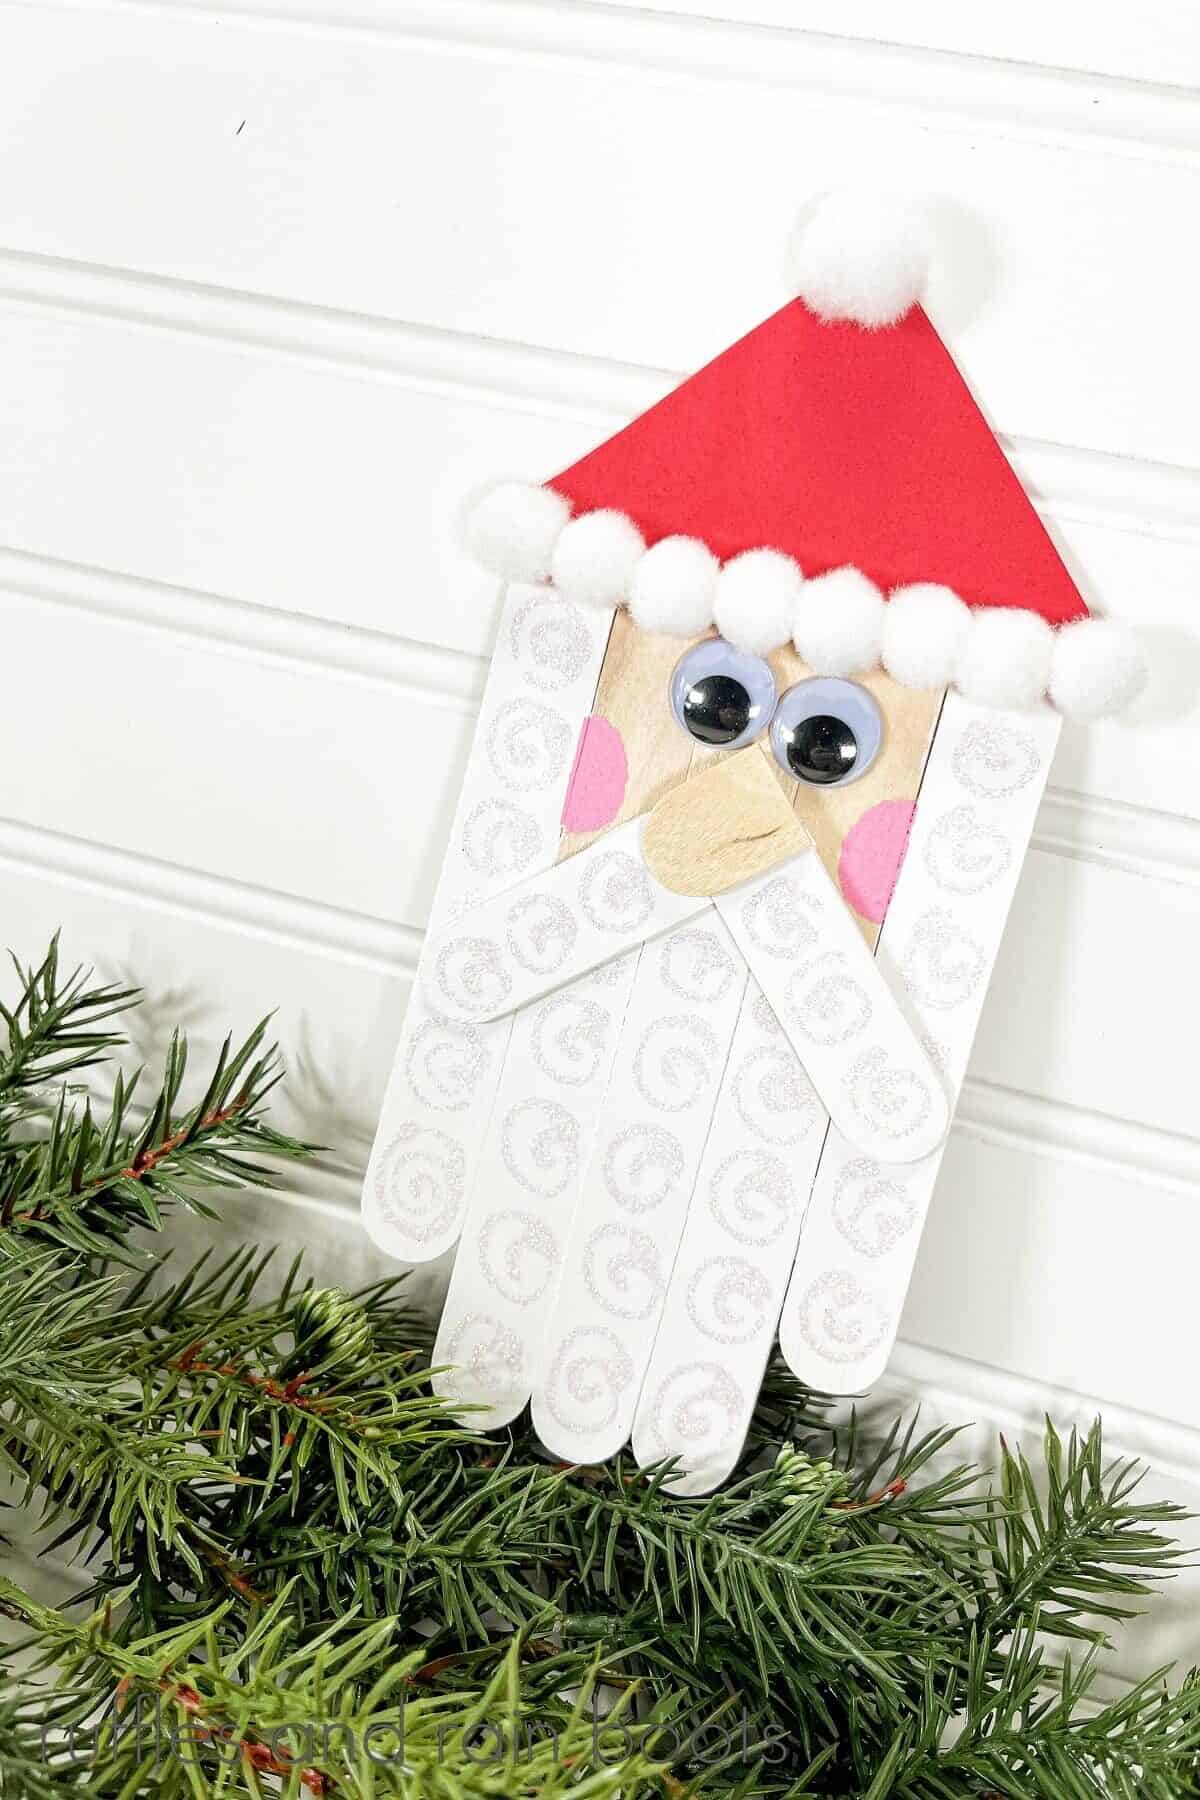
This adorable craft stick Santa DIY is so easy to make, you just need a few minutes of your time and a handful of supplies like popsicle sticks, paint, pom poms, craft foam, and some fun wiggly eyes.
If you are looking for a project for the kids, this is definitely it! The younger kids can help with the painting or coloring and the older kids can manage just about all the steps. This little guy will make a cute gift tag, ornament, or addition to your holiday decor.

RELATED READING: Make This Craft Stick Angel Craft with the Kids for Christmas
What You'll Find On This Page
Craft Stick Santa Claus Craft
Here at Ruffles and Rain Boots, we were recently at the Dollar Tree for a few things when I spotted some jumbo craft sticks and pom poms. All I could picture was a cute Santa and this craft was planned in minutes.
When planning a craft project we have geared towards the kids, I like to make it easy enough to complete in a short time. This keeps the kids focused long enough to make a project they can keep or share.
No Time to Make This Now? Save or Share
If you need to run to the Dollar Store to grab your supplies for this craft stick Santa, save or share this craft to your favorite Christmas craft pin board or share it on Facebook. Using the sharing buttons makes it easier when you are ready to begin your winter craft project.
As an Amazon Associate, I could earn from qualifying purchases. There may be affiliate links within this article.
Tips for Making a Popsicle Stick Santa
- If you don’t have craft foam for the hat, you can use felt or scrap fabric instead.
- Add a bit of glitz to this craft project and use sparkling pom poms.
- If you don’t have a foam dauber to make Santa’s cheeks, you can use an eraser from a new No. 2 pencil.
- If you want to make this craft stick Santa into a Christmas ornament for your tree, attach a ribbon to the back for hanging.
Supplies for This Adorable Craft Stick Santa DIY
Below are the supplies I used, but check your stash. For instance, regular-sized popsicle sticks will work for the body and red paper will be fine for the hat.
- Jumbo Craft Sticks
- White Pom Poms
- Wiggle Eyes
- Sponge Dabbers
- Iridescent Glitter Glue
- Glue Gun and Glue Sticks
- Red Craft Foam
- White and Pink Acrylic Craft Paint
- Scissors
- Paintbrush
- Pencil
- Craft Stick Santa Template

How to Make a Craft Stick Santa DIY
Each step for this cute holiday craft for kids is detailed below so it’s easy to follow. Keep this page open while you are creating your craft stick DIY project. If you would rather have a printable how-to, just scroll down and select the print button.

Line up five craft sticks, making the three in the middle an inch longer than the two on the sides. Cut two additional sticks in half as an anchor for the back. Glue all the pieces in place with the hot glue gun.
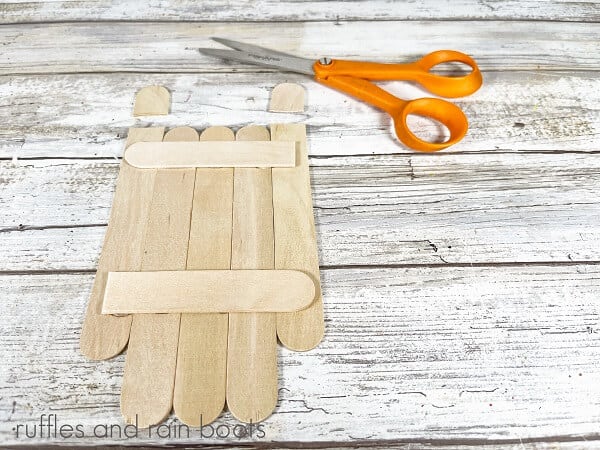
Using scissors, trim the excess from the top of the two longer craft sticks.

Glue two of the discarded pieces to create a “V” shaped mustache. Paint Santa’s body and his mustache white.

Trace the hat pattern from the template onto the red craft foam. Cut out the hat with scissors.
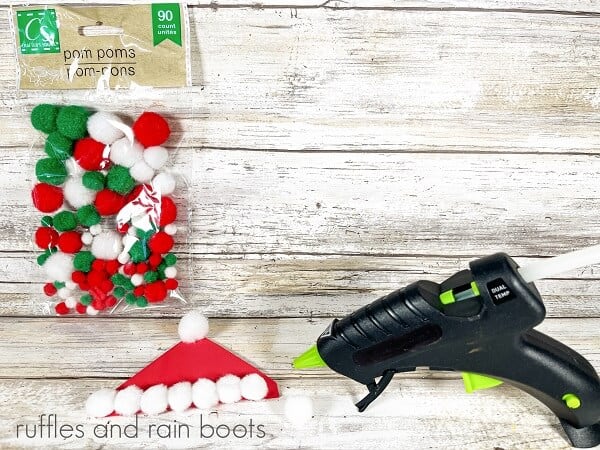
Using a glue gun or craft glue for the younger kids, attach the 7 white pom poms to the bottom of Santa’s hat and 1 to the top.

Glue Santa’s hat to his head and the wiggly eyes and mustache to his face. Use one of the pieces of the excess craft stick from step 2 for Santa’s nose.
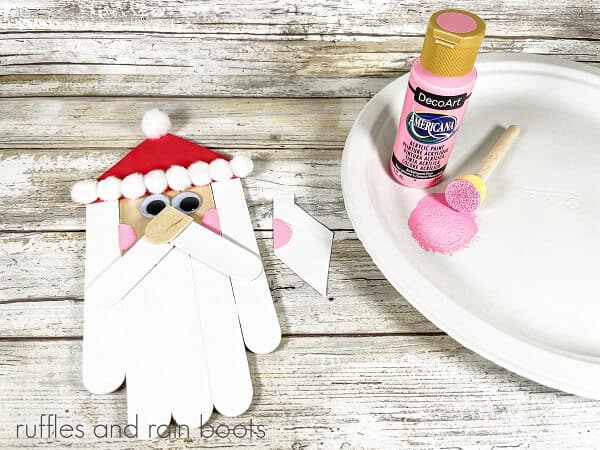
Using the round foam dauber and a scrap piece of paper or foam to protect the white painted area, make Santa’s cheeks with the pink acrylic paint.
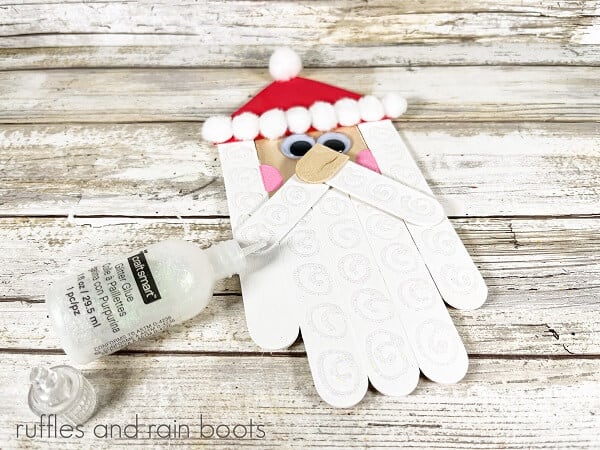
Using the iridescent glitter glue, add sparkle to Santa’s beard and mustache by making a swirl pattern.

Once the iridescent paint is dry, you can enjoy your Craft Stick Santa DIY.
Notes for Making a Craft Stick Santa
- If preparing this Santa craft for kids in advance for very young children to decorate, use a small piece of sandpaper to smooth out the edges on the cut craft sticks.
- To keep the wood from splintering when you cut the craft sticks, you can use a pair of serrated craft scissors.
- Instead of the wiggly eyes, use a black marker to make Santa’s eyes.
More Crafts You May Like
- DIY Christmas Tree Gnomes: These cute holiday gnomes are made with just a handful, of supplies from the Dollar Tree. He is too cute to keep to yourself, so make a few extra to share!
- Toilet Paper Christmas Gnome DIY: We were able to make this cute paper roll gnome in under 5 minutes. This is the perfect craft for younger hands to create. Kids will love it.
- MERRY Shiplap Christmas Sign: This holiday sign will fit right in with your Farmhouse-style decor. Your guests will never guess you didn’t buy this already made from the big box store.
- Christmas Paintbrush Gnome DIY: This adorable Christmas gnome had two sides to him, making it reversible. Who knew you could turn a simple paintbrush and some puffy paint into a piece of holiday decor?
Please Save or Share
Your shares are how this site grows and I sincerely appreciate it. Please save this craft project to your favorite Christmas craft project for kids’ pin board or share it on Facebook.
Craft Stick Santa DIY

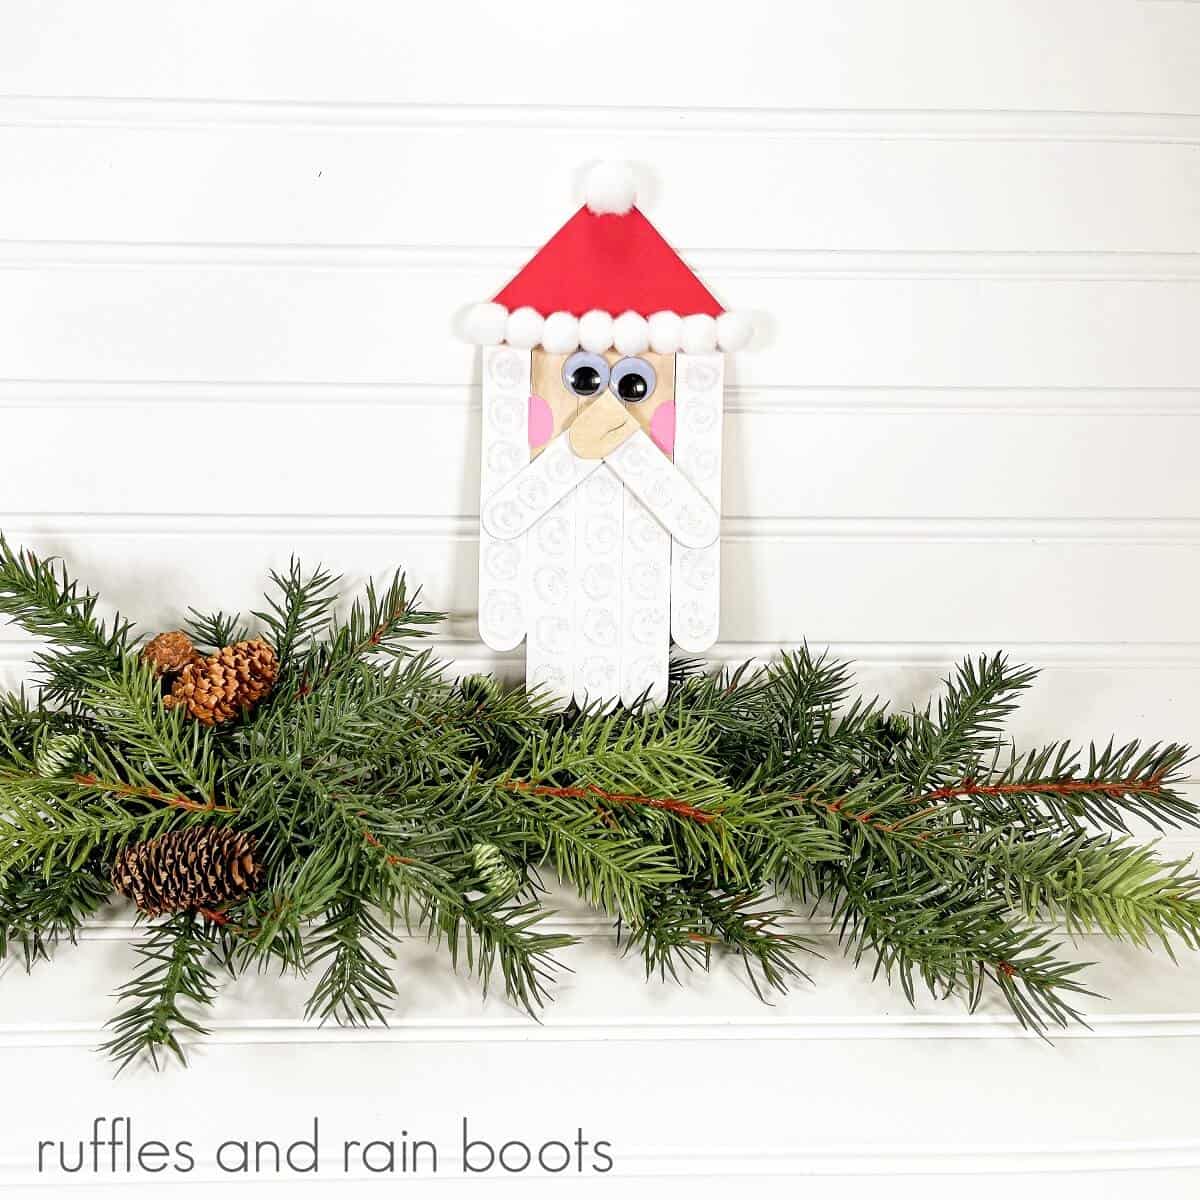
Make the holidays fun with this Adorable Craft Stick Santa DIY. You can make this craft stick Santa in under 30 minutes, including drying time with supplies from your local Dollar Tree. This adorable Santa is perfect to use as a tag for your holiday gifts or as a Christmas tree ornament this holiday season. This craft stick Santa makes a cute gift for the kid’s teachers, your family, and your friends.
Materials
- Jumbo Craft Sticks
- White Pom Poms
- Wiggle Eyes
- Sponge Dabbers
- Iridescent Glitter Glue
- Craft Foam, Red
- White and Pink Acrylic Craft Paint
- Craft Stick Santa Template
Tools
- Glue Gun and Glue Sticks
- Scissors
- Paintbrush
- Pencil
Instructions
- Line up five craft sticks, making the three in the center one inch longer than the two on the sides. Using scissors, trim two craft sticks the width of the Santa and attach them with the glue gun.
- Using scissors, trim the excess from the top of the two longer craft sticks.
- Glue two of the discarded pieces to create a “V” shaped mustache. Place the mustache on Santa and trace lightly with a pencil. Paint Santa’s beard, mustache, and hair with white acrylic craft paint. Allow to dry completely.
- Download, print, and cut out the craft stick Santa template. Using a pencil, trace the hat pattern onto red craft foam and cut it out with scissors.
- Using a glue gun, attach eight small white pom poms along the bottom edge of Santa’s. Glue one large white pom pom to the top of Santa’s hat.
- Glue Santa’s hat to his head. Using the glue gun, attach the mustache and wiggle eyes onto Santa’s face. Measure and cut a one-inch section of a jumbo craft stick, and glue it to Santa’s mustache face for his nose.
- Using the sponge dauber and pink paint, create cheeks on Santa’s face.
- Using the iridescent glitter glue, add sparkle to Santa’s beard and mustache by creating swirls. Set aside to dry.
Meet the Creator
Hi there, I’m Sarah Nenni-Daher. I’m a crafty gal and always have at least 14 projects going at once. I am a crafter, designer, DIYer, and pattern maker. I share my creations here and in the Ruffles and Rain Boots® Shop.
Here at Ruffles and Rain Boots®, you’ll find DIY gnomes, crafts, gifts, cupcakes, laser crafts, and so much more. I love sharing video tutorials over on YouTube and chatting with other crafters in my Facebook groups. We’d love to have you!