
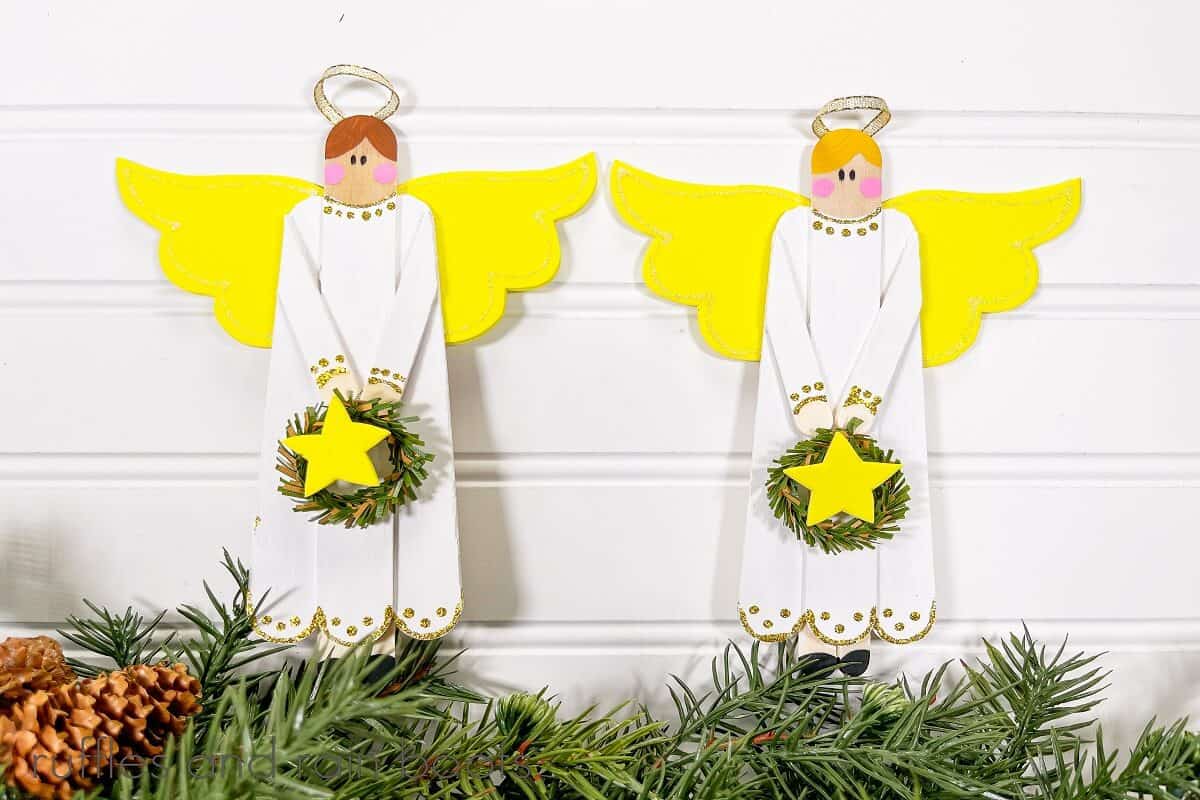
Dollar Tree Craft Stick Angel
This cute craft stick angel is a perfect project for little ones on winter break or their adults. You can use bright colors for little ones or leave them natural for a more grown-up style.
These adorable, simple style angels are made with supplies from the dollar store. And if you’re crafting with very young ones, be sure to read through the tips to see how to set this up for them.
RELATED READING: Make Some Craft Stick Fairy Dolls (with Flower Skirts)
What You'll Find On This Page
Craft Stick Angels Craft
Here at Ruffles and Rain Boots, I love to focus on low-priced crafts for the holiday season. Little ones are home, the lights are twinkling, and everyone just seems ready to make something. And well, I have a lot of these so we’re going to make some popsicle stick crafts this season.
Most of the supplies you might have on hand – popsicle sticks, foam, glitter glue, paint – and anything else you can find at the dollar stores. And some of what I used can easily be replaced – the ribbon halo, for example, would be great as a pipe cleaner.
No Time to Save or Share This Now? Save or Share
Gathering ideas for holiday crafts for kids? Save this Dollar Tree angel craft idea to your favorite winter craft pin board or share it on Facebook. Using the sharing buttons will make it easy when you are ready to make your angels.

As an Amazon Associate, I could earn from qualifying purchases. There may be affiliate links within this article.
Tips for Making Craft Stick Angels
- If you cannot find the foam for the wings, use a piece of medium-weight felt. The dollar stores also have paper doilies that, when folded in half, would work great for wings for this farmhouse angel DIY.
- No glitter glue on hand? Decorate the angel’s dress and wings with paint or a marker.
- You can use craft glue instead of the glue gun. If you choose to do this, allow it to dry completely.
- To make this craft with very young children, assemble the body and wings in advance and let them decorate with beads, sequins, markers, and other age-appropriate supplies.
- For very young children you might not be able to participate, a handprint angel (paint on hand, press to paper) is a great idea.
Supplies for Making a Dollar Tree Craft Stick Angel
Below are the supplies I used for this easy holiday craft for kids, but use what you have on hand. I’ll add a couple of alternate supply suggestions for inspiration.
- Craft Sticks, Jumbo and Regular Sizes
- Craft Foam for Angel Wings (or felt or a paper doily)
- Pine stems (or bells, ornaments, or mini hymnals)
- Iridescent and Gold Glitter Glue (or markers)
- Glue Gun and Glue Sticks or Tacky Glue
- Black Marker
- White, Black, Pink, Yellow, and Brown Acrylic Craft Paint
- Thin Gold Ribbon (or pipe cleaners)
- Paintbrush
- Scissors
- Ruler
- Craft Stick Angel Wing Pattern

How to Make a Craft Stick Angel
Each step for this Christmas craft for kids is detailed below so it’s easy to follow. Keep this page open while you are creating your craft stick winter angel. If you would rather have a printable how-to, just scroll down and select the print button.

Cut the tips off two craft sticks and place them side by side. Place a 3rd uncut craft stick in the middle, and glue the craft sticks into place.

To create angel arms, measure and cut two regular craft sticks in half. Place the flat side up near the edges of the outer sticks and angle the sticks so each meet in the center. Use a pencil to mark a diagonal line on two and snip off with the scissors so the stick is flush with the body. Place them on the body as shown in the image.

Use the remaining sticks as legs placed under the body. Use the glue gun to attach the arms and legs to the body of the angel.

Paint the angel’s dress with white acrylic craft paint, leaving the feet, hands, and head plain.

Next, paint the angel’s hair yellow and/or brown, and paint the feet black.

Using the end of an eraser, paint the angel’s cheeks pink on either side of the face.

Using a marker, draw the eyes as small ovals between the cheeks. Make a loop with the gold ribbon to form the halo and glue it to the back of the angel’s head.

Print and cut out the free wing template. Trace the wings onto felt or foam and cut out. Glue them onto the back of the angel, just below where the face stops.

Decorate the dress and wings with the gold and iridescent glitter glue. Or, let the kids go wild with markers or paint.

Now, using the pine stems, create the wreath by forming a small portion of the stem into a circle. Join the ends by twisting them over each other.

Glue the wreath just below the angel’s hands. If desired, cut a star from the yellow foam and attach it to the front of the wreath. Now you can hang this as an angel ornament on your Christmas tree.
Notes for Making a Dollar Tree Craft Stick Angel
- Paint the angel’s face and hands with flesh-tone paint as an alternative to leaving it natural.
- Use a paper doily folded in half for the wings if you can’t find felt or foam to work with tacky glue.
- Instead of using ribbon to make the angel’s halo, use a gold or silver chenille stem, bent to make the halo shape and attached with a glue gun.
More Christmas and Winter Crafts You May Like
- Christmas Drop Cloth Trees Craft: Finish these fabric trees in about 30 minutes. They are a perfect palette for any color scheme.
- Christmas Reindeer Paper Roll Craft: This paper roll reindeer is the cutest Christmas kid’s craft idea. Younger and older toddlers can make this with a help from an adult.
- Make a Jack Frost Gnome for Winter: This Jack Frost gnome is a perfectly fun craft to usher in the colder wintertime weather.
Please Save or Share
Your shares are how this site grows and I sincerely appreciate it. Please save this sweet angel to your favorite craft pin board or share it on Facebook.

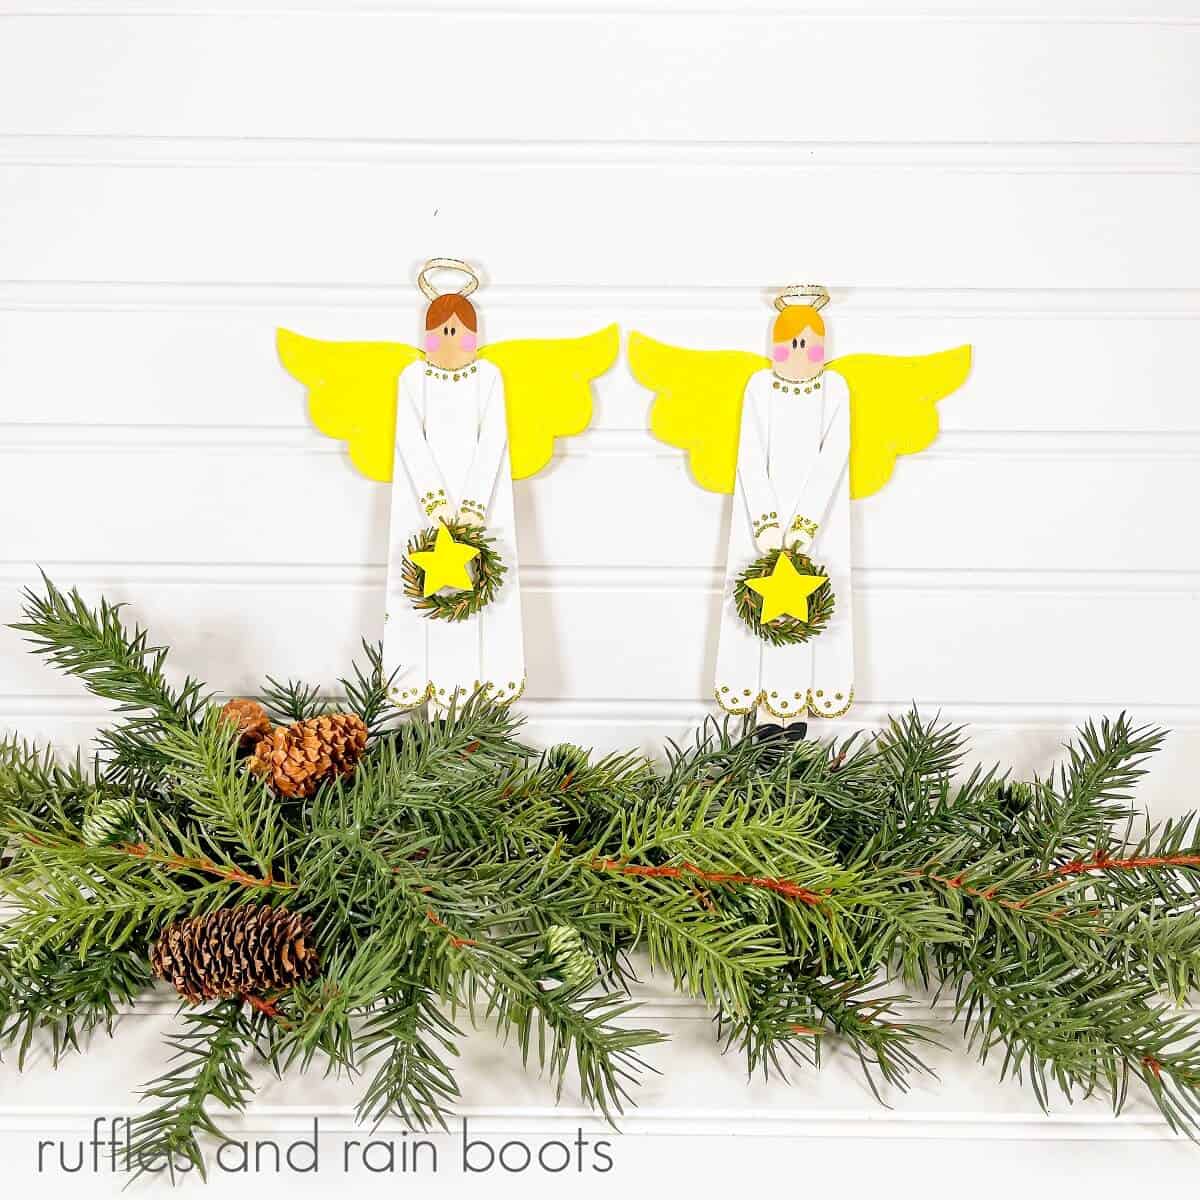
Dollar Tree Craft Stick Angel

This cute Dollar Tree Craft Stick Angel is so easy to put together. All you need are some simple supplies from Dollar Tree to create this inspirational craft. We used materials like jumbo craft sticks, paint, craft foam, and scissors. This adorable craft is a wonderful way to help the younger kids with skills like cutting, tracing, coloring, and counting. Older kids can pull this off on their own while the littles will need some adult help.
Materials
- Craft Sticks, Jumbo and Regular Sizes
- Craft Foam, Felt, or Paper Doily for Wings
- Chenille Stems, Pine (or other small holiday decoration)
- Glitter Glue
- White, Black, Pink, Yellow, and Brown Acrylic Craft Paint
- Gold Ribbon, thin
- Craft Stick Angel Pattern
Tools
- Glue Gun and Glue Sticks
- Scissors
- Ruler
- Small Paintbrush
- Black Marker
Instructions
- If needed, print and cut out the angel wing template.
- Cut the tips off two jumbo craft sticks. Using a 3rd uncut craft stick in the middle, glue the cut craft sticks into place behind the uncut at an inward angle.
- To create arms, measure and cut two regular craft sticks in half. Place them on the body (allowing a space for the shoulders) and angle them in to the center. Use a pencil to mark a diagonal line where the sticks hang off and snip the ends off with the scissors.
- Use the other two halves of the regular craft sticks as legs. Position them in the center, behind the body and use the glue gun to attach.
- Paint the angel's dress (we used white acrylic craft paint), leaving the feet, hands, and head plain.
- Next, paint the angel's hair at the top of the center jumbo stick. We created feet by painting the end tips of the legs black.
- Paint the angel's cheeks pink. Use the end of an eraser or fill them in with markers.
- Using a black marker, draw two ovals for eyes between the cheeks.
- Make a loop with the gold ribbon to form the halo and attach it to the back of the angel's head.
- Use the template and pencil to trace the shape onto foam, felt, or paper. Cut out the shape and glue the wings onto the back of the angel.
- Using no more than a half of a pine stem, create the wreath by joining and twisting the two ends together to form a circle. Attach the wreath just under the angel's hands.
- Optional: add a star cut from the foam or felt to the center of the wreath.
Notes
Use foam, felt, or even paper doilies to form the angel's wings.
For young children, create the body and attach the wings before letting them decorate.
A few more ideas for the accessory are mini ornaments, mini hymnals, or a piece of popsicle stick the little ones can write their name upon.
Meet the Creator
Hi there, I’m Sarah Nenni-Daher. I’m a crafty gal and always have at least 14 projects going at once. I am a crafter, designer, DIYer, and pattern maker. I share my creations here and in the Ruffles and Rain Boots® Shop.
Here at Ruffles and Rain Boots®, you’ll find DIY gnomes, crafts, gifts, cupcakes, laser crafts, and so much more. I love sharing video tutorials over on YouTube and chatting with other crafters in my Facebook groups. We’d love to have you!