Dollar Tree Clay Pot Acorn Treat Jar
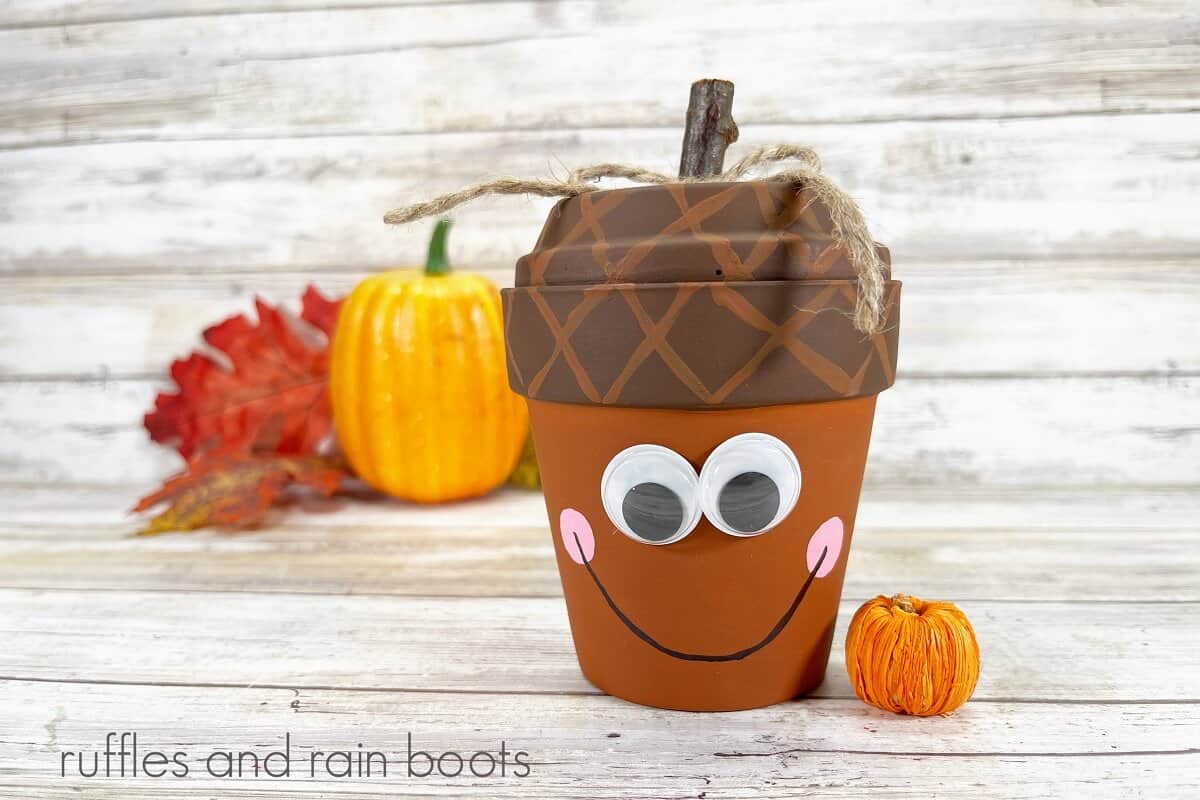
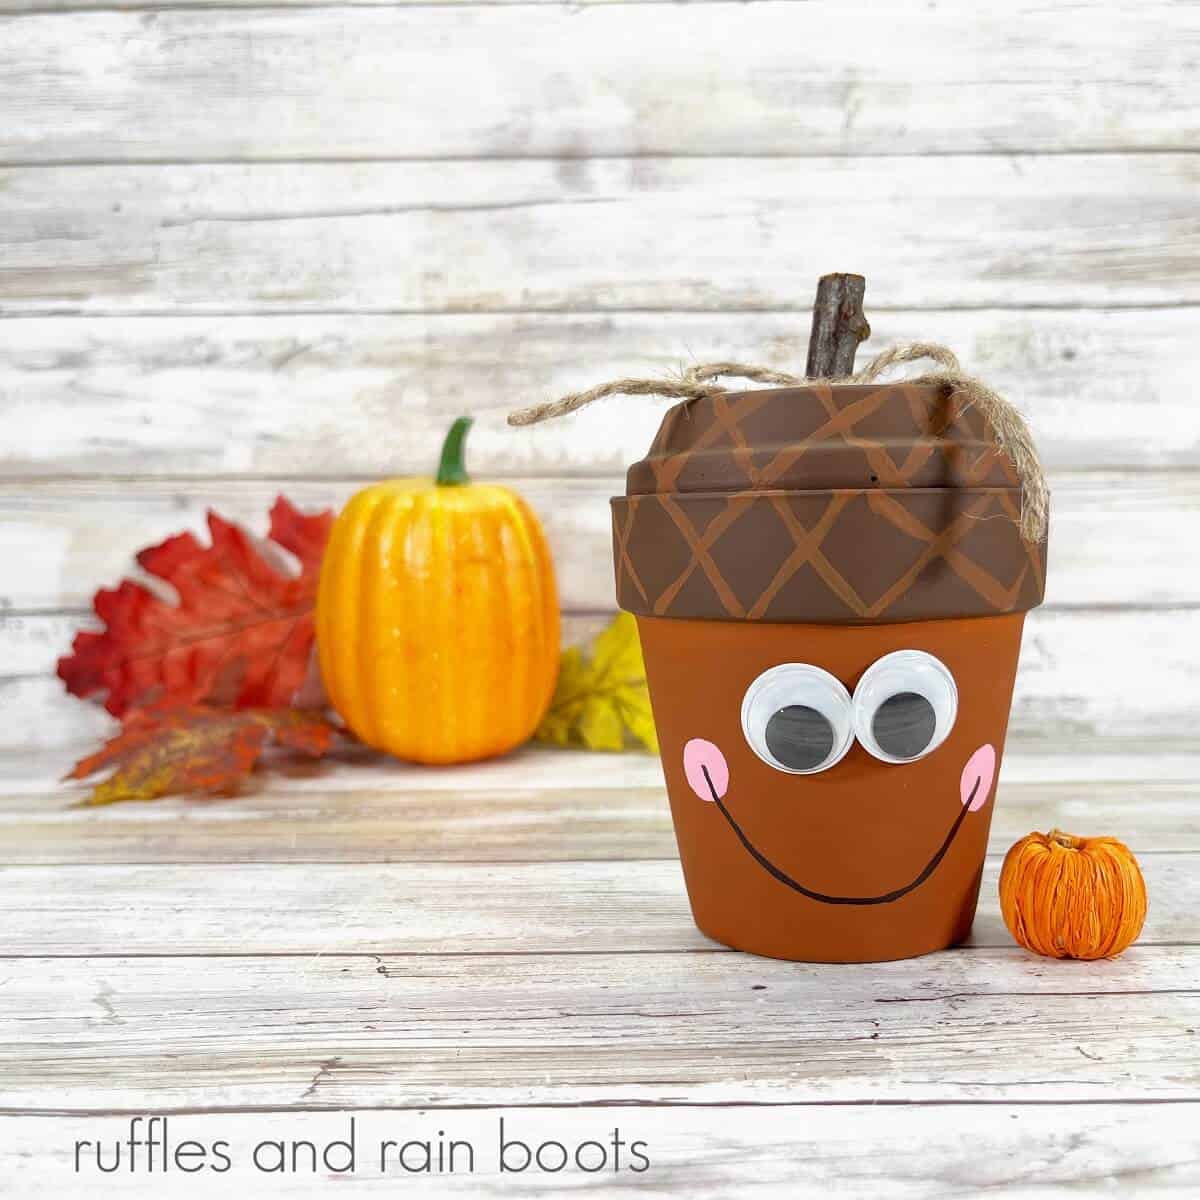
Make this cute clay pot acorn treat jar for fall. It’s time to get out the sweater, grab some apple cider, and this Dollar Tree fall craft can be used as decor or an adorable treat jar.
This fall craft idea is so easy and fun to make for kids of all ages or as gift for your child’s teacher or care giver. Look at the cute little face on this guy!
RELATED READING: 3-Minute Sock Pumpkins for Fall (Modern Style)
What You'll Find On This Page
Easy Clay Pot Craft
Here at Ruffles and Rain Boots, I’m working through my craft supplies stash. Having moved all of these supplies from Washington to Texas, you can bet I’m using them up before I buy more.
Check your stash to see what you have on hand to make your own Dollar Tree fall candy dish. Instead of brown paint, maybe wrap the top edge of the clay pot in twine. Perhaps use a cork for the stem instead of a twig.
If you need a minute to sift through your supplies and gather up everything for your clay pot craft, bookmark this page to make it easier to come back to when you are ready to create your acorn.

As an Amazon Associate, I could earn from qualifying purchases. There may be affiliate links within this article.
RELATED READING: Dollar Tree Basket Pumpkin – Look for These!
Why You Should Make Dollar Store Fall Treat Jar
This fall craft idea is so versatile! You can use it as a treat jar or you can glue the lid down and make it a permanent acorn decor piece.
This is a kid-friendly craft project. Granted, there is some detail work and grown-up tools the little ones may not be able to master, but overall, they will have a blast making this clay pot craft idea.
If you are worried about breaking the bank, you won’t do that with this project. The materials needed can be picked up from the dollar store. And they make such a great gift idea or you can sell them on Etsy!

RELATED READING: Clay Pot Mushrooms DIY – These Look Great All Year
Tips for Making Clay Pot Acorns
- Though I used a stick for the stem, a craft cork, wood thimble, or another craft stash find would work, as well.
- If you have paint markers, use them for the cheeks and the mouth but allow them to dry for 30 minutes before moving on to the next step.
- Once you have completed your project, allow it to cure for 24 hours before sealing it. This step is not mandatory, but it will increase the life span of the painted accents.
- If you plan to use this little guy for edible treats, use wrapped candies and products.
Supplies for This Fall Acorn Craft
Below are the items I used to make my clay pot acorn craft. Before you head to the store, check your craft bin and yard to see what you have on hand.
- Clay Pot
- Clay Pot Saucer
- Googly Eyes
- Wooden Stems
- Twine
- Light Brown, Brown, Dark Brown, and Pink Craft Paint
- Hot Glue Gun and Glue Sticks
- Small Detail Paintbrush
- Scissors (Ask a grown-up for help with this one)
- Pencil with new Eraser
- Black Permanent Marker

How to Make a Clay Pot Acorn
Each step for the terracotta clay pot craft is detailed below. Keep this page open while you are creating your acorn clay pot. If you would prefer a printable how-to, scroll down and select the print button or save it as a PDF.
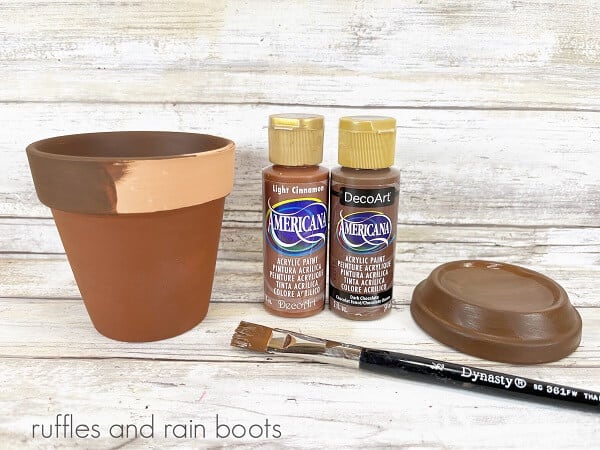
Basecoat the base part of the clay pot with medium brown craft paint. Basecoat the rim of the clay pot and the clay saucer with dark brown craft paint. Allow the paint to dry completely. If you struggle with keeping the lines tidy, you can use some painting tape to help! (Painting tape is good because it won’t stick to the paint and pull it up.)
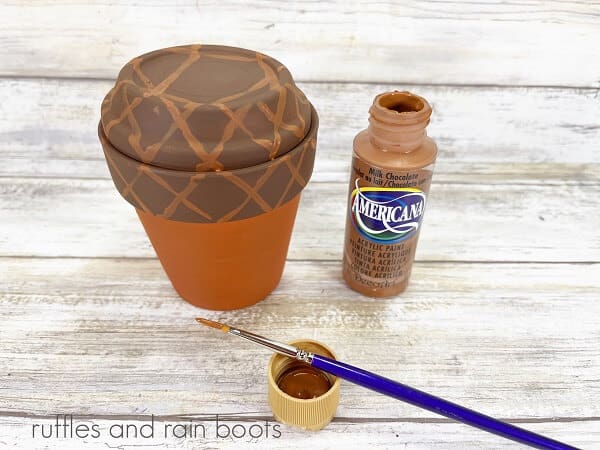
Using a small detail paintbrush and light brown craft paint, create an “X” pattern around the rim of the clay pot. Place the clay saucer on top of the pot as a lid and continue to paint the “X” pattern. To help the X’s line up you can sketch the pattern in pencil first to make sure it works with both pieces!

Add a wooden stem to the top center of the clay saucer by sticking it on with a glue gun. This can be a random (cleaned first) stick from the yard or sticks from your dollar store run. Note: you can substitute the hot glue for a tacky glue if working with young children.
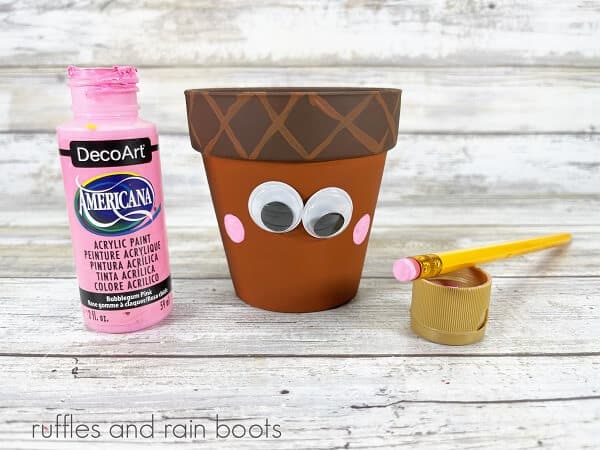
Attach two googly eyes with a glue gun. You can put them as close or as far apart as you want them to be. Next, add cheeks by dipping a new pencil eraser into a small drop of pink craft paint and placing it on either side of the face.

Draw a mouth from cheek to cheek with a black magic marker. You can also do a test drawing or two in pencil here as well.
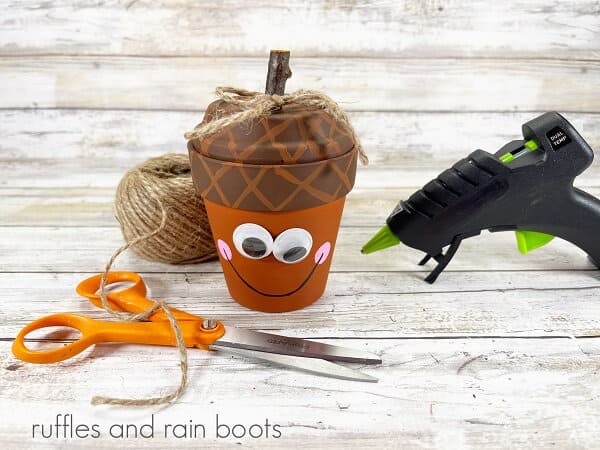
Tie a small-ish bow with the twine and fit it to the wooden stem with the hot glue gun.

Fill the pot with fall treats and gift cards, plant some cool (and safe for kids and pets) plants, or glue the top down and use it for a cute fall decoration. You can even add a few faux leaves for a fun fall look.
Notes for Making a Clay Pot Treat Jar
- Clay tends to be dusty, so wipe your pot with a lightly damp cloth and let dry before painting.
- Because clay is porous, a light coat of Mod Podge or a spray sealant prior to painting is a good idea to save on paint. Once you are done with the painting, seal it again and it will last for years.
- If you have them on hand, this craft can also be done with a mason jar. Seal the paint to avoid any scratching.
- For a more elevated piece, leave off the eyes and face painting.
More Fall Crafts You May Like
- Clay Pot Apple Craft: This is another Dollar Tree clay pot craft idea that is perfect for fall and you can turn it into a Teacher Appreciation gift, treat jar, or decor piece.
- Cricut Pillow for Fall with Free SVG: Do you have a heat press and you are looking for a fun fall craft? This infusible ink pillow is just what your fall decor needs. It is simple, adorable, and inexpensive to make.
- Buffalo Check Fall Sock Gnome: I am a huge sucker for buffalo plaid, so this gnome went right up to the top of my favorite gnomes list. He is so easy to make and will be right at home in your already-growing gnome collection.
Please Save or Share
Your shares are how this site grows and I sincerely appreciate it. Please save this fall craft to your favorite Pinterest board or share it on Facebook.

Clay Pot Acorn Craft
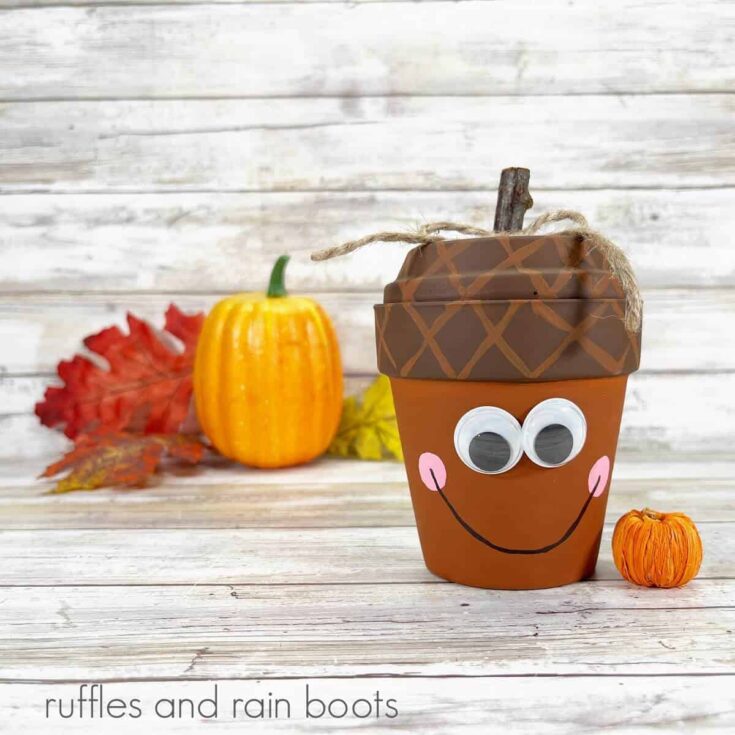
This clay pot acorn craft is a fun activity to create with the kiddos in just about 30 minutes. Add a special treat or gift card inside the acorn for a fun fall gift! You can also glue the top down as an adorable fall decorative accessory. This fall craft project is super cost-effective. You can put this craft together with limited supplies and under $3. This would also be a cute classroom craft for kids or a great teacher’s appreciation gift.
Materials
- Clay Pot, 3.5”
- Clay Pot Saucer, 3”
- Googly Eyes
- Wooden Stems
- Twine
- Light Brown, Medium Brown, Dark Brown, and Pink Craft Paint
Tools
- Glue Gun and Glue Sticks
- Paintbrush, flat and detail
- Scissors
- Pencil with new Eraser
- Permanent Marker, Black
Instructions
- Basecoat the base part of the clay pot with medium brown craft paint. Basecoat the rim of the clay pot and the clay saucer with dark brown craft paint. Allow the paint to dry completely.
- Using a small detail paintbrush and light brown craft paint, create an “X” pattern around the rim of the clay pot. Place the clay saucer on top of the pot as a lid and continue to paint the crosshatch pattern.
- Add a wooden stem to the top center of the clay saucer by gluing it with a glue gun.
- Attach two googly eyes with a glue gun. Add cheeks by dipping a new pencil eraser into the pink craft paint and painting on either side of the face.
- Draw a mouth from cheek to cheek with a black magic marker.
- Tie a bow with the twine and glue it to the wooden stem. You can fill the pot with treats, gift cards, faux flowers or glue the saucer to the pot, sealing them together.

