
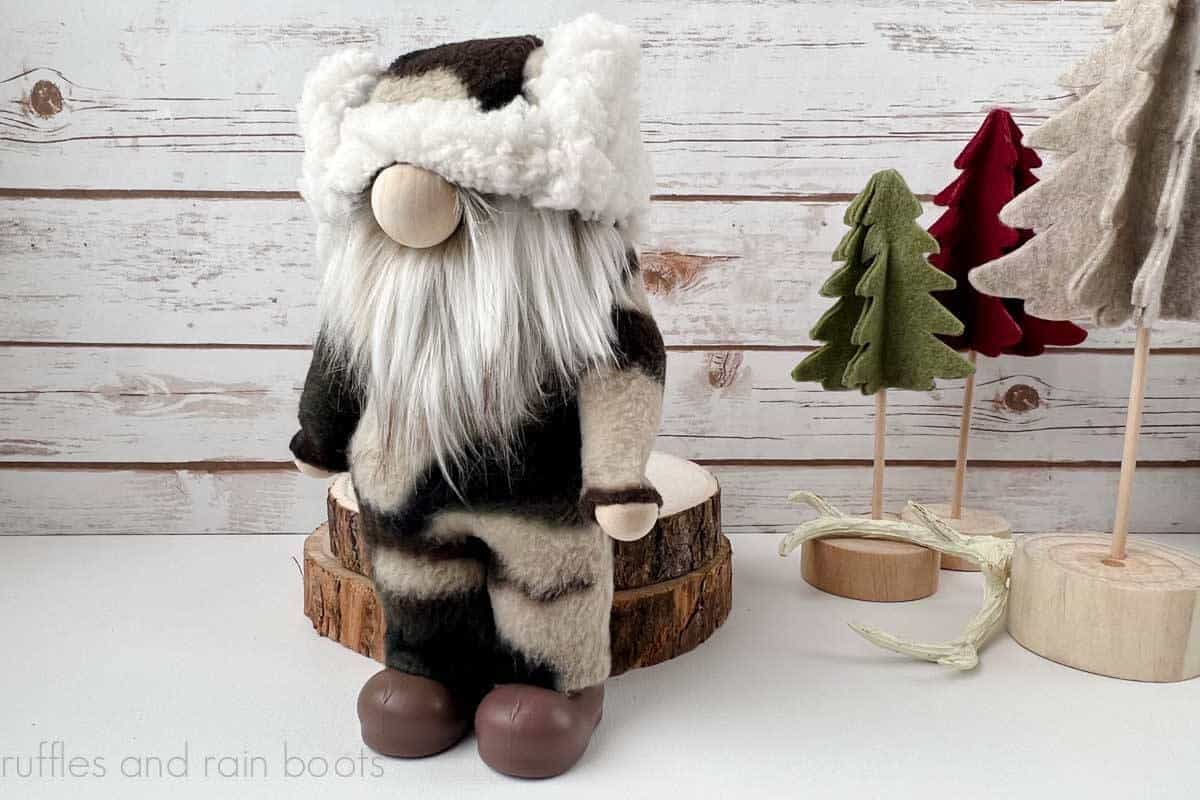
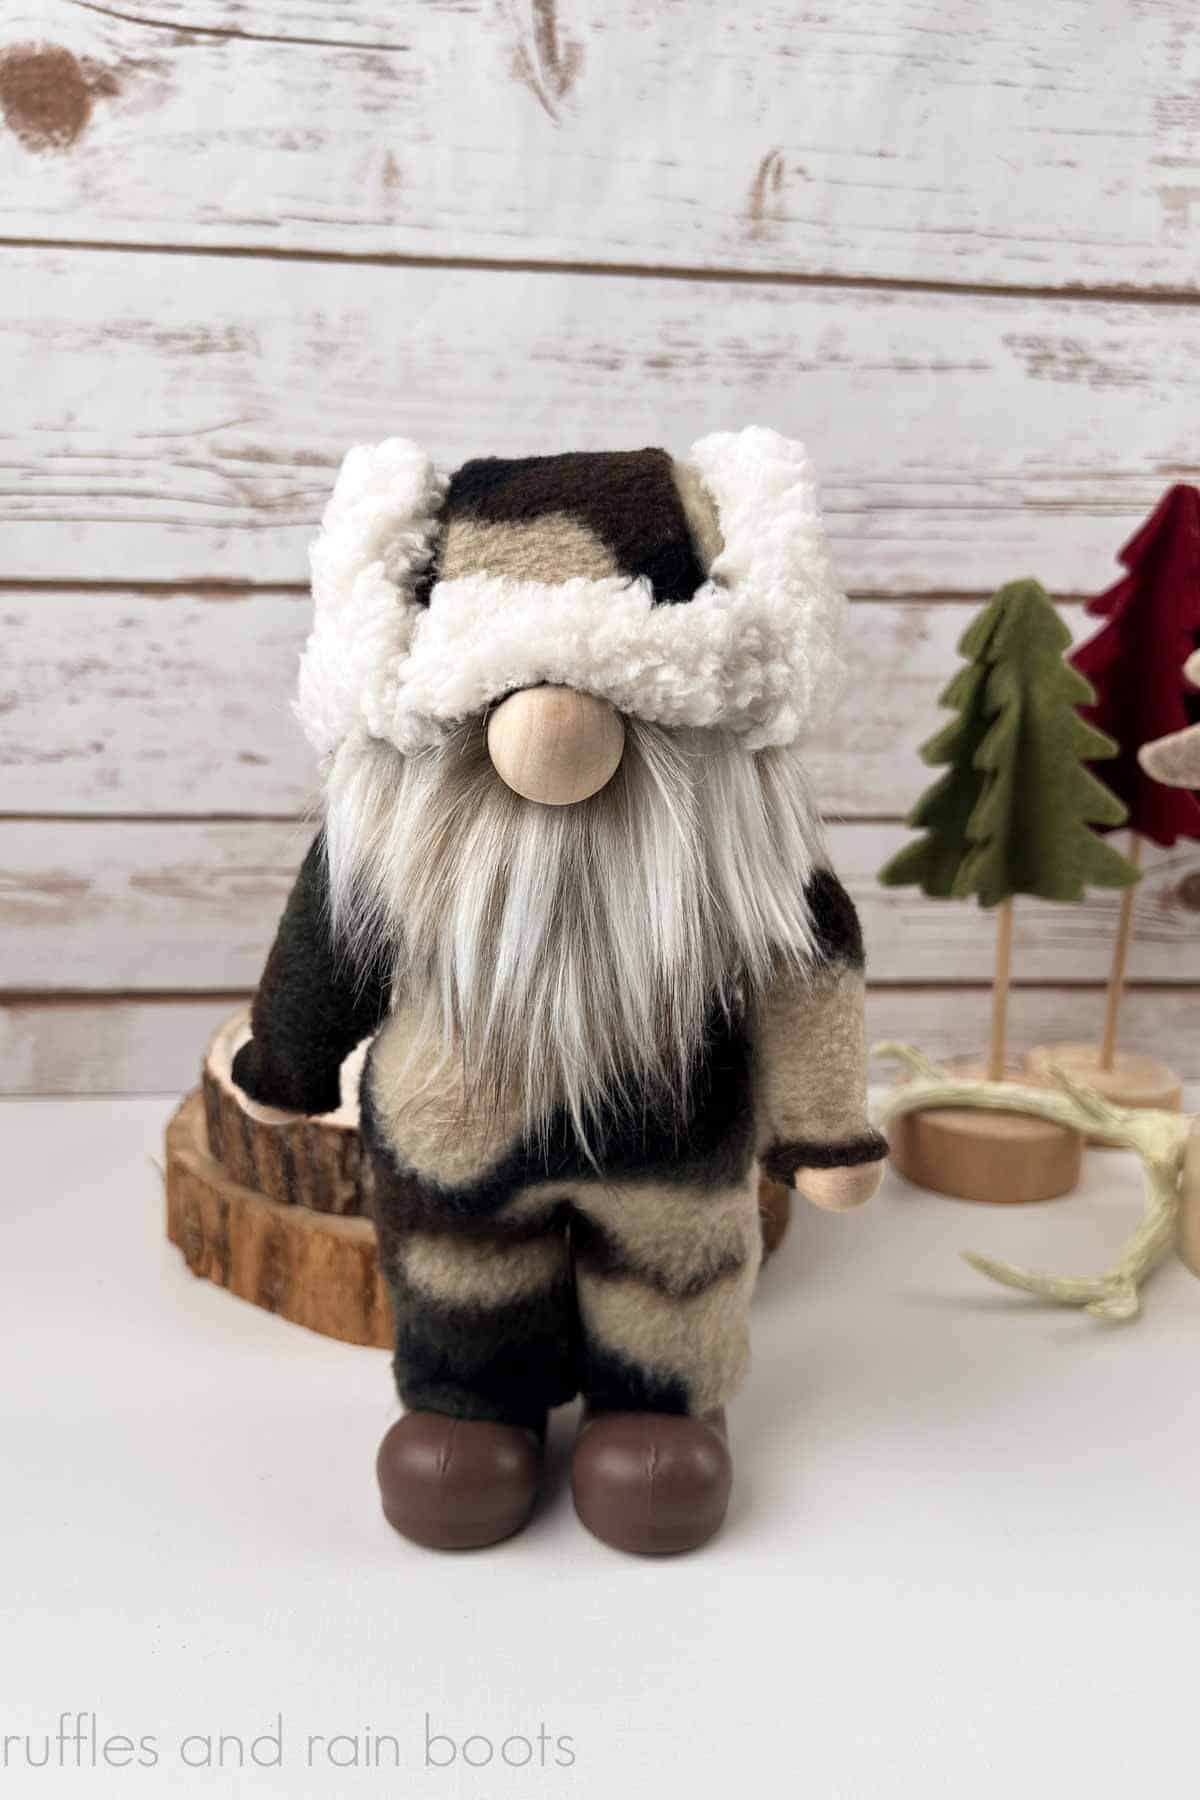
Standing Hunter Gnome in Boots
This adorable DIY standing hunter gnome has the best boots, the easiest hat, and the most boopable nose. Create a standing pool noodle gnome in about 30 minutes using this free gnome tutorial.
Follow along below with the step by step tutorial or watch the real-time creation of this DIY hunter gnome in boots video tutorial. Either way, let’s get started with this fun gnome craft.
RELATED READING: Easy Hunter Sock Gnome with Mudflap Hat
What You'll Find On This Page
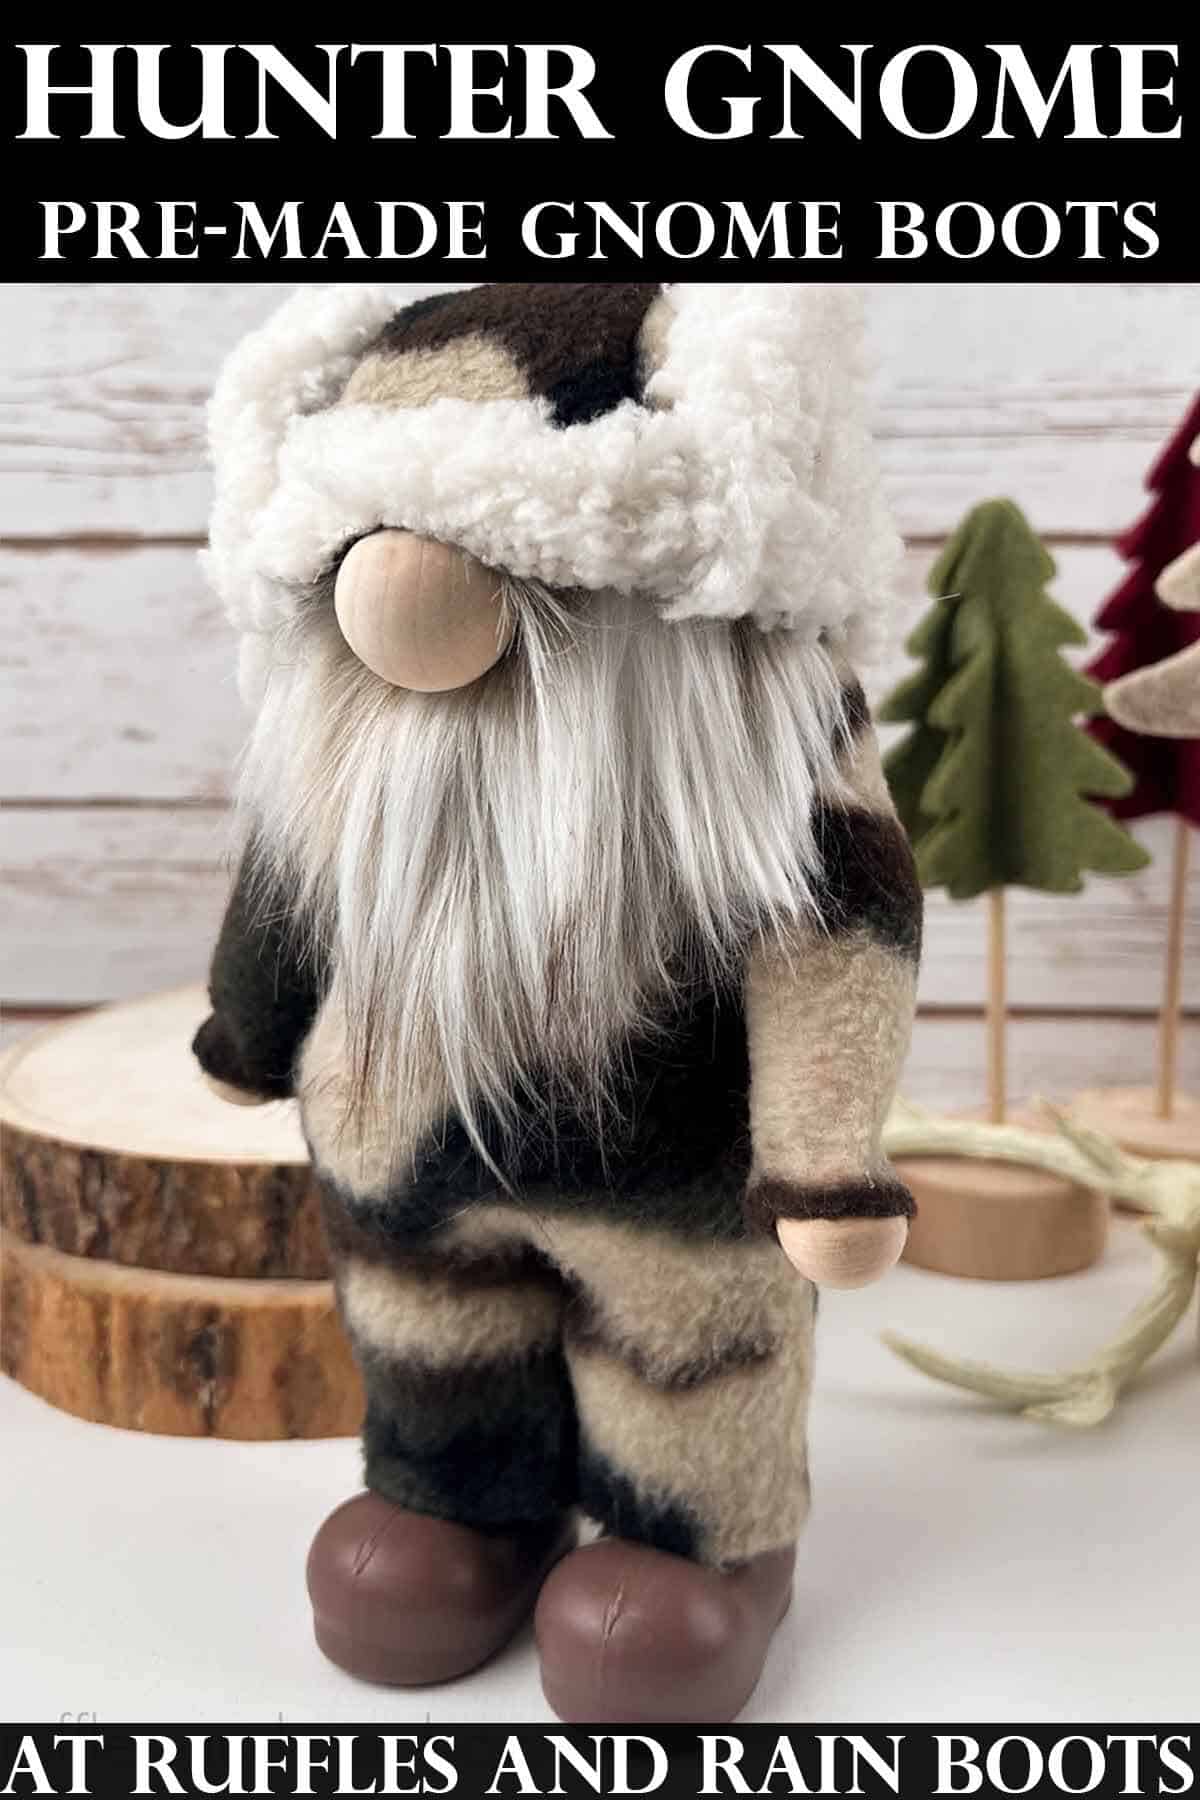
DIY Standing Hunter Gnome
Here at Ruffles and Rain Boots, I’ve been working through some of craft supplies. When I came across this camouflage fleece, I knew exactly what to make.
Because I’m asked often about where to buy gnome boots instead of making them, I decided to source out some to try. And I was NOT disappointed. Follow along as I create a standing gnome in boots with them, a bit of fur, and the very popular mudflap hat pattern.
If you love this but are waiting on the fabulous boots to come in, save this to a gnomes pin board or share with a Facebook group. Either way will make it easy to find when you’re ready to begin.
As an Amazon Affiliate, I could earn from qualifying purchases. There could be affiliate links within this article.
Pre-Made Gnome Boots – Where to Buy Gnome Boots
I’ve shared a TON of tutorials on how to make gnome boots and even have a set of 17 gnome boots and shoes patterns. That said, I love when I can use holiday boot ornaments when creating gnomes because it saves me so much time.
These pre-made gnome boots are my new favorites because I can weight them for a standing gnome. That said, I can also create a sock gnome or a cone gnome and just plop the body right on top! During the fall and winter seasons, this is going to save me so much time.

RELATED READING: Quick and Easy Fall Sock Gnome with a Slouchy Hat
Tips to Keep in Mind When Making a Hunter Gnome
- Pre-made gnome boots are a good investment when you want to spend more time on the details.
- The mudflap hat pattern can be made a few different ways, giving you options on how the finished product looks.
- For weight, I prefer small rocks and pebbles, however, poly pellets are a great idea. I do not use food (rice, beans, etc.) to weight my gnomes at all due to sprouting, rot, and critter scenarios.
- If you want to add a few accessories to make this your perfect hunter gnome DIY, consider adding this pew pew gnome accessory.
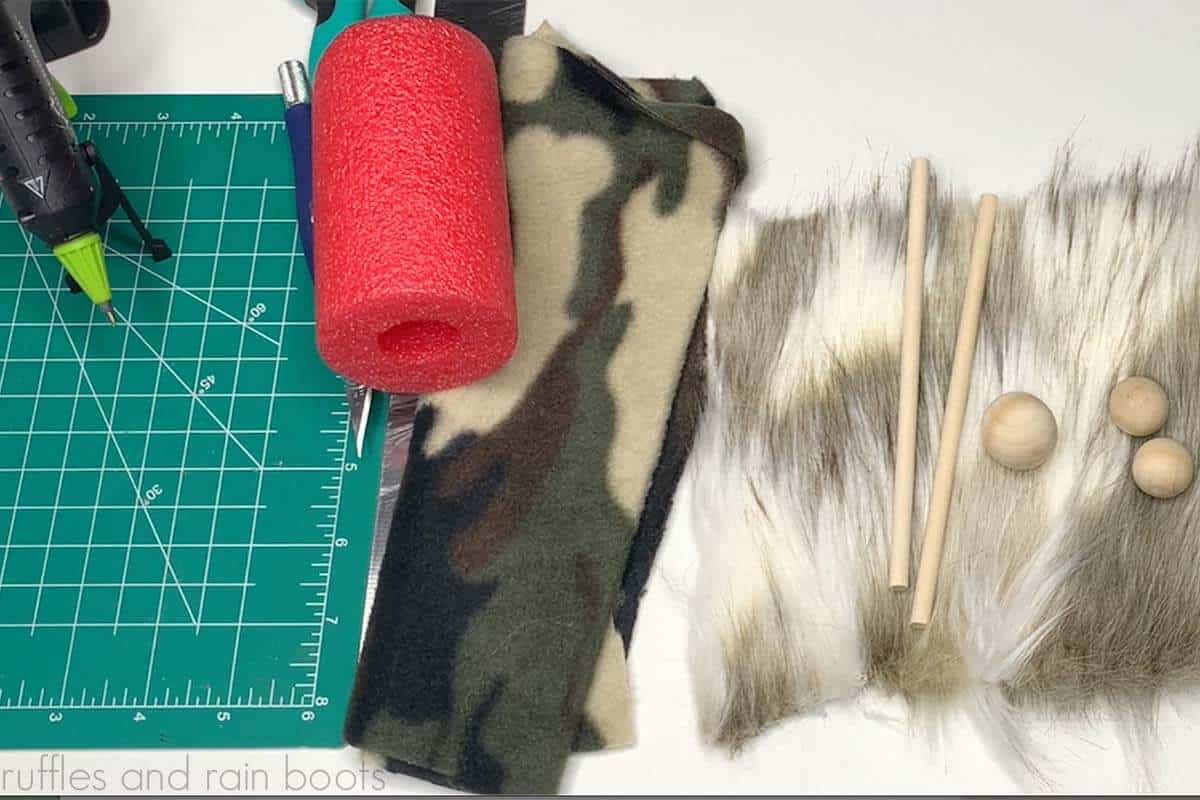
Supplies to Make a Hunter Gnome in Boots
- Gnome Boots (I used brown)
- Mudflap Gnome Hat Pattern
- Camo Fleece
- Faux Fur
- 1 inch Wood Ball and 2, 1/2 inch Wood Balls (optional)
- Pool Noodle (or other body type)
- 2, 6-inch dowels
- Pebbles or Small Rocks (I got them at the Dollar Tree)
- Wire (optional)
- Poly-Fill (optional)
How to Make a Standing DIY Hunter Gnome
Below are the step by step instructions to create this gnome; the printable version (without images) is at the end of this article. If you’re a visual learner, watch the full, real-time Hunter Gnome in Boots video tutorial for detailed explanations.
Use the scissors to cut a hole into the top of the boots, positioned just back of the middle.
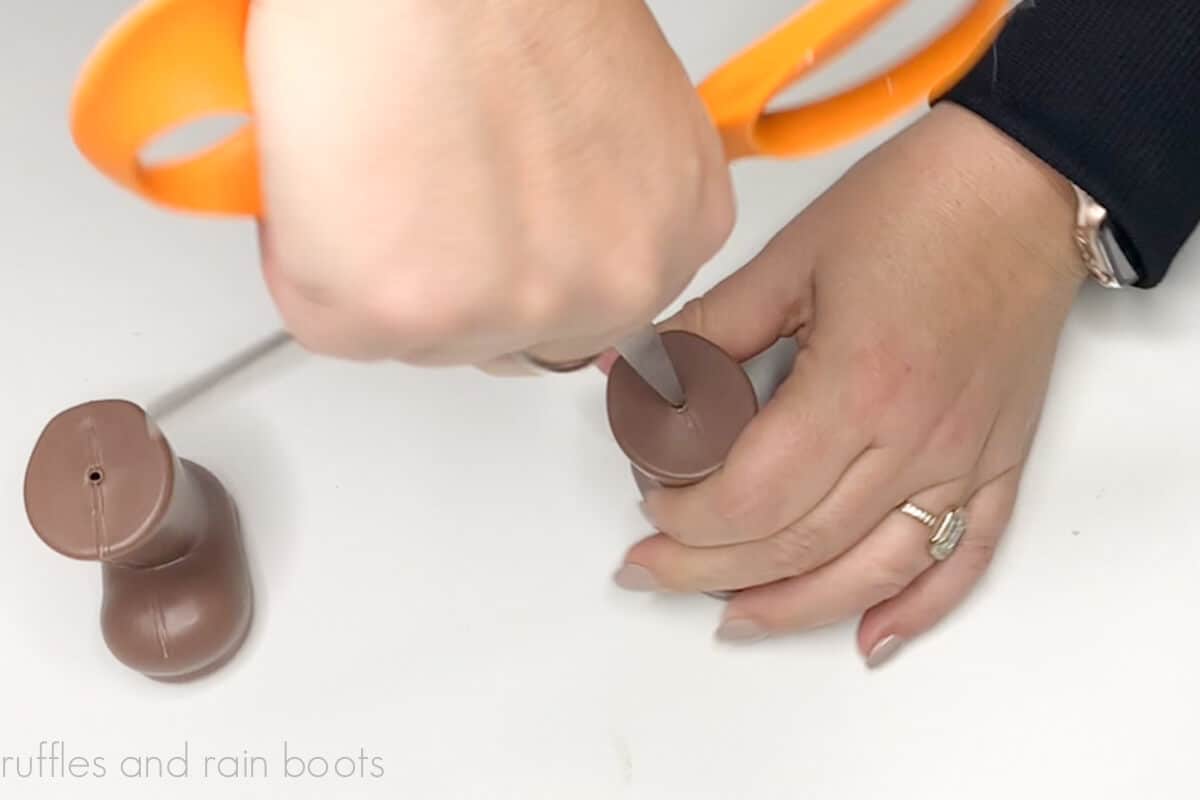
Add small rocks into the front of the boot and secure with hot glue. Glue in a 6 inch dowel to the foot bed and fill around it with rocks. Secure the rocks with glue and sharpen the ends of the dowels so they come to points.

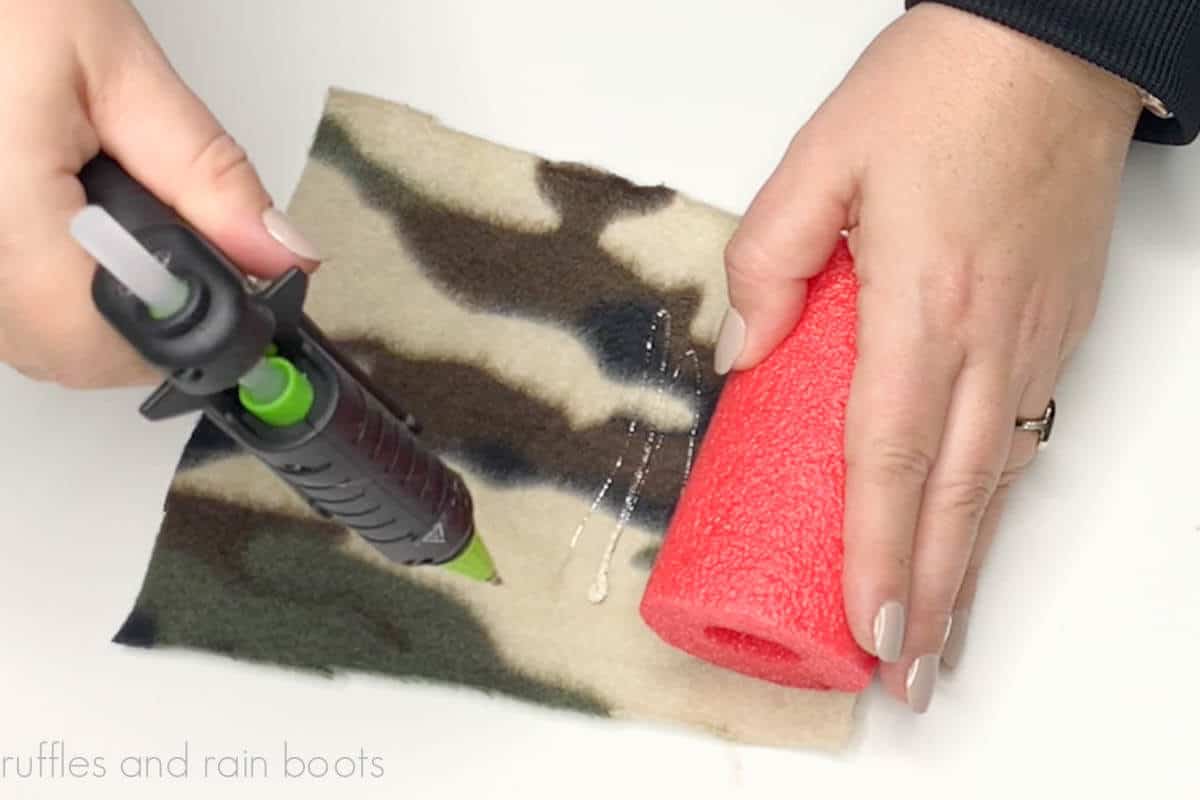
Wrap the pool noodle with camouflage fleece and secure with hot glue. Leave the top and bottom unglued.
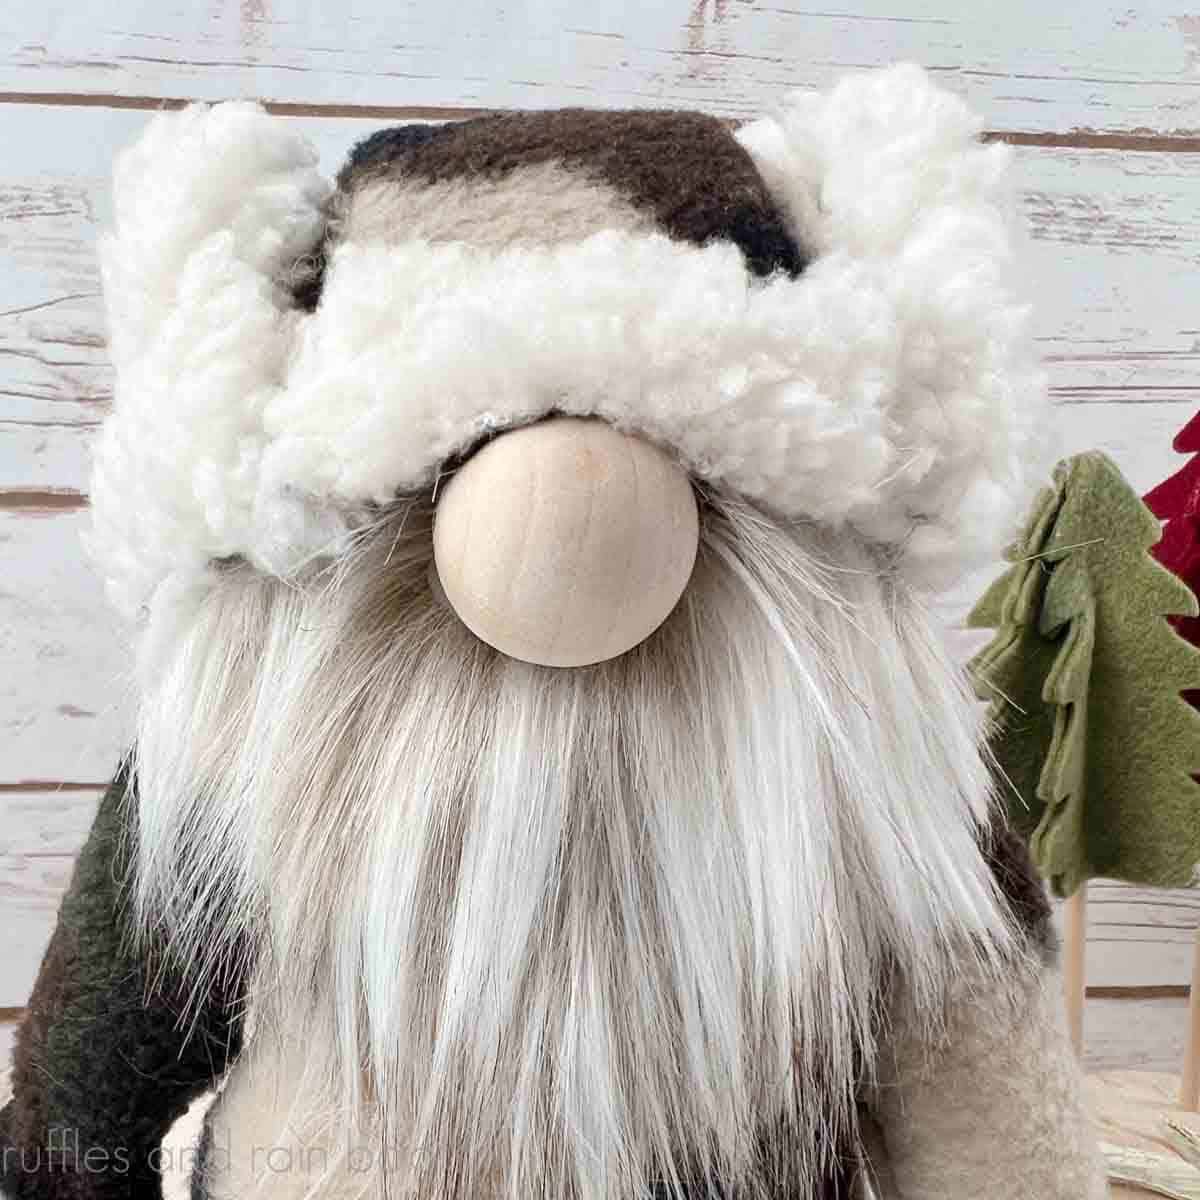
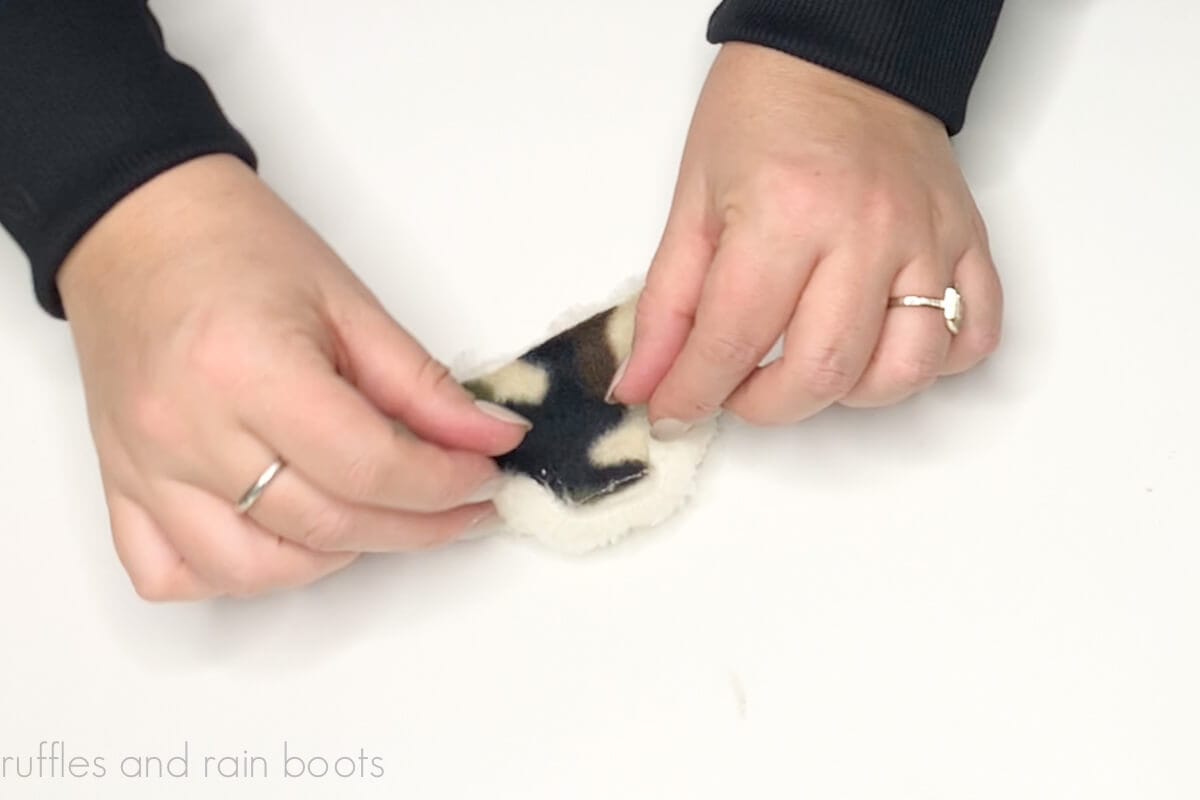
Measure and cut the faux fur gnome beard. I used a v-shape with a 1-inch drop.

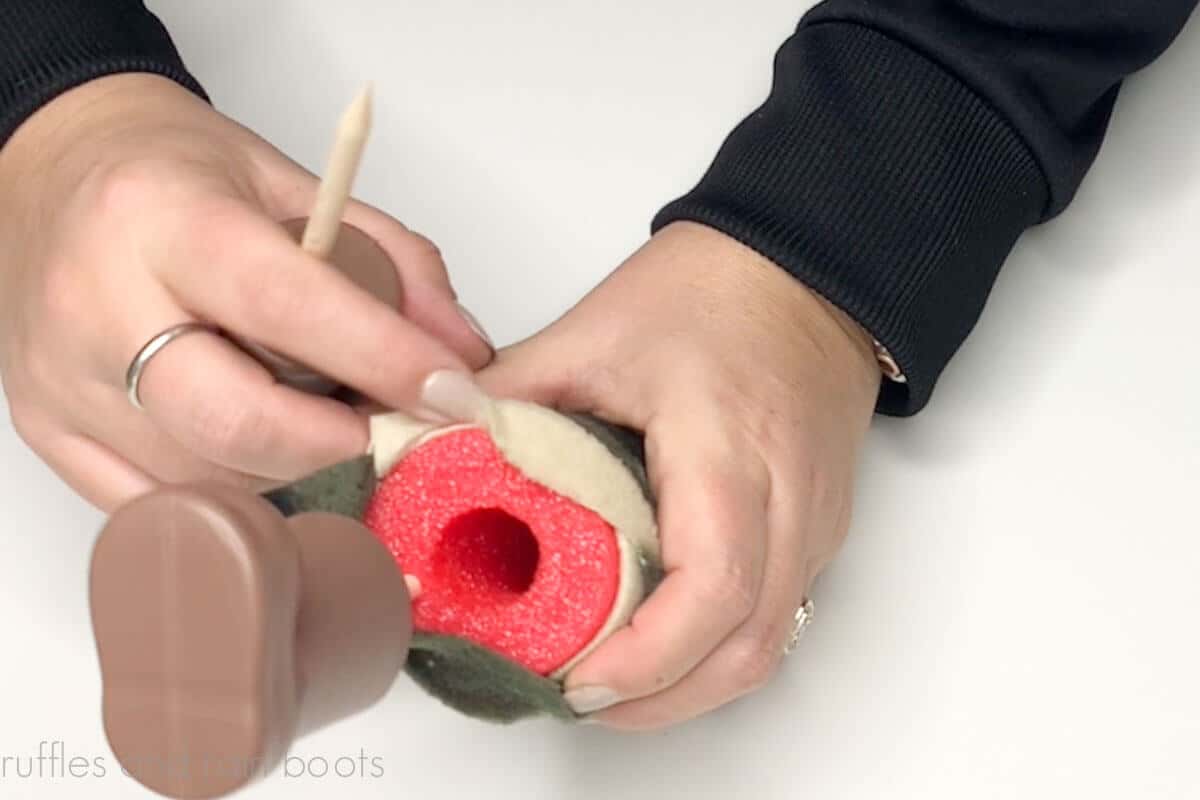
Press the boots into the pool noodle (position explained in the gnome video tutorial) to determine the height of the gnome.
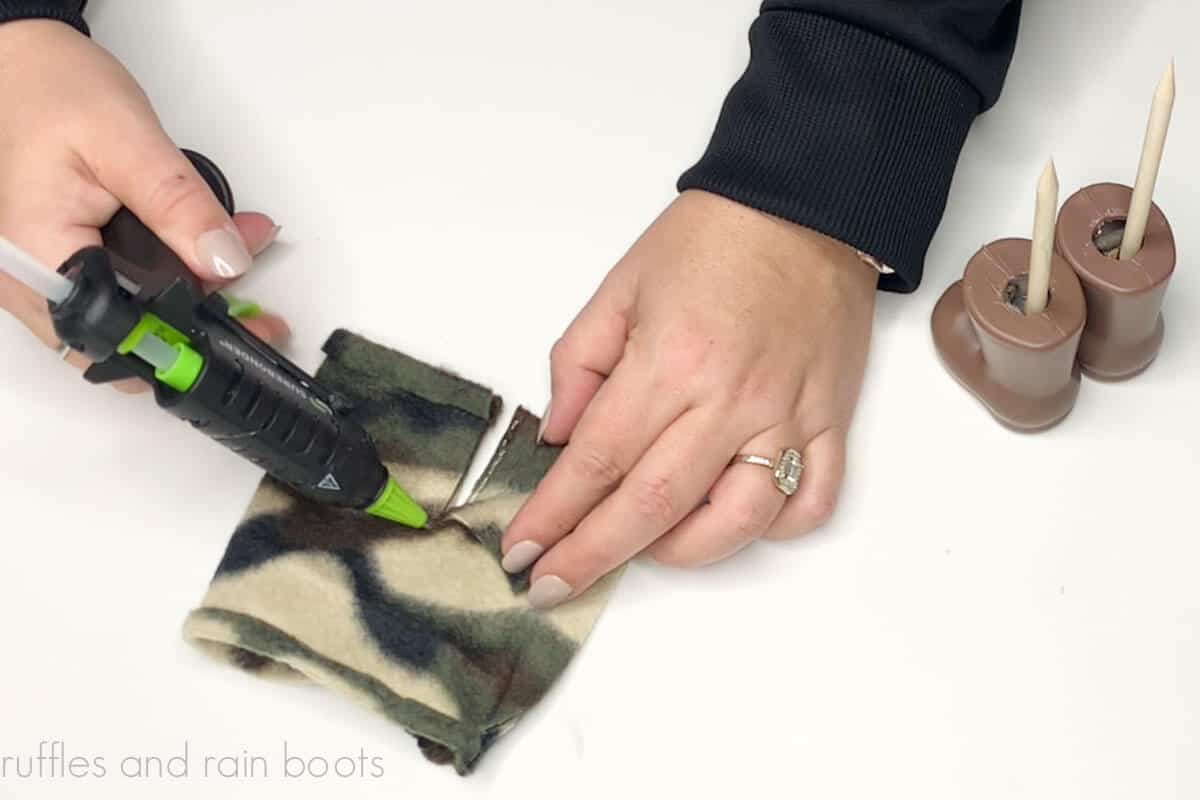
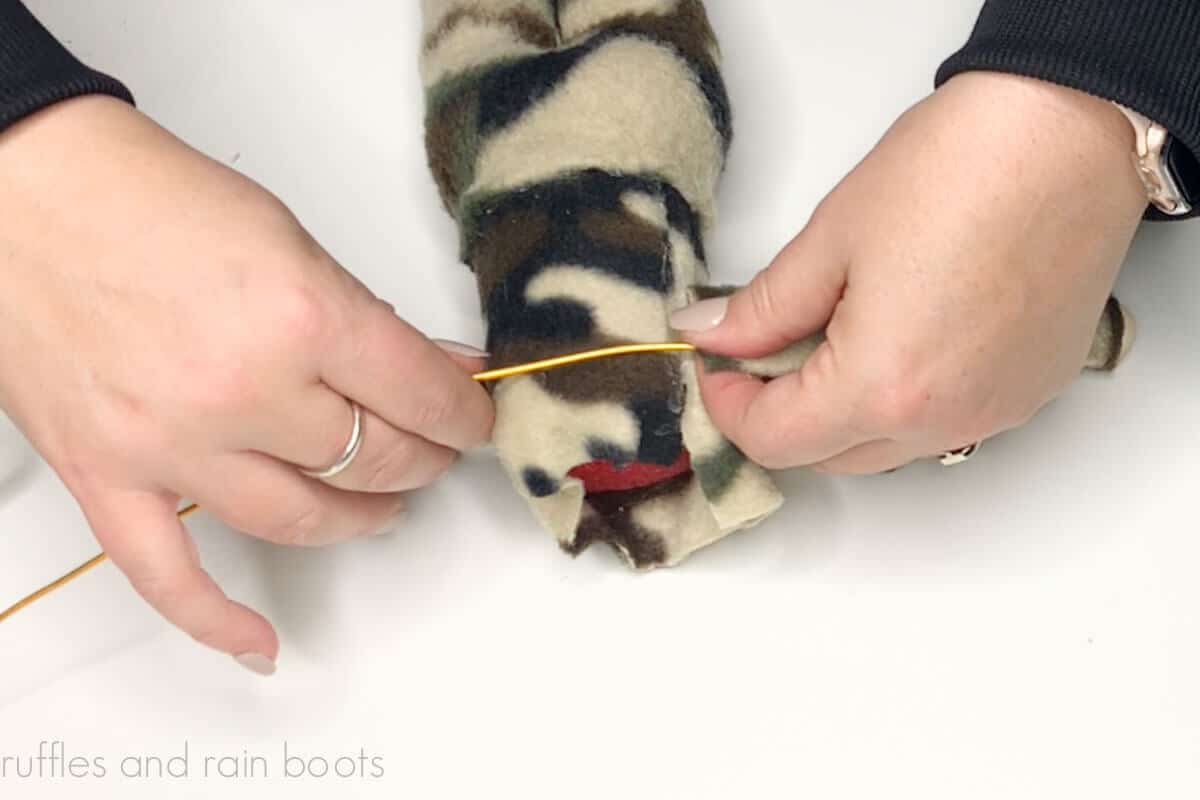
Wrap fleece around the body to determine the height of the gnome pants, cut fleece into a rectangle, and glue up the short edge. Split the pants and glue the edges of the split. You can hem the fleece top and bottom if you like, but it is not needed.
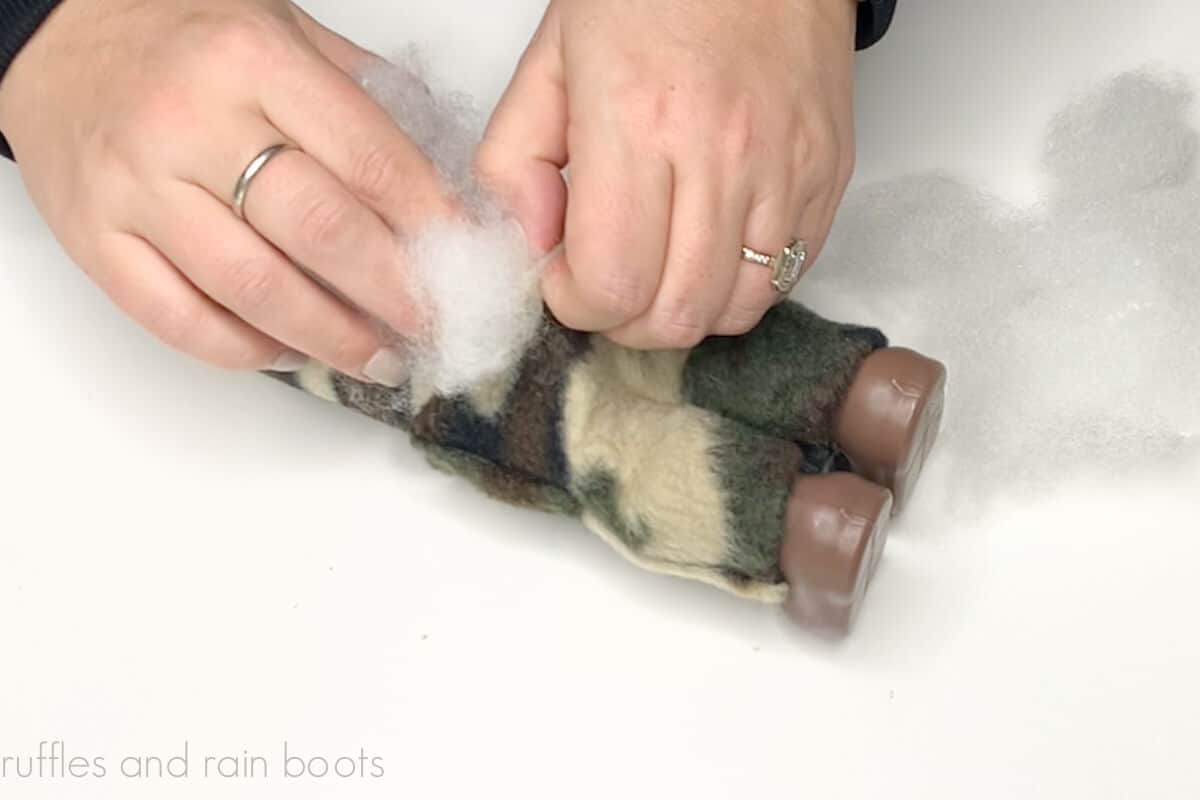
Slide the pants onto the legs, add glue to the top of the dowels, and secure the legs to the body. Pull up the pants and secure. If using, add the Poly-Fill to the front and back of the gnome pants and secure with glue.
Create the hunter gnome hat using the mud flap gnome hat pattern (you will need Sherpa fleece in addition to the camouflage fleece).
If using, create two gnome arms using a rectangle of fleece and add a wood bead to the end for a hand. If wiring, cut the wire long enough to go through each arm and the entire pool noodle body. Attach the fabric of the arms to the body with glue.
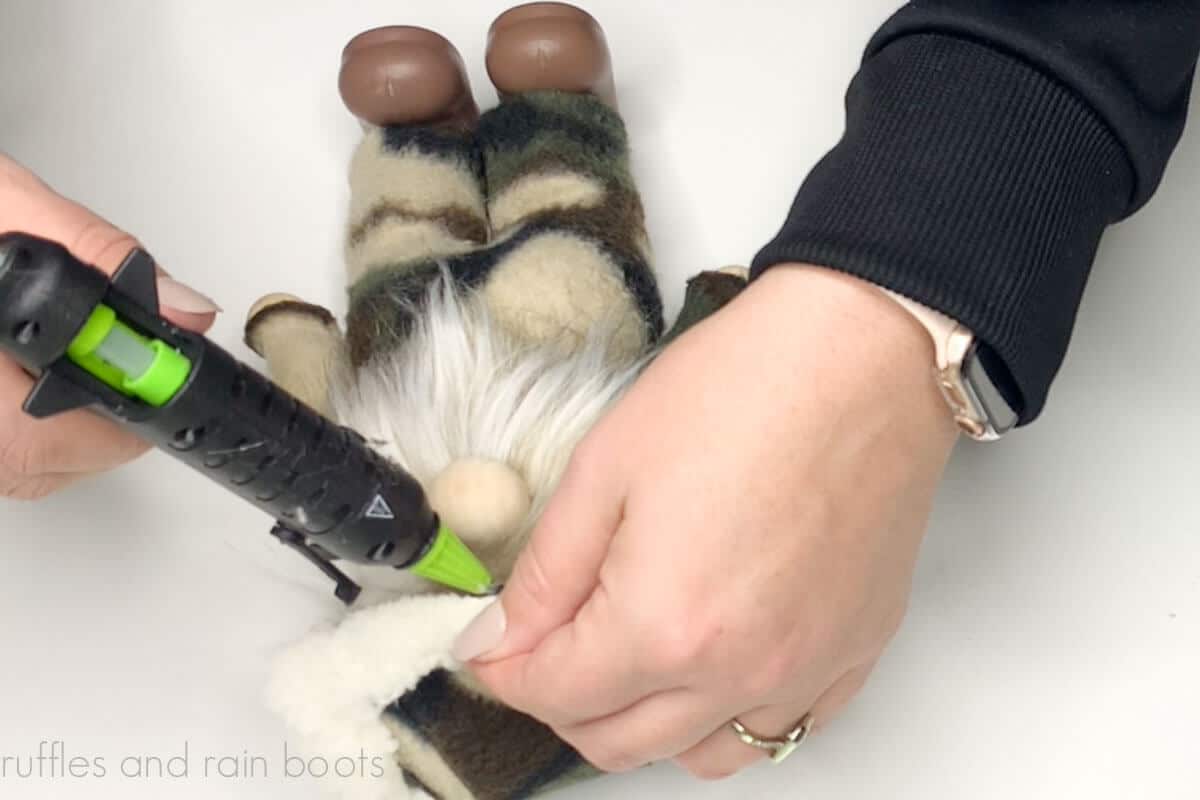
Glue the gnome beard to the body and attach the gnome nose to the fabric backing of the fur.

Add stuffing to the hunter hat pattern and glue to the top of the pool noodle body. The standing hunter gnome is done!
More Gnome Crafts You Might Like
- Easy Hunter Sock Gnome – This guy is so easy to make and doesn’t take a lot of supplies.
- Fall Shelf Sitter Gnome – The dangling legs on this guy have made him one of the most popular gnomes on the Internet!
- DIY Scarecrow Gnome (Standing) – Perfect for Fall, this guy has details everywhere.
Please Save or Share This Fun Standing Gnome with Arms and Legs
Your shares are how this site grows and I am sincerely grateful. Please use the sharing buttons to save this to a DIY gnome pin board or share it on Facebook.
Standing Hunter Gnome in Boots

Use this easy to follow tutorial to turn a pool noodle into a DIY standing hunter gnome. The gnome boots are easy to work with and allow for weight, making a professional gnome in no time. Create this easy fall gnome using camouflage fleece, some faux fur, and a wood ball for a nose.
Materials
- Gnome Boots (I used brown)
- Hunter Cap Gnome Hat Pattern
- Camouflage Fleece
- Faux Fur
- 4-inch Pool Noodle
- 2,6-inch Wood Dowels
- Mini Rocks (or Other Weight)
- 1-inch Wood Round (or Other Nose)
- Optional, Poly-Fil for a Belly and Booty
- Optional, Wire and Beads for Arms
Tools
- Scissors
- Hot Glue Gun and Glue Sticks
- X-Acto Knife
- Optional, Wire Snips
Instructions
- Use the scissors to cut a hole into the top of the boots, positioned just back of the center.
- Add small rocks into the front of the boot and secure with hot glue.
- Glue in a 6 inch dowel to the foot bed and fill around it with rocks. Secure the rocks with glue. Sharpen the ends of the dowels so they come to points.
- Wrap the pool noodle with camouflage fleece and secure with hot glue. Leave the top and bottom unglued.
- Measure and cut the faux fur gnome beard. I used a v-shape with a 1-inch drop.
- Press the boots into the pool noodle (position explained in the gnome video tutorial) to determine the height of the gnome.
- Wrap fleece around the body to determine the height of the gnome pants, cut fleece into a rectangle, and glue up the short edge.
- Split the pants and glue the edges of the split. You can hem the fleece top and bottom if you like, but it is not needed.
- Slide the pants onto the legs, add glue to the top of the dowels, and secure the legs to the body. Pull up the pants and secure.
- If using, add the Poly-Fill to the front and back of the gnome pants and secure with glue.
- Create the hunter gnome hat using the mud flap gnome hat pattern (you will need Sherpa fleece in addition to the camouflage flecce).
- If using, create two gnome arms using a rectangle of fleece and add a wood bead to the end for a hand. If wiring, cut the wire long enough to go through each arm and the entire pool noodle body. Attach the fabric of the arms to the body with glue.
- Glue the gnome beard to the body and attach the gnome nose to the fabric backing of the fur.
- Add stuffing to the hunter hat pattern and glue to the top of the pool noodle body. The standing hunter gnome is done!
Meet the Creator
Hi there, I’m Sarah Nenni-Daher. I’m a crafty gal and always have at least 14 projects going at once. I am a crafter, designer, DIYer, and pattern maker. I share my creations here and in the Ruffles and Rain Boots® Shop.
Here at Ruffles and Rain Boots®, you’ll find DIY gnomes, crafts, gifts, cupcakes, laser crafts, and so much more. I love sharing video tutorials over on YouTube and chatting with other crafters in my Facebook groups. We’d love to have you!