
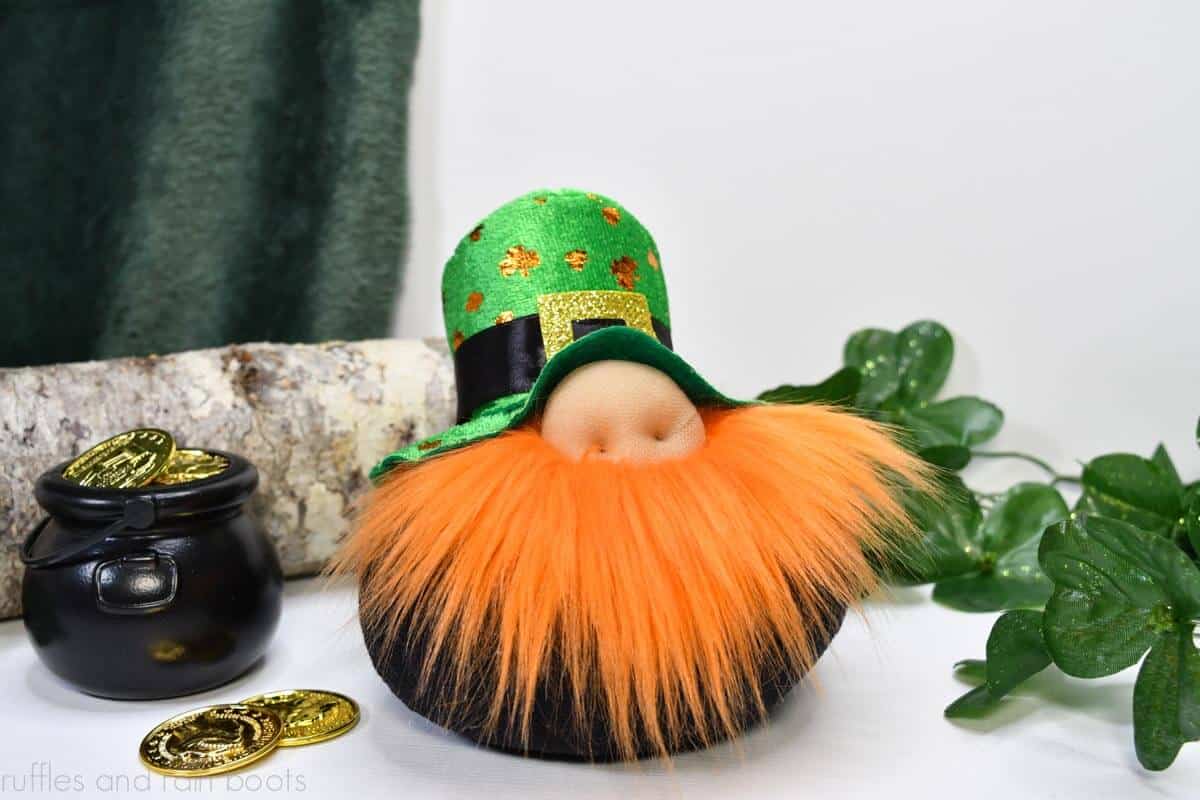
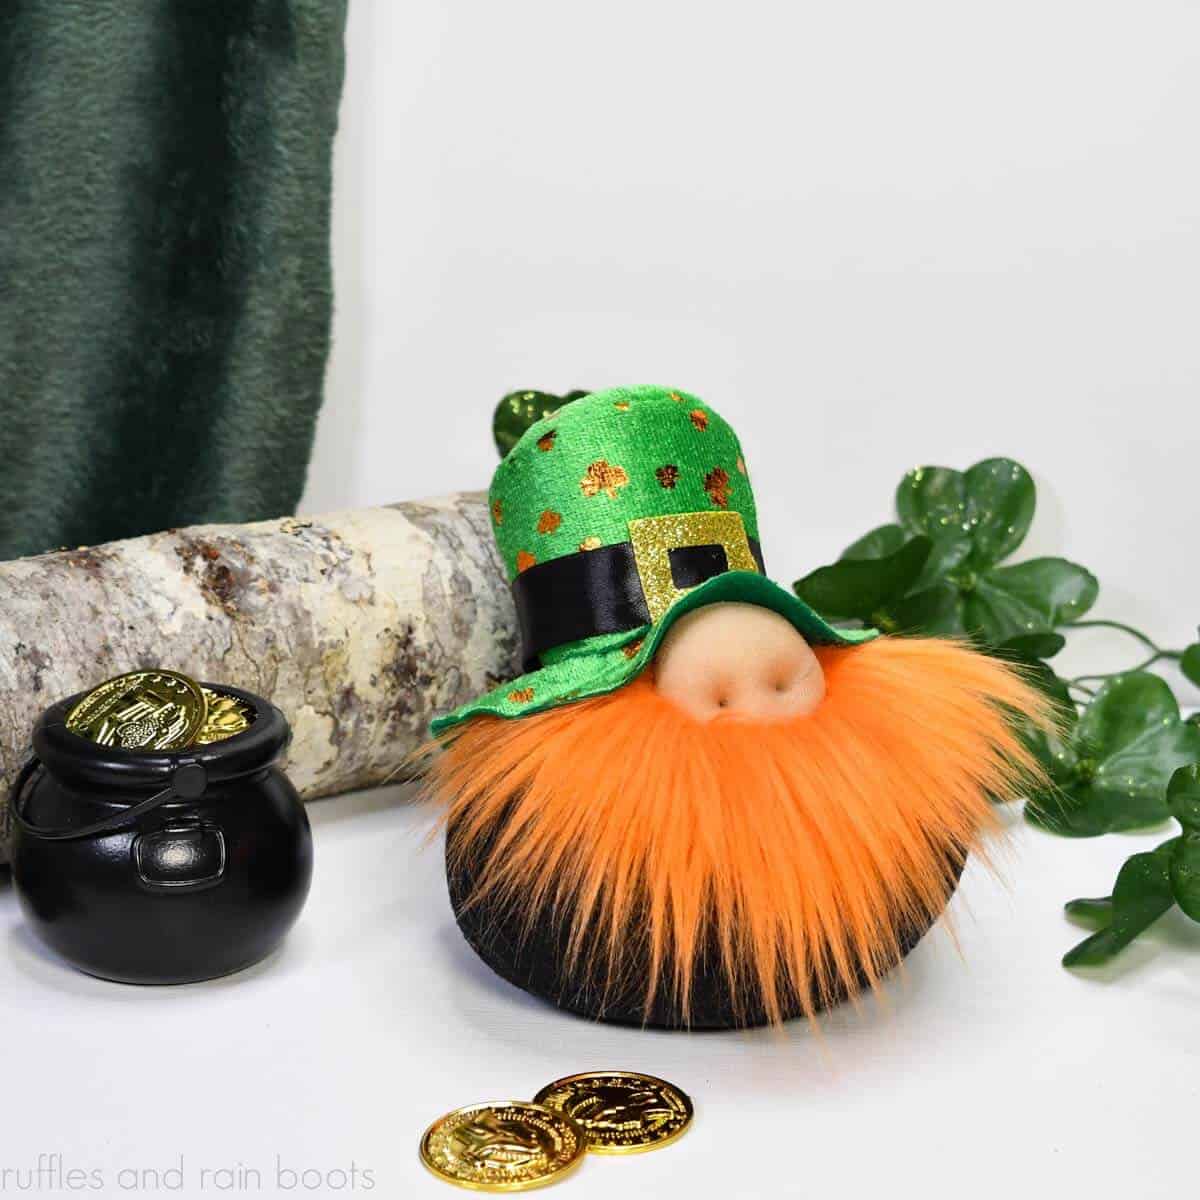
St Patrick’s Day Gnome DIY with Soft Sculpted Nose
If you’re like me and want to make a St Patrick’s Day gnome the easy way, it doesn’t get much easier than this adorable guy. Learn how to make a stable, round body gnome with a Dollar Tree hat, wrap around beard, and the most adorable gnome nose!
A soft sculpted gnome nose is easier than you think and the personality comes out with each different shape. If you want to make an adorable holiday gnome without a sewing machine, keep reading.
What You'll Find On This Page
Leprechaun Gnome for St Patrick’s Day
Here at Ruffles and Rain Boots, I don’t decorate a lot for St Patrick’s Day. I put together a tiered tray on the dining room table and well, that’s it for the green and gold around here. That said, I saw this little leprechaun hat headband at the Dollar Tree and plopped it in my cart.
The best thing about this free gnome pattern – if you can even call it that – is that it can be easily customized. I made this tiny round body gnome and a larger witch gnome using this same technique (without the cool nose).
RELATED READING: Dollar Tree Leprechaun Sock Gnome – Easy and Quick DIY
Not Ready to Begin? Save or Share This
If you need to gather up some supplies and check your stash for fabric, save this to a DIY pin board or share it on Facebook. It will be easy to find when you’re ready to make this adorable St Patrick’s Day gnome DIY.
Tips for Making This Leprechaun Gnome in a Round Body Style
- Be sure to watch the full video tutorial if you are new to the soft sculpting technique.
- If using the Dollar Tree plush leprechaun hat, cut it off the headband. Do not pull it or it will likely rip (the material is very thin).
- When making this guy, stuff the body more than you think necessary – squeeze it and ensure it bounces back before moving on.
- If you want to change the shape of the body from a circle to an oval, work the fill around with your fingers and move the fabric folds. It will be formed in about a minute.
- Use the same soft sculpt gnome nose technique for a wider, flatter nose but make a wide flat oval instead of a round nose when sewing the nylon.
How to Soft Sculpt a Gnome Nose and a Round Gnome Body
Below is the written and printable tutorial for this fun holiday craft. If you are a visual learner or are new to soft sculpting, please watch the full length, real-time St Patrick’s Day gnome with soft sculpted nose tutorial here.
St Patrick's Day Gnome with Soft Sculpt Nose
This round leprechaun gnome features some Dollar Tree supplies and the cutest soft sculpted gnome nose.
Materials
- Fabric for Body
- Nylon for Nose or Other
- Faux Fur for Beard
- Top Hat (Dollar Tree) or Other
- Poly Pellets
- Poly Fill
- Embroidery Thread
- Cardboard (optional)
Tools
- Embroidery Needle
- Hot Glue Gun and Glue Sticks
- Scissors and/or Rotary Cutter
Instructions
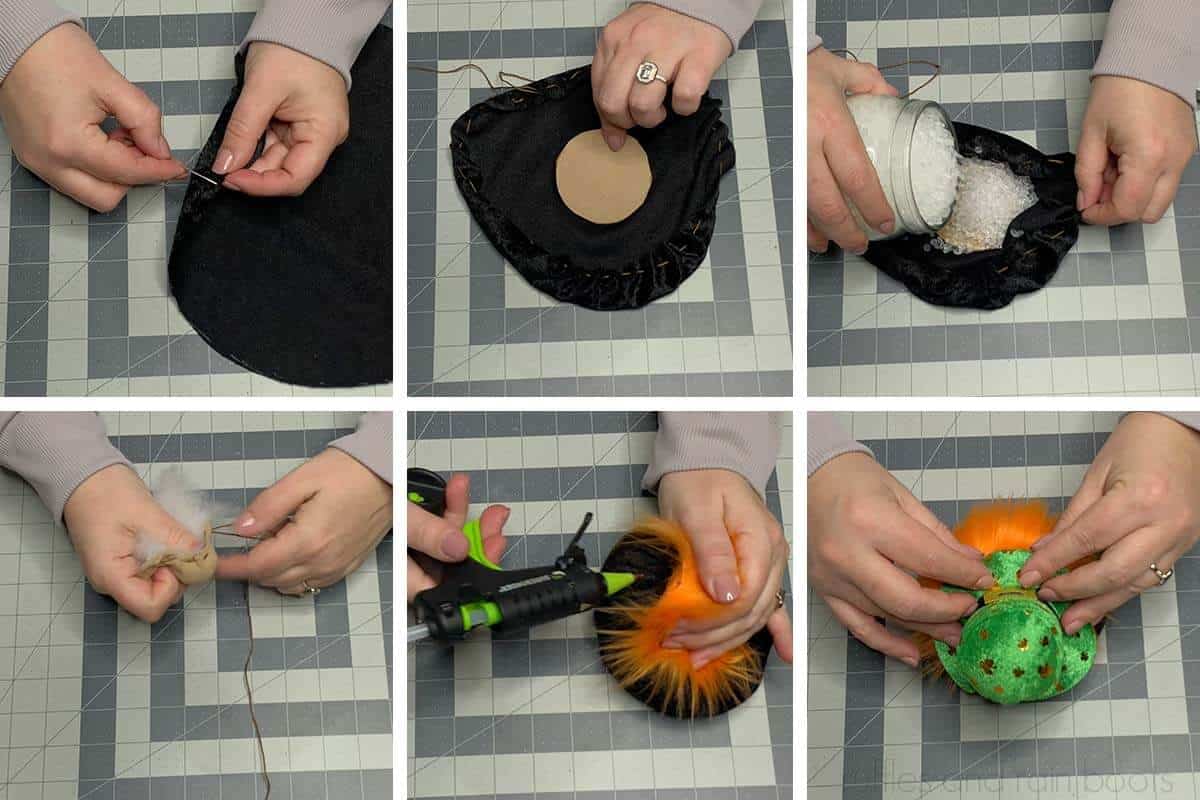
- Measure a 10-12 inch circle onto the wrong side of fabric. Trace and cut out.
- Using 26 inches of the embroidery thread and a needle, create a running stitch one half inch away from the outside edge. Remember to start and end on the outside. Pull strings slightly to form a very loose, open pouch.
- If using a base, cut a 2-3 inch circle from cardboard and hot glue to the inside center of the pouch. Add 1/2 cup of Poly Pellets and stuff with Poly Fill and pull tight. Use enough Poly Fill so that the body bounces back to its original form when squeezed. Tie off with one short and one long end (we will use for the nose).
- Using the embroidery thread and needle, form a circle or oval with the nylon (I doubled mine over), add Poly Fill, close, and secure. Again, take care to leave a long end of thread.
- Remove the top hat from the headband, if using. Cut a 4 x 2 inch (fabric-backing measurement) beard from the faux fur, notching out a portion of the nose about 1 inch wide.

- Using the thread on the nose, secure attach the nose to the body. Once attached, go in through the middle opening in the body and out through the nose in the first vertical third of the nose at the bottom. Thread the needle back into the nose just under where you came out. Secure that stitch to the body and repeat. Note: please see the video.
- Pull on the notched gnome beard, tucking it up under the nose and pull it around the circular body. Secure with hot glue.
- Secure the hat to the top of the nose and the body with hot glue.
Notes
Tips:
1. Be sure to watch the full video tutorial if you are new to the soft sculpting technique. https://youtu.be/SuAvuMS0cqQ
2. If using the Dollar Tree plush leprechaun hat, cut it off the headband - do not pull or it will likely rip.
3. Stuff the body more than you think necessary - squeeze it and ensure it bounces back before moving on.
More St Patrick’s Day Crafts and Ideas You Might Like
- Leprechaun Sock Gnome – This Dollar Tree delight is done in just minutes and looks great on a coffee bar.
- Easy Leprechaun Gnome from Felt – If you love to hand sew, this little cutie is a fun and quick craft for a rainy day (printable template and pattern included).
- Shenanigans St Patrick’s Day Book Stack – The basis for this fun farmhouse book stack craft is a Dollar Tree staple.
- St Patrick’s Day Topiaries – Pick up these Dollar Tree leprechaun tinsel hats and follow along with Jennifer and make these cute topiaries!
Please Save or Share This
Your shares are how this site grows and I am sincerely grateful. Please save this to a St Patrick’s Day pin board or to a crafty fun Facebook group.

Meet the Creator
Hi there, I’m Sarah Nenni-Daher. I’m a crafty gal and always have at least 14 projects going at once. I am a crafter, designer, DIYer, and pattern maker. I share my creations here and in the Ruffles and Rain Boots® Shop.
Here at Ruffles and Rain Boots®, you’ll find DIY gnomes, crafts, gifts, cupcakes, laser crafts, and so much more. I love sharing video tutorials over on YouTube and chatting with other crafters in my Facebook groups. We’d love to have you!