
This Plush Saint Patricks Day Gnome Is So Lucky & Cute!
This ridiculously easy and cute plush Saint Patricks Day gnome is perfect for kids to play with or even make! It’s so fun–and just a cute decoration.

Plush Saint Patricks Day Gnome
Here at Ruffles and Rain Boots, we love making gnomes. No, really, if I have 20 minutes free, I’m picking up my hot glue gun and running straight to my crafting table. But sometimes the kiddo wants to make one and then she wants to play with it–take it to school for show and tell. It becomes a whole thing.
RELATED READING: ST. PATRICKS DAY GNOME GARLAND
So, I decided to sit down with her this weekend and make a fun plush Saint Patricks Day gnome that she can safely play with, help me make, and take to school to show her friends! If you’re ready to make a little plush gnome for St. Patty’s day, let’s get started.
No Time to Make This Now? Pin it for Later
You’re busy, I get it. Pin this to your favorite east DIYs board on Pinterest and it’ll be here for when you’re ready.

As an Amazon Associate, I can earn from qualifying purchases.
Tips to Make St. Patty’s Gnome
- Start by getting your free gnome pattern here. Won’t do you much good to follow this pattern without the printable!
- Don’t be afraid to use different colors than what I have shown. You can make so many different gnomes just with this one gnome pattern–just pick different color combinations! You could make a whole little passel of gnomes.
- Be sure to use sharp scissors to cut your felt. It will make it more easy and less likely to look “frazzled”. To sharpen scissors, I find cutting some folded aluminum foil usually does the trick just fine.
- If you wanted to turn these into gnome magnets, you can just stick a round magnet like this one into the back of the plush while you’re stuffing it.

How Do I Make this Plush Saint Patricks Day Gnome?
I’m so glad you asked. Below is our written tutorial.
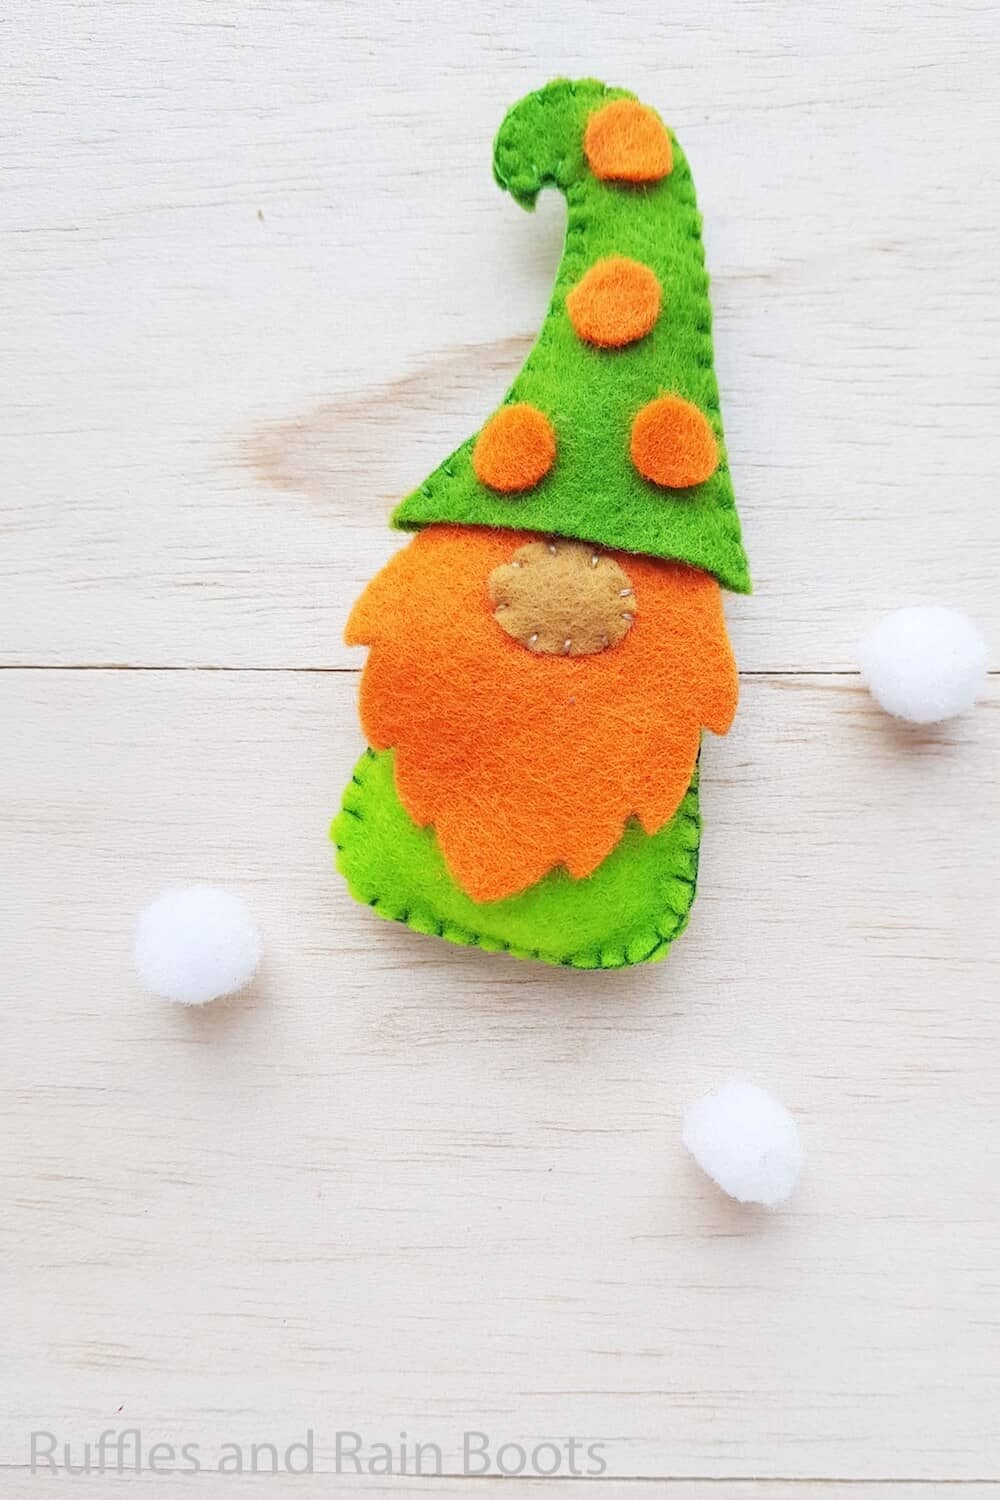
Plush Saint Patrick's Day Gnome
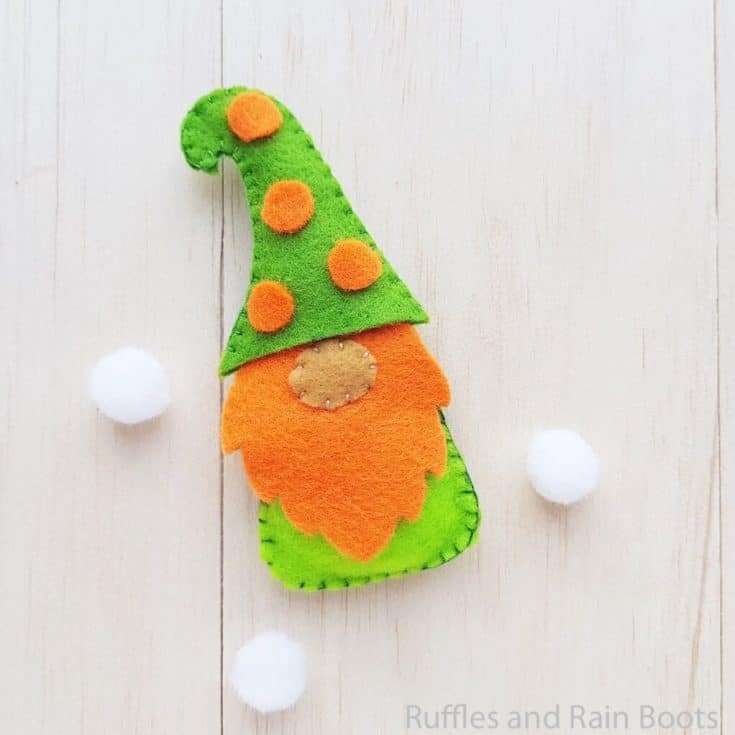
This plush Saint Patricks Day gnome is such an easy and fun little project. You could make a magnet, a garland, or just a fun kids toy from St. Patrick's Day gnome pattern!
Materials
- Felt fabric in green, orange and peach
- Small amount of polyfill
Tools
- Pencil or fabric marker
- Needle and thread
- Scissors
- Hot glue gun and glue, optional
Instructions
- Cut out the pieces on the printable template and trace the pieces of the pattern on the felt fabric of your choice then cut them out.
- With any one of the body pieces, place the beard on top of it and align its straight edge with the top straight edge of the body. Place the nose near the top of the beard, keeping about a 1/4 inch or so gap from that the edge.
- Stitch the nose, beard and body together to join all three pieces.
- Place the two hat pieces together and stitch them around both sides leaving the bottom open. Stuff the hat.
- Place the face/front of the gnome on the other body piece (the gnome's back). Stitch around the sides of both pieces to join. Leave the top side open to allow for stuffing--and stuff it.
- Fit the gnome body slightly inside the hat and stitch the bottom end of the hat with the top end of the gnome’s body to join both pieces together. Or, you can also use hot glue to join them--that's what I did.
- Cut circles to decorate the hat and hot glue them in place before enjoying!


Notes
For more fun gnome patterns, visit Ruffles and Rain Boots!
More Easy Gnome DIY Ideas You Might Like
- Gnome Barrette Holder – This is one of my kiddo’s favorite gnome DIYs that we made together. She sees it every day and loves putting her barrettes on it.
- Plush Gnome Ornament – A cute ornament that actually rides on my kid’s backpack now, this gnome is what inspired my St. Patty’s gnome plush!
- How to Make a Sock Gnome – If you’re into easy gnomes DIYs, you definitely want to check out this tutorial to help you build every gnome ever.
Please Save This to Pinterest
Your shares are how this site grows and I am sincerely grateful. Know a friend who’d like this? Please share it on Facebook or save it to your favorite kid’s DIY ideas board on Pinterest.

Meet the Creator
Hi there, I’m Sarah Nenni-Daher. I’m a crafty gal and always have at least 14 projects going at once. I am a crafter, designer, DIYer, and pattern maker. I share my creations here and in the Ruffles and Rain Boots® Shop.
Here at Ruffles and Rain Boots®, you’ll find DIY gnomes, crafts, gifts, cupcakes, laser crafts, and so much more. I love sharing video tutorials over on YouTube and chatting with other crafters in my Facebook groups. We’d love to have you!