
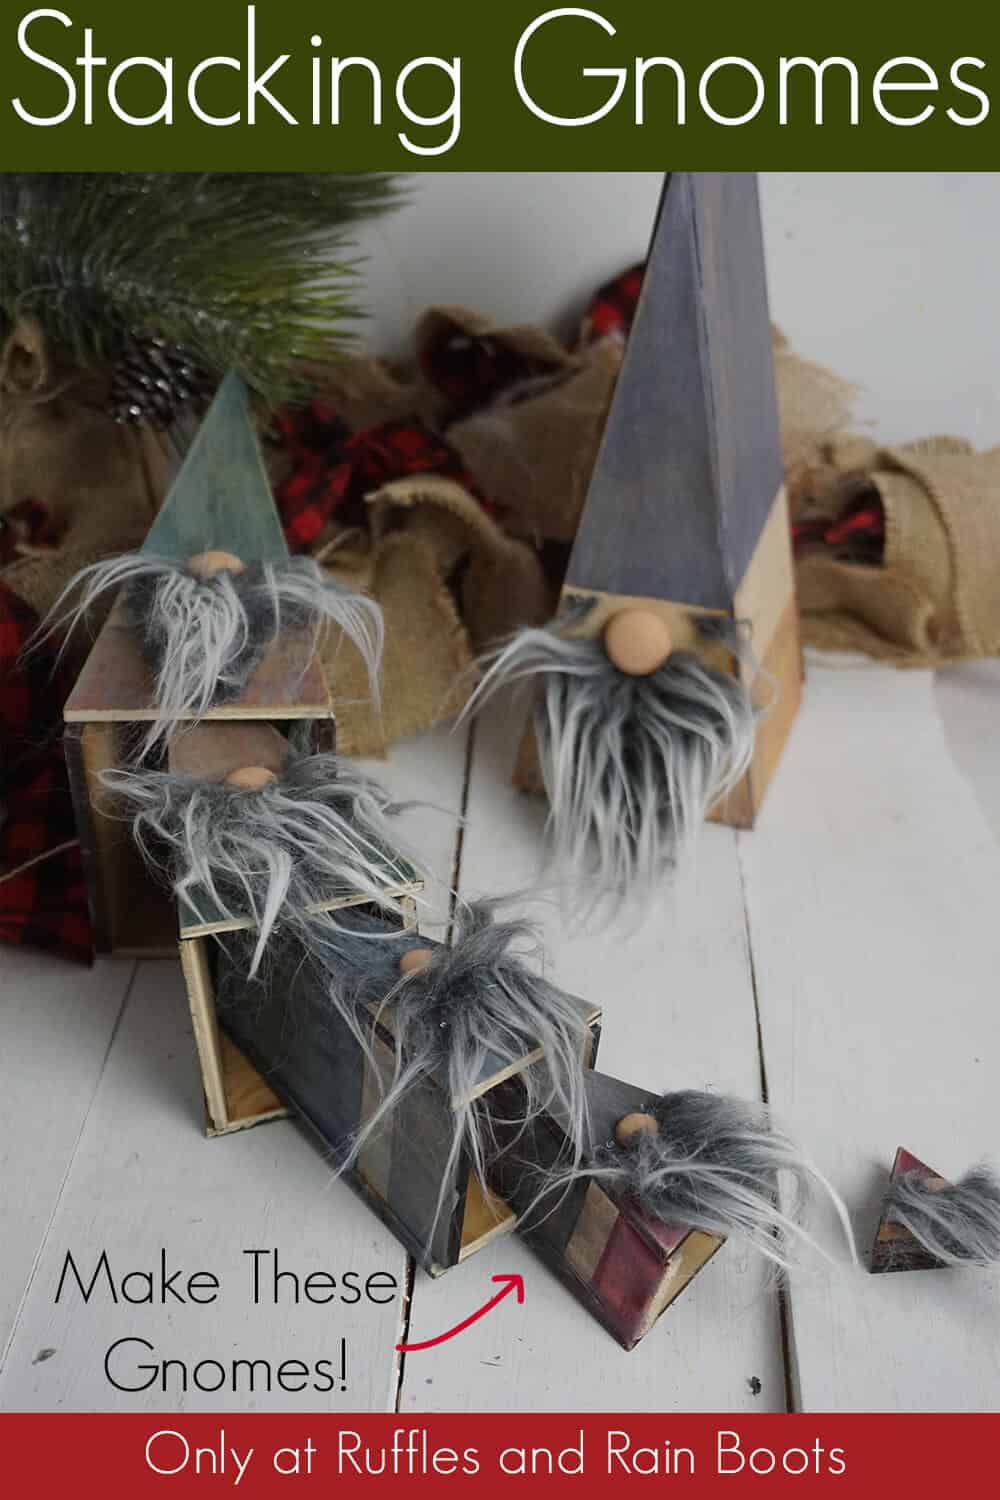
These Wooden Nesting Gnomes are So CUTE and easy!
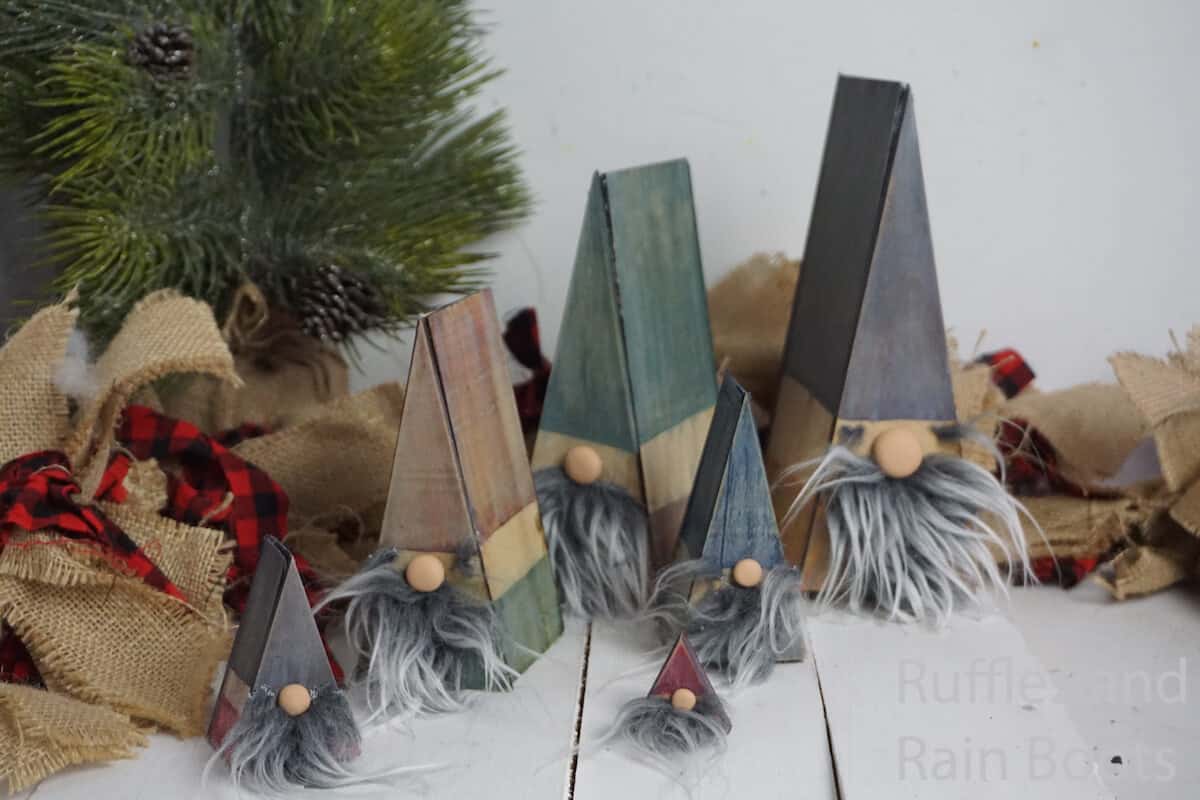
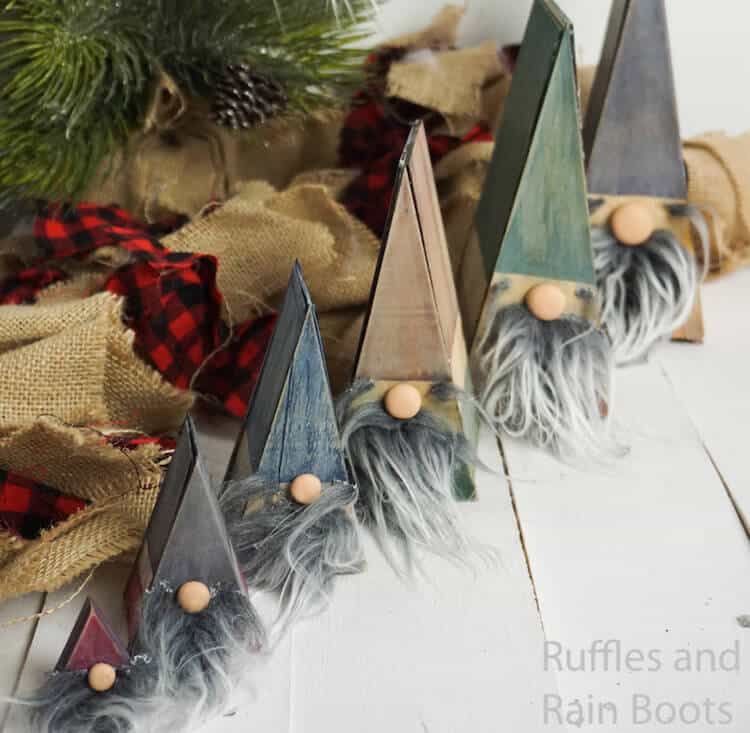
I absolutely adore these wooden nesting gnomes I made. These stacking gnomes are not only easy, but they make awesome Christmas gnomes to decorate the mantel or by the tree.
What You'll Find On This Page
Wooden Nesting Gnomes
Here at Ruffles and Rain Boots, we are what you’d call “gnome obsessed”. Seriously, I have made everything from gnome ornaments to wine cork gnomes. If it’s a gnome, nisse, tomte, tomtenisse or any other gnome-ish name you might call it, I’m going to make it. Heck, I’ve even taken to blending ideas like with these wooden nesting gnomes.
RELATED READING: ULTIMATE LIST OF GNOME TUTORIALS AND VIDEOS
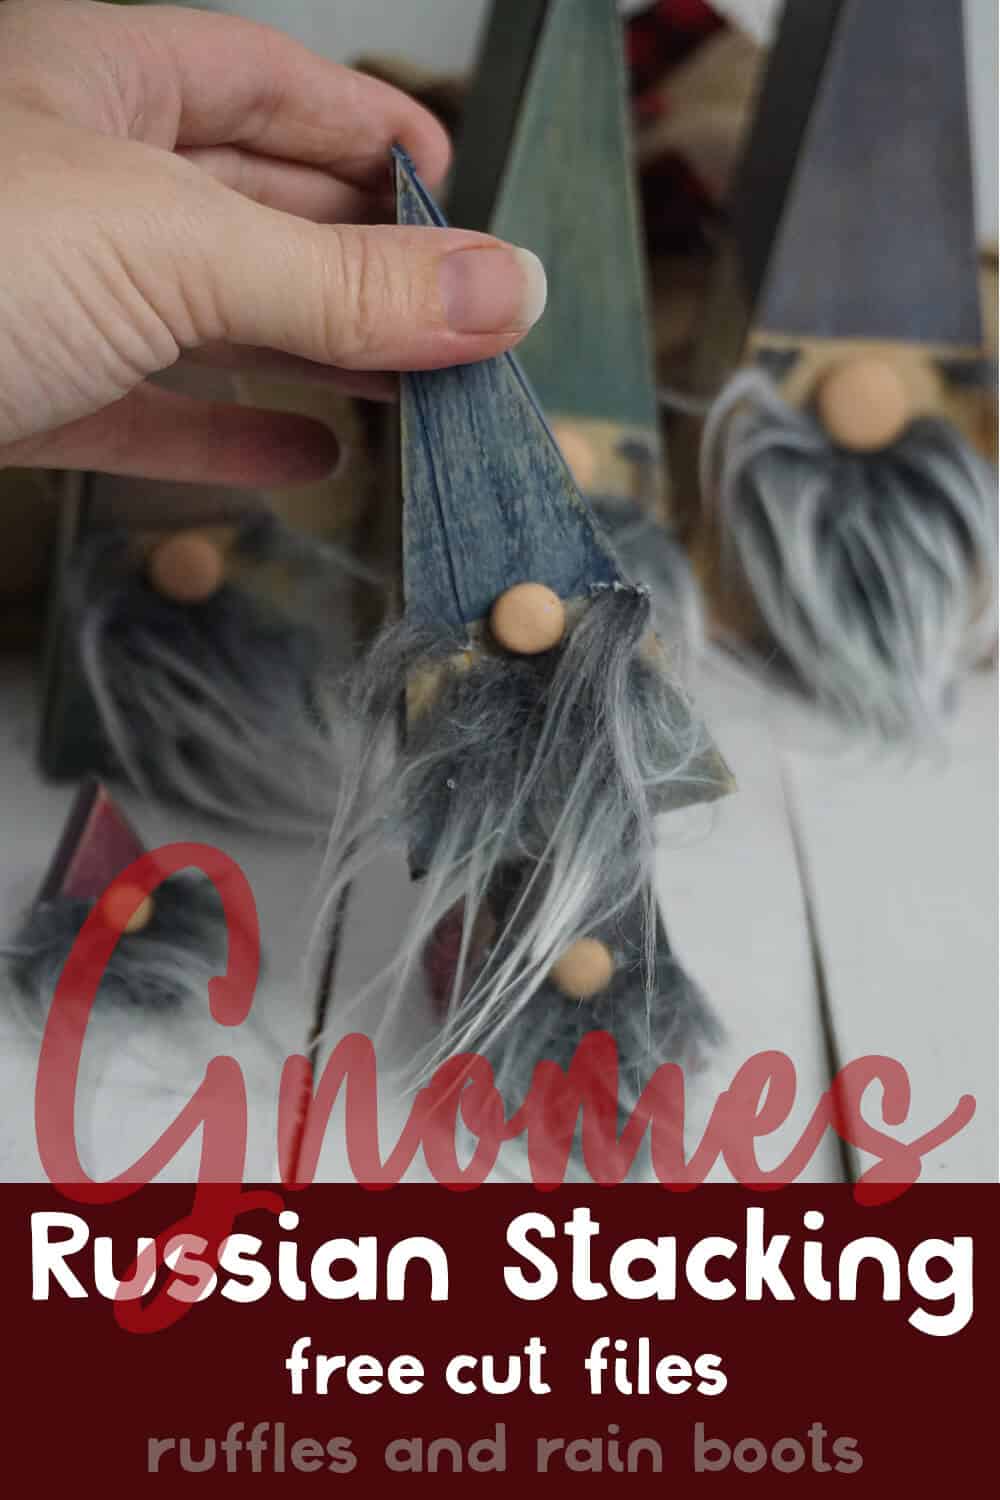
Imagine Russian nesting dolls, you know the ones with the baby that fits inside the doll that fits inside–and so on. Well, imagine that but with gnomes. That’s how I came up with these wooden nesting gnomes.
They fit inside each other from the smallest to the largest. And the best part? These stacking gnomes are so easy to make, you can have them done and on the mantle in about 30 minutes (well, after the paint dries). Let’s get started.
No Time to Make This Now? Pin it for Later
You’re busy, I get it. Pin this to your favorite holiday crafts board on Pinterest and it’ll be here for when you’re ready.
As an Amazon Associate, I can earn from qualifying purchases.
Tips to Make Stacking Gnomes
- Click here to download the free cut files for these wooden nesting gnomes. Its free for personal use, but I would appreciate if you shared this on your favorite holiday crafts board.
- Be sure to make your gnome’s noses flat for these wooden nesting doll gnomes or they won’t nest very well. The fit is snug and too big of a nose would take up all the space!
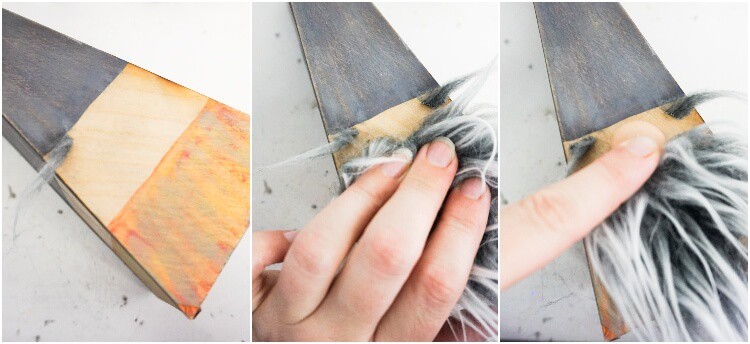
- I tried making the beards from felt and while it looked ok, it just wasn’t as awesome as the fur. To get the fur used here (and some alternates), check out my supplies list here.
- If you’ve never cut craft fur, it’s not as hard as it looks. Just flip it over and, using an Exacto knife or box knife and cut just the fabric, avoiding the fur itself. I have made you a quick video tutorial on how to cut faux fur without waste or error.
- If you don’t have a Cricut or Silhouette, don’t panic. You can cut these stacking gnomes at your local maker space. Don’t know where your local maker space is? We have one at our local library, so start there.
The Measurements for the Stacking Gnomes
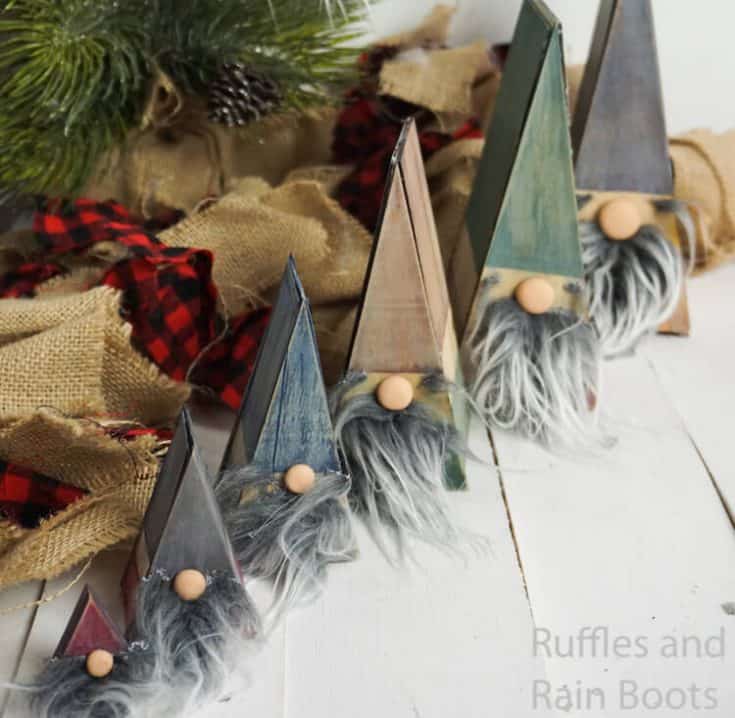
You can choose which sizes you make of these adorable little Nordic gnomes and here are the measurements for you to decide what to make and where to put them. The largest tomte is 12-inches, then 10 1/2, 8, 6 1/2, 4, and finally, 2 1/2 inches.
How Do I Make Wooden Nesting Gnomes?
I’m so glad you asked. Below is our written tutorial. If you have any questions, please let me know in the comments below. Because you all loved these, I made a DIY nesting gnomes video tutorial for these guys.
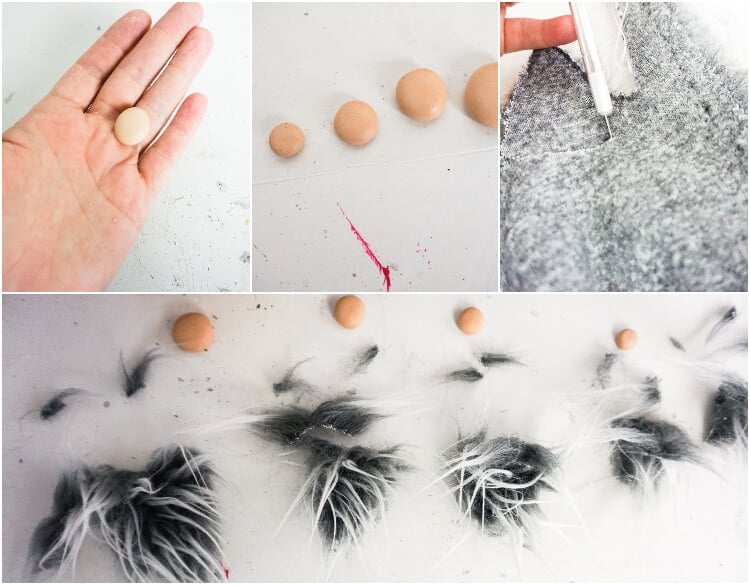
First, start making your gnome noses by combining the brown and white polymer clay until a flesh-color is consistent throughout. Roll clay into a 6 neat balls (in graduating sizes), making sure they are smooth all the way around. Then smash them a little flat, so that they will not interfere with the stacking of the gnomes.
Bake in the oven per the polymer clay package directions. Allow to cool before touching. Cut out the fur or the felt for beards, mustaches and eyebrows. Set aside fur items and noses.
Using the pattern provided, cut out all of the wood pieces.
Sand each of the rectangle pieces on one end to help the triangle peak more accurately.
To keep things organized, I recommend keeping the pieces together for each gnome. So, group the largest rectangles and the largest triangles together, and the next size down and so on.
Working with the largest gnome pieces, hot glue the rectangle pieces onto each side of the triangle pieces. This will form a triangle-shaped box with an open end.
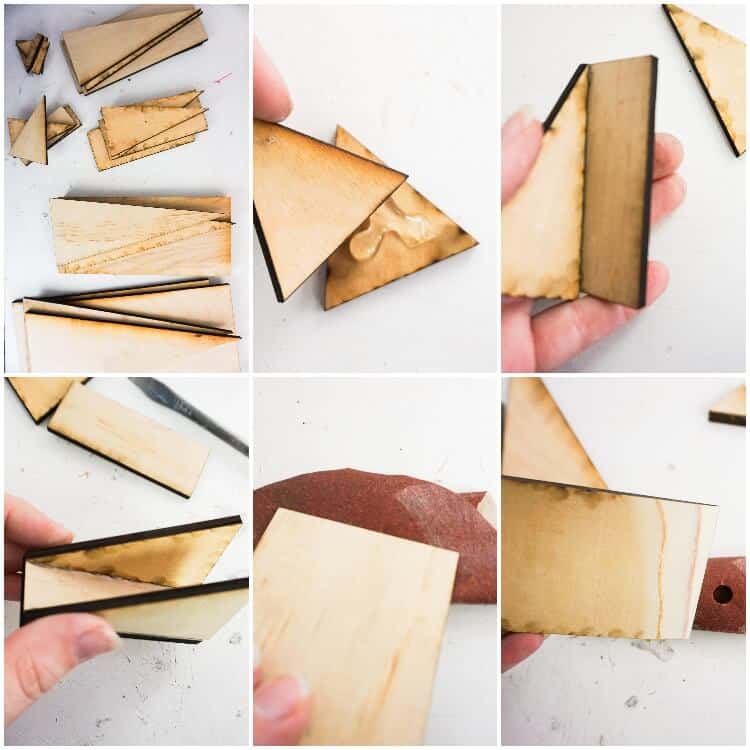
Sand each wood length smooth with a sheet of paper, sketch out where you want the hat and clothes to be on your gnomes. Be sure to leave a 1-inch space between the hat and clothes.
Transfer locations of hat and clothes onto wood.
Paint the hats and clothes in colors as desired.
Allow paint to dry completely. Sand paint a little, making the wood look aged.
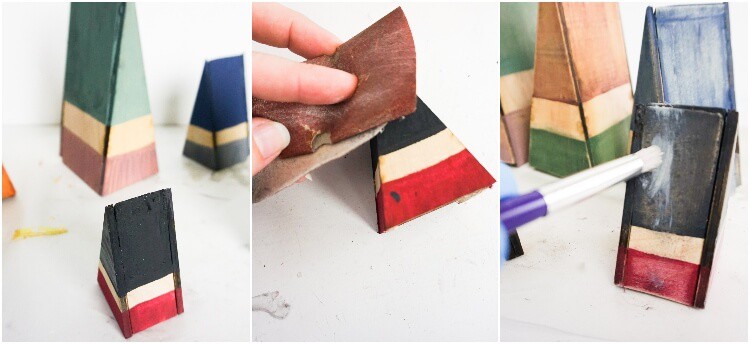
Add a coat of grey wood stain and immediately wipe off, making the wood look more aged. Allow stain to dry completely.
Sand again to further age the wood.
Hot glue beards, mustaches, and eyebrows in place.Hot glue noses in place above beard.
Enjoy!
More DIY Gnomes You Might Like
- Christmas Gnome Ornament – Our most popular craft, it’s 15-minutes until you have the cutest gnome ornament ever.
- DIY Farmhouse Gnome – For an every-day gnome, this is the cutest little farmhouse gnome I’ve ever seen. And I’ve seen a lotta gnomes…
- Best Christmas Gnome Tutorials EVER! – I gathered up the best tutorials (and videos) for gnomes that you’ll ever find. If you want it, it’s here.
Please Save This to Pinterest
Your shares are how this site grows and I am sincerely grateful. Know a friend who’d like this? Please share it on Facebook or save it to your favorite crafts board on Pinterest.
Wooden Nesting Gnomes
I absolutely adore these wooden nesting gnomes I made. These stacking gnomes are not only easy, but they make awesome Christmas gnomes to decorate the mantel or by the tree.
Materials
- 2 Sheets 12x18-inch wide 3/32-Thick Wood if Using Cutting Machines (if no cutting machine is being used, thickness is based on your preference, however, go no wider than 1/4-inch thick so as not to interfere with the nesting of the gnomes)
- Craft Paint:
- Red
- Yellow
- Black
- Green
- White
- Grey Wood Stain
- Wipe-on Polyurethane to Seal (optional)
- Craft Fur, Mongolian Fur or any fur OR Ivory Craft Felt
- Polymer Clay (for EACH gnome nose--you can alternatively use a 1/4-inch wooden bead per gnome):
- 1 small, dime-sized portion of brown
- 1 quarter-sized portion of white
- Printable Pattern or Cut File
Tools
- Sand Paper
- Pencil
- Cutting Machine, Miter Saw or Scroll Saw
- Paintbrush
- Exacto Knife or Scissors
- Hot Glue Gun and Glue
Instructions
- Start making your gnome noses by combining the brown and white polymer clay until a flesh-color is consistent throughout.
- Roll clay into a 6 neat balls (in graduating sizes), making sure they are smooth all the way around. Then smash them a little flat, so that they will not interfere with the stacking of the gnomes.
- Bake in the oven per the polymer clay package directions. Allow to cool before touching.
- Cut out the fur or the felt for beards, mustaches and eyebrows. Set aside fur items and noses.
- Using the pattern provided, cut out all of the wood pieces.
- Sand each of the rectangle pieces on one end to help the triangle peak more accurately.
- To keep things organized, I recommend keeping the pieces together for each gnome. So, group the largest rectangles and the largest triangles together, and the next size down and so on.
- Working with the largest gnome pieces, hot glue the rectangle pieces onto each side of the triangle pieces. This will form a triangle-shaped box with an open end.
- Sand each wood length smooth.
- With a sheet of paper, sketch out where you want the hat and clothes to be on your gnomes. Be sure to leave a 1-inch space between the hat and clothes.
- Transfer locations of hat and clothes onto wood.
- Paint the hats and clothes in colors as desired.
- Allow paint to dry completely.
- Sand paint a little, making the wood look aged.
- Add a coat of grey wood stain and immediately wipe off, making the wood look more aged.
- Allow stain to dry completely.
- Sand again to further age the wood.
- Hot glue beards, mustaches and eyebrows in place.
- Hot glue noses in place above beard.
- Enjoy!
Notes
For more awesome DIY gnome tutorials, visit RufflesandRainboots.com

These look wonderful, Sarah. Thank you for sharing.
May I ask for help to ensure I get the correct size as I do not have a cutting machine and in the UK I do not know where I can get an svg printed. I hoped I could simply print your diagram at the correct size and ‘go from there’.
If you would be so kind as to share the dimensions of one piece (say the largest Gnome) then I can play with percentages on the printer to get it right. Thank you for any help you are able to give.
Hi, Toni! The largest gnome is 3 inches wide at the base on the front and back pieces, while the sides are 4 1/2 inches wide at the base.
How tall would the largest one be?
I should update the article with these measurements, thanks, Julie. Okay, so here goes: the largest is 12-inches, then 10 1/2, 8, 6 1/2, 4, and finally, 2 1/2 inches.