
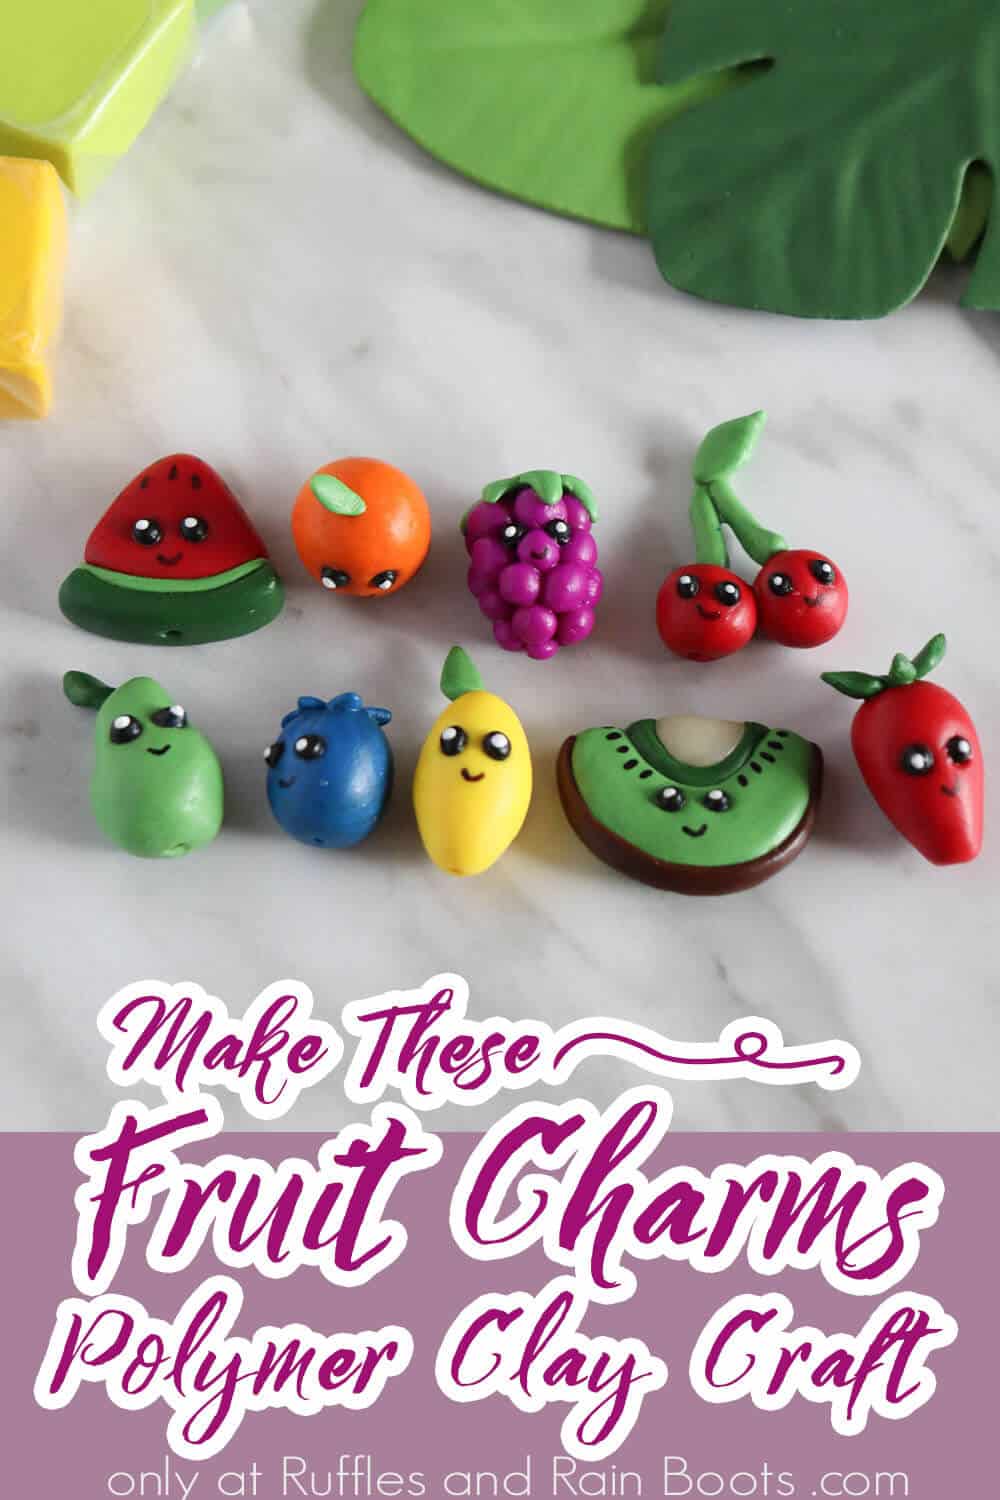
Make These Polymer Clay Fruit for a Cute Clay Craft!
You’re going to be obsessed with this adorable Polymer Clay Fruit! Make cute charms, jewelry, and more! (even some really cool gift ideas!)
Add this gnome mug topper to your list of must-do’s when you’re in the mood for crafting. Creating gnomes is always a good idea. And since you have the clay out on the crafting table…why not?!
What You'll Find On This Page
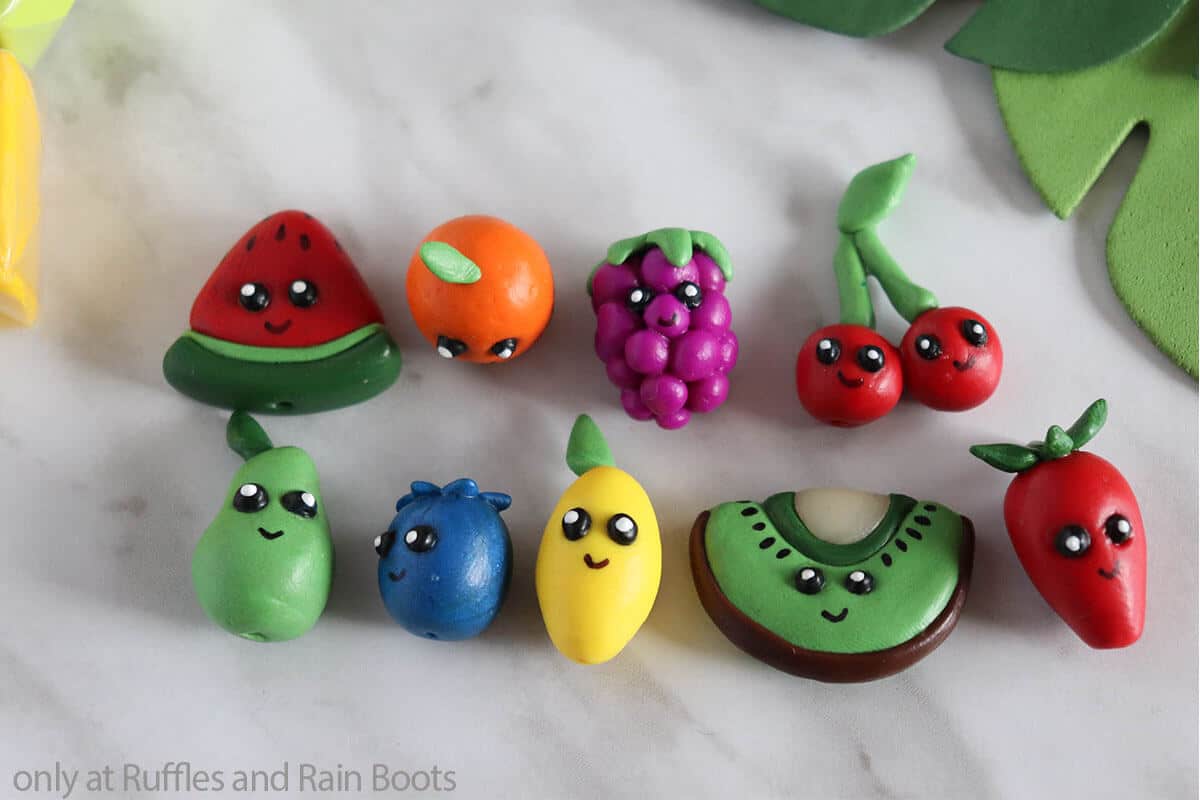
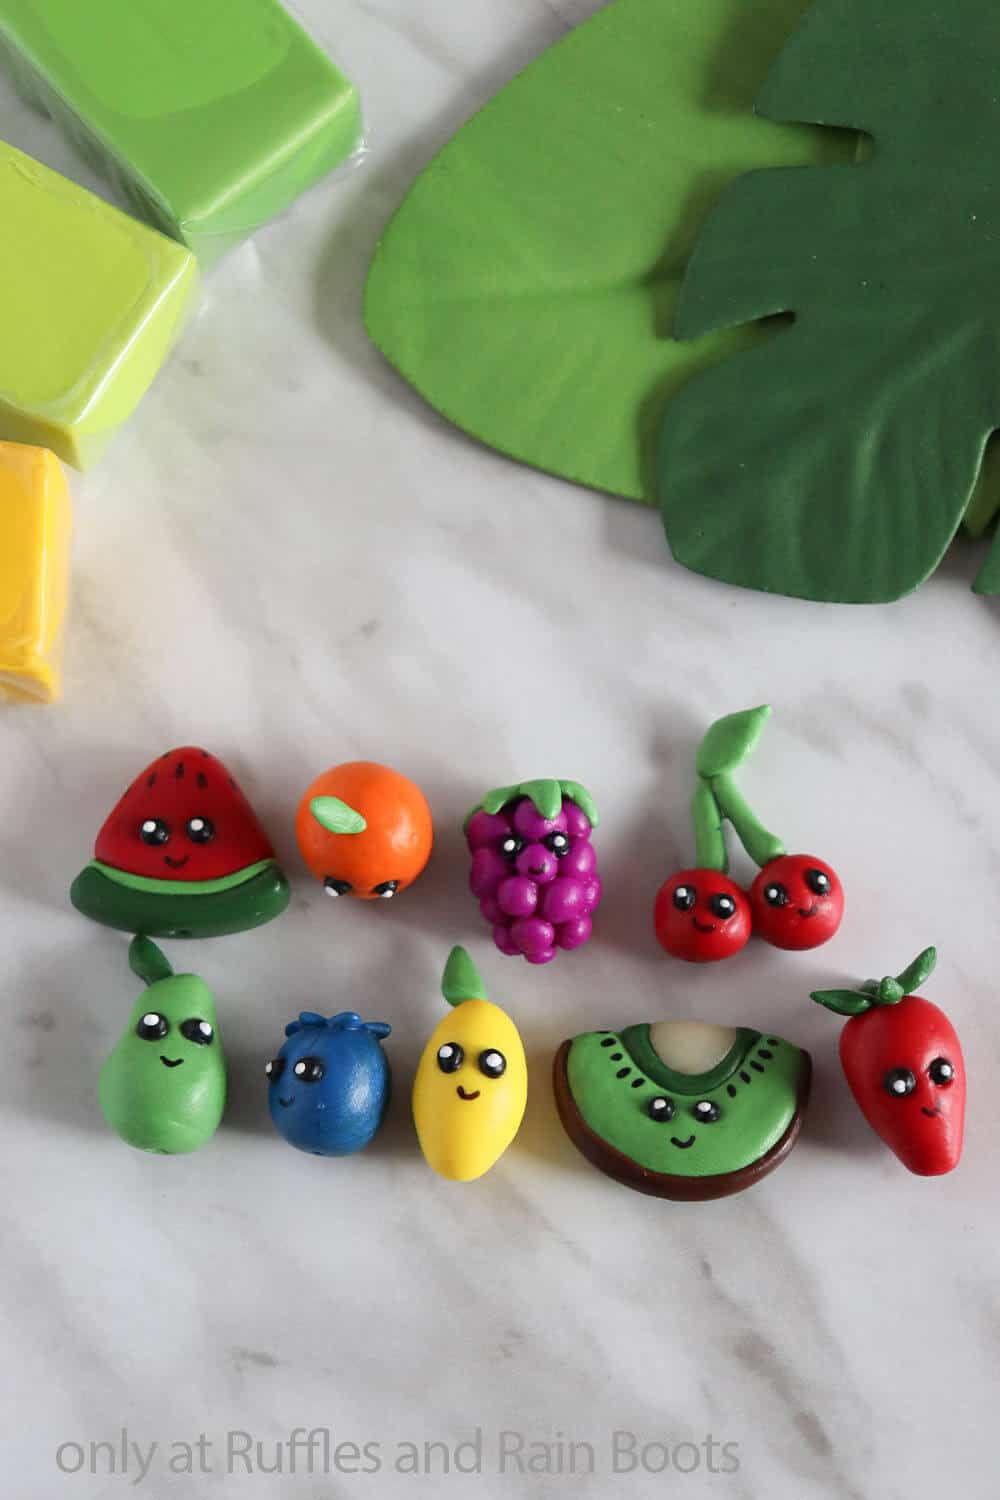
Polymer Clay Fruit
Here at Ruffles and Rain Boots, we’re pretty much obsessed with anything tiny and cute. This is why these adorable clay fruit ideas are always on our minds. We love making these baby fruits for a fun charm or just a little doo-dad to put on my desk!
RELATED READING: POLYMER CLAY GNOMES
If you’re looking for a simple activity that is perfect for a fun polymer clay craft, making clay fruit needs to be high up on your radar. Let’s get started!
No Time to Make This Now? Pin it for Later
Need to come back to this later? I totally understand that – take a second to pin this to your favorite craft board on Pinterest so it’s ready and waiting when you have time!

As an Amazon Associate, I can earn from qualifying purchases.
Tips For Creating This Easy Clay Craft
- Grab a pack of brightly colored polymer clay. You can always color your own clay, of course, but it’s a bigger hassle than it’s worth when you’re just making something that is a standard color, like fruit. LOL!
- Let the kids join in and make their own as gifts for friends! Have the kids be as creative as they want! Do they want a pink lemon? Go for it! Want to add a frowny face to their apple? For sure!
- Be patient as these firm up so that they last and don’t crack or break. If you rush the process, you might have to start all over. So, let them cool completely before smooshing them, is what I’m saying.
- If you want to seal these so that they won’t get stained, I highly recommend giving them a coat of Mod Podge when they’re cooled. That is going to really seal in those colors and make your adorable fruit charms pop!

Ready to Learn How to Make These Polymer Clay Fruits?
I think you’ll find that once you get started, it’ll be easy to get on a roll to make all the cute polymer clay charms!
Polymer Clay Fruit
This easy tutorial for polymer clay fruit will have you making a whole fruit basket of charm options!
Materials
- Polymer clay
- White glue
- White paint
- Mod Podge
Tools
- Paint brush
- Oven
- Sharpie
- Stylus
- Clay forming tools
- Parchment paper
- Baking sheet
Instructions
- Make the clay a ball shape for each fruit you're going to make.
- To make the grapes: Make a 2cm cylinder shape. Make about 20 or so 1-cm purple balls and one green 1-cm ball. Push the purple balls all over the cylinder and put the green ball flat and shape into leaves. Attach to the edges. Make 2 dents with the stylus for the eyes.

- To make the strawberry: Make a 2cm cone shape with the red clay and make 4 different 1-cm green balls in a teardrop shape. Put the leaves on the top and make 2 dents for the eyes.
- To make the lemon: Make a 2cm yellow ball into a cylinder and have it tapered a bit at the very end. Make a 1/2-cm green ball and shape it like a leaf and put it on the top. Make two dents for the eyes.
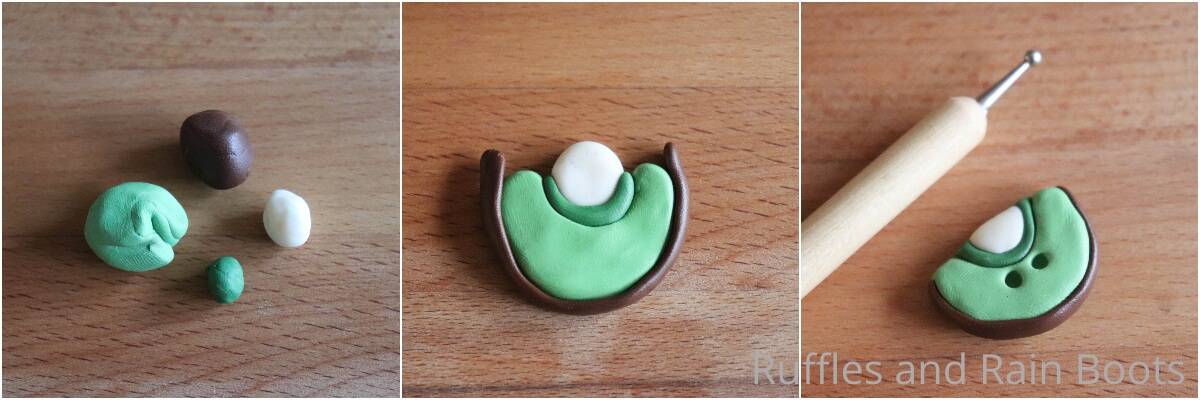
- To make a kiwi: Make a 2-cm green ball and then flatten it into the shape of a "u". Make 1/2 cm dark green ball and have it be like a thin rope. Make a 1/2 cm brown ball and make a rope as you did the green one. Make a 1/2 cm white ball and make it into a flat half-circle. Take the green rope and put it around the white circle. Put the green "u" around that and then finish with putting the brown rope wrapped around that. Add indents for eyes.
- To make an orange: make a 2cm orange ball. Add dots all over using the tool. Make 1/4 cm green ball and shape like a leaf - put on the top. Add indents for eyes.
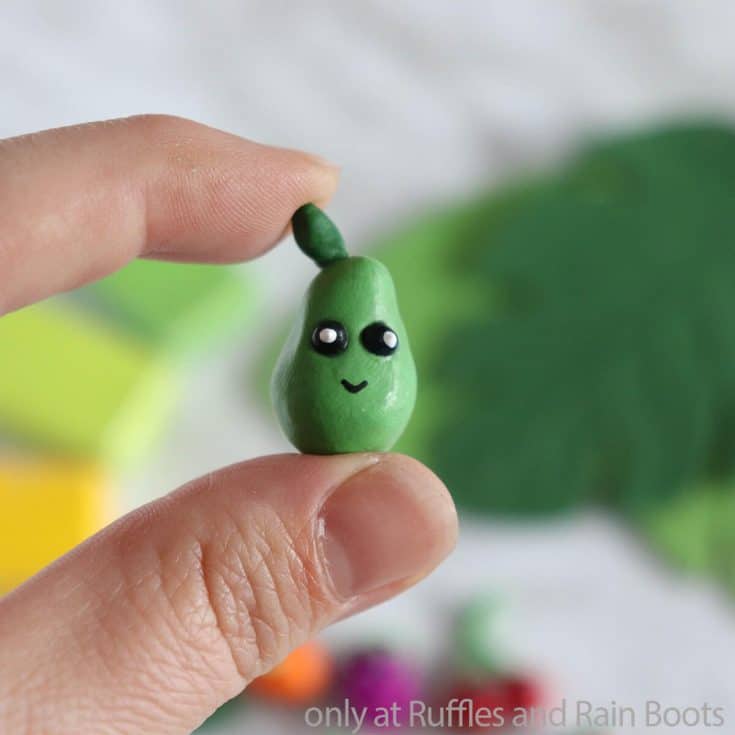
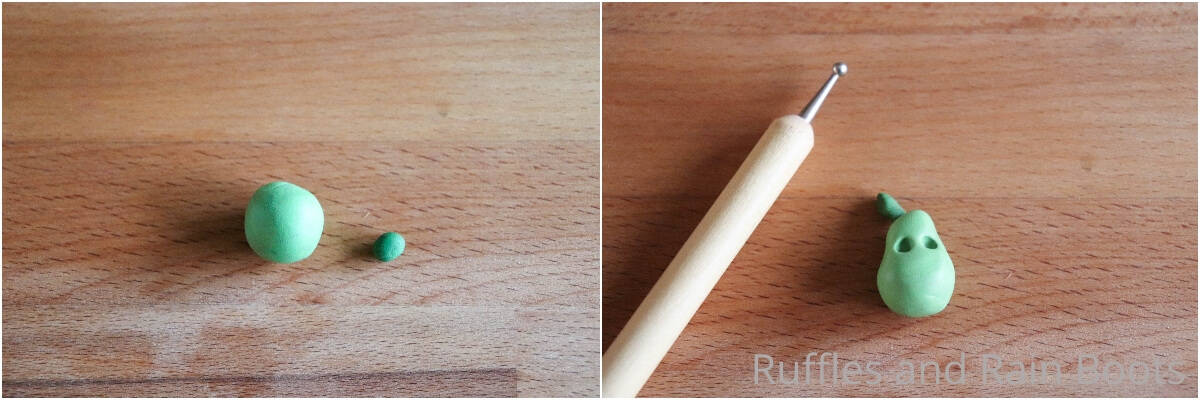
- To make a pear: Make a 2cm green ball and shape it like a pear. Make 1/2 cm green ball and have it look like a leaf - put it on the top. Add indents for eyes.
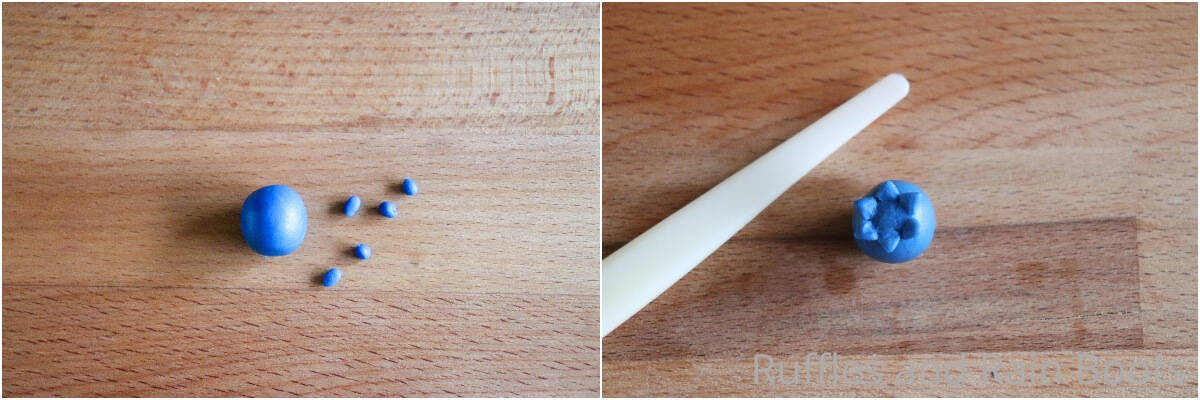
- To make a blueberry: Make 1/2 cm blue ball and also six 1/4 cm blue balls. Make them into a triangle shape and put them on the top. Add indents for eyes.
- To make a watermelon: Make a 2 cm red ball and shape it like a triangle. Make a 1/2 cm green ball and then light green balls into ropes. Put them on the bottom of the clay piece that looks like a triangle. Add indents for eyes.
- To make cherries: Make 1 cm red circles. Make 2 green balls that are 1/4 cm in size and turn them into ropes. Make another 1/4 cm ball into a leaf shape. Put on the leaf and stems to the top of the red ball. Add indents for eyes.
- For each of the fruit, make 2 little black balls for the eyes.
- Bake the clay fruit as directed per the package instructions.
- Once the clay is cooled, use the sharpie and draw a smile.
- Put some glue on the black balls and press them into the indents you created. Paint a little dot of white paint onto each of the eyes to make them look like they have a shine.
- Optionally, you can then coat each piece of clay fruit with modge podge.


Notes
For more fun polymer clay crafts, visit Ruffles and Rain Boots!
Recommended Products
As an Amazon Associate and member of other affiliate programs, I earn from qualifying purchases.


Ever More Fun Polymer Clay Craft Ideas
- Clay Unicorn Charm – Seriously adorable, you can have this unicorn done and ready to go in just a few minutes!
- Polymer Clay Gnomes with Feet – SUPER cute and such fun to make, this is a great afternoon clay craft anyone will love!
- Harry Potter Sorting Hat Bookmark – This is a ROCKSTAR polymer clay craft. It’s fast, fun and super silly!
Please Save This to Pinterest
All of your shares are what help this site to grow! Thank you for that!!! and Please share to Facebook or pin to your favorite board on Pinterest to continue to spread the word.
Meet the Creator
Hi there, I’m Sarah Nenni-Daher. I’m a crafty gal and always have at least 14 projects going at once. I am a crafter, designer, DIYer, and pattern maker. I share my creations here and in the Ruffles and Rain Boots® Shop.
Here at Ruffles and Rain Boots®, you’ll find DIY gnomes, crafts, gifts, cupcakes, laser crafts, and so much more. I love sharing video tutorials over on YouTube and chatting with other crafters in my Facebook groups. We’d love to have you!