
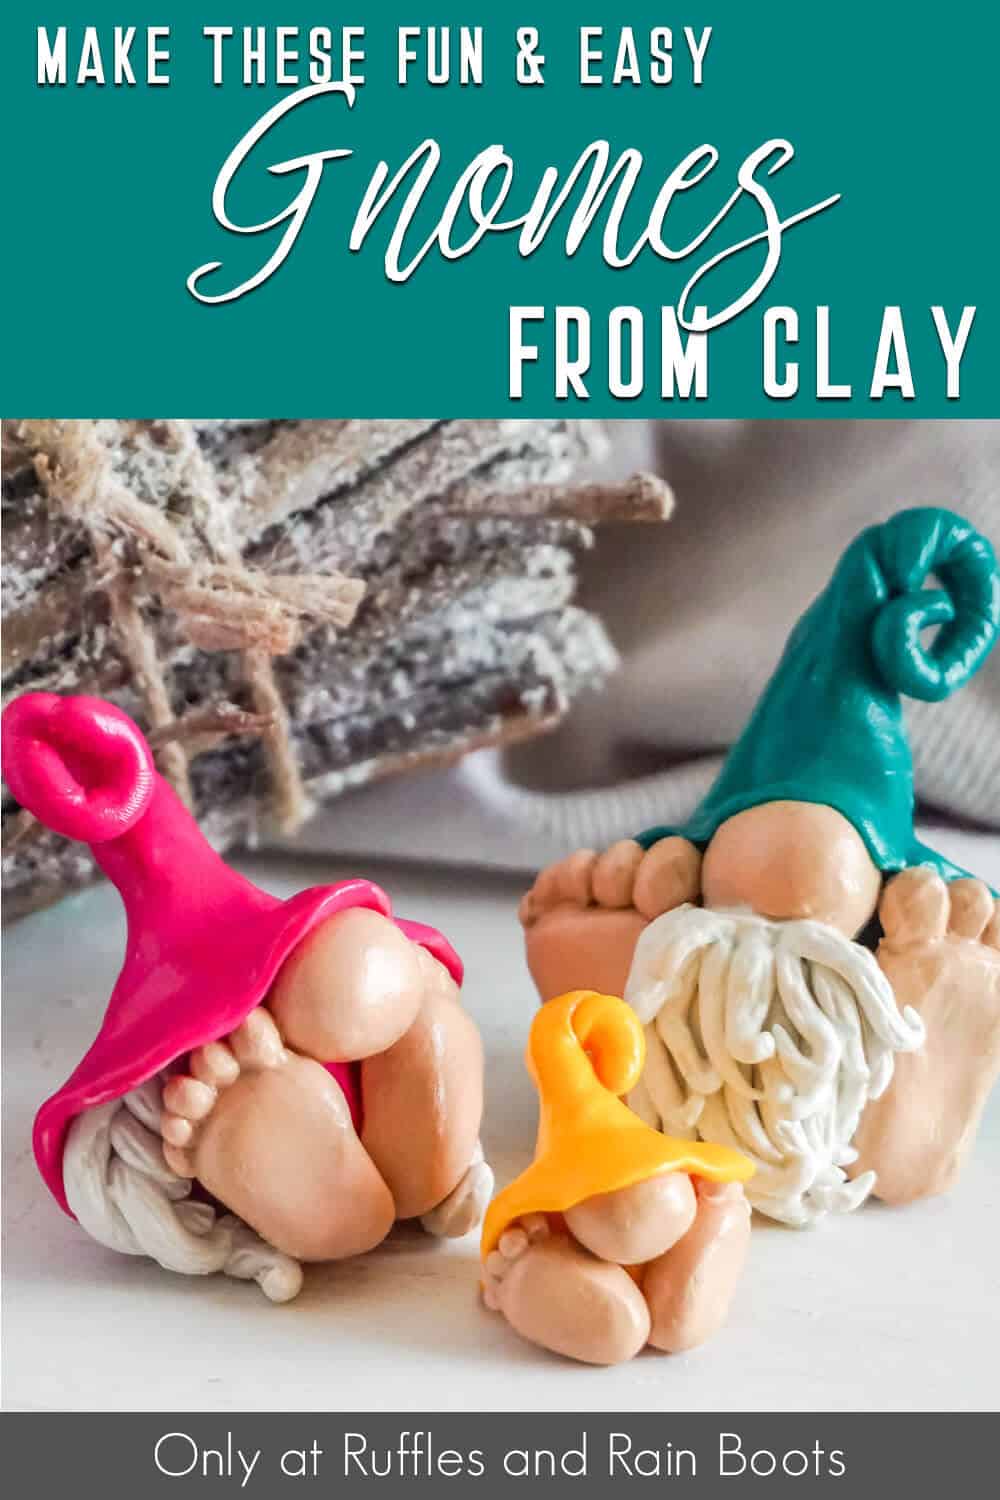
How to Make Polymer Clay Gnomes with Feet
Fun and just this side of ridiculous these polymer clay gnomes with feet are a great polymer clay craft, even for beginners!

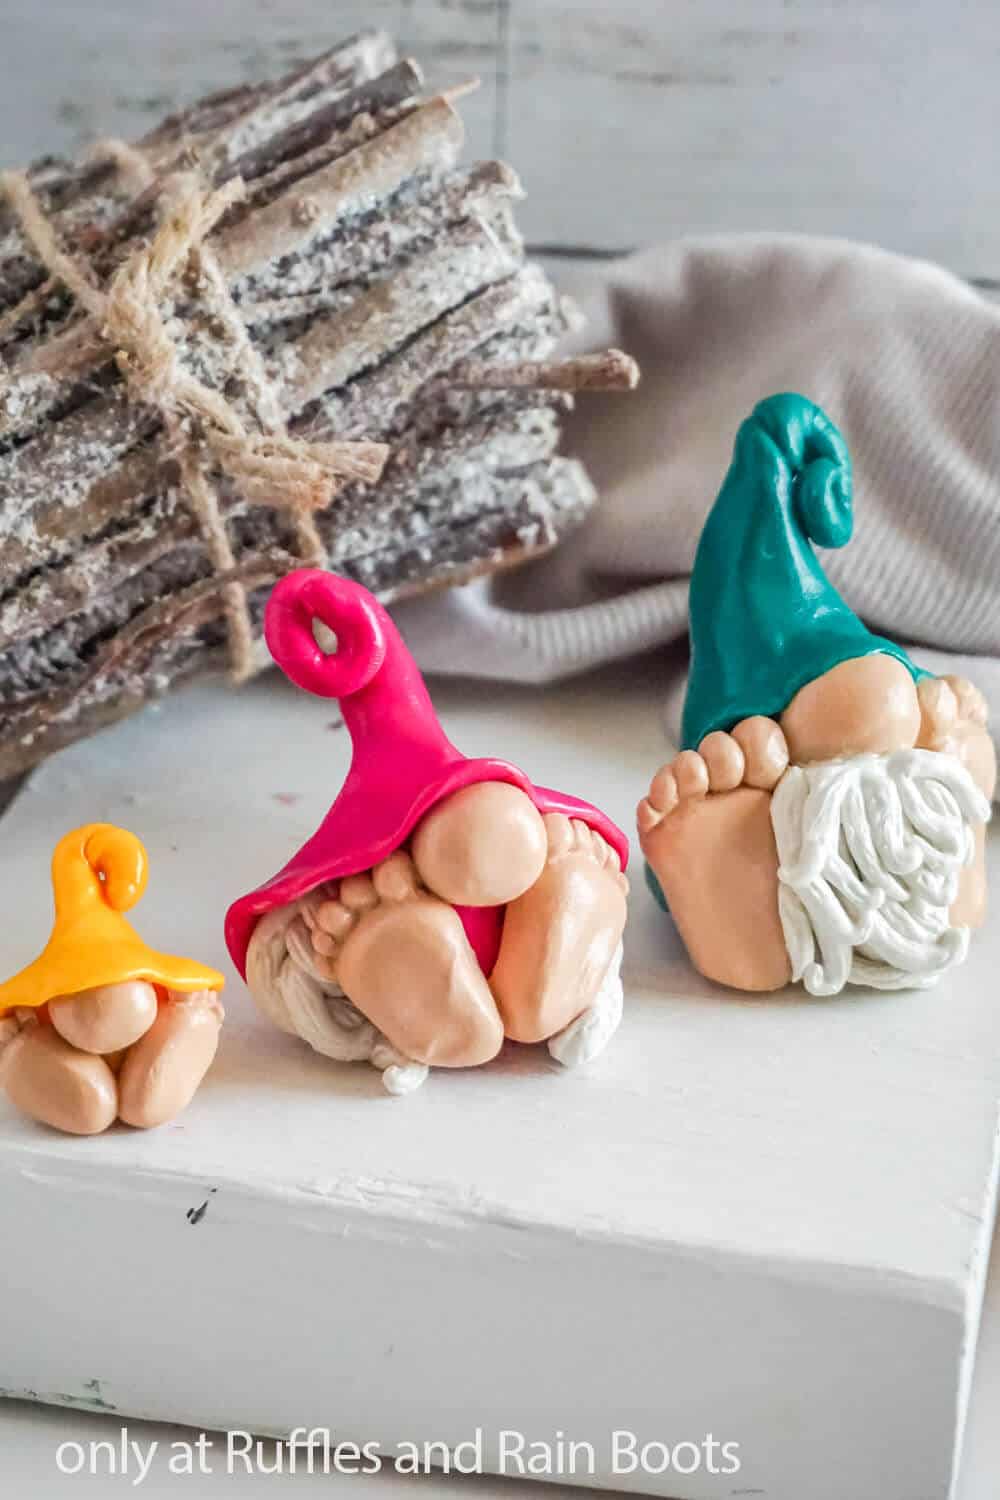
Polymer Clay Gnomes with Feet
Here at Ruffles and Rain Boots, we love experimenting and just enjoying time in the craft room. I mean, it’s like a personal therapy. But it can’t all be sewing and hot glue. Sometimes, I like to break out some polymer clay crafts and sculpt away!
RELATED READING: BASIC POLYMER CLAY GNOMES
This little trio of polymer clay gnomes with feet are my experimental gnomes, building on the ones I made not too long ago. Whimsical and easy, these are some of funnest I’ve made. Let’s get started.
No Time to Make This Now? Pin it for Later
You’re busy, I get it. Pin this to your favorite fun crafts board on Pinterest and it’ll be here when you’re ready.

As an Amazon Associate, I can earn from qualifying purchases.
Tips to Make Gnomes from Clay
- Grab your favorite trio of polymer clay colors or snag a sampler pack here. I branched out this time and got the brightest colors I could find that I felt like would really stand out together but also compliment. Lots of thinking went into it, but overthinking is my jam.
- Clean your work surface very well. Particularly when you’re working light colors like yellow or white to make the beard and braids for your gnomes from clay. Because if there’s any lint or dust, that will transfer onto the surface of the clay and make it look dirty. So, wash your hands between working with colors and be sure to wipe the work surface using a lint-free wipe.
- Such a cute set, you could make them as a little gnome mug topper or desk accent. But the real fun is leaving them on a friend’s doorstep or putting them in the bathroom on a shelf. They’re just adorable and hilarious. So fun.

Make Polymer Clay Gnomes with Big Feet
Below is our written and printable tutorial for this fun beginner clay gnome. If you’re a visual learner, see them all come together (and learn additional tips) in the full clay gnomes with big feet video tutorial here on YouTube.
Polymer Clay Gnomes with Feet

This quick and easy tutorial will get you making these polymer clay gnomes with feet in just a few minutes with their own personality and style!
Materials
- Polymer Clay in Pink, Yellow, Light Brown, White, and Teal
Tools
- Rubbing Alcohol
- Paintbrush
- Clay cutting and piercing tools, optional (you can use a toothpick, razor blade, craft knife, or anything really)Oven
- Parchment Paper
- Baking Sheet
- Mod Podge
Instructions
- Preheat your oven to the temperature noted on your clay package directions and line your baking sheet with the parchment paper and set aside.
- Combine a small portion of light brown clay with a larger chunk of white clay. You want to make a large-ish amount because you'll need enough to make all three noses and all six feet. So, give yourself ample amount of the resulting beige color. I tested to make sure I had enough by making three balls for stand-in noses, making sure I had excess in addition to that.
- Work a teal ball of about 1-inch in diameter into a chubby cone shape, flattening the base into a thin, concave shape, making it about 1/2 inch deep with a wide brim. Twist the cone top, thinning it out to about 1/8-inch in width, giving it a wide twist about halfway down. Finish the hat by curling the tip inward, making a spiral.

- Work a second teal ball of about 3/4-inches in diameter into a skinny cone shape with a rounded bottom, then set the hat on top. The hat should fit nicely on top of the cone, covering the gnome in the back completely, but lifting up in the front.
- Form a nose of about 1/2-inch diameter (or a little smaller - leave yourself room for the feet under the hat too) beige clay ball and tuck this up under the brim of the hat, pressing it gently but firmly into the body cone. Do not push the hat brim down on the sides - we will need that room for the feet.
- Make the feet by breaking off a 1 1/2-inch ball of beige clay, then breaking it in half. Form each half into a rectangle with rounded edges and corners. Make one end slightly smaller than the other and use your thumb to add a bit of depth to create an arch. Roll five descending-size tiny balls of beige clay and place them in descending order on the thicker end of the two rounded rectangle feet shapes. Fit a foot on either side of the nose, leaving room for your beard.

- Make the beard by forming a triangle shape of white clay about 1/4-inch thick and sized to fill the area between the feet, nose and bottom of the gnome. Add a little curve to the tip, then firmly but gently press this shape into the body cone of the gnome, along with the feet, setting everything in place.
- Create 10-15 long snakes of white clay about 1/4-1/8 -inch in diameter just long enough to fit in the space for the beard. Give each of these snakes a pointed tip and a little wiggly shape before pressing them onto the beard shape, filling the area to overflowing. Make smaller ones to add depth, using a toothpick or other clay-working tool to press the ends into the beard and firmly join the clay.
- Use a toothpick or clay-working tool to scrape lines in the beard strands to make them look more beard-like. Use the same tool to smooth the transition from toe-to-foot.
- Brush all of the gnome with the paintbrush dampened with the rubbing alcohol, to work out all of the fingerprints and rough spots. When you're happy with your gnome, place him on the prepared baking sheet.
- Repeat at a smaller scale, all of the above steps to make a pink gnome. To add braids instead of a beard, make 3 long (about 5-inches) snakes of white clay, then braid them together gently. Cut it in half, then twist the ends. Fit the braids up under the hat on either side of the feet. Finish your gnome with the alcohol treatment.
- Repeat on a much smaller scale, all of the above steps, to make a yellow gnome, but leave off a beard or braids - because he's a baby and doesn't have facial hair yet.
- Bake your gnomes per the package directions. Allow the gnomes to cool completely.
- Give each gnome a thick coat of Mod Podge and allow that to dry completely before displaying!


Notes
For more fun polymer clay crafts, visit Ruffles and Rain Boots!
More DIY Gnome Crafts You Might Like
- DIY Garden Gnome – You can make your own garden gnome with just a few supplies and an idea!
- Mini Mushroom Gnome – Mini mushroom from Dollar Tree customized with a beard, nose, feet and a hidden fig leaf. LOL!
- Tiny Scandinavian Gnome Pattern – Such a wee little gnome set, smooching and spending time in the snow together.
Please Save This to Pinterest
Your shares are how this site grows and I am sincerely grateful. Know a friend who’d like this? Please share it on Facebook or save it to your favorite clay crafts board on Pinterest.

If the directions are 30 minutes per quarter inch how long would you say you baked your gnomes? They are very cute.
If I recall, this one was 33 active and then I turned off the toaster oven (dedicated for my crafting) and then let them cool completely in the oven. So although it was on 33, I left it in for a good 50 minutes.