
Peppermint Sandwich Cookies Recipe
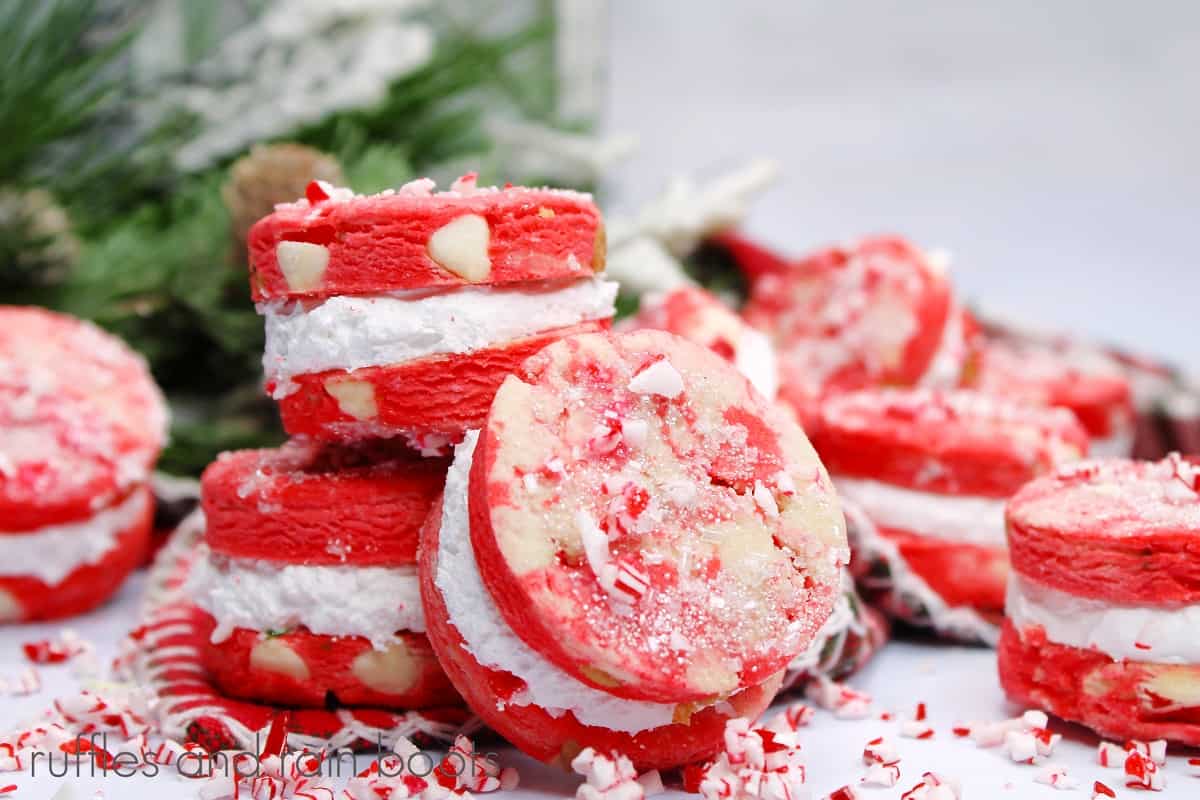
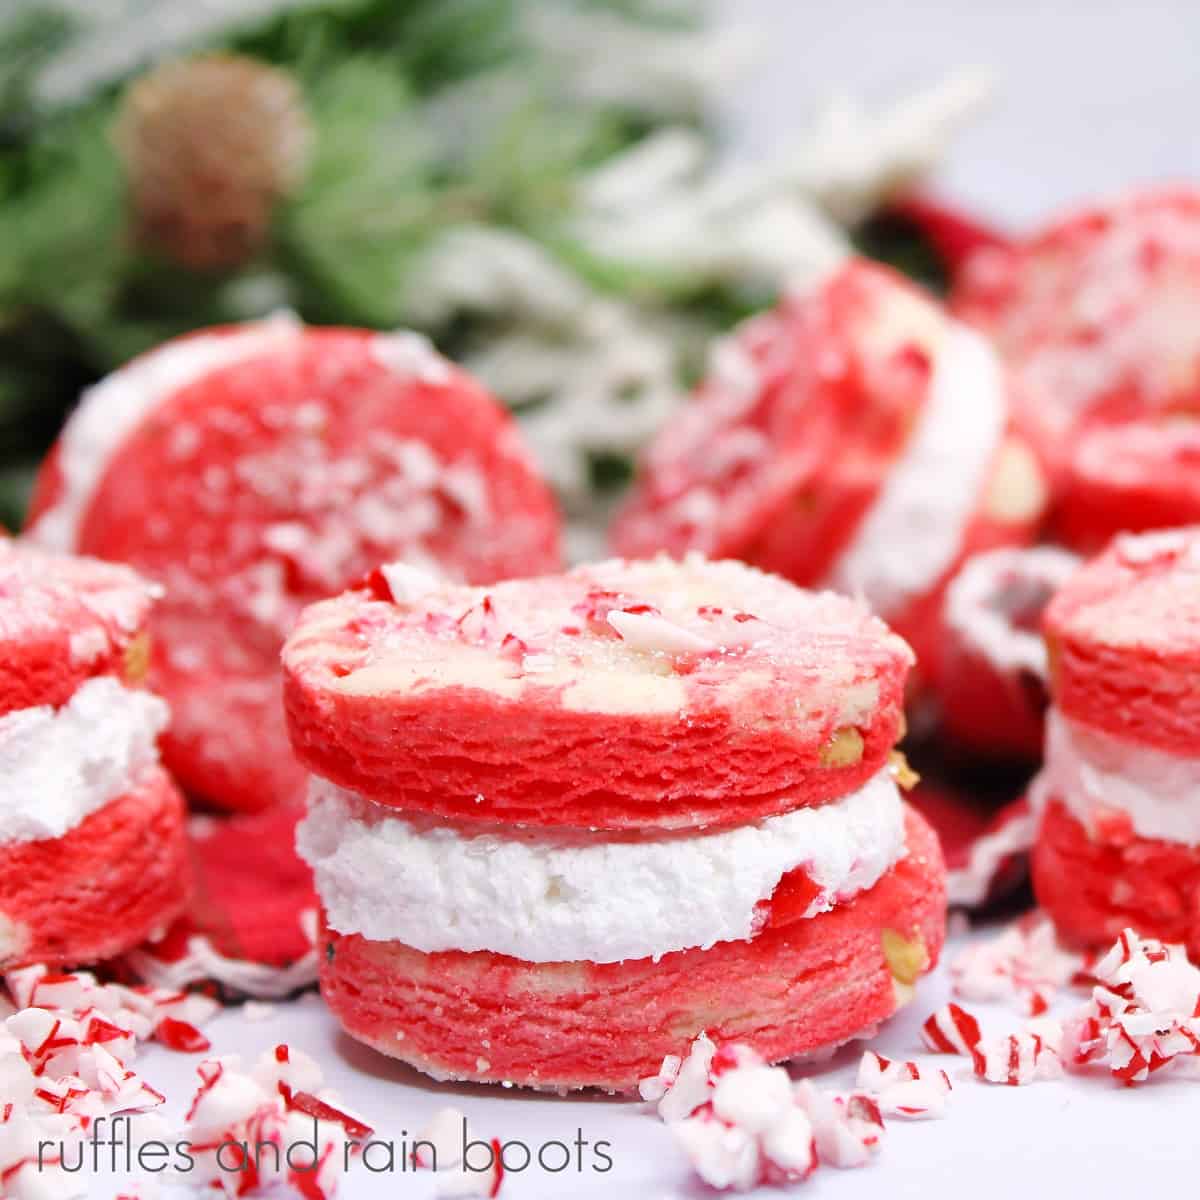
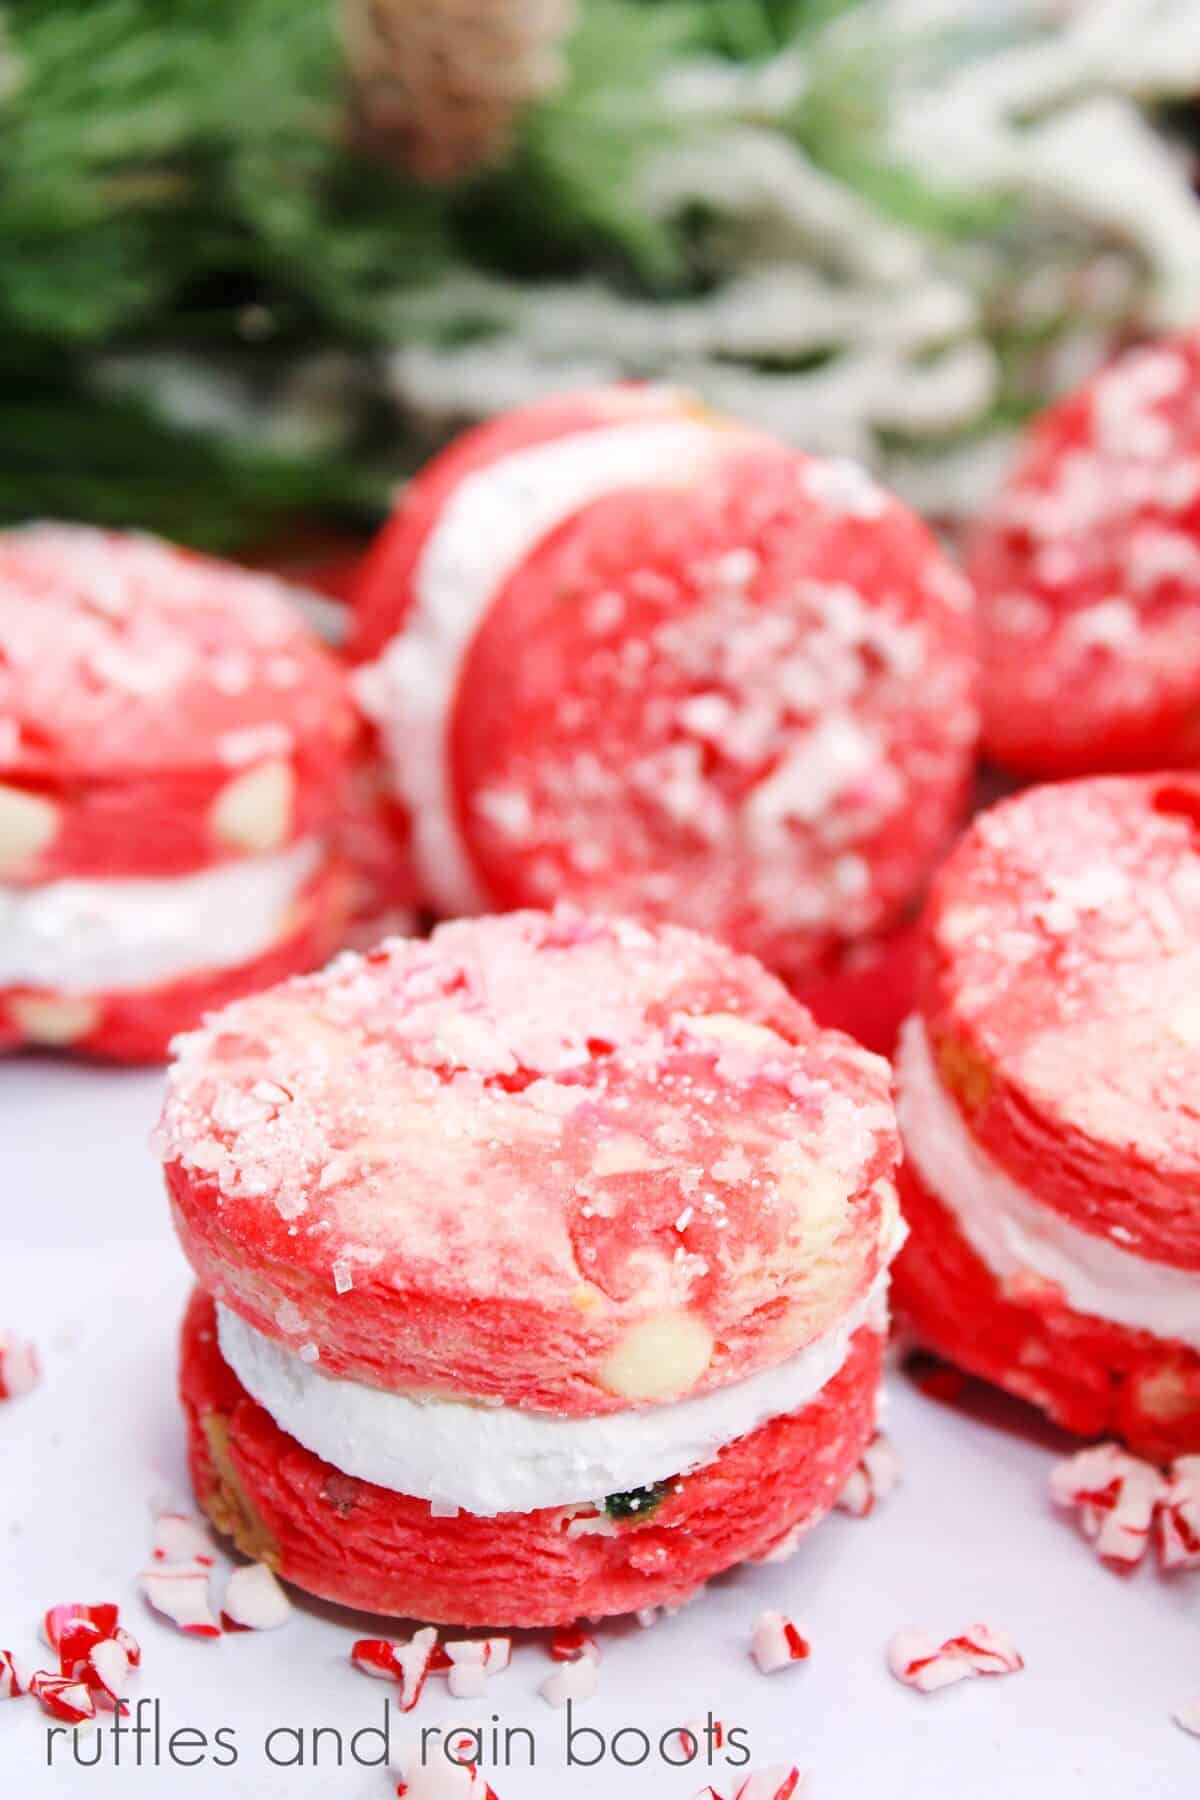
These peppermint sandwich cookies are something different from the same old same old holiday cookies. They are the perfect balance of sweet and minty (so yummy).
Everyone absolutely LOVED these cookies, even the little ones. The cookies are filled with a delicious buttercream frosting which balances their “spicy” peppermint flavor.
What You'll Find On This Page
Soft Peppermint Cookies Recipe
Here at Ruffles and Rain Boots, we make a lot of cookies during the holidays (cookie platter exchanges are so fun). A friend of mine whipped these up, shared the recipe with us, and they were loved by all!
If you’re ‘okay’ with baking but have never made sandwich cookies, do not be afraid. These cookies are easier to make than you would think – they look so fancy but are simple to put together. Your friends and family will want to learn how to make them too!
Please Save or Share For Later
Need a little time to crush up those peppermints and make your simple syrup? Use the sharing buttons and save this cookie recipe to your favorite Christmas or dessert pin board or share this cookie exchange idea on Facebook.
As an Amazon Associate, I could earn from qualifying purchases. There may be affiliate links within this article.
RELATED READING: Divine Dark Chocolate Fudge with Peppermint (Heavenly)
Tips for Making Your Peppermint Cookies
- These cookies are nice and soft. If you want to make them a bit chewier, add an extra egg yolk.
- If you want less of a peppermint taste, you can leave out the peppermint extract or reduce the amount. You will still get a nice minty flavor from the crushed peppermints.
- Salt is one of the major ways to season your cookies, so even if you are tempted, don’t leave this ingredient out.
Here are the Ingredients For Your Peppermint Cookies Recipe
- Butter
- Sugar
- Eggs
- Vanilla extract
- Red food coloring
- Cocoa powder
- Baking soda
- Cornstarch
- Salt
- Cake flour
- All-purpose flour
- White chocolate chips
- Ready to bake sugar cookies
- Candy cane simple syrup
- Sanding sugar
- Crushed candy canes
- Granulated sugar
- Water
- Powdered sugar
- Peppermint extract
Each step for this creative Christmas dessert idea is detailed below so it’s easy to follow. Keep this page open while you are making your holiday cookie recipe. If you would rather have a printable recipe, just scroll down and select the print button.

- Line 2 baking sheets with silicone mats or parchment paper. Set aside.
- Add the butter and sugar to a large mixing bowl. Using an electric hand or stand mixer, cream the butter and sugar on medium for 2 minutes or until light and fluffy.
- Mix in one egg at a time
- Add in the peppermint and vanilla extracts and mix on low speed until combined.
- Add in the red food coloring and mix on low speed until the desired color is achieved.
- In a separate bowl add flours, cocoa, baking soda, cornstarch, and salt. Whisk to combine. Slowly add the flour mixture to the butter mixture and mix on low speed until a soft dough is made.
- Fold in the white chocolate chips. For a chocolate peppermint sandwich cookie flavor, add milk chocolate chips instead.
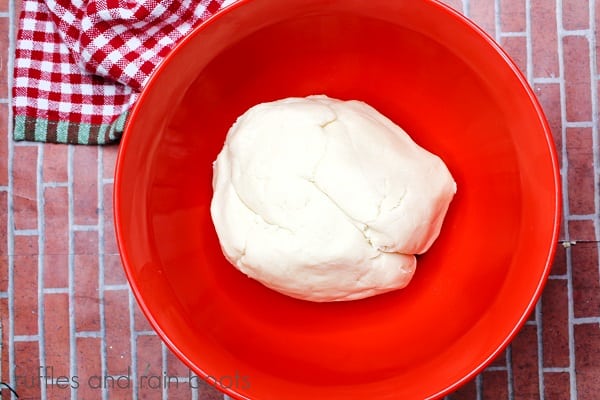
- Remove the sugar cookie dough from the wrapper and add it to the red velvet dough. Combine the two cookie doughs.
- Place the dough in the refrigerator and cover until chilled, (about 20 minutes.) Preheat the oven to 350 degrees.
- Place the dough on a well-floured surface. Using a rolling pin, roll out the dough to ½ inch of thickness. Cut out 24 circles with a round cookie cutter and place them on the prepared baking pan.
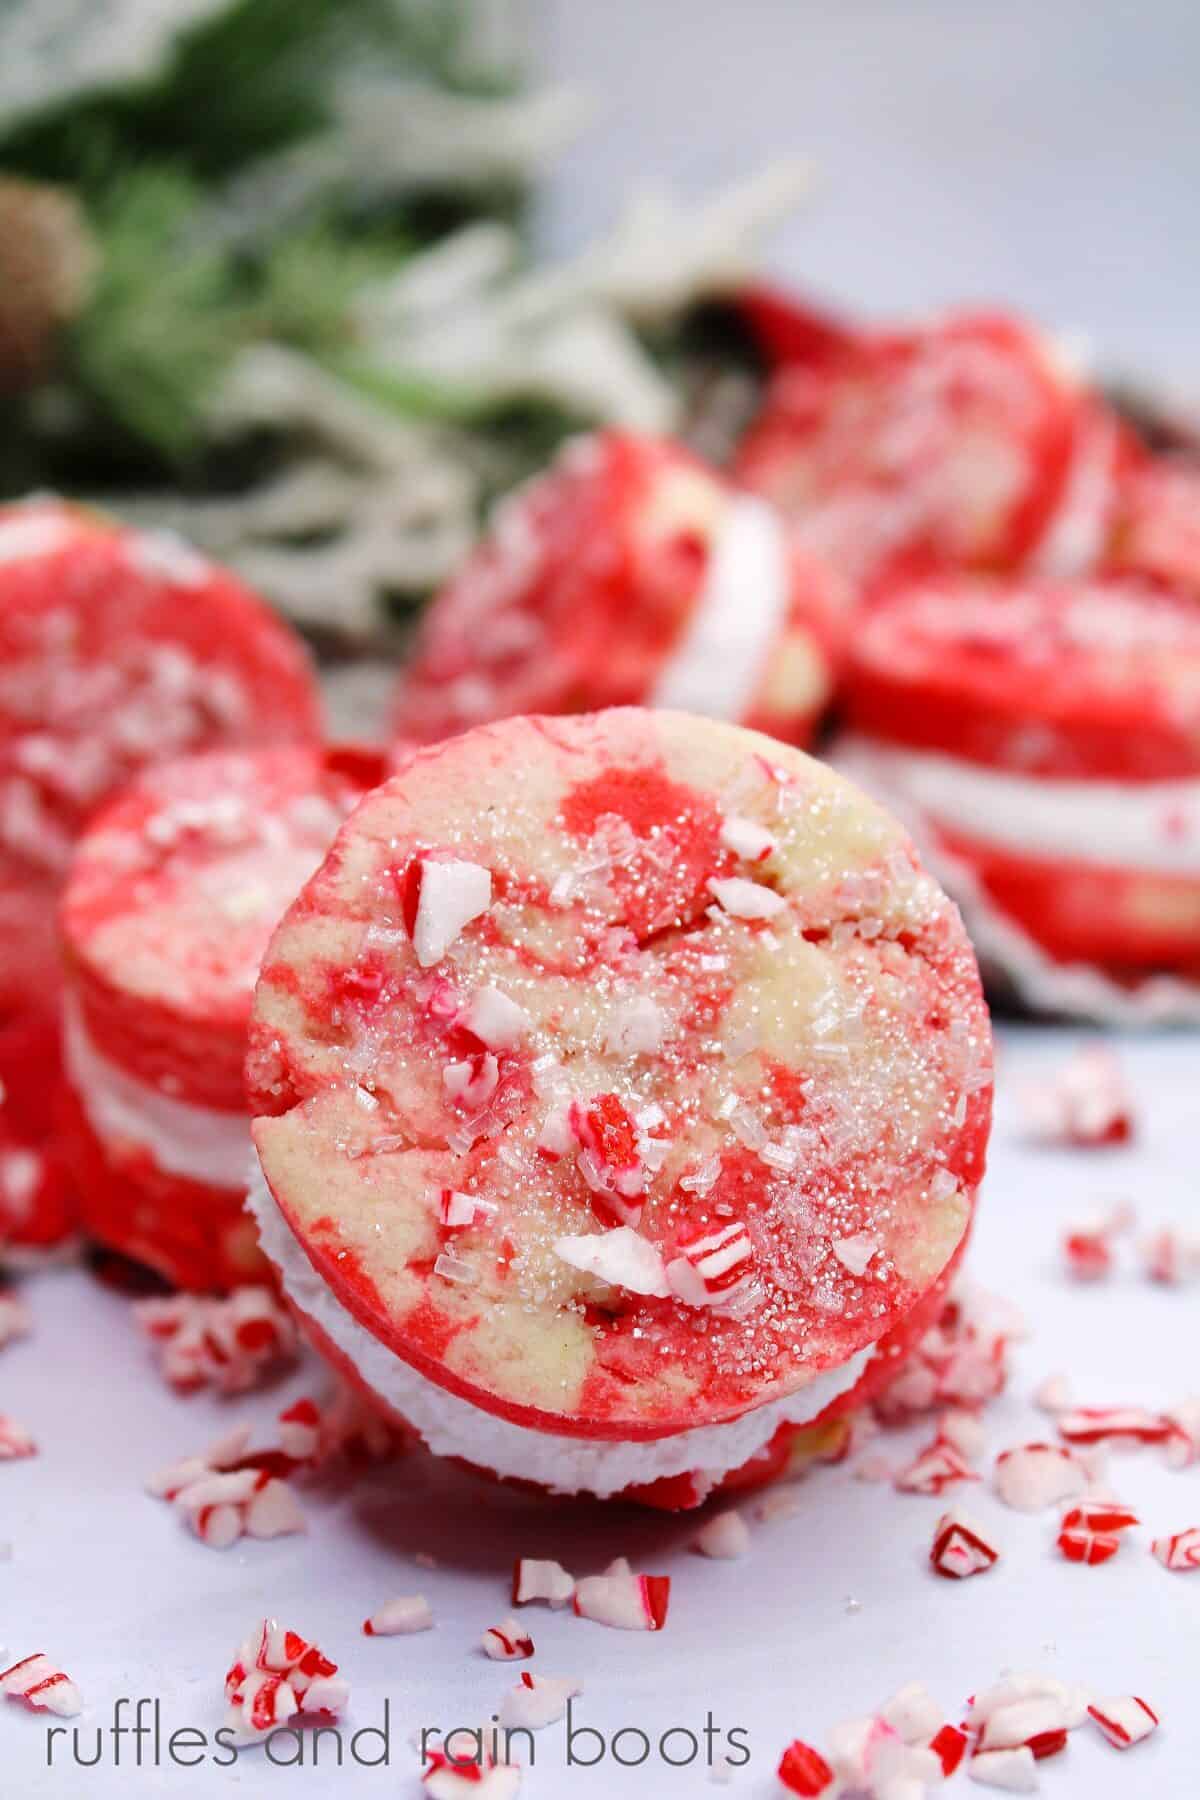
- In a small bowl add half of the sanding sugar and crushed candy canes, and mix to combine. Dip each cookie into the mixture and lightly press the mixture into the cookie. Place on the baking sheet.
- Bake for 8-10 minutes or until they begin to turn golden brown on top. Remove the cookies from the oven and let them cool for 10 minutes and then transfer the cookies to wire racks to cool completely.
In a medium saucepan add the sugar, water, and candy canes. Cook over medium-high heat and bring to a boil. Reduce the heat to low and cook for 10 minutes. Stir often until the sugar and candy canes are dissolved. Remove from the heat and set to the side.
In a large mixing bowl, add the 1/2 cup butter, vanilla, and peppermint extracts. Beat on medium for 2 minutes or until light and fluffy. Slowly mix in the 1 1/2 cups powdered sugar and 2-3 tablespoons milk until smooth, about 2 minutes. Add to the prepared piping bag and set aside.
Notes for Making Peppermint Cookies
- When making sandwich cookies, it is important they are uniform. This means each cookie needs to be the same size and shape. Using a 1/2″ or 1″ ice cream scoop will ensure this.
- Make sure your cookies are cooled completely before trying to add the frosting. If you don’t, you might have a goopy mess on your hands.
- Two important notes about your dough are: do not over-mix and chill it completely before baking.
More Cookie Recipes You May Like
- Peppermint Hot Cocoa Bombs – They only take 10 minutes to make and the kids (and adults) will absolutely LOVE them. They are the perfect Christmas party treat!
- Peppermint Cupcakes for Christmas – A rich and quick chocolate cupcake base topped with a whipped frosting makes this holiday dessert easy and delicious. Don’t forget to leave one next to the Christmas tree for Santa!
- Yummy PINK Peppermint Cocoa Recipe – Oh, friends. Everyone goes WILD for this every year. It’s so much fun to watch faces when you bring this cocoa recipe out (be sure to have a camera ready).
Save or Share for Later
Your shares are how this site grows and I sincerely appreciate it. Please save or share these peppermint cookies to your favorite dessert pin board or share them on Facebook.

Peppermint Sandwich Cookies
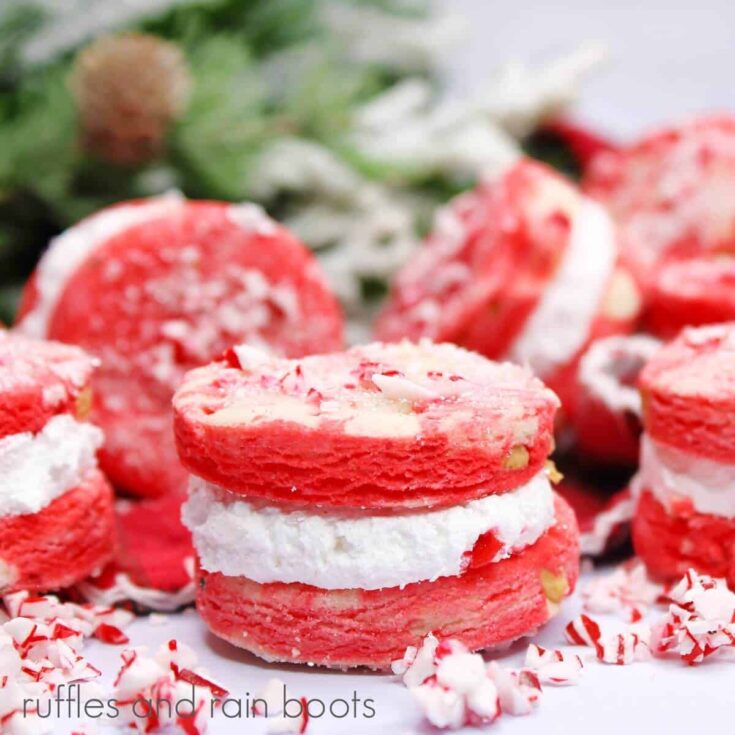
Our peppermint sandwich cookies recipe has just the right amount of crunch on the outside and sweet vanilla filling in the middle. You cannot go wrong with serving this yummy Christmas cookie on your holiday dessert table. This minty-flavored cookie will delight your guests of all ages. Our soft cookies are topped with crushed peppermints and are perfect for your next party, cookie exchange or school bake sale. Follow Sarah at Ruffles and Rain Boots for the complete instructions for this recipe.
Ingredients
- Butter
- Sugar
- Eggs
- Vanilla extract
- Red food coloring
- Cocoa powder
- Baking soda
- Cornstarch
- Salt
- Cake flour
- All-purpose flour
- White chocolate chips
- Ready to bake sugar cookies
- Candy cane simple syrup
- Sanding sugar
- Crushed candy canes
- Granulated sugar
- Water
- Powdered sugar
- Peppermint extract
Instructions
- Line 2 baking sheets with silicone mats or parchment paper. Set aside.
- Add the butter and sugar to a large mixing bowl. Using an electric hand or stand mixer, cream the butter and sugar on medium for 2 minutes or until light and fluffy.
- Mix in one egg at a time
- Add in the peppermint and vanilla extracts and mix on low speed until combined.
- Add in the red food coloring and mix on low speed until the desired color is achieved.
- In a separate bowl add flours, cocoa, baking soda, cornstarch, and salt. Whisk to combine. Slowly add the flour mixture to the butter mixture and mix on low speed until a soft dough is made.
- Fold in the white chocolate chips
- Remove the sugar cookie dough from the wrapper and add it to the red velvet dough. Combine the two cookie doughs.
- Place the dough in the refrigerator, covered, until chilled for about 20 minutes. Preheat the oven to 350 degrees.
- Place the dough on a well-floured surface. Using a rolling pin, roll out the dough to ½ inch of thickness. With a small-sized circle cookie cutter, cut out 24 circles and place them on the prepared baking pan.
- In a small bowl add half of the sanding sugar and crushed candy canes, and mix to combine. Dip each cookie into the mixture and lightly press the mixture into the cookie. Place on the baking sheet.
- Bake for 8-10 minutes or until they begin to turn golden brown on top. Remove the cookies from the oven and let them cool for 10 minutes and then transfer the cookies to wire racks to cool completely.
- Remove the sugar cookie dough from the wrapper and add it to the red velvet dough. Combine the two cookie doughs.
- Place the dough in the refrigerator and cover until chilled, (about 20 minutes.) Preheat the oven to 350 degrees.
- Place the dough on a well-floured surface. Using a rolling pin, roll out the dough to ½ inch of thickness. Cut out 24 circles with a round cookie cutter and place them on the prepared baking pan.
- In a small bowl add half of the sanding sugar and crushed candy canes, and mix to combine. Dip each cookie into the mixture and lightly press the mixture into the cookie. Place on the baking sheet.
- Bake for 8-10 minutes or until they begin to turn golden brown on top. Remove the cookies from the oven and let them cool for 10 minutes and then transfer the cookies to wire racks to cool completely.
- In a medium saucepan add the sugar, water, and candy canes. Cook over medium-high heat and bring to a boil. Reduce the heat to low and cook for 10 minutes. Stir often until the sugar and candy canes are dissolved. Remove from the heat and set to the side.
- In a large mixing bowl, add the 1/2 cup butter, vanilla, and peppermint extracts. Beat on medium for 2 minutes or until light and fluffy. Slowly mix in the 1 1/2 cups powdered sugar and 2-3 tablespoons milk until smooth, about 2 minutes. Add to the prepared piping bag and set aside.
Nutrition Information:
Yield:
18Serving Size:
1Amount Per Serving: Calories: 154Total Fat: 2gSaturated Fat: 1gTrans Fat: 0gUnsaturated Fat: 1gCholesterol: 13mgSodium: 121mgCarbohydrates: 31gFiber: 0gSugar: 19gProtein: 2g
All nutrition information is estimated. For accuracy, please calculate your exact brands and ingredients if accuracy is desired.
Meet the Creator
Hi there, I’m Sarah Nenni-Daher. I’m a crafty gal and always have at least 14 projects going at once. I am a crafter, designer, DIYer, and pattern maker. I share my creations here and in the Ruffles and Rain Boots® Shop.
Here at Ruffles and Rain Boots®, you’ll find DIY gnomes, crafts, gifts, cupcakes, laser crafts, and so much more. I love sharing video tutorials over on YouTube and chatting with other crafters in my Facebook groups. We’d love to have you!