
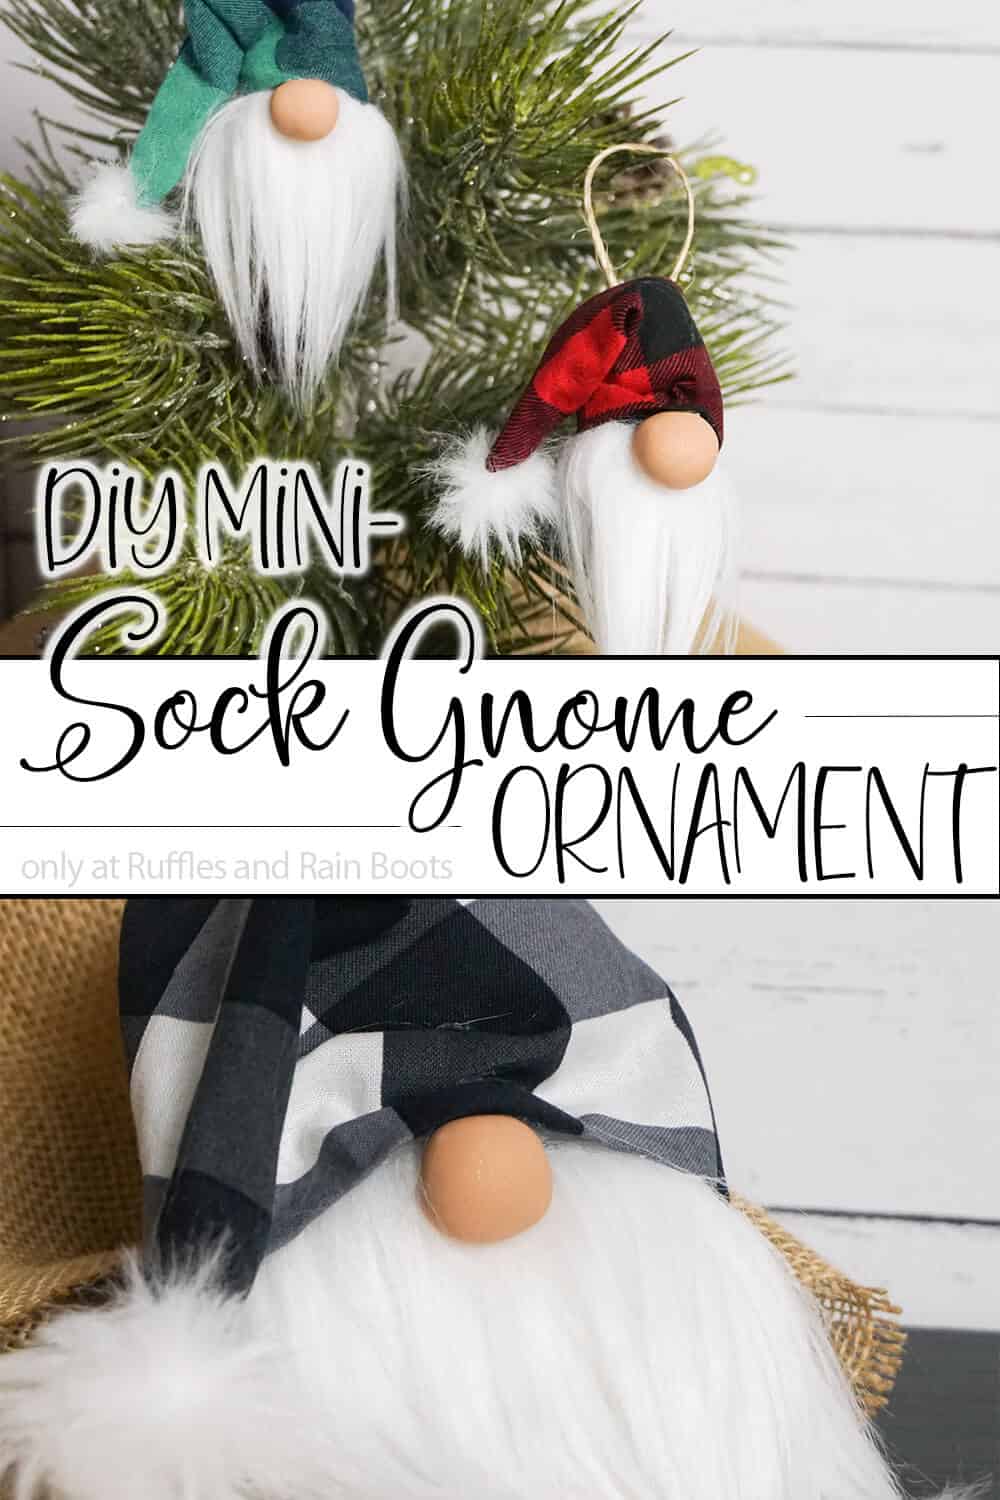
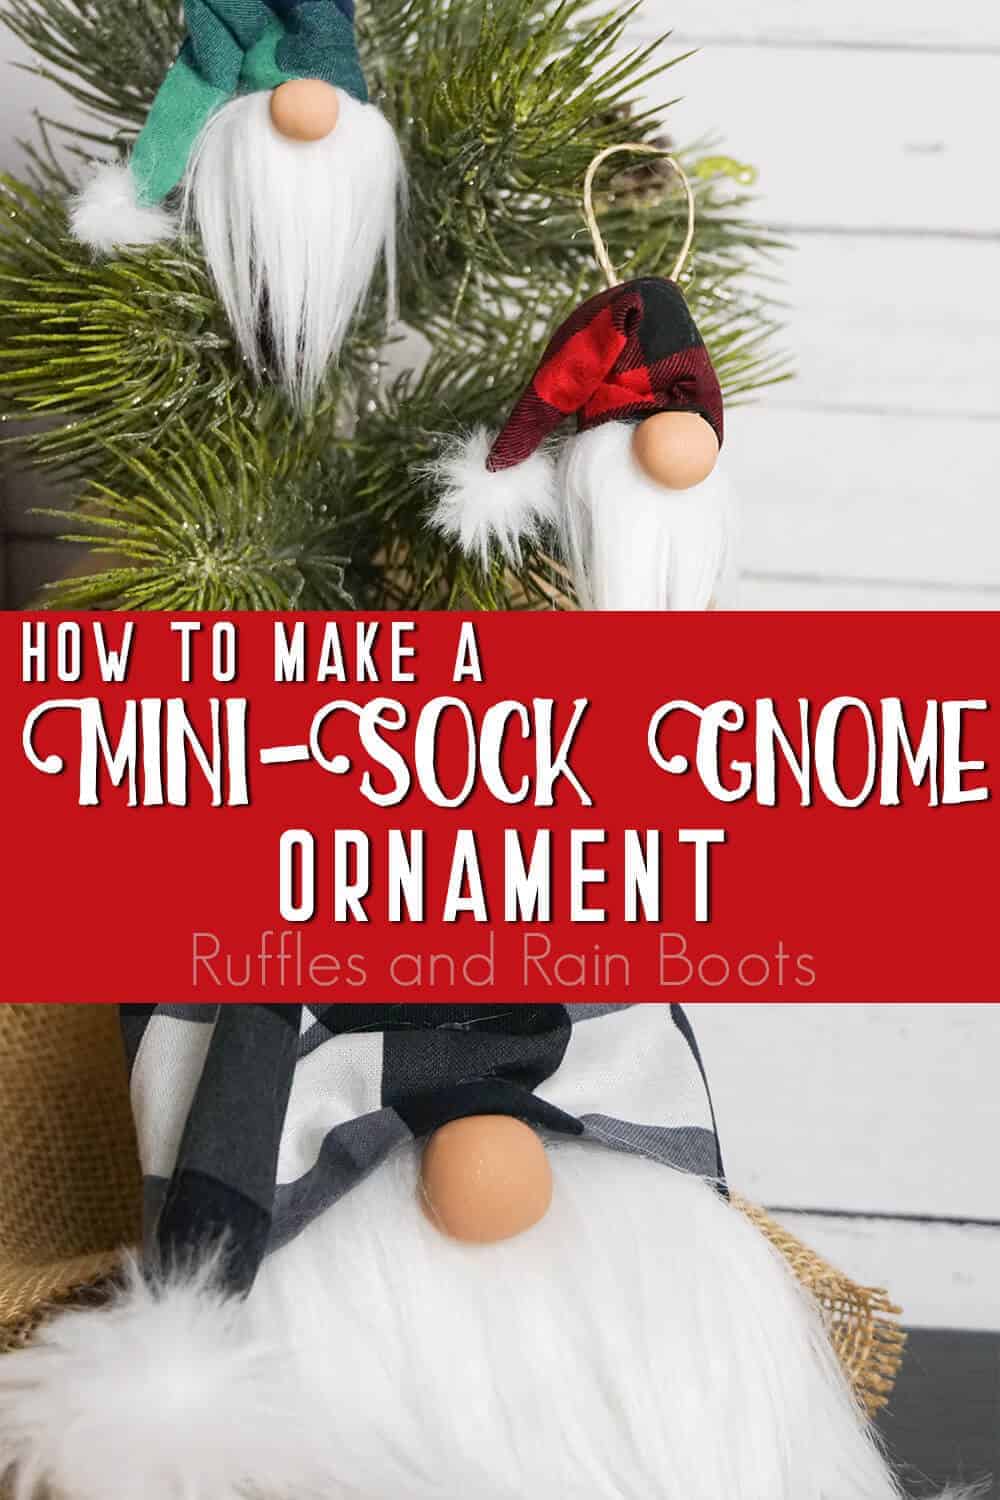
How to Make a Mini Sock Gnome Ornament in Minutes!
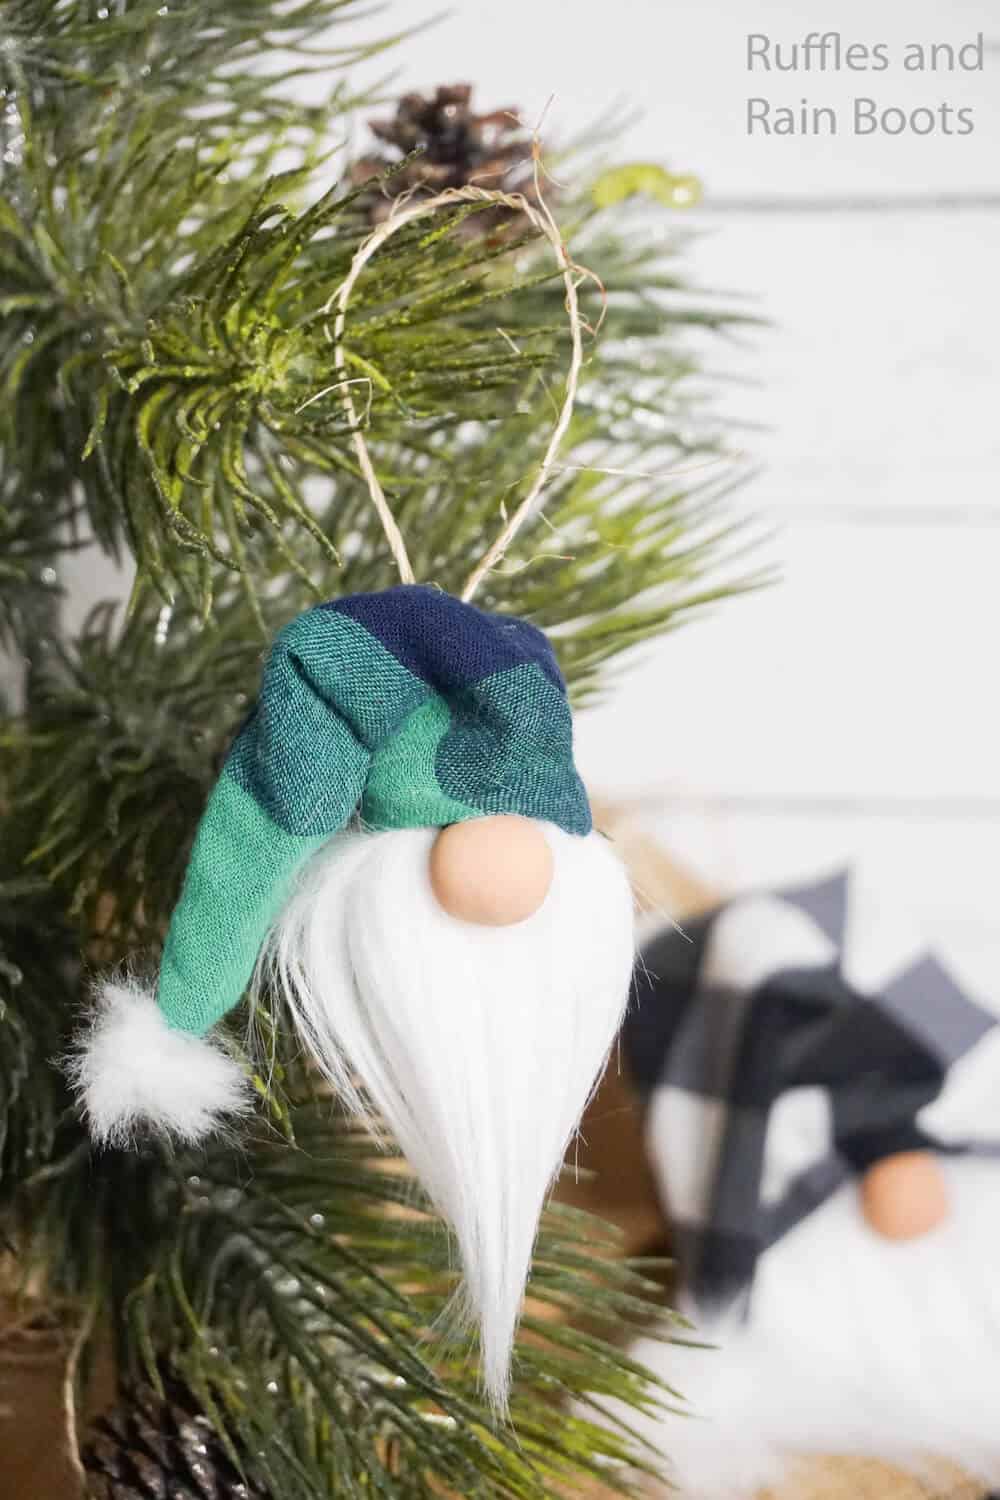
I wanted to make a fun mini sock gnome ornament to go on my farmhouse Christmas tree and wow! They turned out so cute that I had to make a little trio.

What You'll Find On This Page
Mini Sock Gnome Ornament
Here at Ruffles and Rain Boots, we need some gnome-intervention. Seriously, these gnomes are so fun to make and every time I have a few minutes, I find myself coming up with sketches or making a new tomte to add to my home (or someone else’s).
RELATED READING: EASY CHRISTMAS GNOME ORNAMENTS
Today, I sketched these adorable farmhouse gnome ornaments on a sticky note while waiting for water to boil. Not only are they adorably decked-out in buffalo check but they’re mini sock gnome ornaments that I made with a little bit of leftover sock from previous sock-gnome projects. If you’re ready to make a fun miniature gnome ornament, let’s get started.
DIY Christmas Gnome Tutorials
If you’re looking for the best DIY Christmas gnome tutorials, you have come to the right place. Check out all of my favorite tomte tutorials for the holidays!
RELATED READING: The Internet’s Most Popular Gnome Ornaments (So Many Fun Ones)
No Time to Make This Now? Pin it for Later
You’re busy, I get it. Pin this to your favorite DIY ideas board on Pinterest and it’ll be here for when you’re ready.
As an Amazon Associate, I can earn from qualifying purchases.
Tips For Learning How to Make Gnome Ornaments
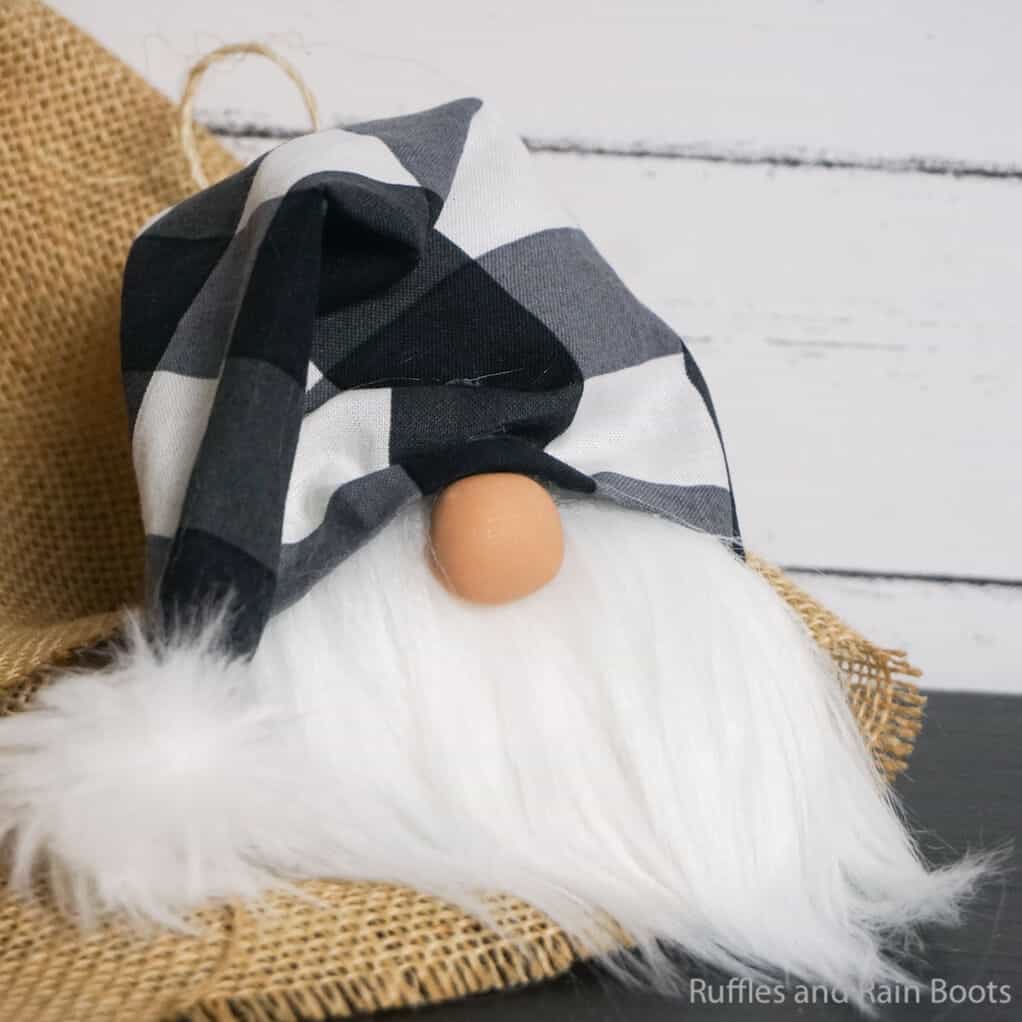
- Despite how big these ornaments look on my mini Christmas tree in the photos, they’re actually really small. The big one with the black and white buffalo check? It’s no bigger than the palm of my hand. Keep that in mind as you’re making these mini sock gnome ornaments.
- Let’s talk gnome noses. My favorite way to make a nose is polymer clay because I have more control over how big and what color it is. But, I also love these wood beads, beads I find rolling around in my craft room, buttons, and sometimes even a tiny pony bead. My point: use what you have.
- If you’ve never cut faux fur before, put down the scissors. :) Instead, flip the fur over and cut the fabric backing only with an Exacto knife. You’ll be able to save the most fur, have a gorgeous drape, and it’ll look great! I have this video of how to cut faux fur the right way and while you’re there watching that, be sure to subscribe to my channel so you get to see all the latest and greatest gnome tutorials.
- I like to make my gnome beards from the nicer faux fabric furs that come on the big rolls at the craft store. The simple mini sock gnome ornaments here were made with the fancy version (Mongolian) of the white craft fur. You can click here to get a yard of it.
- Love how smooth my gnome’s beard is? Me too. I did that by just brushing my fingers through it and by using a pet-grooming comb. If you are making gnomes, a comb and a slicker brush are indispensable.
How Do I Make this Mini Sock Gnome Ornament?
I’m so glad you asked. Below is our written tutorial. If you are making a playlist of Christmas gnome crafts on YouTube, here is our full-length, detailed sock gnome ornament video tutorial.
First, make your gnome nose by combining a portion of light brown and white polymer clay until you have the color you want.
Roll a quarter-sized portion of this clay into a neat ball. This is the nose. Bake the nose per the clay package’s directions. Allow it to cool fully.
Cut the portion of sock into a 4×5-inch rectangle. Glue the sides of the rectangle closed, forming a 2×5-inch pouch.
Turn the pouch right side out.
Fill the pouch with polyfill.
Hot glue the top of the sock-pouch closed.
Based on the size of the sock-pouch, cut a “u” shaped beard from the faux fur–cutting with the exacto knife only through the fabric on the back of the fur.
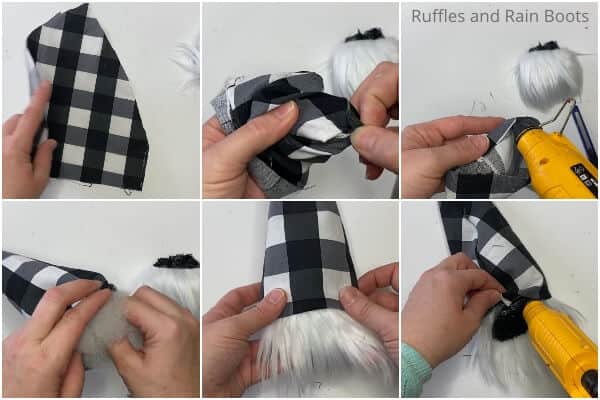
Hot glue the beard onto the sock pouch. Cut a large triangle of buffalo check fabric about 11 inches wide on the bottom side of the triangle.

Run a bead of hot glue down the side edge of the hat on the right side, then fold the hat over and glue the two sides together.
Allow the hot glue to cool completely.
Turn the hat right side out.
Fold the brim of the hat over and hot glue in place, forming a hem.
Fill the gnome’s hat with a little polyfill.
Hot glue the nose in place about 1/2 inch from the top of the beard.
Tuck the hat on top of the gnome body and hot glue it in place on the back.
Hot glue a little wrinkle into the hat at the nose and glue the hat in place over it.
Make a little faux fur pom pom by cutting a quarter-sized circle of faux fur, then placing a bead of hot glue around the edge. Pinch the faux fur circled closed and trim the fur, making the pom pom.
Hot glue the pom pom onto the end of the hat. Flop the hat over and hot glue it in place.
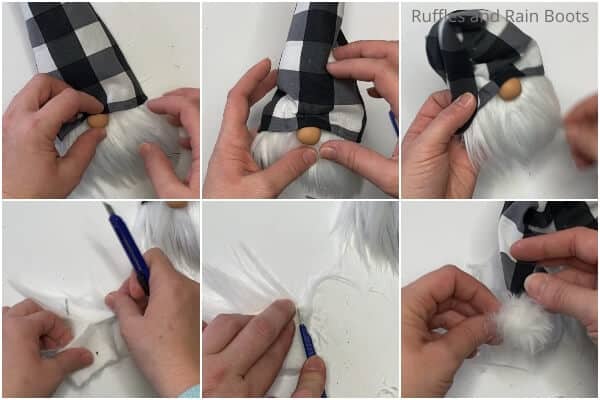
Attach a small loop of twine on the back of the gnome.
More Gnome Ornaments You Might Like
- Wooden Gnome Ornaments – I love this easy wooden gnome ornament, it’s so easy and fun. But the resulting little gnomes? So precious on the tree.
- Scandinavian Gnome Ornaments – One of my favorite ornaments ever, these little Scandinavian gnomes are fun and each one can be customized to your own tastes!
- Mitten Gnome Ornament – A gnome peeking out of a mitten could not be cuter. Except that it’s tiny and on the Christmas tree–ooope!
Please Save This to Pinterest
Your shares are how this site grows and I am sincerely grateful. Know a friend who’d like this? Please share it on Facebook or save it to your favorite DIY Christmas crafts board on Pinterest.
Mini Sock Gnome Ornament

How fun is this cute mini sock gnome ornament?! I mean, I love Christmas ornament gnomes, but making one like a little farmhouse sock gnome? That's priceless.
Materials
- Top of a Sock
- Small Amount of Polyfill
- Scraps White Mongolian Fur
- Light Brown Polymer Clay
- White Polymer Clay
- Scraps Buffalo Check Fabric
- Small Amount of Twine
- Wood Bead for Nose
Tools
- Scissors
- Exacto Knife or Razor Blade
- Oven
Instructions
- Make your gnome nose by combining a portion of light brown and white polymer clay until you have the color you want.
- Roll a quarter-sized portion of this clay into a neat ball. This is the nose.
- Bake the nose per the clay package's directions. Allow it to cool fully.
- Cut the portion of sock into a 4x5-inch rectangle.
- Glue the sides of the rectangle closed, forming a 2x5-inch pouch.
- Turn the pouch right side out.
- Fill the pouch with polyfill.
- Hot glue the top of the sock-pouch closed.
- Based on the size of the sock-pouch, cut a "u" shaped beard from the faux fur--cutting with the exacto knife only through the fabric on the back of the fur.
- Hot glue the beard onto the sock pouch.
- Cut a large triangle of buffalo check fabric about 11 inches wide on the bottom side of the triangle.
- Run a bead of hot glue down the side edge of the hat on the right side, then fold the hat over and glue the two sides together.
- Allow the hot glue to cool completely.
- Turn the hat right side out.
- Fold the brim of the hat over and hot glue in place, forming a hem.
- Fill the gnome's hat with a little polyfill.
- Hot glue the nose in place about 1/2 inch from the top of the beard.
- Tuck the hat on top of the gnome body and hot glue it in place on the back.
- Hot glue a little wrinkle into the hat at the nose and glue the hat in place over it.
- Make a little faux fur pom pom by cutting a quarter-sized circle of faux fur, then placing a bead of hot glue around the edge.
- Pinch the faux fur circled closed and trim the fur, making the pom pom.
- Hot glue the pom pom onto the end of the hat.
- Flop the hat over and hot glue it in place.
- Attach a small loop of twine on the back of the gnome.
Notes
To see more adorable gnome tutorials, visit Ruffles and Rain Boots.

Hi I have been sewing for going on 53 years but my senior mind can’t figure out how to cut the fabric for the xmas gnome. I know the directions say what the size is. BUT……if you say 5 1/2 x 9 (fold) what exactly did you cut the fabric? Do you cut the fabric (with stretch) 5 1/2 horizontally and 18 vertically and then fold it to be 9 vertically? And with the directions for the hat you gave directions that make a rectangle. Do you then cut it to be a triangle? Sorry for sounding so stupid but I need the cut sizes before you fold please. Thanks Denise
So the longer number is on the fold. So if you’re cutting 5 x 9.5 on the fold, it’s 10 x 9 total (the 9 is the fold). And yes, you cut a triangle for the hat, opting to cut a rise or not (I cut the rise). This one was originally a YouTube exclusive which shows the cut pieces. I’m on mobile so can’t grab the exact starting position, but here is the video: https://youtu.be/uGEmpXsJu3A