
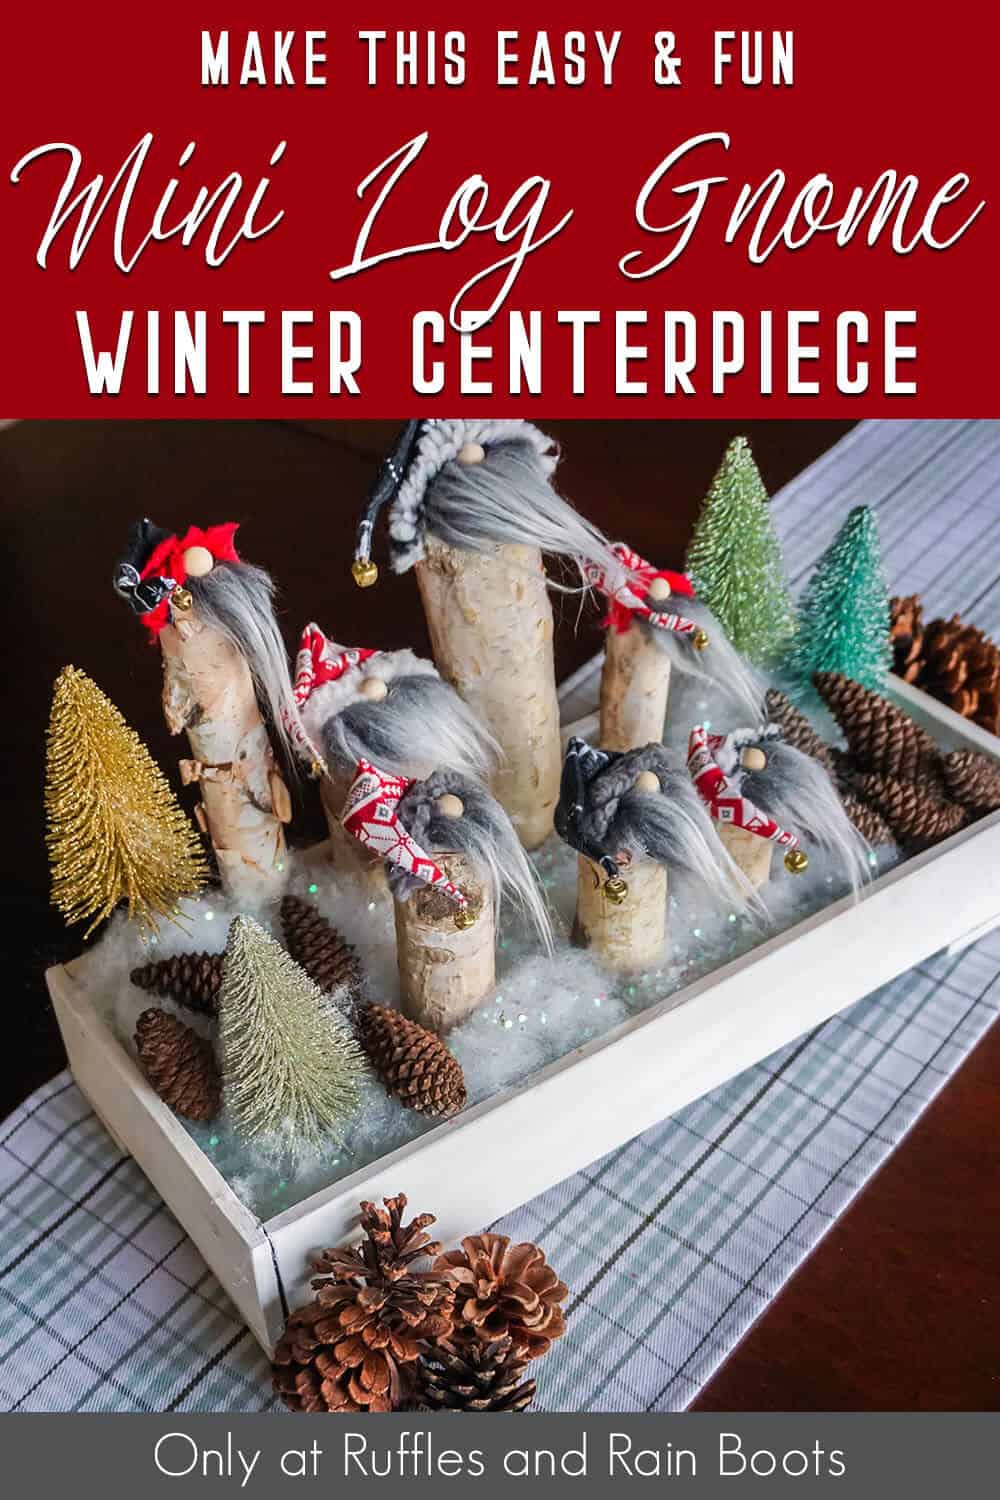
Mini Log Gnome Centerpiece for Winter
This mini log gnome centerpiece is perfect to bring a whimsical bit of the “outdoors” inside. When the winter brings branches, let’s cut them down and use them!

Related Reading: DIY No-Sew Gnome Mug Cozy
Mini Log Gnome Centerpiece
Here at Ruffles and Rain Boots, we have a bit of a adoration for a DIY gnome project ideas (or 200). I wanted to bring my love of gnomes out of the Christmas-specific realm and make a wintery Scandinavian gnome centerpiece.
One of my favorite things about this easy no-sew gnome craft is that it’s the perfect balance of outdoor whimsy and crafting inside (because it’s COLD out there). Let’s get started.
If you like this craft idea but need to head outside for a branch (or the craft store), save or share this article. Either way will make this easy to find when you’re ready to begin.
As an Amazon Associate, I can earn from qualifying purchases. There could be affiliate links within this article.
Tips to Make This DIY Gnome Winter Craft
- First, grab some birch craft logs. They’re the perfect material for this because they’re soft, free of bugs, and you can find them everywhere during the cooler season.
- I found an amazing Scandinavian flannel fabric and you can find them here (just search that term). Flannel is the perfect material because it won’t fray and it looks warm and inviting.
- I chose to use wood beads for the noses in this winter craft idea, but you can also make them out of polymer or air dry clay.
- We are going to make little triangles of fur for the gnome beards. If you’ve never had the opportunity to work with faux fur before, I have a quick video tutorial on how to cut faux fur here to get you started.

How to Make a Mini Log Gnome Centerpiece
Below is the written, step by step tutorial. Keep this page open and follow along with the DIY. If you’d prefer to print off the instructions, scroll to the end of this article.
Paint the wood with the white spray paint, both sides. Allow the paint to dry completely.
Make the gnomes by cutting the logs to varying heights. I cut each of them at different heights, trying to make sure no two gnomes would be identical.
Place a log onto your hat fabric to gauge how large you want your fabric to be to make a hat. Because each log will be different, do not skip this step for each log.
Start by cutting a rectangle, the width of which will need to be the same as that of your log, plus 1/2 inch; the height of which will need to be the same as that of your log, plus 2 inches so you can have a flopped-over look.
Once the rectangle is cut, fold it in half and cut a triangle, starting about 1/2 inch from the bottom of the rectangle.
Unfold the triangle shape and hot glue hem the two sides of the hat, then hot glue the bell into the tip of the triangle. Fold the triangle together and, starting at the base of the triangle (leaving the base below the triangle alone) hot glue the two sides of the triangle together, creating your hat cone.
Hot glue the hat in place on top of the corresponding log, wrapping the sides around the top of the log and hot gluing them in place.
Place the Mongolian fur face down on the table and, using your craft knife or razor blade, cut out a triangle that will fit nicely on the top of the log, covering the bottom half of the log’s top. Take care to cut only the fabric, not the fur underneath, when cutting your faux fur.
Repeat for each log, cutting a beard sized for each one specifically.
Hot glue the corresponding beard onto each log, squarely in the center, with the edge butting against the hat edge neatly. This area will be covered with the trim but you don’t want any gaps in case the trim shifts around over time.
Hot glue a wood bead nose into the center of each beard, just below the meeting of the hat and beard.
Cut a piece of the lamb’s wool or Sherpa fleece trim fabric about 1/4-inch wide, long enough to cover the joint line between the hat and beard and covering the edges of the hat wrapped around on both sides of the log. Hot glue this in place, taking care to work around the nose.
Repeat making all of the little gnomes you’d like. Set the gnomes aside.
To make the box, form an “L” shape with one 18-inch long painted wood piece and one 6-inch long wood piece, using a combination of craft glue and hot glue to affix these two pieces in place together.
Repeat with another 18-inch wood piece and the remaining 6-inch wood piece.
Place the two “L” shapes together and, with the craft glue and hot glue combination, affix the two shapes into a large rectangle.
With the craft glue or hot glue, affix the two remaining 18-inch wood pieces to the bottom of your rectangle of wood, creating a bottom. Yes, there is a gap, but this is fine, you don’t need to cover the entirety of the bottom of the box for this craft.
To give the box a little more solidity, glue the four remaining pieces of wood to each corner on the bottom of the box.
Position the gnomes and a few bottle brush trees to get an idea of where you might like them permanently affixed. You can add height to some of the bottle brush trees by putting a wine cork underneath them.
Once you have an arrangement you like, hot glue each of the gnomes in place, followed by gluing down the bottle brush trees. Tuck the Poly-Fil in and around each of the gnomes, building it up in places and tamping it down in others, taking care to hide all of the bottle brush tree bases.
Sprinkle the holographic glitter over the fill and place the pinecones in and around the display.
More Winter Craft Ideas You Might Like
- Cone Gnome with Boots – Such a fun and easy gnome craft, you can pull him together and have a large gnome for your winter decor in minutes!
- Farmhouse Gnomes with Skis – These easy sock gnomes with skis are the cutest little snow bunny couple on the slopes.
- Upcycled Christmas Tree Gnome – Take that old fake Christmas tree and turn it into a super cute porch gnome in just a few minutes!
Please Save This to Pinterest
Your shares are how this site grows and I am sincerely grateful. Know a friend who’d like this? Please share it on Facebook or save it to your favorite easy DIY gnomes board on Pinterest.

Mini Log Gnome Centerpiece
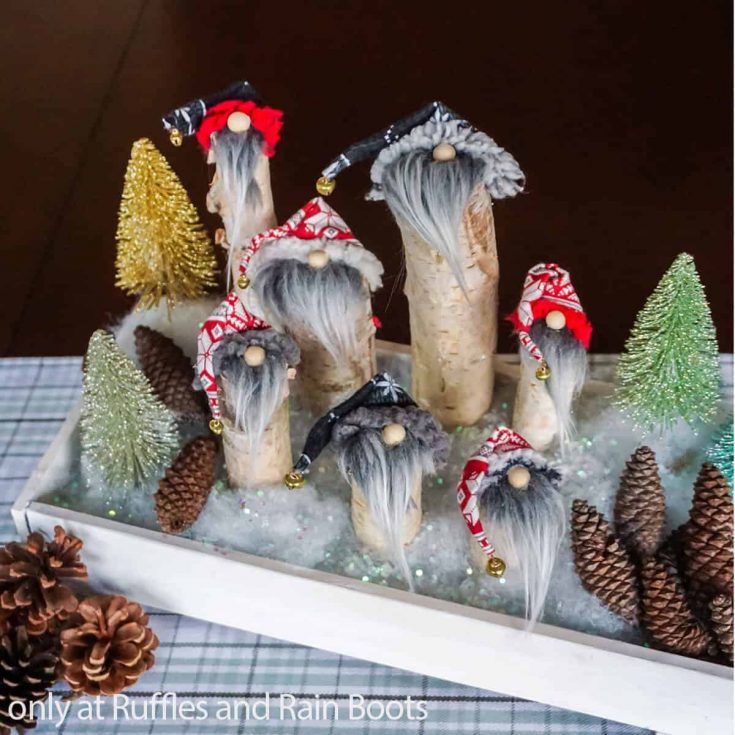
Such a quick and fun winter craft, this mini log gnome centerpiece is just a fun way to bring Scandinavian whimsy to your winter tablescape!
Materials
Gnomes
- Birch Craft Logs
- 1/8 yd Scandinavian Fabric
- 7-9 1/4-inch Wood Beads
- 1/8 yd Mongolian Fur
- Red and/or Grey Lambswool Trim (or Chenille Yarn would be perfect too)
- 7-9 Mini Bells (mine were on floral wire which turned out to be nice, so I recommend adding 1-inch of floral wire to each bell, but this is optional)
Wood Box
- 4 Wood Planks - 18-inches x 2 1/2-inches
- 2 Wood Planks - 6-inches x 2 1/2-inches
- 4 Wood Planks - 2-inches x 2 1/2-inches
- White Chalk Spray Paint
- White Acrylic Paint
Box Fillers
- 3-4 Glitter Bottle Brush Trees
- Polyfill
- White Holographic Glitter
- 2-3 Wine Corks
- 10-12 Pinecones
Tools
- Hot Glue Gun & Glue
- Craft Glue (like E6000)
- Scissors
- Craft Knife or Razor Blade
- Paintbrush
Instructions
- Start by painting your wood with the white spray paint, on both sides. Allow the paint to dry completely.
- Make your gnomes by cutting your logs to varying heights. I cut each of them at different heights, trying to make sure no two gnomes would be identical.
- Place the log onto your hat fabric to gauge how large you want your fabric to be to make a hat. Because each log will be different, do not skip this step for each log. Start by cutting a rectangle, the width of which will need to be the same as that of your log, plus 1/2 inch; the height of which will need to be the same as that of your log, plus 2 inches so you can have a flopped-over look. Cut a rectangle for each log.
- Fold your hat rectangle in half and cut a triangle, starting about 1/2 inch from the bottom of the rectangle.
- Unfold the triangle shape and hot glue hem the two sides of the hat, then hot glue the bell into the tip of the triangle. Fold the triangle together and, starting at the base of the triangle (leaving the base below the triangle alone) hot glue the two sides of the triangle together, creating your hat cone.
- Hot glue the hat in place on top of the corresponding log, wrapping the sides around the top of the log and hot gluing them in place.

- Place the Mongolian fur face down on the table and, using your craft knife or razor blade, cut out a triangle that will fit nicely on the top of the log, covering the bottom half of the log's top. Take care to cut only the fabric, not the fur underneath, when cutting your faux fur. Repeat for each log, cutting a beard sized for each one specifically.
- Hot glue the corresponding beard onto each log, squarely in the center, with the edge butting against the hat edge neatly. This area will be covered with the trim, but you don't want any gaps in case the trim shifts around over time.
- Hot glue a wood bead nose into the center of each beard, just below the meeting of the hat and beard.
- Cut a piece of the lambswool trim fabric about 1/4-inch wide, long enough to cover the joint line between the hat and beard, covering the edges of the hat wrapped around on both sides of the log. Hot glue this in place, taking care to work around the nose, if necessary.
- Repeat making all of the little gnomes you'd like. Set the gnomes aside.
- To make the box, form an "L" shape with one 18-inch long painted wood piece and one 6-inch long wood piece, using a combination of craft glue and hot glue to affix these two pieces in place together. Repeat with another 18-inch wood piece and the remaining 6-inch wood piece.
- Place the two "L" shapes together and, with the craft glue and hot glue combination, affix the two shapes into a large rectangle.
- With the craft glue or hot glue, affix the two remaining 18-inch wood pieces to the bottom of your rectangle of wood, creating a bottom. Yes, there is a gap, but this is fine, you don't need to cover the entirety of the bottom of the box for this craft.
- To give the box a little more solidity, glue the four remaining pieces of wood to each corner on the bottom of the box.
- Touchup any scratches or glue squeeze-out on the wood box with the white acrylic paint.
- Position your gnomes and the bottle brush trees to get an idea of where you might like them permanently affixed. You can add height to some of the bottle brush trees by putting a wine cork underneath them. I did this on two of my trees. Once you have an arrangement you like, hot glue each of the gnomes in place, followed by gluing down the bottle brush trees.
- Tuck the polyfill in and around each of the gnomes, building it up in places and tamping it down in others, taking care to hide all of the bottle brush tree bases.
- Sprinkle the holographic glitter over the polyfill.
- Place the pinecones in and around the gnomes and bottle brush trees, then place your centerpiece on the table and enjoy!


Notes
For more fun DIY gnome tutorials, visit Ruffles and Rain Boots!
Recommended Products
As an Amazon Associate and member of other affiliate programs, I earn from qualifying purchases.


Meet the Creator
Hi there, I’m Sarah Nenni-Daher. I’m a crafty gal and always have at least 14 projects going at once. I am a crafter, designer, DIYer, and pattern maker. I share my creations here and in the Ruffles and Rain Boots® Shop.
Here at Ruffles and Rain Boots®, you’ll find DIY gnomes, crafts, gifts, cupcakes, laser crafts, and so much more. I love sharing video tutorials over on YouTube and chatting with other crafters in my Facebook groups. We’d love to have you!