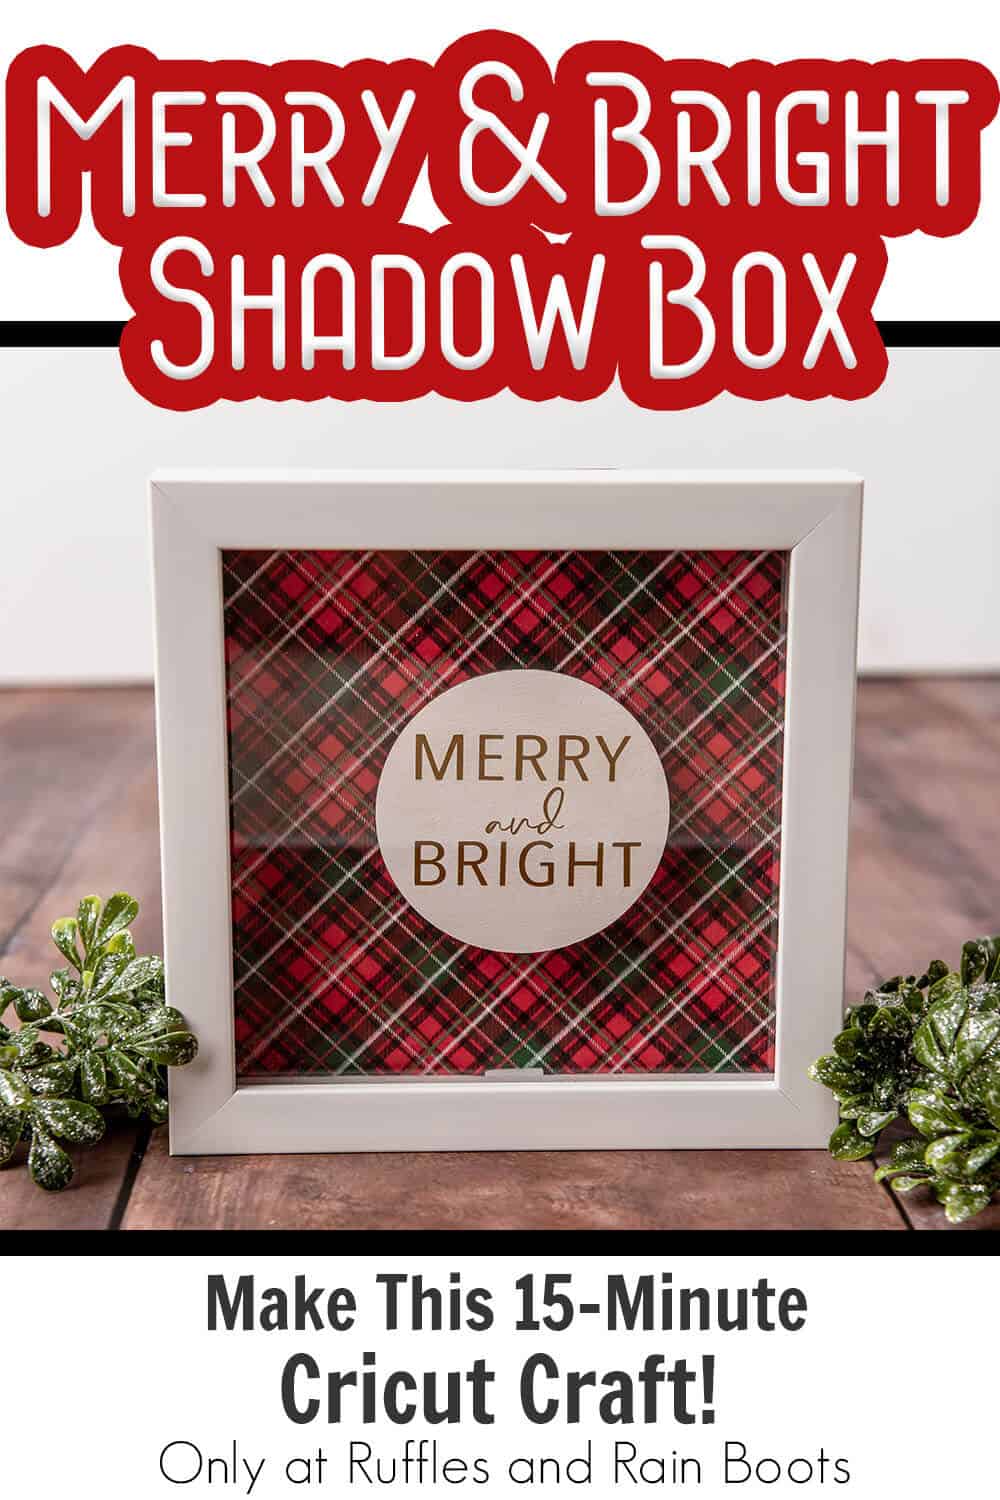
Merry & Bright Shadow Box Cricut Craft for Christmas
This easy merry & bright shadow box Cricut craft is one of my favorite holiday decor pieces you can DIY in minutes!
Merry & Bright Shadow Box Cricut Craft
Here at Ruffles and Rain Boots, I have a lot going on in the holiday season and nothing is more fun than making DIY holiday decor pieces! I love making and creating – and this fun merry & bright shadow box Cricut craft is a perfect little piece to really set off your mantle or wall!
RELATED READING: EASY HOME FOR THE HOLIDAYS WOOD SIGN
Plus, it’s easy, so it would make a great gift if you have a friend that would love it, too. So, grab your scissors and let’s get started.
No Time to Make This Now? Pin it for Later
You’re busy, I get it. Pin this to your favorite Christmas crafts board on Pinterest and it’ll be here when you’re ready.
As an Amazon Associate, I can earn from qualifying purchases.
Tips to Make Christmas Shadow Box
- First, let’s be really clear. You can use any printed wrapping paper or anything, really for the background. But if you’d like to use the same plaid design I used, you can grab the free printable pattern and lettering.
- Second, let’s talk shadow boxes. There are times of the year when I see shadow boxes everywhere – and then others when there’s not a shadow box to be found. So, I find that it’s easiest to grab a couple when they’re on sale and there are several on the shelf. Or, you can just grab one here, although, again, there are some times of the year when they seem to be out of stock.
- Finally, while I love a little “merry and bright”, if you wanted, you could use any other phrases. I love all sorts of sayings, so I’d use “winter wishes”, “joy to the world”, “winter wonderland”, although there are so many more to choose from. But the above link will get you the whole kit-and-caboodle, so to speak. LOL!

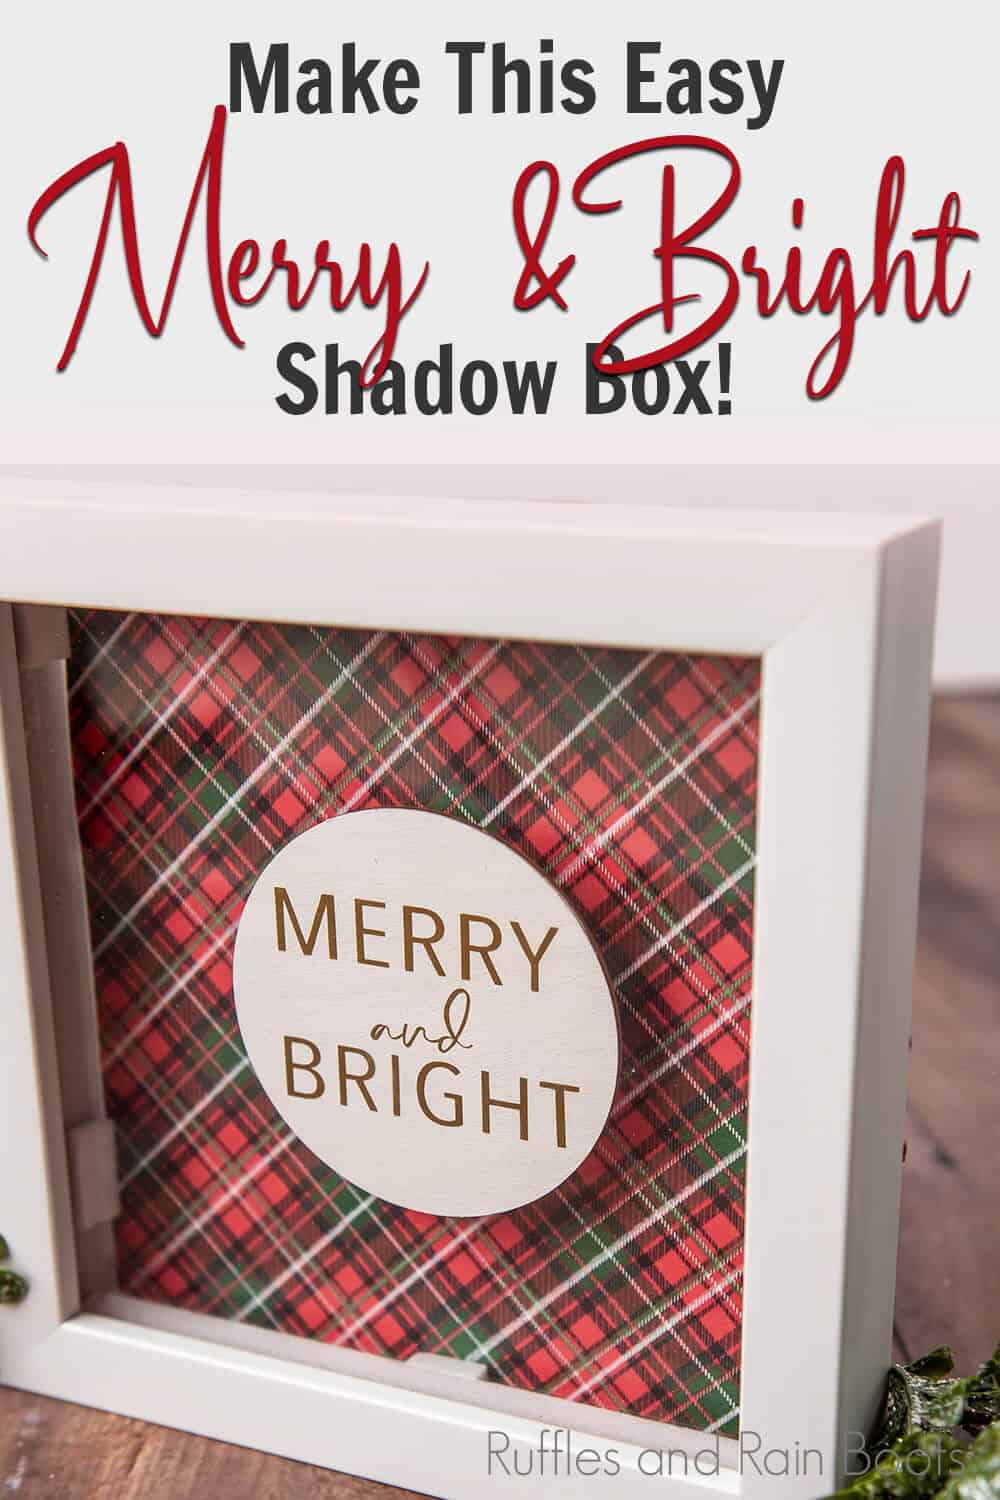
How Do I Make this Merry & Bright Shadow Box Cricut Craft?
I’m so glad you asked. Below is our written tutorial.
Merry & Bright Shadow Box Cricut Craft
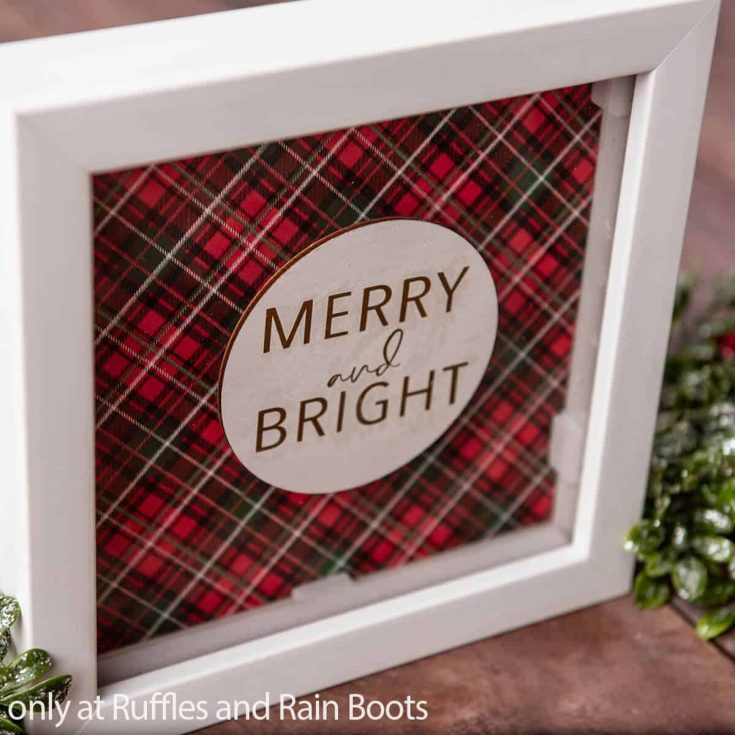
Such a fun and easy craft for the holidays, this merry & bright shadow box Cricut craft is a great gift idea!
Materials
- 4in Wood Round
- Wood Spacer (just something smaller than the wood round I used a small craft wood spool)
- Acrylic Paint in White
- Permanent Vinyl in red and black
- Shadow Box Picture Frame (8 x 8)
- Plaid Pattern Background and Text Cut File Set
Tools
- Paint brushes and sponge brushes
- Hot Glue Gun
- Cricut or other cutting machine
- Blue or Green Grip Mat
- Weeding Tool
- Scraper Tool
- Transfer Tape
Instructions
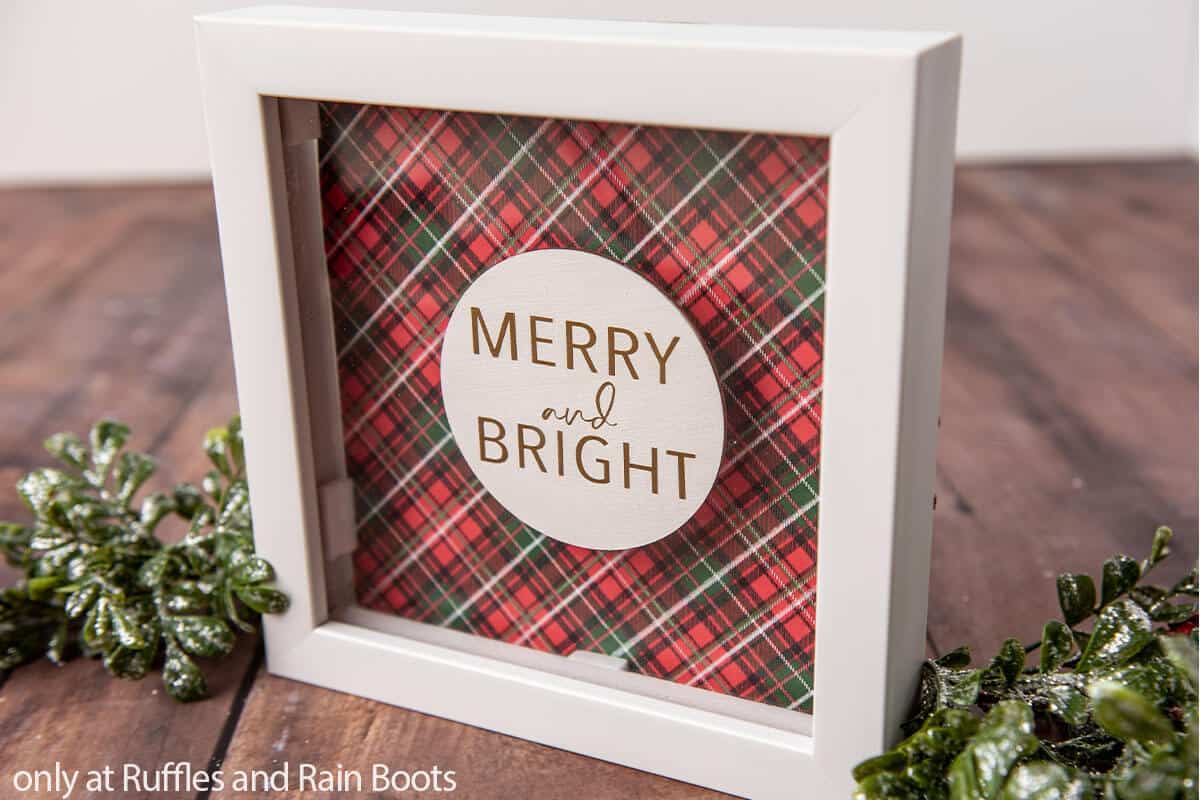
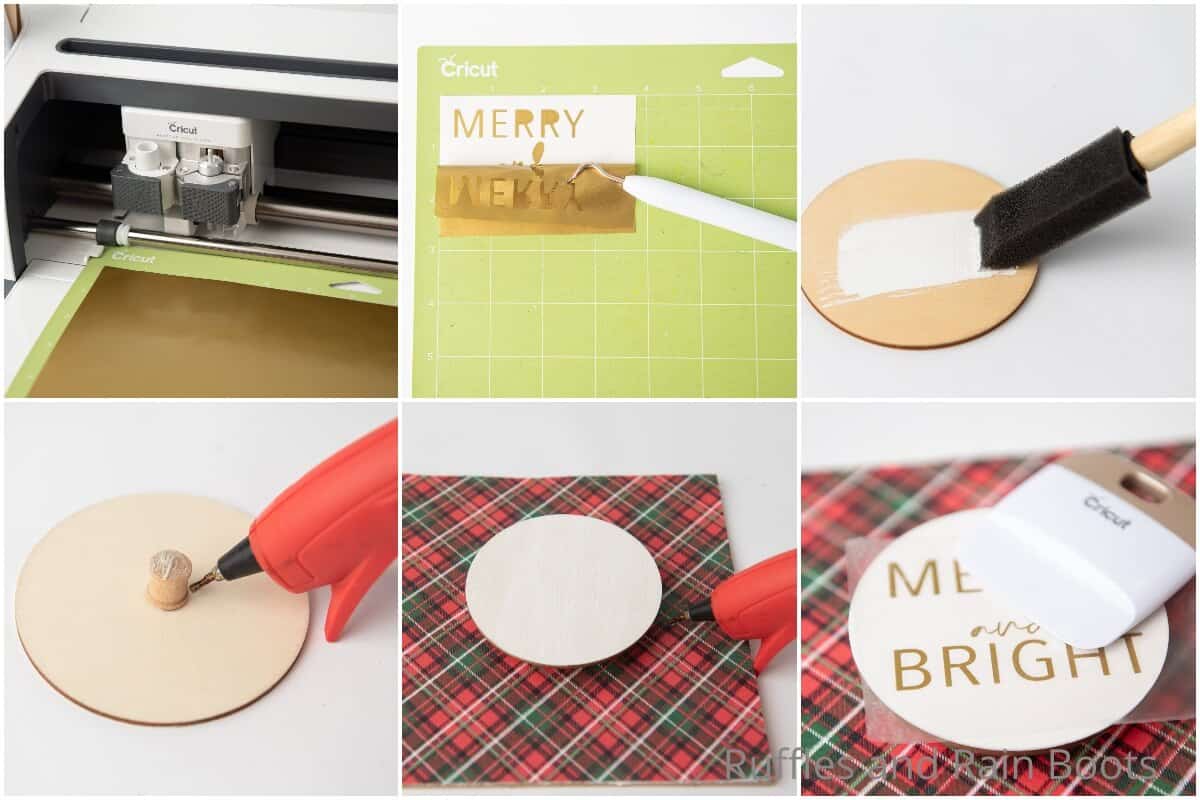
- Paint the wood round with white acrylic paint, then allow it to dry completely.
- Download the plaid background sheet and print it. Trim it down to fit inside the shadow box. Glue the printed plaid pattern or wrapping paper piece to the back of the shadow box and allow the glue to dry completely.
- Glue the wood spacer to the middle of the back of the shadow box on top of the paper. To find the center, be sure to measure because the perspective of the print may affect the location if you try to estimate without measuring. Allow the glue to dry completely.
- Glue the painted wood round on top of the wood spacer and allow the glue to dry completely.
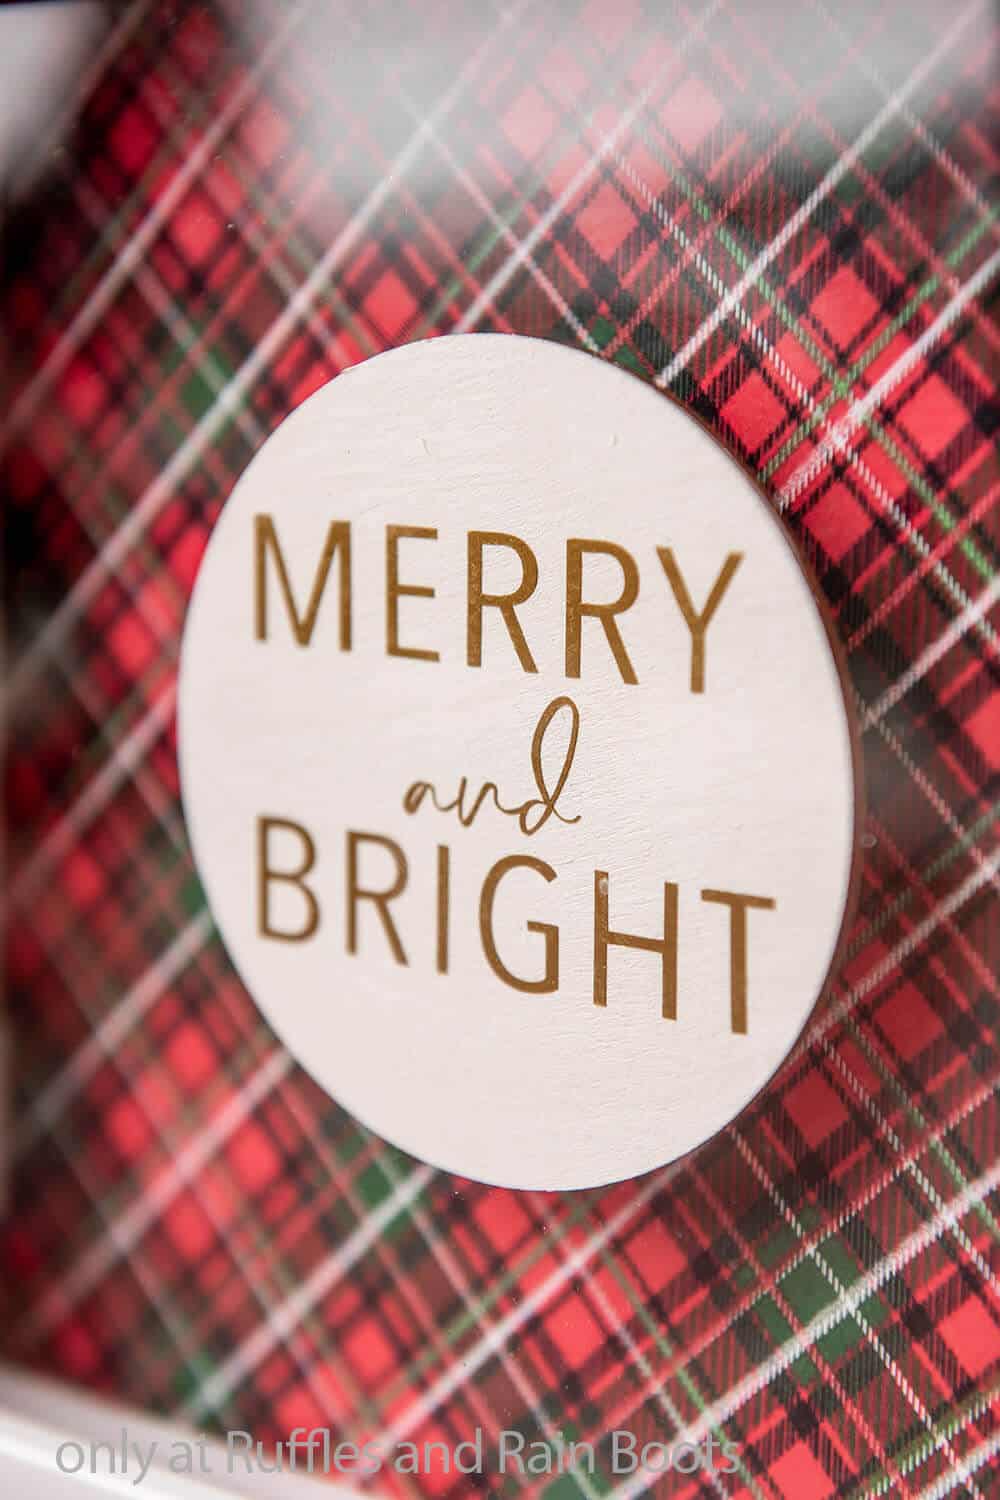
- Download the merry and bright cut file and upload it into Design Space. Alternatively, type your selected text into Design Space and size it to fit within the 4-inch wood round.
- Hit "make it" button and place the vinyl onto the cutting mat, then into the machine.
- Adjust the material setting to vinyl and hit “go”.
- After the cut is complete, weed out the negative vinyl and discard.
- Cut off a piece of transfer paper about the size of your cut vinyl design and place on top of the vinyl. Rub the vinyl design with the scraper tool to make sure that the vinyl sticks to the transfer paper.
- Turn the entire design face-down and begin gently pulling the vinyl backing off and away from the design and transfer paper. Starting at a corner and rolling it away slowly while applying pressure is best. Use the scraper tool to help, if necessary.
- Place the transfer paper and vinyl design lightly on top of the wood round to get it centered. Do not apply any pressure or smooth the design down until you are certain of the location. Once happy with the location, apply pressure and smooth down the design with a scraper tool or old gift card.
- Slowly peel away the transfer paper starting at a corner and carefully pulling it away and off the wood, leaving the vinyl on the wood. Then close the shadow box and display!

Notes
For more fun holiday crafts, visit Ruffles and Rain Boots!
Recommended Products
As an Amazon Associate and member of other affiliate programs, I earn from qualifying purchases.


More Christmas DIY Wood Signs You Might Like
- Rustic Farm Truck Joy to the World Sign – Take a tiny wood red farm truck and add a little farmhouse charm and you’ve got a fun wall sign just for the holidays!
- Magic of Christmas Wood Sign – This is such a cute wood sign, it’s perfect for putting near the tree, hanging on the door or just adding to your mantle!
- Merry Christmas Santa Wood Round Sign – It’s magical and fun when Santa makes his midnight ride. And you can make this quick sign to bring that feeling right to your door.
Please Save This to Pinterest
Your shares are how this site grows and I am sincerely grateful. Know a friend who’d like this? Please share it on Facebook or save it to your favorite Cricut crafts board on Pinterest.