
Make This Dollar Store Gnome Wreath in 20 Minutes!
I am a little in love with this adorable dollar store gnome wreath–it’s the cutest gnome face wreath that I’ve ever seen and it was so easy, it was done in 20 minutes!

What You'll Find On This Page
Dollar Store Gnome Wreath
Here at Ruffles and Rain Boots, we are all about the Christmas gnomes. If there’s a gnome that needs to be made, I’m making it. It’s plain and simple. I love whipping-up a new creation with a little hot glue, felt and scissors. So simple, but ridiculously fun. And then I get a cute decoration, too.
RELATED READING: DIY FARMHOUSE CHRISTMAS CRAFTS
Take this adorable Scandinavian gnome wreath. It took me about 20 minutes to make, but I really felt like I’d made something awesome. If you’re ready to make an awesome gnome face wreath, let’s get started.
DIY Christmas Gnome Tutorials
If you’re looking for the best DIY Christmas gnome tutorials, you have come to the right place. Check out all of my favorite tomte tutorials for the holidays!
No Time to Make This Now? Pin it for Later
You’re busy, I get it. Pin this to your favorite Christmas crafts board on Pinterest and it’ll be here for when you’re ready.

As an Amazon Associate, I can earn from qualifying purchases.
Tips to Make a Gnome Face Wreath
- Despite the fact that the little wreath wire frame from the dollar store seems really small in your hands, don’t be worried. It’s going to be a lot bigger when you’re done and that base is just perfect.
- You don’t have any plastic bubble wrap to use as a support for your hat? Oh no! Just kidding. You can use anything from cardboard to a piece of plastic. I just liked the idea of using a material that would otherwise not be recyclable.
- Be really gentle with the mop yarn strands when making the gnome beard. Those threads, despite appearing to be thick and heavy, are in fact, kind of frail and easily broken. So just be gentle when you’re making your Christmas wreath.

How Do I Make this Dollar Store Gnome?
I’m so glad you asked. Below is our written tutorial.
Dollar Store Gnome Wreath

How fun is this dollar store gnome wreath?! It's a simple gnome face wreath with a bell and it's so adorable, I want to make more (but I only have one front door, sigh).
Materials
- Buffalo Check Towel (or scrap fabric)
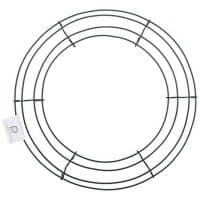
- 18-inch Wire Wreath Form
- Red Glitter Ball Ornament
- 12-24 Pine Floral Picks
- Red Ribbon
- Mop Head
- Bell
- Bubble Wrap
- 1/2-inch Wood Bead
- Fuzzy White Sock (or the inside of a slipper or scrap fabric)
- Floral Wire or Twisty Ties
Tools
- Hot Glue Gun and Glue
- Wire Cutters
Instructions
- Using the floral wire, tie the floral picks to the wire wreath form, leaving about 1/4 of the wreath form open on the bottom.

- Wrap the red ribbon around the wreath, kind of loosely, securing it in place where possible.
- Cut the bubble wrap in a triangle shape about the same size as the hole in the wreath form. To stiffen it, you can cut a second triangle and hot glue them together.
- Cut the buffalo check towel or scrap fabric into the same shape as the bubble wrap triangle, but with an additional 1-inch on either side to wrap around the bubble wrap.
- Hot glue the fabric towel cut out to the bubble wrap triangle, wrapping the edges around and securing them behind the triangle. This forms the hat.
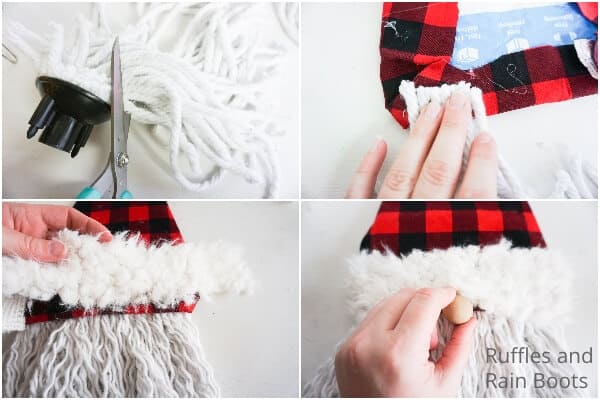
- Cut 1/2 of the yarn loose from the mop head.
- Glue each strand of yarn onto the back of the bubble wrap triangle, along the bottom edge, to form the beard.
- Un-wind each strand of yarn, fluffing the beard.
- Flip the hat over.
- Cut the fuzzy sock in half along the long sides, making one long length of fuzzy fabric.
- Hot glue this in place on the brim of the hat, wrapping the edges around the edges of the bubble wrap.
- Affix the wood bead in the center of the beard, tucked a little under the fuzzy fabric you just attached.
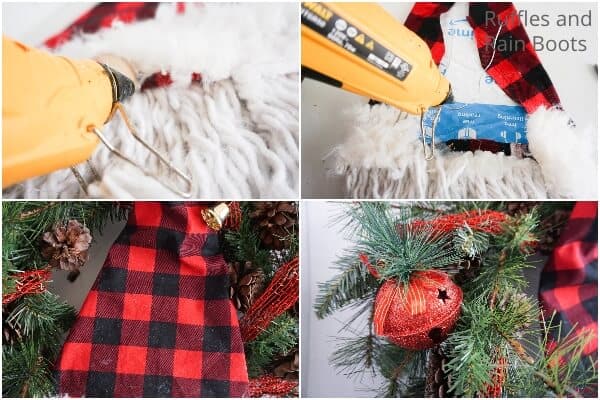
- Hot glue a piece of floral wire to the back of the hat and then, using that wire, affix the hat to the wreath, fitting the beard in the open area of the wreath, so that it falls nicely.
- Bend the hat a little and hot glue that bend in place.
- Affix the bell to the point of the hat.
- With the floral wire, attach the red glitter bell and any additional baubles onto the wreath as desired.
- Enjoy!


Notes
For more fun Christmas gnome DIY ideas, be sure to check out the tons of ideas on Ruffles and Rain Boots.
Recommended Products
As an Amazon Associate and member of other affiliate programs, I earn from qualifying purchases.


More Christmas Crafts You Might Like
- The BEST Christmas Crafts and DIYs for Gifts – If you’re into making gifts by hand for just the right person, you have to check out all these easy DIYs I found.
- DIY Mason Jar Lid Christmas Crafts – Every cool ornament or craft starts with a mason jar lid, I’m telling you.
- Dollar Store Gnome – Oh, you want a gnome you can make from 100% dollar store materials? I’ve got your back.
Please Save This to Pinterest
Your shares are how this site grows and I am sincerely grateful. Know a friend who’d like this? Please share it on Facebook or save it to your favorite Christmas crafts board on Pinterest.


Really Cute! YOu make it look so easy too!
Thanks, Nana of 5 little Gnomes!