
Make This Fun Looped Ribbon Mickey Topiary for Disney DIY Decor!
This beautiful and fun looped ribbon Mickey topiary is a great afternoon craft that you can make to add to your Disney DIY decor!
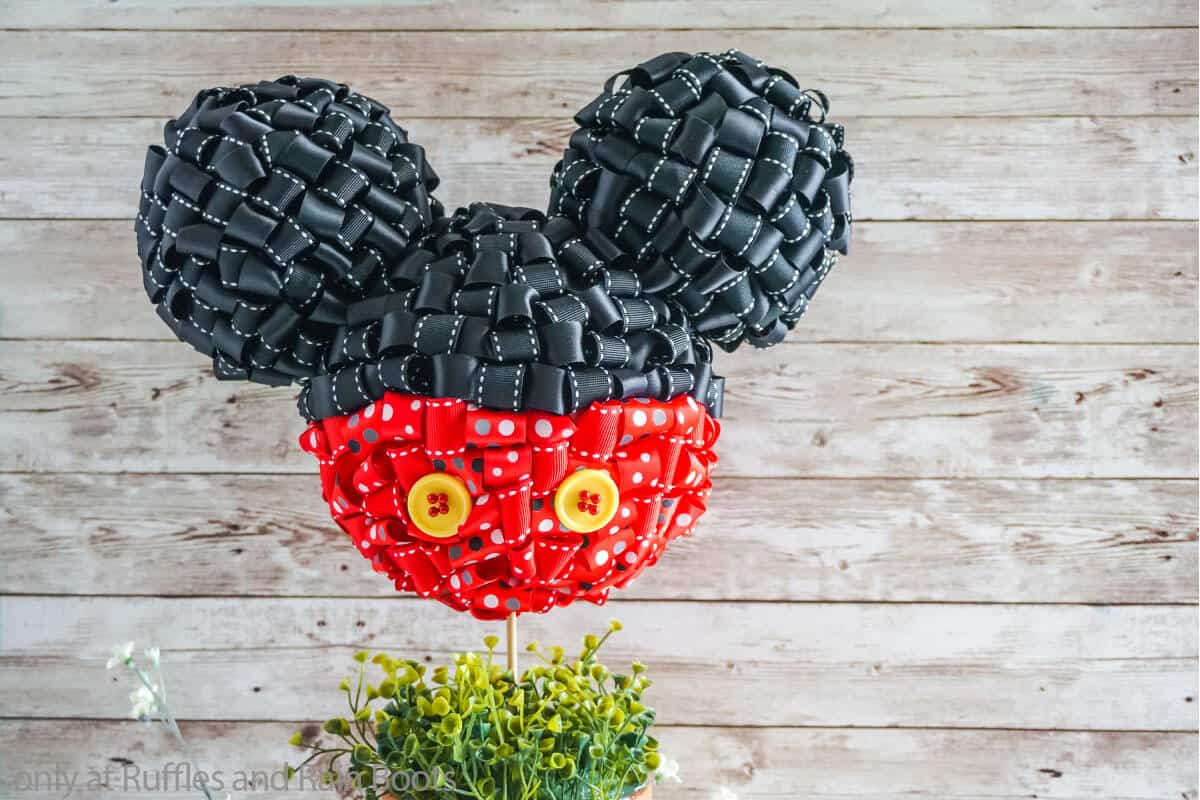
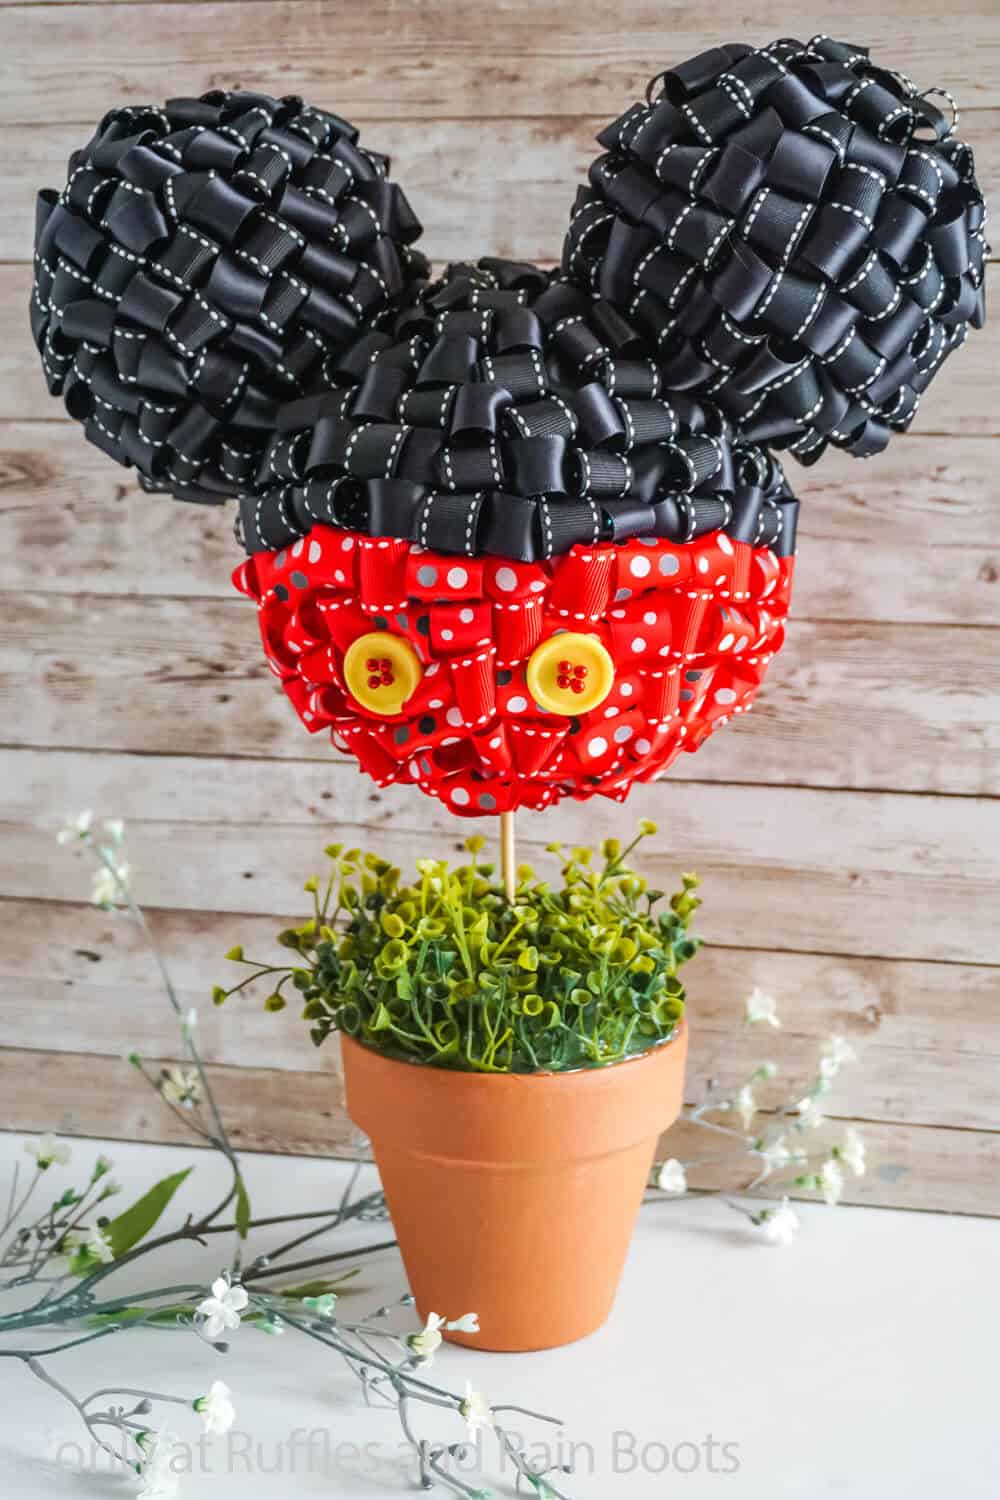
Looped Ribbon Mickey Topiary
Here at Ruffles and Rain Boots, we really love making all the Disney crafts. All of them. So, when I decided I needed a larger piece to add to my DIY Disney decor elements, well, I couldn’t get the idea of a looped ribbon topiary of Mickey Mouse! Easy and fun to make, this is definitely a statement piece!
RELATED READING: DIY MICKEY GNOME
I love the squishy, fluffy look of the rolled ribbon bits and the unique style is just too fun. If you’re ready to make a cool Mickey topiary you’re going to love, let’s get started.
No Time to Make This Now? Pin it for Later
You’re busy, I get it. Pin this to your favorite Disney crafts board on Pinterest and it’ll be here when you’re ready.

As an Amazon Associate, I can earn from qualifying purchases.
Tips to Make this DIY Disney topiary
- I love working with foam balls, they’re perfect for projects like this. But one thing I DON’T like about working with foam is that hot glue burns right through it. So, if this annoys you, keep in mind that you can use an ultra low-temp hot glue gun like this one to keep that melting from happening.
- Don’t feel constrained by the color scheme I went with. I mean, I know this is the traditional Mickey color arrangement, but you can also go for a solid monochromatic look in whites or silvers for winter, add some sprigs of greenery for spring, or go for all orange with a stem for Halloween!
- This particular craft requires a LOT of pins. Once I was done with this project, I had literally had no pins left to do any sewing projects and was loathe to take apart my Mickey topiary to use them. So, be a little smarter than I was and grab a few extra sewing pins here to keep yourself from getting in that bind.
How Do I Make this Looped Ribbon Mickey Topiary?
I’m so glad you asked. Below is our written tutorial.
Looped Ribbon Mickey Topiary

Such an easy craft, this looped ribbon Mickey topiary is a great statement piece to go with your other DIY Disney decor!
Materials
- 2 - 3-inch Foam Balls
- 1 - 5-inch Foam Ball
- 1 - ¼-inch Dowel
- 4 Toothpicks
- 1 - 4-inch Terra Cotta Pot
- Green Foam Brick (enough to Fill the Terra Cotta Pot, about 1/3 of a brick))
- Faux Greenery Plants to Cover Foam in Pot
- 12 yds ½-inch Red Ribbon
- 12 yds ½-inch Black Ribbon
- 2 - ½-inch Yellow Buttons
- 100-150 Sewing Pins
Tools
- Scissors
- Ruler
- Craft Knife
- Hot Glue Gun & Glue
Instructions
- Cut the green foam brick to fit snugly inside the pot. Fit the foam down into the pot, hot gluing it in place. This needs to be a snug, solid fit so that the Mickey head doesn't fall over.
- Work the dowel down into the green foam brick inside the pot, securing it with hot glue at least 3-inches deep down into the foam.
- Work the larger of the foam balls down onto the dowel, leaving about 4-5 inches between the bottom of the ball and the top of the pot. Hot glue the dowel to the ball to hold it in place securely.
- Work two toothpicks about halfway into each of the smaller foam balls, about 1-inch apart. Add hot glue to secure them, then press the smaller balls down onto either side of the larger foam ball, about 5-6 inches apart. Add hot glue to ensure that the smaller balls won't come off.
- Cut a lot of the black ribbon into several 2-inch lengths - you will need 50-75. Roll one of the 2-inch lengths of black ribbon into a circle around your finger, overlapping the ends by approximately ¼-inch.

- From the inside of the looped piece of ribbon, slide a pin through the overlapped ends of the ribbon, then press the pin into the upper portion of the large foam ball or somewhere on either of the ears. Be sure to press the pin all the way into the ball to ensure that the ribbon stays in place.
- Repeat making black ribbon loops, filling the whole upper portion of the large foam ball as well as both of the ears. Take a moment to ensure that all of the pins are pressed fully into the foam to secure them.
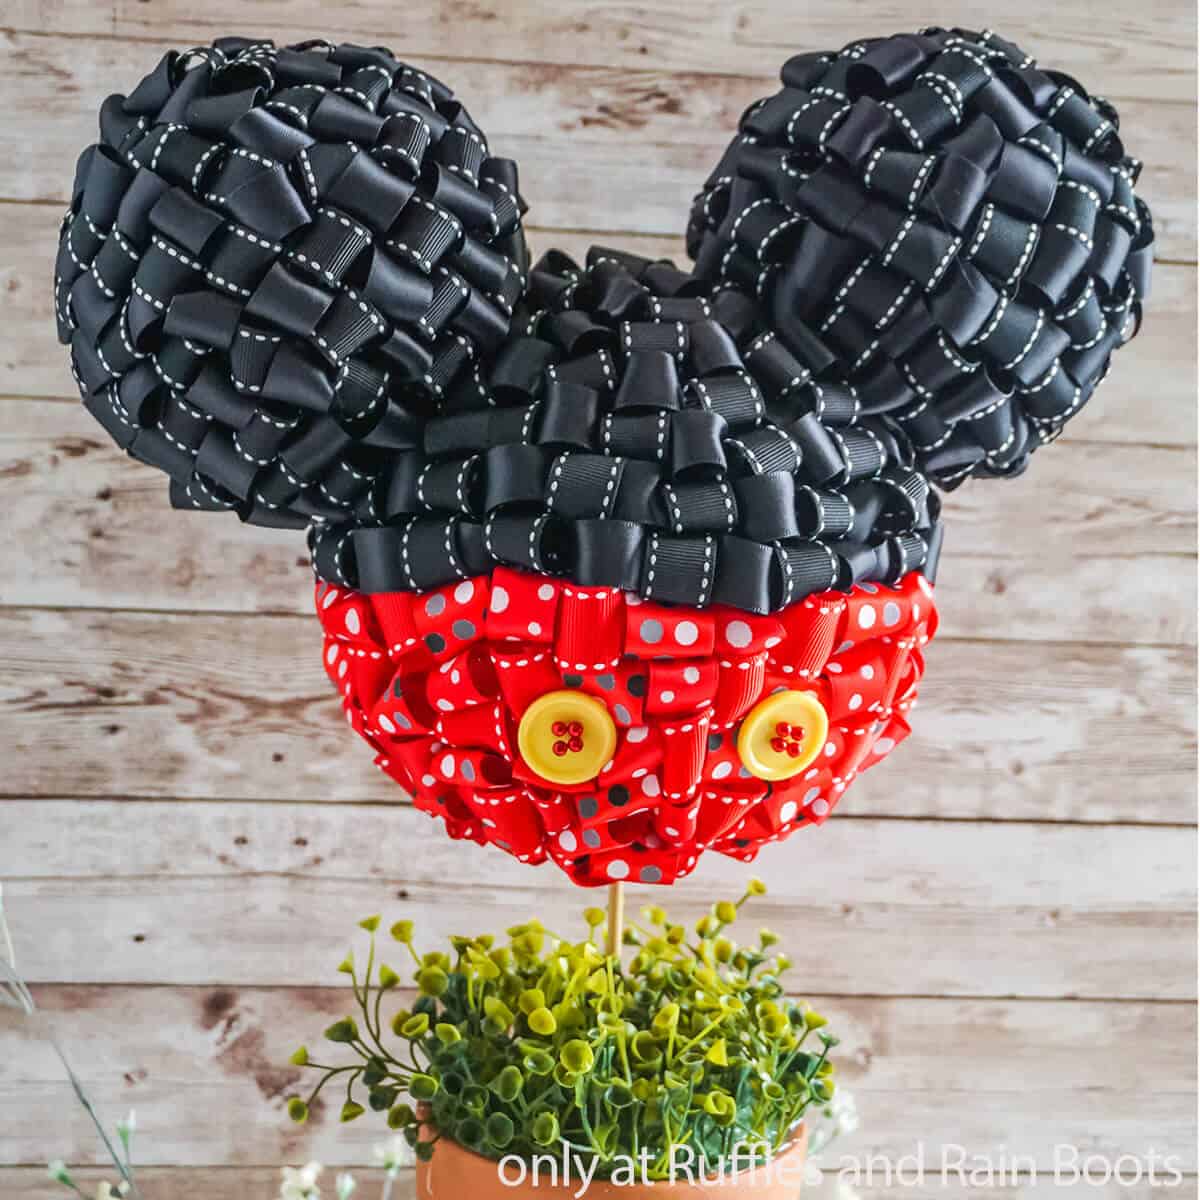
- When the black ribbon completely covers the whole upper half of the larger ball and both ears, repeat making red ribbon loops and pressing them into the bottom half of the larger ball, covering the entirety.
- Place 4 red pins into the holes of each of your buttons, then slide the pins into the red area, about 3-inches apart.
- To cover the green foam brick, hot glue the faux floral elements on top, then enjoy!


Notes
For more fun Disney crafts, visit Ruffles and Rain Boots!
More DIY Disney Crafts You Might Like
- DIY Disney Makeup Bags – I loved making little pouches for various things – pencil bags, make-up, gifts and more!
- Mickey Notebooks – A quick and fun way to make a Mickey craft that the kids are going to love having for back to school.
- Mickey & Minnie Photo Frames – Want a fun way to display your Disney vacation photos? This quick and fun DIY is where it’s at!
Please Save This to Pinterest
Your shares are how this site grows and I am sincerely grateful. Know a friend who’d like this? Please share it on Facebook or save it to your favorite DIY Disney ideas board on Pinterest.
Meet the Creator
Hi there, I’m Sarah Nenni-Daher. I’m a crafty gal and always have at least 14 projects going at once. I am a crafter, designer, DIYer, and pattern maker. I share my creations here and in the Ruffles and Rain Boots® Shop.
Here at Ruffles and Rain Boots®, you’ll find DIY gnomes, crafts, gifts, cupcakes, laser crafts, and so much more. I love sharing video tutorials over on YouTube and chatting with other crafters in my Facebook groups. We’d love to have you!