
Garden Gnome Story Stones – Spring Rock Painting
These garden gnome story stones are perfect for a fun Spring craft for kids. Decorating your outdoor area has never been so much fun!
What You'll Find On This Page
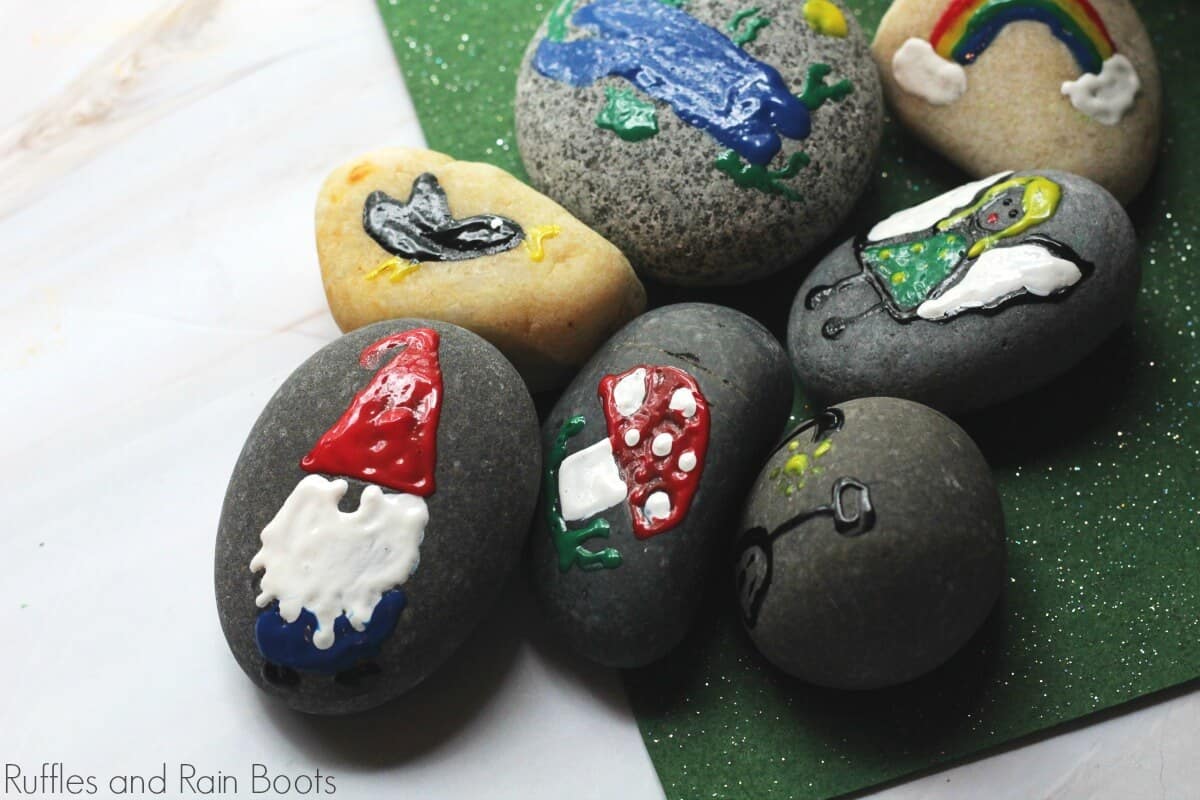
Garden Gnome Story Stones
Here are Ruffles and Rain Boots, my daughter shares my passion for gnomes. We combined my love of gnomes with her love of rock painting and created these cute and simple gnome story stones to share with you.
Story stones are an easy way to get creative with your child through art and storytelling. Use these stones for sequences, imaginative play, and more.
RELATED READING: Gnome Paper Plate Craft Peek-a-Boo Free Printable!
Save or Share for Later
If you like this craft but need to set it up later, save this to your favorite rock painting pin board or share it to a creative Facebook group.

Tips to Make this Gnome Rock Painting Set
These tips may give you a little bit of helping with making this gnome rock painting. Remember, if the children want to make adjustments, let them Flowers, garden beds, and even a hose or watering can will add to the fun.
- The smoother the stones are, the better as younger kids will more easily paint on a flat surface.
- If you find stones outside, give them a rinse and light scrubbing before painting.
- There are no blueprints for designs here – let the kids get as creative as they’d like. My daughter later added a fire hydrant to her set.
- You can pull the rocks from your garden to use or buy some from the garden center at a home improvement store. Craft store stones often have a wax on them, so they are best avoided.
- If you don’t have puffy paint, try paint markers. If you don’t have those, acrylic paints will work with small brushes.

Gnome Painted Rocks
I’m so happy you asked. Here are some written step-by-step directions for making them with ease. Remember that this is a child-led creative project and whatever they see or think of, they can create.
Garden Gnome Story Stones

These Garden Gnome Story Stones are simple and easy to create!
Materials
- 6 large smooth stones
- Clear spray paint
- Puffy fabric paint
- A pencil
- Small basket, pouch, or bucket for storage
Instructions
- Gather up all your supplies.

- Wash your stones well to remove any dust or oil, this helps the paint adhere much better. Dry completely. I have seen small bags in craft stores now but the best place to purchase your rocks is at a landscaping/rock supply store.
- Before you begin on your stones brainstorm some things that you would like to include on them and sketch them out on paper first to practice. We even use our colored pencils to get an idea of details.
- Now take your pencil and draw out your general shapes, even on the dark stones the graphite lead gives a nice outline to work from.
- Trace your outline in the colors you want each part of your image to be. If a child is doing it or you don’t feel you have a steady enough hand you can draw in one color section at a time and allow it to dry while you move on to the next rock or dry them a bit quicker with a blow dryer on a low cool setting. While you can paint with a small brush if you have a steady hand I love to work with the paint bottles with a small tip, I am able to get so much more detail and cleaner edges with the plastic tips on small stones.
- Fill in each of your outlines, you don’t have to keep squeezing out more paint, use the tip to push the paint around to fill it in completely.
- This is how it will look once filled.
- Allow paint to dry thoroughly then take your rocks outside and give them 1-2 coats a clear spray sealant to help them stay bright and sharp for a long time.
- Put your stones in a bucket, basket, or drawstring pouch to store, they also make a lovely handmade gift for children!


Notes
For more fun story stone inspiration, visit RufflesandRainBoots.com
Creativity, Delivered
Would you like inspiration delivered right to you each week? Sign up for the once-weekly Ruffles and Rain Boots newsletter and you’ll get that and more! Get access to the exclusive libraries full of free SVGs, hand lettering practice, and so much more.
More Gnome Crafts You Might Like
- Gnome Teacup Garden; Adorable and Fun– These are so cute and simple to create.
- This Farmhouse Gnome is No-Sew and Absolutely Adorable! – No sewing needed on this fun gnome craft!
- DIY Adorable Gnome Pillow for Easy Christmas Decor – It’s never too early for Christmas
Please Save or Share This
Your shares are how this site grows and I am sincerely grateful. Know a friend who’d like this? Please share it on Facebook or save it to your favorite kid’s crafts pin board.

Meet the Creator
Hi there, I’m Sarah Nenni-Daher. I’m a crafty gal and always have at least 14 projects going at once. I am a crafter, designer, DIYer, and pattern maker. I share my creations here and in the Ruffles and Rain Boots® Shop.
Here at Ruffles and Rain Boots®, you’ll find DIY gnomes, crafts, gifts, cupcakes, laser crafts, and so much more. I love sharing video tutorials over on YouTube and chatting with other crafters in my Facebook groups. We’d love to have you!