
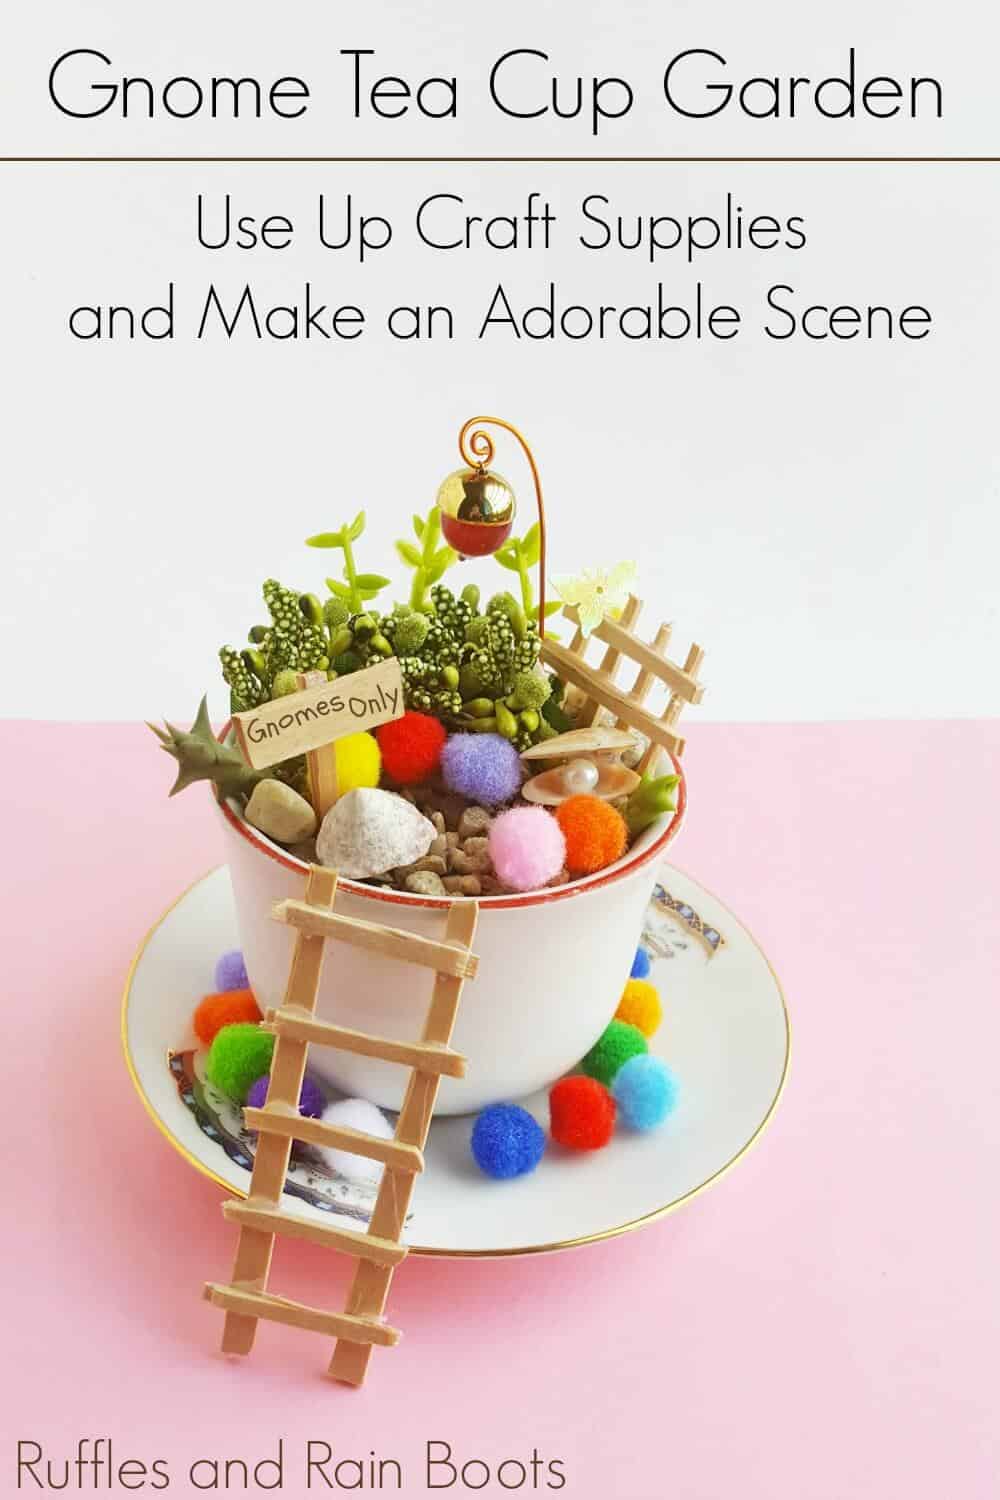
Make a Gnome Teacup Garden
This gnome teacup garden adds a little fun and whimsy to a rainy day. Grab the kids, some basic craft supplies, and let’s get crafting.
If you have little treasures you can’t part with or come across fun finds like single teacup set, why not turn them into something creative? Let the little ones go wild with their greenery, accessories, and extras.

What You'll Find On This Page
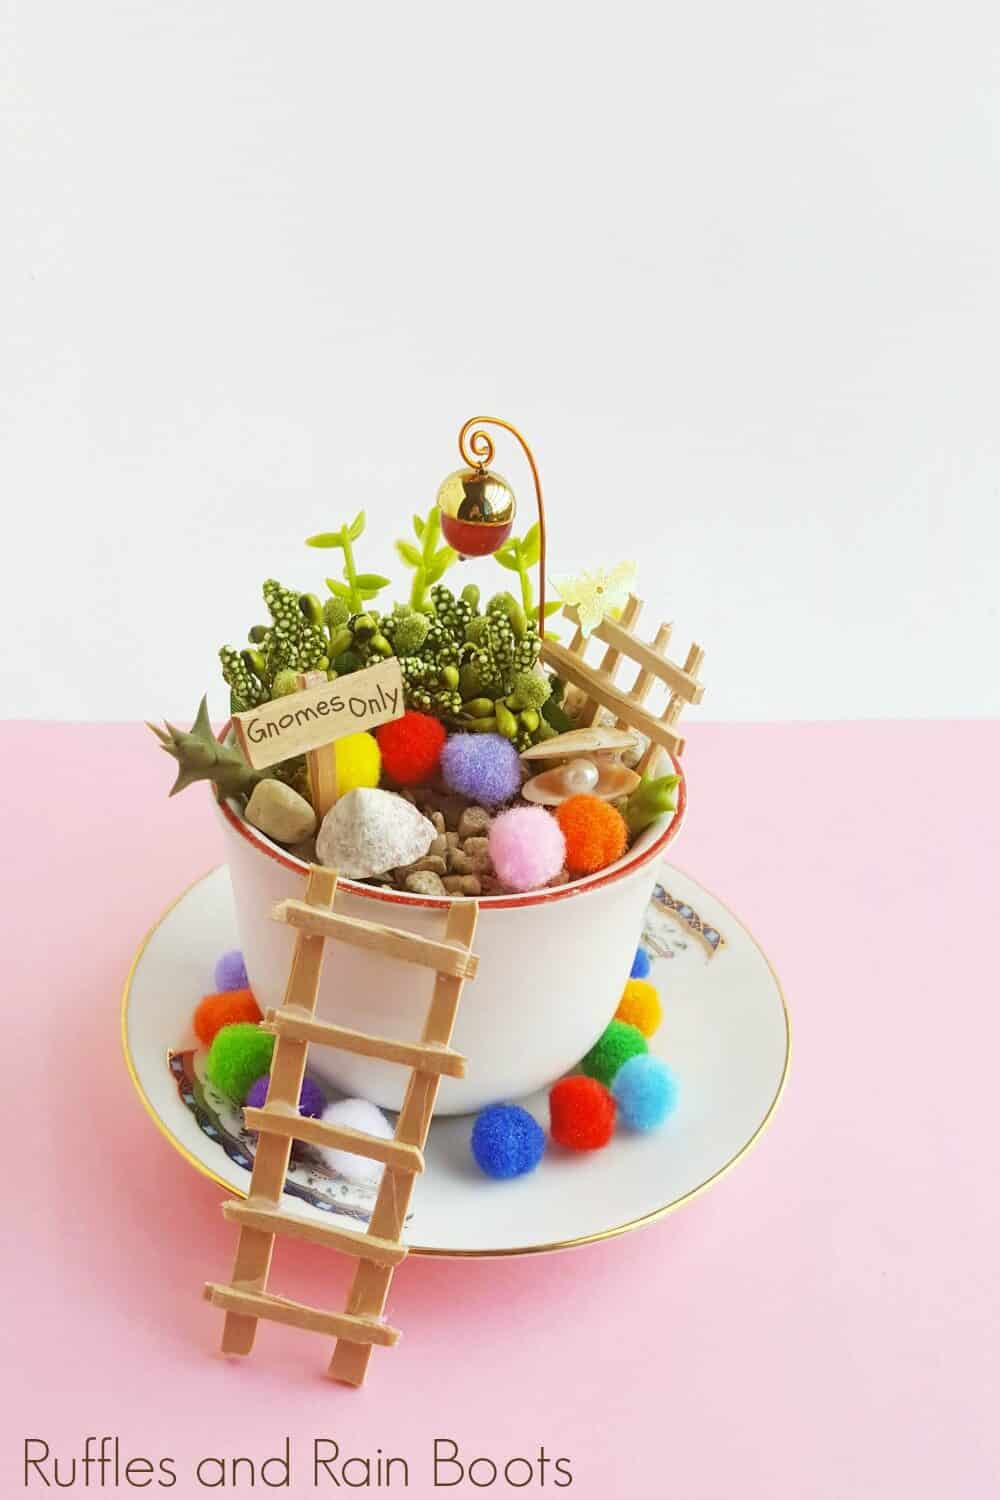
Gnome Teacup Garden
Here at Ruffles and Rain Boots, I loved making this gnome and fairy garden with my daughter almost as much as I love gnomes. And honestly, we have so many bits, bobs, trinkets, and extras floating around that it made it really fun to hunt them down to add.
This is a fun rainy day craft for kids, as it uses natural elements they can pull in from outdoors and it uses craft supplies you’re likely to have on hand. Let’s get started making a gnome teacup garden.
No Time to Make This Now? Save or Share for Later
If you need to gather up supplies save this to a crafts pin board or share it on Facebook. It will make it easier to find when you’re ready.
Tips to Make This Gnome Craft for Kids
- Let the kids get creative because the more freedom they have, the more fun they’ll have.
- Use leftover craft supplies from other projects, pompoms, glitter glue, pieces from Kiwi Crates (is that just our house), and even those mini toys. Anything small works for this easy craft.
- If you have younger kids and don’t want to make the pieces, run to the craft store and use the fairy finds. The Dollar Tree carries a lot of seasonal fairy and gnome miniatures, as well.

Make a Gnome Teacup Garden
Below is the written and printable tutorial you can leave open or print off for the kids. If you’re making a gnome or fairy garden playlist on YouTube, here is our gnome teacup garden video tutorial.
Gnome Teacup Garden
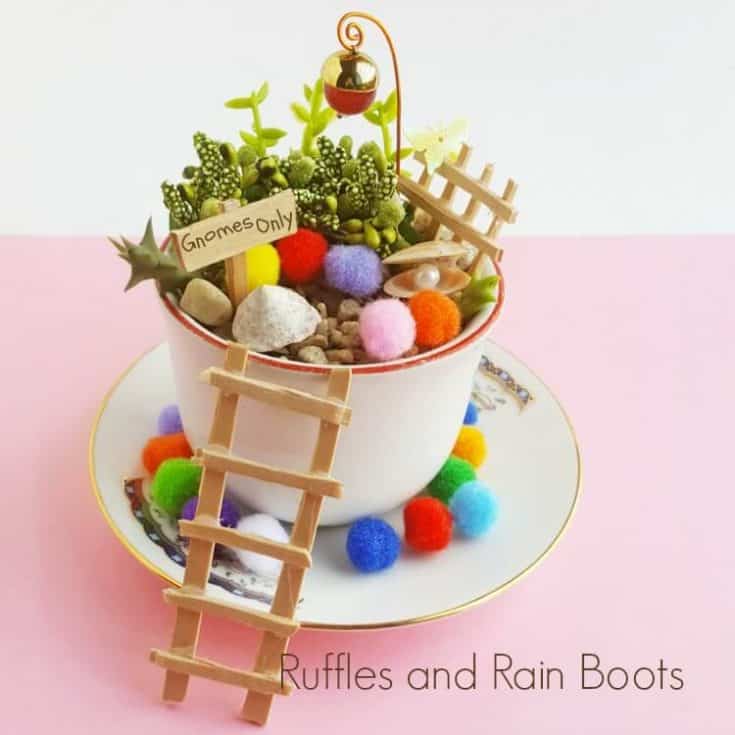
Grab some simple craft supplies and a few natural elements to make this fun gnome teacup garden craft with the kids.
Materials
- Popsicle sticks
- Small stones or rocks
- Craft wire
- Round crystal bead and topper (if you have it)
- Snail and/or sea shells
- teacup (best from a second-hand store)
Tools
- Pencil
- Scissors
- Craft pliers
- Hot glue gun (or strong craft glue)
Instructions
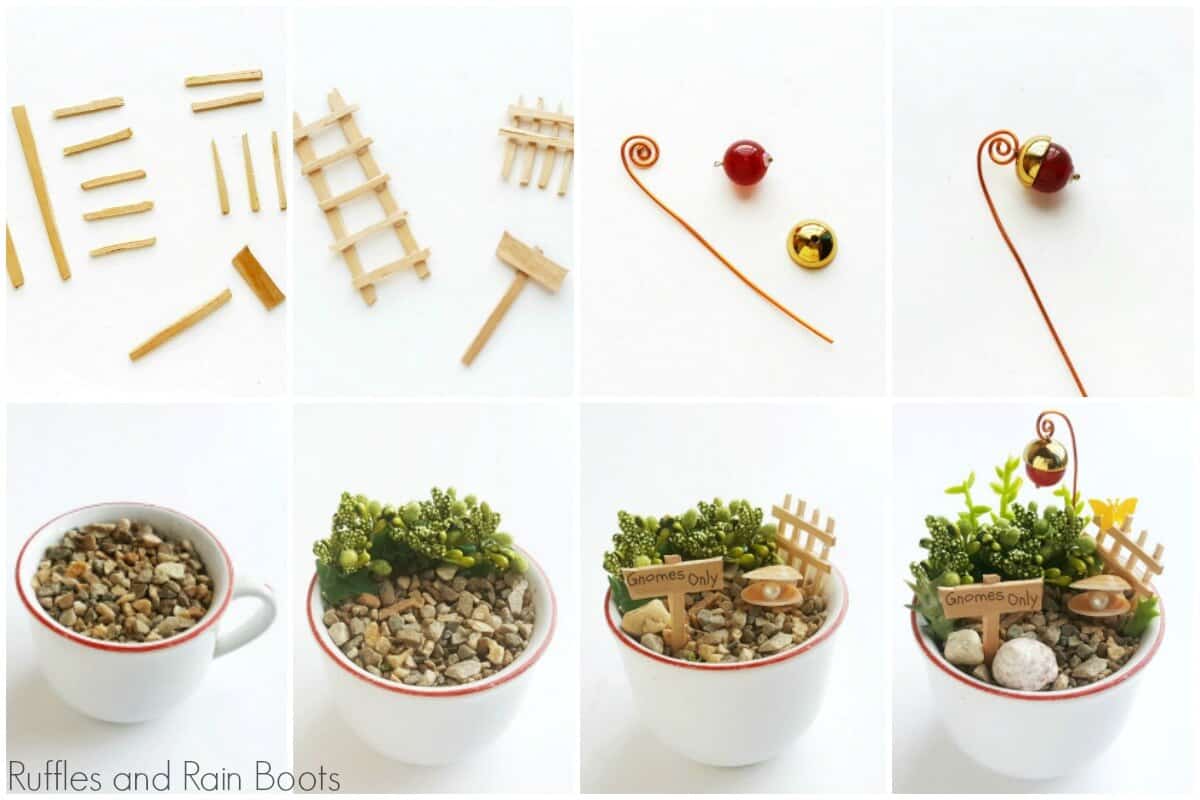
- I am using popsicle sticks to make the mini ladder, mini fence and mini fairy sign. You can either use the actual width of the popsicles or cut them into thinner pieces. For the ladder cut 2 sticks of the same length for the 2 long sides and 5 or 6 smaller sticks for the steps.
For the fence cut 2 sticks of the same length for the horizontal parts and 4 or more sticks for the vertical parts.
For the sign you will need 1 stick for the stand and 1 stick for writing the sign. The sizes of each item are up to you. - Place the 2 vertical sticks of the ladder parallel wise and stick the step sticks on them to complete the ladder. Prepare the fence and sign the same way.
- Take a bead stopper and insert a round bead into it. Push the bead all the way to the stopper and create loop on the open end to secure the bead. Cut out a piece of craft wire and create a twirl pattern on one end but keep the other end straight.
- Fill the cup with soil mix and cover the top with small stones or rocks. Add the plants to the cup by gently pushing the root into the soil mix (or use faux plants).
- Place the fence, sign and other items to the cup for decoration, along with the mini lamp post, by pressing everything into the rocks and soil.
- Place the cup on a saucer and add the ladder to the garden.

Notes
For more fun ideas for a gnome craft for kids, check out RufflesandRainboots.com
More Gnome Crafts for Kids
- Gnome Paper Plate Craft – Let little ones combine their love of painting with peek-a-boo fun.
- Gnome Paper Roll Craft – A less-than-ten-minute craft that will give your kids a new friend, puppet, and a fun toy.
- Popsicle Stick Gnome Puppets –
Please Save or Share This
Your shares are how this site grows and I am sincerely grateful. Please save this to a crafty pin board or share it on Facebook.
Meet the Creator
Hi there, I’m Sarah Nenni-Daher. I’m a crafty gal and always have at least 14 projects going at once. I am a crafter, designer, DIYer, and pattern maker. I share my creations here and in the Ruffles and Rain Boots® Shop.
Here at Ruffles and Rain Boots®, you’ll find DIY gnomes, crafts, gifts, cupcakes, laser crafts, and so much more. I love sharing video tutorials over on YouTube and chatting with other crafters in my Facebook groups. We’d love to have you!