
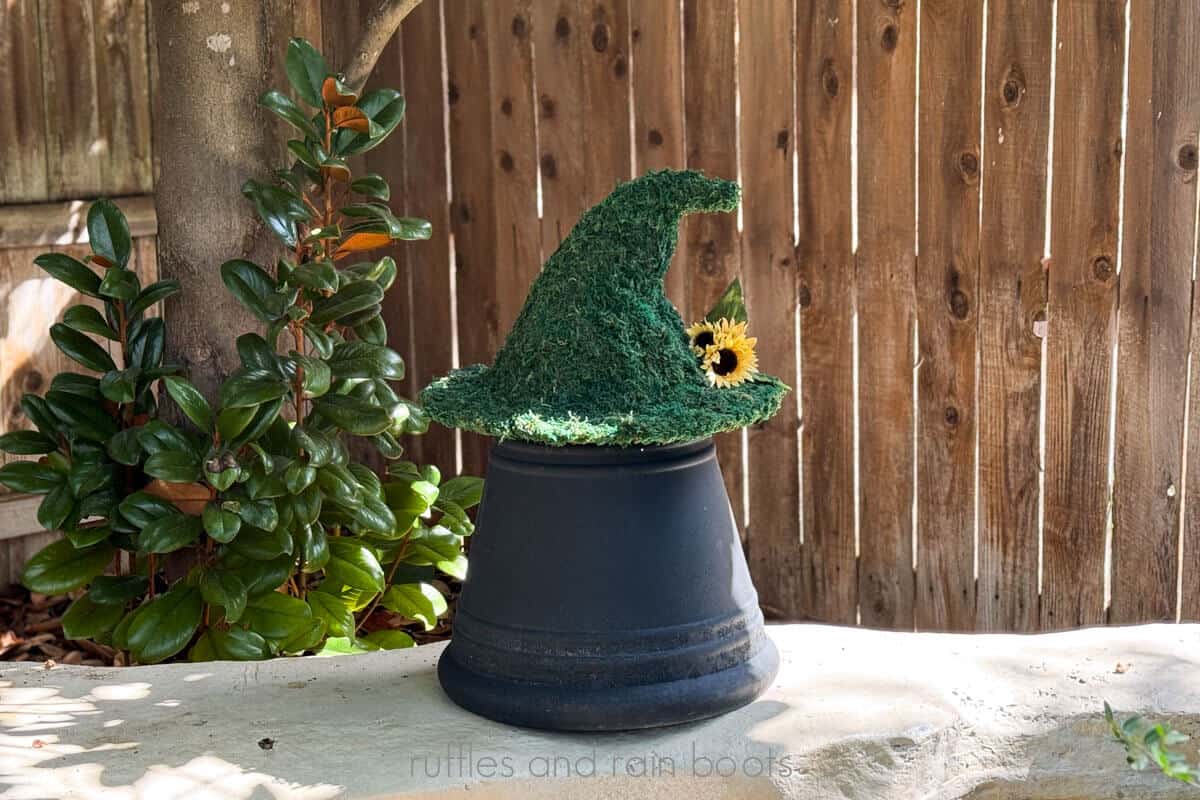
DIY Moss Witch Hat
Whether you want to wear it or use it in your decorating, this DIY moss witch hat craft turns out so beautiful. You can add flowers or keep the cottagecore vibes in an elegant Halloween craft.
RELATED READING: Dollar Tree Witch Hat Craft Using Mini Traffic Cones
What You'll Find On This Page
Moss Witch’s Hat for Halloween Decor
Here at Ruffles and Rain Boots, I am subtle decor diva for the spooky holiday. One day holidays just seem like SO much work and I really save up my stamina for Christmas.
Today, however, I got an idea and immediately sketched it out. It turned out that I had everything on hand (which is kismet when it comes to crafting), so I knew I had to start right away.
Materials You Will Need
Below are the materials I used for this easy Halloween decor idea. If you have a witch’s hat, you’ll already be halfway done!
- cardboard or foam board
- black felt
- chicken wire (I recommend gloves)
- moss sheets
- duct tape and zip ties (stars of the show, my friends)
- hot glue gun, glue sticks
- scissors and an X-Acto knife
- spray sealant
RELATED READING: Dollar Tree Crystal Ball Vase for Halloween (Spooky)
Watch This Mossy Witch Hat Come Together
If you’re a visual learner, I show you how to make your own with this easy DIY moss witch’s hat video tutorial. And you get my colorful commentary… Be sure to subscribe – we have a lot of fun on the channel.

How to Make a Witchy Moss Hat
Keep this page open and follow along or watch the video linked above. If you would like, there is a printable version of this tutorial at the end of this article.
First, trace or create a circle on the foam board as wide as you want the brim. Be sure to create the inside head portion if you’re wearing it or displaying it on something.
Cut out the foam board with an X-Acto knife. There’s no need to make it pretty, as we’re covering it up.
Put on your gloves and cut a piece of chicken wire so that it forms a cone. I added two pieces of wire together and secured them with a few zip ties to hold. Bend over the tip of the hat, if desired.
Cut felt to fit around the brim of the hat with about 2-3 inches all around the edge. Cut out the center head portion, if using. Cut the overhang into 2-3 inch sections and secure with glue. Repeat this with the cut out for the head.

Add duct tape to the join of the chicken wire (if using) and add vertical strips of duct tape on the outside, securing to duct tape on the inside. The felt will stick to this.
Cut felt to fit around the cone and wrap it completely, with an overhang at the bottom of about 3 inches. Cut the overhang into sections and secure it over the bottom of the cone.

Place the cone onto the felt covered brim and mark at least 8 holes on the brim. They will be about 1 inch from the inside of the head portion or 1 inch from the edge of the cone. Mark where you will have a corresponding hole cut into the cone.
Pierce the foam board marks and felt with scissors (and/or an X-Acto knife). Pierce the holes for the cone, as well.
Use zip ties (the connector portion on the inside of the hat) to secure the brim with the cone.
Wrap the moss all around the cone and secure. Use smaller portions to cover any sparse spots or seams.

Secure sheets to the brim, trimming at the edge of the hat. Optional: add moss to cover the edge of the hat, as well.
Spray at least two coats (three recommended) of the sealant to hold in the moss. This will secure the small pieces of moss and help to keep everything looking great after storage.

More Crafts You Might Like
- Dollar Tree Geode Crystal Skull DIY – This craft will definitely get people talking.
- Super Cute Jack Skellington Craft Idea – A jar + some paint = an adorable treat jar.
- Adorable Halloween Ghost Sign – Oh, the little hands just steal my heart!
Please Save or Share This Fun Halloween Craft Idea
Your shares are how this site grows and I am sincerely grateful. Please share this to social media or save it to a DIY crafts pin board.

Mossy Witch Hat DIY

This DIY moss witch hat is a TON of fun to make and even more to display. Whether you wear it or decorate with this mossy witch hat, you will hear oohs and ahhs.
Materials
- foam board or card board
- black felt (or other fabric)
- moss sheets
- chicken wire
- duct tape
- spray sealant
Tools
- hot glue gun and glue sticks
- scissors
- X-Acto knife
Instructions
- First, trace or create a circle on the foam board as wide as you want the brim. Be sure to create the inside head portion if you're wearing it or displaying it on something.
- Cut out the foam board with an X-Acto knife. There's no need to make it pretty, as we're covering it up.
- Put on your gloves and cut a piece of chicken wire so that it forms a cone. I added two pieces of wire together and secured them with a few zip ties to hold. Bend over the tip of the hat, if desired.
- Cut felt to fit around the brim of the hat with about 2-3 inches all around the edge. Cut out the center head portion, if using. Cut the overhang into 2-3 inch sections and secure with glue. Repeat this with the cut out for the head.
- Add duct tape to the join of the chicken wire (if using) and add vertical strips of duct tape on the outside, securing to duct tape on the inside. The felt will stick to this.
- Cut felt to fit around the cone and wrap it completely, with an overhang at the bottom of about 3 inches. Cut the overhang into sections and secure it over the bottom of the cone.
- Place the cone onto the felt covered brim and mark at least 8 holes on the brim. They will be about 1 inch from the inside of the head portion or 1 inch from the edge of the cone. Mark where you will have a corresponding hole cut into the cone.
- Pierce the foam board marks and felt with scissors (and/or an X-Acto knife). Pierce the holes for the cone, as well.
- Use zip ties (the connector portion on the inside of the hat) to secure the brim with the cone.
- Wrap the moss all around the cone and secure. Use smaller portions to cover any sparse spots or seams.
- Secure sheets to the brim, trimming at the edge of the hat. Optional: add moss to cover the edge of the hat, as well.
- Spray at least two coats (three recommended) of the sealant to hold in the moss. This will secure the small pieces of moss and help to keep everything looking great after storage.
Notes
I recommend a few coats of sealant to get all of the moss secured. You can also use Gorilla Glue's spray glue.
Meet the Creator
Hi there, I’m Sarah Nenni-Daher. I’m a crafty gal and always have at least 14 projects going at once. I am a crafter, designer, DIYer, and pattern maker. I share my creations here and in the Ruffles and Rain Boots® Shop.
Here at Ruffles and Rain Boots®, you’ll find DIY gnomes, crafts, gifts, cupcakes, laser crafts, and so much more. I love sharing video tutorials over on YouTube and chatting with other crafters in my Facebook groups. We’d love to have you!