Cupid Rhymes with Stupid SVG Free
This free Cupid rhymes with stupid SVG is perfect for a laser cut ornament, a Cricut t-shirt for Valentine’s Day, or a quick card for a Galentine. And if you’re selling, it also includes a free commercial use license.
Make quick work of a funny Valentine’s Day craft and follow along with the laser cutting tutorial. This is a very, very quick project to make and I’ll share my laser settings.

As an Amazon Associate, I could earn from qualifying purchases. There could be affiliate links within this article.
RELATED READING: Make This Valentine’s Day Laser DIY (White Acrylic!!!)
What You'll Find On This Page
Funny Valentine Laser Cut Ornament
Here at Ruffles and Rain Boots, our house is getting a bit more snarky and sarcastic. Now that our little one is, well, not so little, we’re having a different kind of crafting fun.
My daughter came in SNORTING with laughter because she saw this phrase on a t-shirt and asked me to make something. This funny Valentine laser project idea was born.

Free Cupid Rhymes with Stupid SVG Ornament Video Tutorial
If you’re a visual learner, watch the quick laser cut Valentine ornament video tutorial. It’s a fun way to watch the laser and see the XCS screens for each step.
For those who want a printable, image-free version, scroll to the end of this article.

Materials Used for This Funny Valentine Laser Craft
Below are the materials and some links to the items I used. Always use what you have on hand. You can also size the ornament to scrap you want to use, but don’t go smaller than 3 inches (or so) or you might break an area.
- Free Cupid Rhymes with Stupid SVG
- 3mm Basswood Plywood
- xTool S1 40W (or other laser)
- 6-Inch Inline Fan (LOVE this thing)
- Cloth for Wiping and Sponge for Sanding
- UV Sealant (this is my favorite spray sealant – no messy brushes)

RELATED READING: The xTool S1 Pin-Point Positioning™ in XCS Makes Placement Accurate (Beginner Friendly)
How to Design in XCS
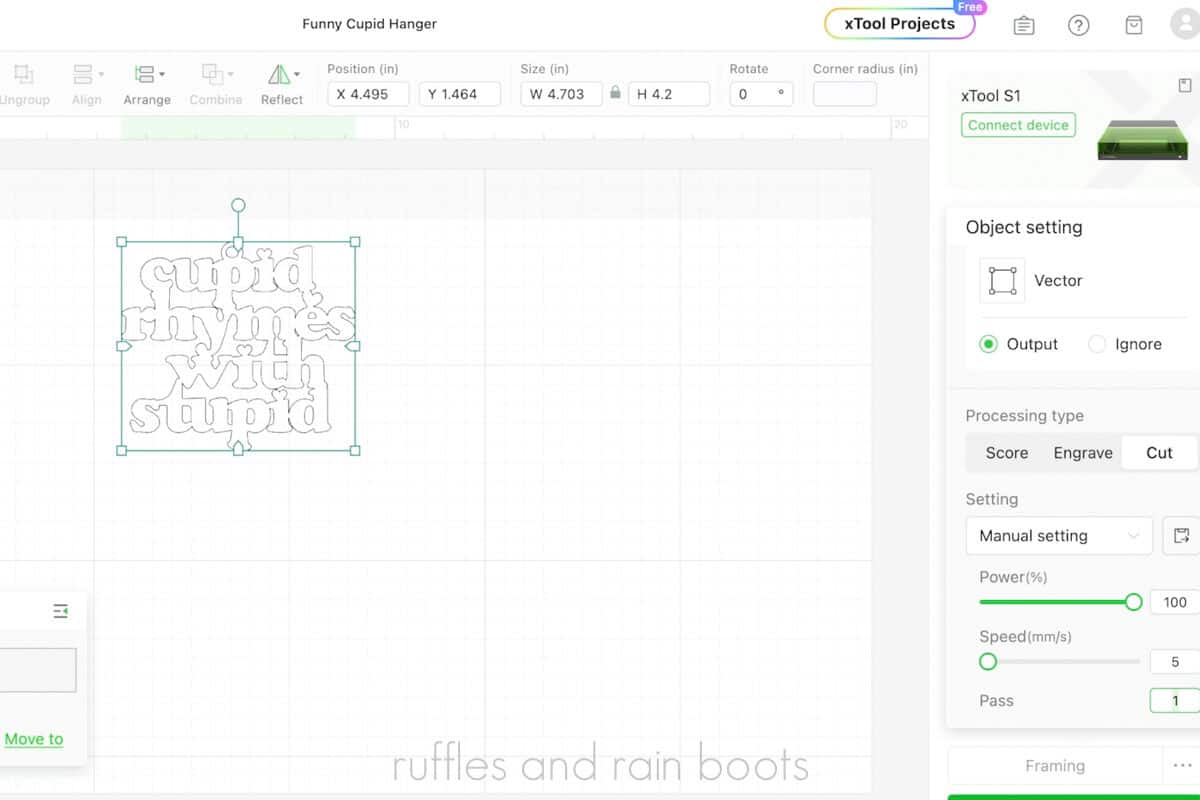
Import the Cupid Rhymes with Stupid SVG or drag and drop it onto the canvas. Size to 4.2 inches high (make sure the proportion lock is in place). Set the item to CUT and insert your settings (see Notes below).

How to Cut 3mm Basswood Plywood with xTool S1 40W
Load the unmasked basswood plywood onto the honeycomb (grain up and down) with something elevating it (wood or acrylic scraps are good). Use the pins to secure.
Turn on the laser and position the crosshairs over the material. Select Auto Measure and allow the machine to set the distance.
Select “Start Marking” and the rectangle option. Move the crosshair to the upper left-most point of the processing area and press the Start button on the machine to lock it in place. Move the crosshair to the bottom right-most point of the processing area and press the Start button to finalize the rectangle. Select End Marking and Done.

Move the design into the processing area and Frame it. Turn on the inline fan (open the blast gate, if necessary) and process the job.
How to Finalize the Cupid Rhymes with Stupid Ornament
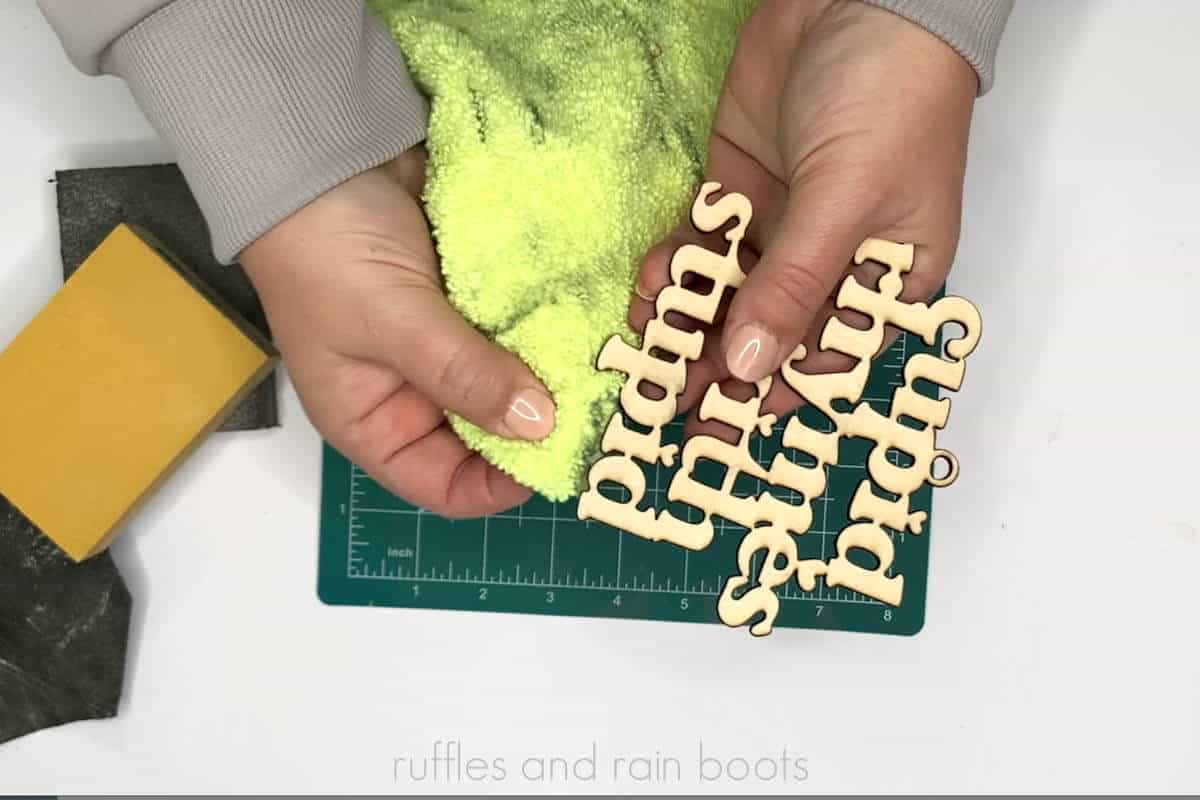
Use a clean, dry cloth to remove soot from the edges of the ornament. Be sure to get into the ribbon / twine hanger.

Take the ornament outside and spray with the UV sealant per the package instructions.
Cut a piece of twine or ribbon, string, and display the funny Valentine SVG ornament.
More Laser Cutting Crafts You Might Like
- xTool Screen Printer Review – Should a laser be used in screen printing? Find out with this thorough review of the newest screen printing tool for beginners.
- Laser Safe Vinyl and Acrylic Tic Tac Toe Game – Have your hand at learning some new materials.
- Laser Cut Highland Cow Door Sign – Use the highland cow SVG to create a fun door sign with a pop of faux fur!
- DIY Laser Cut Wine Charm Tutorial – These easy charms are perfect for any occasion.
Please Save or Share This Valentine’s Day Laser Craft Idea
Your shares are how this site grows and I am sincerely grateful. Please save this beginner laser project to a DIY crafts pin board or share this on Facebook.

Valentine Laser Cut Ornament with SVG

Use this free Cupid Rhymes with Stupid SVG to create Valentine's Day crafts on a Cricut, Silhouette, laser, Glowforge, xTool, or decoupage. This free Valentine's Day SVG is perfect for an ornament, t-shirt, tote bag, or card for that friend, Galentine, or just to make someone laugh.
Materials
- 3mm Basswood Plywood
- UV Clear Sealant
- Ribbon or Twine
- Sanding Sponge
- Cupid Rhymes with Stupid SVG (Free)
Tools
- xTool S1 40W (or other)
- Honeycomb and Automatic Air Assist
- Inline Fan
- Clean Microfiber Cloth
Instructions
How to Design in XCS
- Import the Cupid Rhymes with Stupid SVG or drag and drop it onto the canvas.
- Size to 4.2 inches high (make sure the proportion lock is in place).
- Set the item to CUT and insert your settings (see Notes below).
How to Cut 3mm Basswood Plywood with xTool S1 40W
- Load the unmasked basswood plywood onto the honeycomb (grain up and down) with something elevating it (wood or acrylic scraps are good). Use the pins to secure.
- Turn on the laser and position the crosshairs over the material.
- Select Auto Measure and allow the machine to set the distance.
- Select "Start Marking" and rectangle. Move the crosshair to the upper left-most point of the processing area and press the Start button on the machine to lock it in place. Move the crosshair to the bottom right-most point of the processing area and press the Start button to finalize the rectangle. Select End Marking and Done.
- Move the design into the processing area and Frame it.
- Turn on the inline fan (open the blast gate, if necessary) and process the job.
How to Finalize the Cupid Rhymes with Stupid Ornament
- Use a clean, dry cloth to remove soot from the edges of the ornament. Be sure to get into the ribbon / twine hanger.
- Take the ornament outside and spray with the UV sealant per the package instructions.
- Cut a piece of twine or ribbon, string, and display the funny Valentine SVG ornament.
Notes
xTool S1 40W Settings for Basswood
You can choose the preloaded settings from the material drop down list (100/15/1), however, mine cuts very cleanly at 100/5/1 using the method outlined above.

