
Use This Free Gnome Knitting Pattern to Make a Christmas Gnome
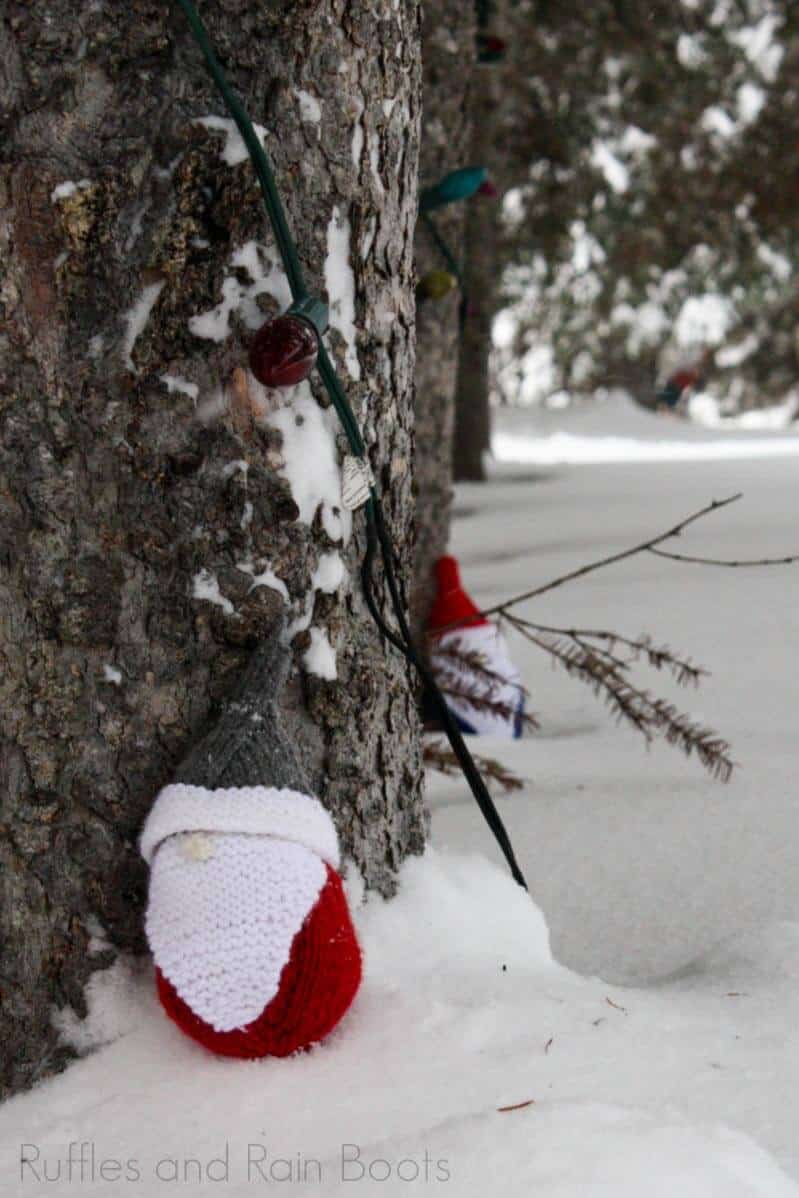
This free gnome knitting pattern is so simple but makes the cutest knitted gnomes. I love everything gnome but when I realized I could make you a knitting pattern for gnomes, I jumped right on it!
RELATED READING: The Best Christmas Gnomes
What You'll Find On This Page
Gnome Knitting Pattern
Here at Ruffles and Rain Boots, it’s that time of year where I start on my fiber crafts. There’s just something comforting about grabbing yarn, wool, or thread when it’s chilly. And my latest WIP is this gnome knitting pattern.
I love the easy-to-follow instructions and the way that I don’t get easily confused when I, inevitably, get distracted by my daughter. What I’m saying is – this is a pretty easy project to do in small batches.
DIY Christmas Gnome Tutorials
If you’re looking for the best DIY Christmas gnome tutorials, you have come to the right place. Check out all of my favorite gnome tutorials for the holidays!
Love this but can’t get started right now? Save this to your knitting pattern pin board or share it on social and it’ll be here for when you’re ready.

As an Amazon Associate, I can earn from qualifying purchases. There could be affiliate links within this article.
This set of crochet gnomes pattern has me reaching for my hooks (I’m a beginner; my daughter is better at crochet than I am). LOL
Tips to Use this Knitting Pattern to Make Gnomes
- As with all knitting, it’s best if you use a stitch marker. If you don’t have something, you can always just use twisty-ties or a piece of string. Personally, I love these little ball of yarn stitch markers…they’re so cute I almost want to knit just so I can use them.
- Skills you’re going to need:
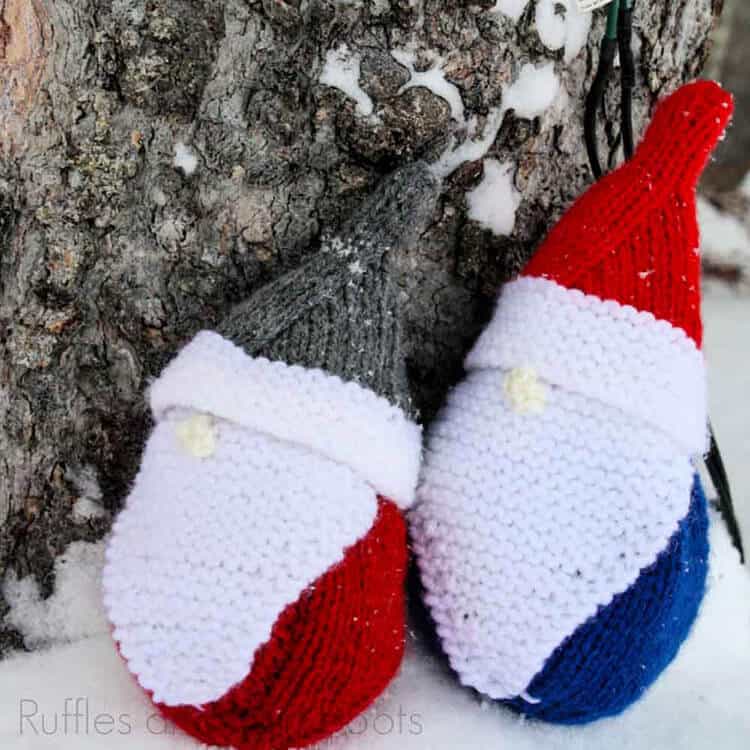
- The small gnome finished height is approximately 7” tall, and the larger version is approximately 9” tall.
- Gauge: In stockinette stitch, 5 stitches x 6 rows = 1″
- For free-standing gnomes, please add weight to the base before stuffing with Poly-fill. I use Poly-beads (1/2 cup for the small, 3/4 cup for the large) tied up inside a piece of fabric. Note: I have included links to the products I use below.
More Gnome Knitting Patterns You Might Like
- Christmas Gnome Knitting Pattern – This is a best-seller for a reason! I fell in love with the little feet.
- Standing Knitted Gnome Pattern – Technically, you can use this gnome knitting pattern all year round with very minor adjustments.
- Tomte Teapot Cozy Gnome Knitting Pattern – Your teapot can be adorable!
- My Favorite Gnome Knitting Pattern (right now) – I saved this one for last because I am now obsessed with gnomes in socks. SOCKS.
More Gnome Tutorial Ideas You Might Like
- The BEST Christmas Gnomes – These Christmas gnomes are easily my favorites.
- 75 Holiday Gnome Tutorials – Tired of searching for the perfect gnome tutorial?
- My Most Popular Christmas Gnome Ornaments – Of all the gnomes I’ve ever made, these gnome ornaments are easily my most popular and easiest.
Please Save or Share This Free Gnome Knitting Pattern
Your shares are how this site grows and I am sincerely grateful. Know a friend who’d like this? Please share it on Facebook or save it to your favorite gnome tutorial ideas pin board.
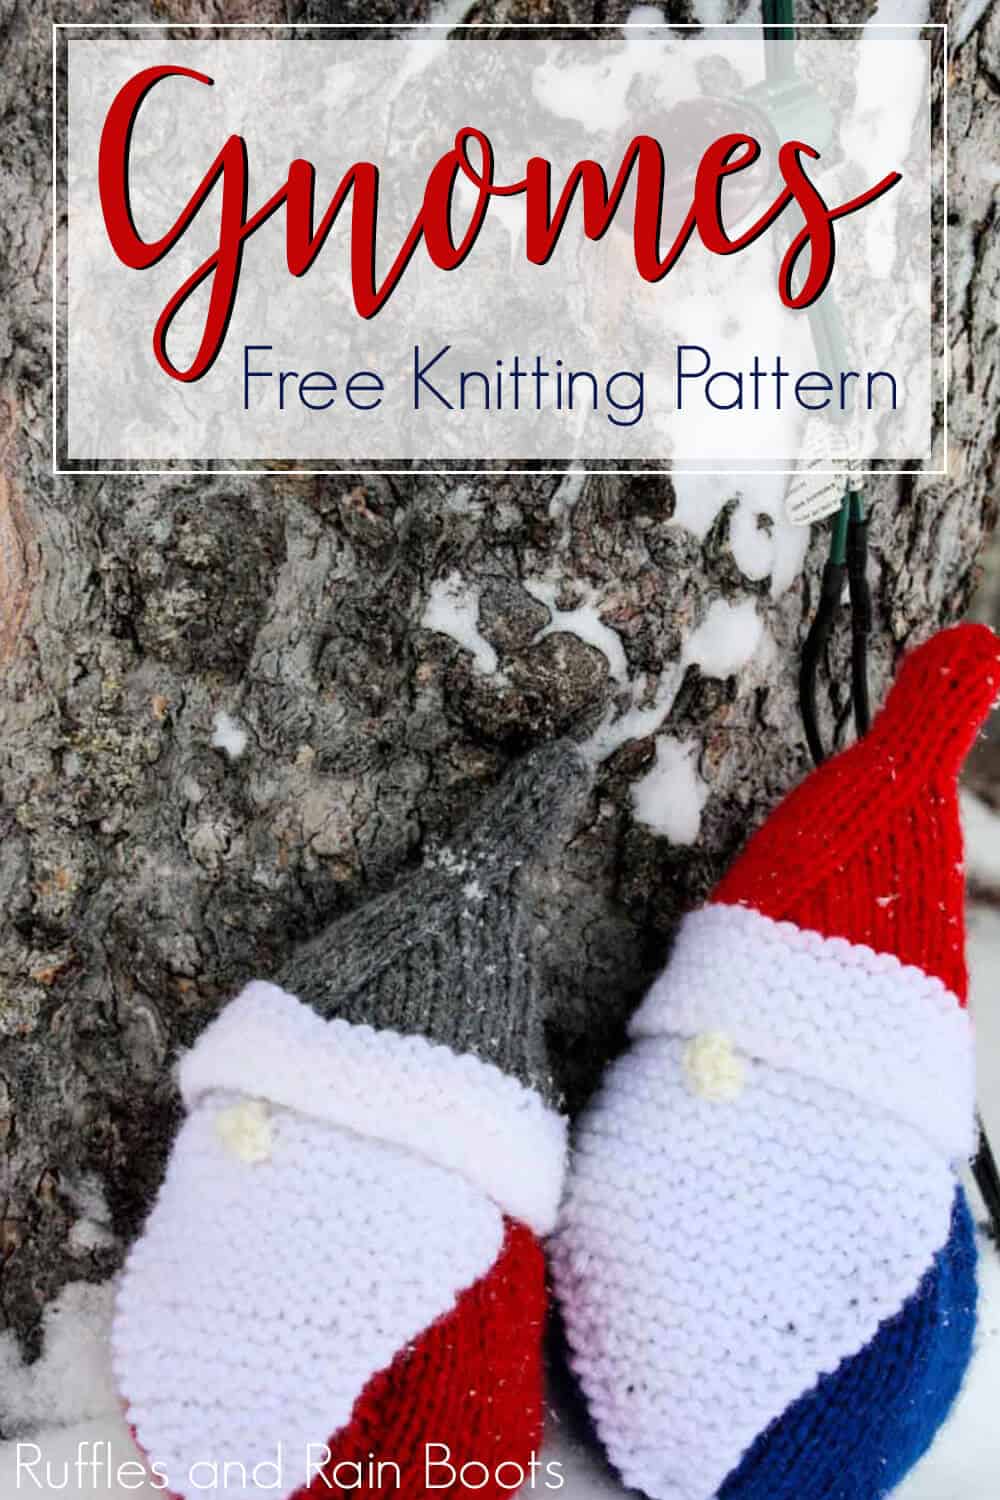
How to Make a Knitted Gnome with This Free Gnome Knitting Pattern
Below is the written tutorial and you can print the instructions below by adding this free knitted gnome pattern to your cart.
Gnome Knitting Pattern

This free gnome knitting pattern is so simple, but makes the cutest knitted gnomes. I love everything gnome, but when I realized I could use this free knitting pattern for gnomes, it's been all bets off.
Materials
- Worsted Weight ( category 4) yarn in red, white, grey, royal blue and off white
- Size 4 mm ( US size 6 ) knitting needles
- Scissors
- Darning needle
- Stuffing ( polyester fiberfill, fabric scraps, yarn scraps etc…)
- Weight (for standing gnomes) - Poly-beads
- Free Pattern Download
Tools
- KFB = Knit front and back – this is a very easy and tidy increase, where you turn one stitch into two. Knit the next stitch on the left-hand needle, without slipping off the old stitch. Proceed to knit into the back of that same stitch, and complete the stitch as usual, slipping off the old stitch when complete. (KFB)
- K2tog = Knit two together – a very simple decrease, where you turn two stitches into one. Insert your right-hand needle into the next two stitches on your left-hand needle, and knit them both together. (K2tog)
- Stockinette Stitch = Alternating a knit row with a purl row – Many patterns call for stockinette stitch and this simply means that you alternate between knit rows and purl rows. For example, row 1: knit, row 2: purl, row 3: knit, row 4: purl, and so on. (Stockinette Stitch)
- Garter Stitch = Knitting every row – Many patterns call for garter stitch and this simply means that you knit every row. For example, row 1: knit, row 2: knit, row 3: knit, row 4: knit, and so on. (Garter Stitch)
- When two numbers are given, the number in parentheses applies to the larger size. Where there are increases and / or decreases in the row, the number of total stitches that you should have at that point are in parentheses at the end of the row. The nose is made with a bauble stitch.
Instructions
- To make the body: Cast on 4
- Row 1: knit
- Row 2: kfb of each stitch (8 sts)
- Row 3: purl (and every other odd number row)
- Row 4:*k1, kfb; repeat from * across (12 sts)
- Row 6:*k2, kfb; repeat from * across (16 sts)
- Row 8:*k3, kfb; repeat from * across (20 sts)
- Row 10:*k4, kfb; repeat from * across (24 sts)
- Row 12:*k5, kfb; repeat from * across (28sts)
- Row 14:*k6, kfb; repeat from * across (32 sts)
- Row 16:*k7, kfb; repeat from * across (36 sts)
- Row 18:*k8, kfb; repeat from * across (40 sts)
- Row 20:*k9, kfb; repeat from * across (44 sts)
- Row 22:*k10, kfb; repeat from * across stitch (48 sts)
- Row 23: purl
- For Larger Version Go To ** (line 35)
- Work 8 rows even in stockinette stitch (knit one row, purl one row)
- Row 32: *Knit 10, k2tog; repeat from * across (44 sts)
- Row 33: purl
- Row 34: *Knit 9, k2tog; repeat from * across (40 sts)
- Row 35: purl
- Row 36: *Knit 8, k2tog; repeat from * across (36 sts)
- Row 37: purl
- Row 38: *Knit 7, k2tog; repeat from * across (32 sts)
- Row 39: purl
- Row 40: *Knit 6, k2tog; repeat from * across (28 sts)
- Row 41: purl
- Row 42: *Knit 5, k2tog; repeat from * across (24 sts)
- Row 43: purl
- Row 44: k2tog across (12 sts)
- Row 45: purl
- Row 46: k2tog across (6 sts)
- Row 47: purl
- Row 48: k2tog across (3 sts)

- ** For Larger Version
- Row 24:*k11, kfb; repeat from * across stitch (52 sts)
- Row 25: purl
- Row 26:*k12, kfb; repeat from * across stitch (56 sts)
- Row 27: purl
- Work 10 rows even in stockinette stitch (knit one row, purl one row)
- Row 38: *Knit 12, k2tog; repeat from * across (52 sts)
- Row 39: purl
- Row 40: *Knit 11, k2tog; repeat from * across (48 sts)
- Row 41: purl
- Row 42: *Knit 10, k2tog; repeat from * across (44 sts)
- Row 43: purl
- Row 44: *Knit 9, k2tog; repeat from * across (40 sts)
- Row 45: purl
- Row 46: *Knit 8, k2tog; repeat from * across (36 sts)
- Row 47: purl
- Row 48: *Knit 7, k2tog; repeat from * across (32 sts)
- Row 49: purl
- Row 50: k2tog across (16 sts)
- Row 51: purl
- Row 52: k2tog across (8 sts)
- Row 53: purl
- Row 54: k2tog across (4 sts)
- For both sizes: Cut yarn leaving a long end, thread darning needle, pull threaded needle back through the three stitches on the knitting needle, removing them from the knitting needle, pull tight to cinch, and sew up seam with right sides facing, leaving a one inch gap on top. Turn right side out, fill with weight and stuffing and finish the seam. Secure and weave in end.
- To make the beard: Cast on 3 sts of your desired beard color (I used white).
- Knit 1 row
- Row 2: k1, kfb, knit across (4 sts)
- Row 3: k1, kfb, knit across (5 sts)
- Row 4: knit Row 5: knit
- Row 6: k1, kfb, knit across (6 sts)
- Row 7: k1, kfb, knit across (7 sts)
- Row 8: knit
- Row 9: knit Row 10: k1, kfb, knit across (8 sts)
- Row 11: k1, kfb, knit across (9 sts)
- Row 12: knit
- Row 13: knit
- Row 14: k1, kfb, knit across (10 sts)
- Row 15: k1, kfb, knit across (11 sts)
- Row 16: knit Row 17: Knit
- Row 18: k1, kfb, knit across (12 sts)
- Row 19: k1, kfb, knit across (13 sts)
- Row 20: Knit
- Row 21: Knit
- Row 22: k1, kfb, knit across (14 sts)
- Row 23: k1, kfb, knit across (15 sts)
- Row 24: Knit
- Row 25: Knit
- Row 26: k1, kfb, knit across (16 sts)
- Row 27: k1, kfb, knit across (17 sts)
- Row 28: Knit
- Row 29: Knit
- Row 30: k1, kfb, knit across (18 sts)
- Row 31: k1, kfb, knit across (19 sts)
- Row 32: Knit
- Row 33: Knit
- Row 34: k1, kfb, knit across (20 sts)
- Row 35: k1, kfb, knit across (21 sts)
- Row 36: Knit
- Row 37: Knit
- ** For Larger Version, Continue
- Row 38: k1, kfb, knit across (22 sts)
- Row 39: k1, kfb, knit across (23 sts)
- Row 40: Knit
- Row 41: Knit
- Row 42: k1, kfb, knit across (24 sts)
- Row 43: k1, kfb, knit across (25 sts)
- Row 44: Knit
- Row 45: Knit
- For Both Sizes: Bind Off
. Cut yarn leaving approx. 8 " tail.
Secure last stitch.
Attach Beard to gnome so that the point of the beard is *almost* to the bottom
- Hat Cast on 40 sts (of your desired hat color)
- To make the hat brim: Work in garter stitch for 8 (10) rows.
- Rise: Row 1: *knit 8, k2tog; repeat from * to end of row (36 sts)
- Row 2: purl
- Row 3: *knit 7, k2tog; repeat from * to end of row (32 sts)
- Row 4: purl
- Row 5: *knit 6, k2tog; repeat from * to end of row (28 sts) Row 6: purl
- Row 7: *knit 5, k2tog; repeat from * to end of row (24 sts)
- Row 8: purl
- Row 9: *knit 4, k2tog; repeat from * to end of row (20 sts)
- Row 10: purl
- Row 11: *knit 3, k2tog; repeat from * to end of row (16 sts)
- Row 12: purl
- Row 13: *knit 2, k2tog; repeat from * to end of row (12 sts)
- Row 14: purl Row 15: *knit 1, k2tog; repeat from * to end of row (8 sts)
- Row 16: purl
- Work 4 (6) rows in stockinette stitch (starting with a knit row, and alternating with purl rows)
- Crown: Row 1:k2tog( 4 sts)
- Row 2: purl
- Work 4 (6) rows in stockinette stitch (starting with a knit row, and alternating with purl rows)
- Next row: k2tog( 2 sts)
- Next row 2: purl
- Next row K2tog.
- For Both Sizes: You now have 1 stitch remaining on the needle.
Cut yarn, leaving approx. 8 inch tail and secure the last stitch.
Thread darning needle, and sew the hat seam , with right sides facing.
Turn right side out and place on the gnome. Stitch in a few places to keep it secure.
- To make the nose : Cast on 1 stitch.
- Row 1: Kfb, Kfb and k into the front again of the same stitch (5 sts)
- Row 2: Purl across
- Row 3: Bind off cut yarn about 5 inches, and secure last stitch.
This will not look like much of a nose when you bind off. However, it will look super cute once you attach it. Just use the cast on and bind off ends to secure the nose to the beard. Place each end around one stitch and pull tight, and secure. Weave in and trim any loose ends.


Notes
Note: For more fun gnome tutorials, visit RufflesandRainBoots.com

What type of needles do you use, dons or straight?
I used straight needles.
I love, love, love this gnome pattern! However, I’m having a hard time keeping them upright. Do you have a trick to prevent them from falling over? Is there some kind of weight I could add to the stuffing? Thanks for a great pattern!
Yes, I add poly beads to the base for free-standing gnomes. Depending on how tight your weave, you might need to put them into a tied-off piece of fabric. Usually, a 1/2 cup works for the smaller one and 3/4 for the large. I thought I had that in the notes, but I’ll go check now.