
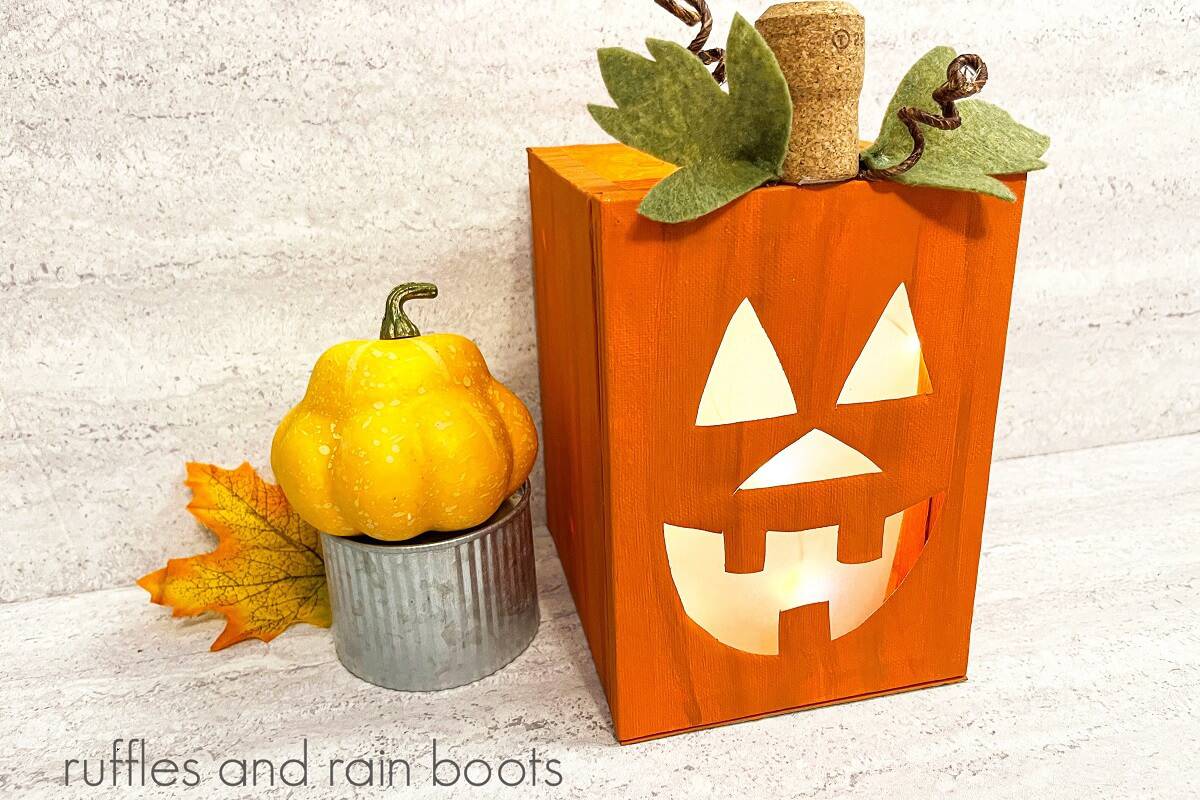
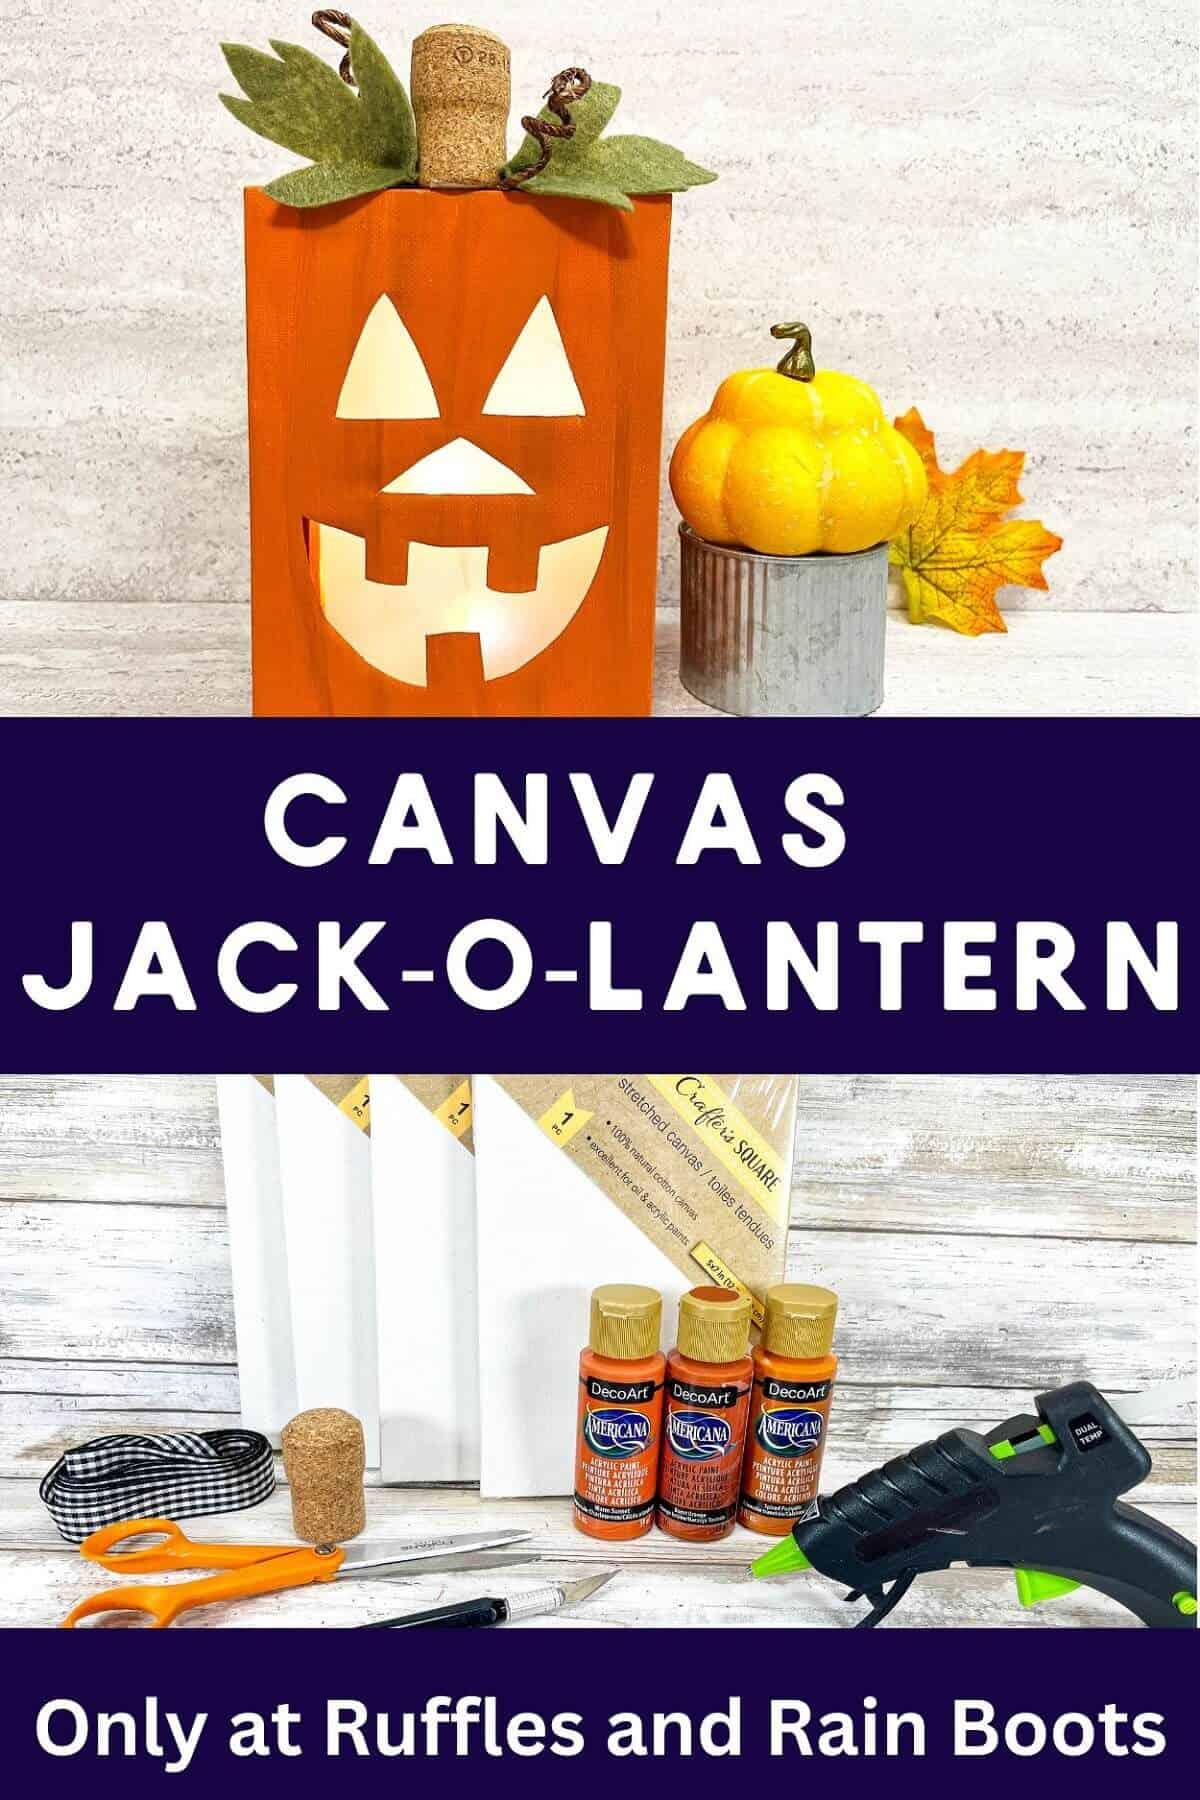
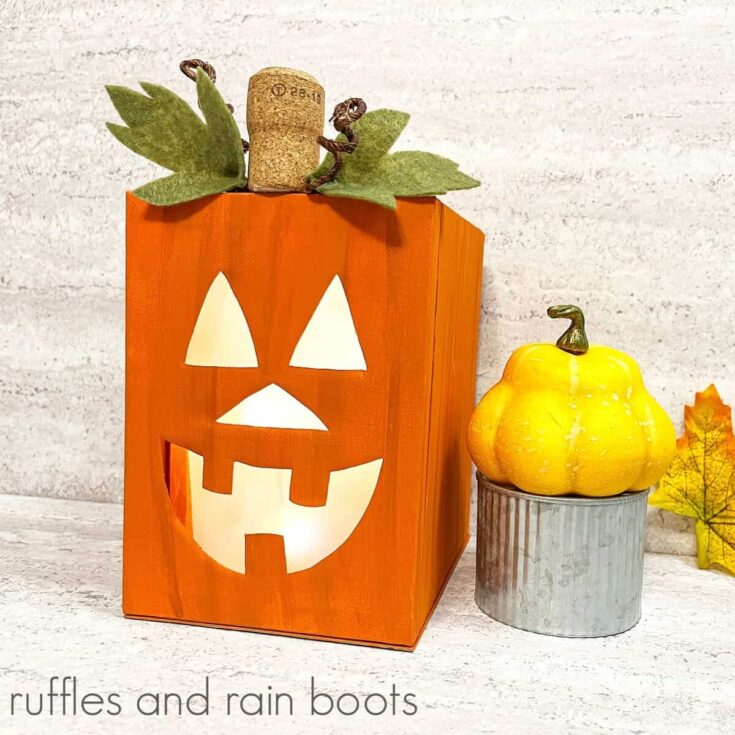
Light Up Canvas Jack-O-Lantern
This canvas jack-o-lantern could not be cuter or easier to make. We used what we had in the craft bin, and what we didn’t have, we easily found at the Dollar Tree. You can make it in under an hour for about $2.50!
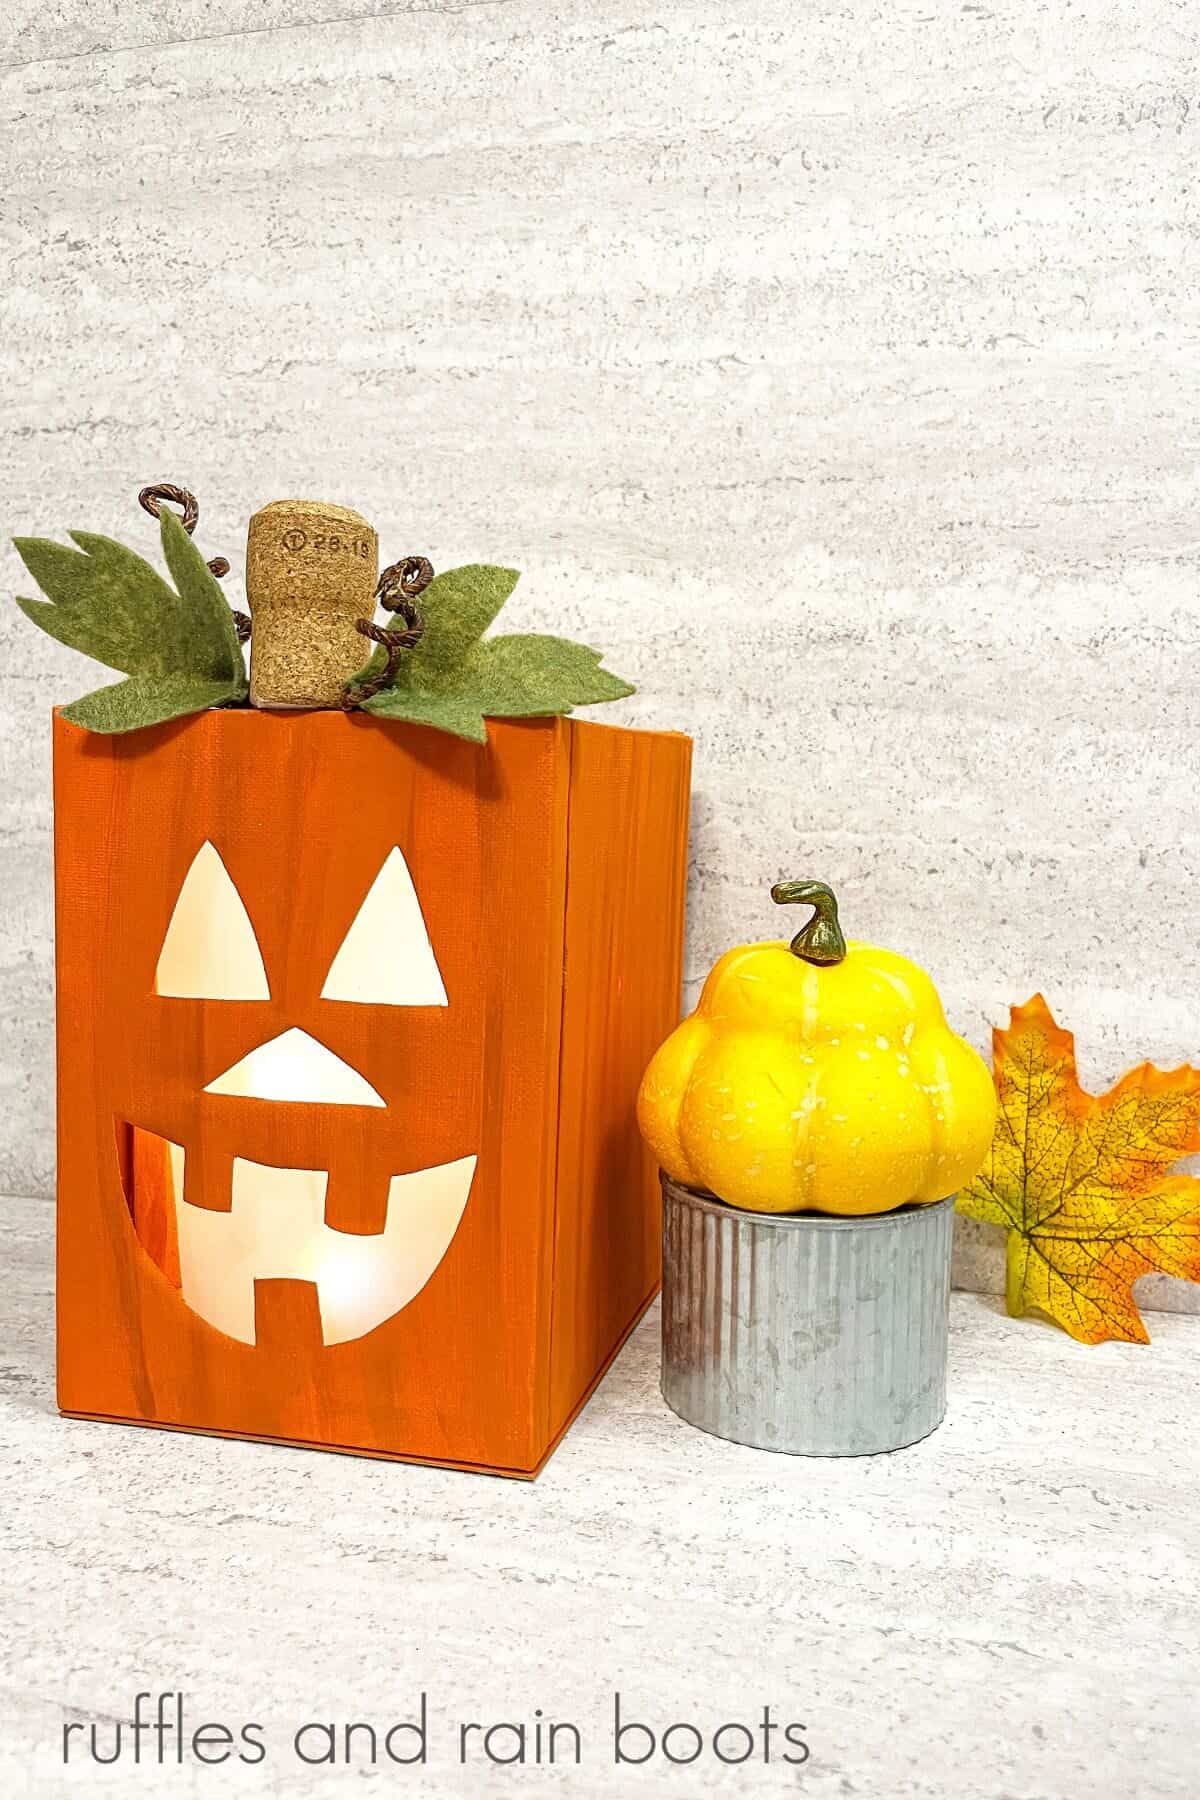
Can you picture this cute lighted jack-o-lantern on your front porch or in your windows, watching over your home? They have a beautiful warm glow and will put a smile on your face each time you see them.
RELATED READING: Terra Cotta Pumpkin DIY – High-End Decor for Halloween
What You'll Find On This Page
Repurposed Painted Canvas Jack-O-Lantern
Here at Ruffles and Rain Boots, we are on a fall decorating kick and we were looking for new crafts we could make to showcase. It took just a few minutes of shopping and gathering supplies to plan how to make this toothy little guy.
If you are like us, you know how to appreciate a handmade piece of home decor over something store-bought. I feel such a sense of pride when I make something for my home that I can share with others.
If you need time to gather the supplies for this canvas light-up pumpkin, bookmark this page to make it easy when you are ready to make your repurposed painted canvas jack-o-lantern.
As an Amazon Associate, I could earn from qualifying purchases. There may be affiliate links within this article.
Why This Canvas Jack-O-Lantern is the Perfect Fall Craft
You can display this lighted canvas jack-o-lantern in a number of places in your home as well as outside. If placing it outdoors, be sure to display it in a place that is protected from the elements.
The kids will have such a blast helping or being in charge of putting this adorable repurposed craft together. The younger kiddos will need help with the cutting and gluing, on this Dollar Tree canvas craft but would have lots of fun with the painting!
This would make a thoughtful gift for a friend, family member, or neighbor. It would also be a cute addition to your home office. I think this Dollar Tree Halloween craft idea would look great on your desk.
RELATED READING: Spooky Spider Jar Craft for Halloween
Tips for Making a Canvas Jack-O-Lantern
- Because this craft uses three different shades of orange acrylic paint, you only need to paint one layer in each step where any painting takes place. This saves you time and money.
- If this is a craft that will be handled frequently, use ultra-bond hot glue gun sticks. This way, you don’t need to worry about handling the lantern gingerly or it breaking apart when you touch it.
- When gluing the canvases together to form the rectangle, use a straight line of glue that is of medium thickness (you don’t want it too thick and have it seep out the sides.)
- We suggest using strong double-sided tape when attaching the vellum paper. This will avoid burns if you were to use a hot glue gun on this delicate paper.

RELATED READING: Dollar Tree DIY Crystal Ball Vase (SO Spooky)
Supplies To Make a Lighted Canvas Jack-O-Lantern
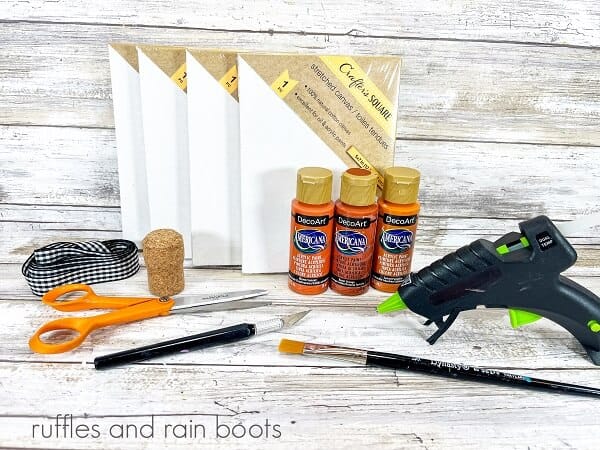
Below are the supplies I used to make a lighted canvas jack-o-lantern. Before heading to the store, check your craft bin to see what supplies you have on hand for this Dollar Tree Halloween craft idea. Read the tips section above for information on how to paint the canvases on this light up canvas pumpkin.
- Art Canvases
- Wooden Craft Sticks
- Glue Gun and Glue Sticks
- White Twinkle Lights and Batteries (if needed)
- Bright, Medium, and Dark Orange Acrylic Craft Paint
- Olive Green Scrap of Felt
- Recycled Champagne Cork
- A Scrap of Cardboard
- Vellum Paper
- Wired Twine
- Craft Knife and Self-Healing Mat
- Scissors and Wire Cutters (optional)
- Pencil
- Jack-O-Lantern Face Pattern and Leaf Pattern
How to Make a Lighted Canvas Jack-O-Lantern
Each step for this Dollar Tree craft is detailed below. Keep this page open while you create a canvas light-up jack-o-lantern DIY If you would rather have a printable how-to, scroll down and select the print button.

Paint the art canvases with medium orange craft paint. While they are still wet, add strokes of dark orange and light orange craft paint. Allow them to dry completely.
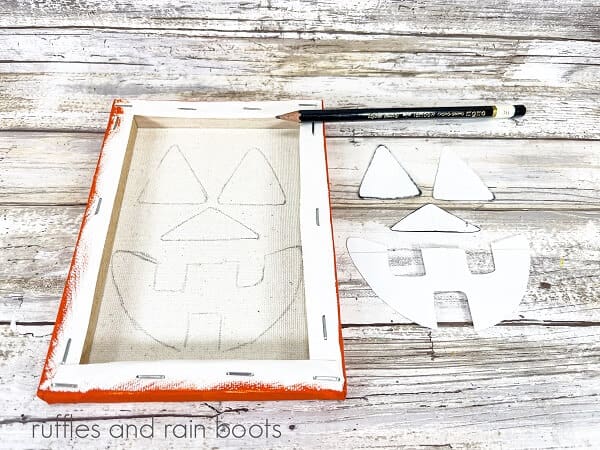
Download, print, and cut out the jack-o-lantern face pattern. Flip over one canvas and trace the jack-o-lantern face pieces with a pencil.

Place the traced canvas on a self-healing mat and carefully cut out the jack-o-lantern face pieces with a craft knife.
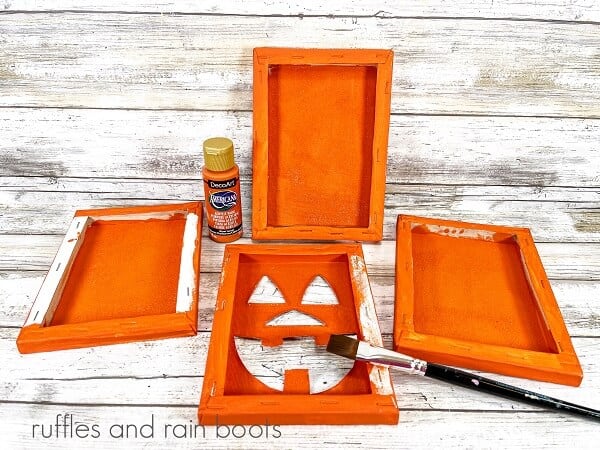
Paint the backside, sides, and edges of the four canvases with medium orange acrylic craft paint.

Cut a wooden craft stick into three pieces with scissors. Attach to the back of the jack-o-lantern’s teeth with a glue gun.

Using a glue gun, attach the canvases together in a rectangle. Begin by gluing a canvas to the right and left side of the jack-o-lantern face, which is the front of the lantern. Pay close attention to make sure there is glue where the corners connect.

Attach the back canvas to the first three with a glue gun, completing the rectangle.

Measure and cut a piece of scrap cardboard to fit the bottom of the lantern.

Paint the cardboard with medium orange craft paint.

With the orange side up, attach the cardboard to the base of the lantern with the glue gun.
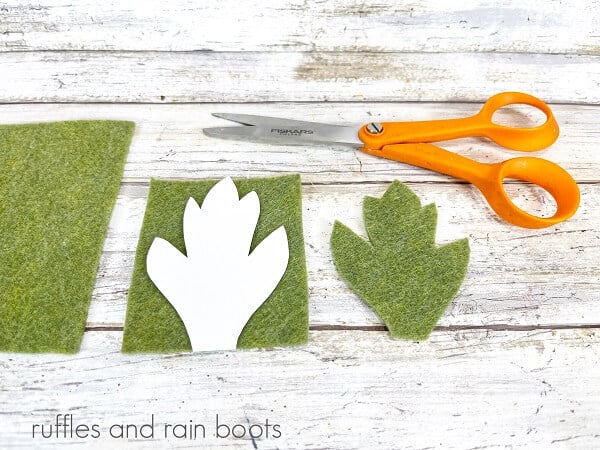
Download and print the leaf pattern. Place it onto a scrap of olive-green craft felt and cut out two. Apply a dot of glue at the base of each leaf and fold it in half.

Measure two 12” lengths of wired twine and cut using wire cutters. Wrap each around a pencil, and then slide off. Stretch and bend the wire to create the pumpkin vines.

Using the glue gun, attach the champagne cork to the top front center of the canvas. Hold in place until the glue dries completely. Glue the wired twine vines and the leaves to either side of the cork stem.

Measure and cut a piece of 4” by 6” vellum paper and secure it in place inside the lantern behind the jack-o-lantern. Place batteries in the twinkle lights.

Place the lights inside and enjoy the warm glow of the jack-o-lantern.
Notes to Make a Canvas Lighted Jack-O-Lantern
- True vellum is a parchment made from calfskin. For this project, we are using vellum paper, which is a semi-transparent paper found in craft and art supply stores. This type of paper allows the lights to warmly glow in the canvas jack-o-lantern.
- If you don’t see any twinkle lights at the Dollar Store and don’t have a set at home that isn’t being used, you can use a battery-powered tea light candle from the Dollar Tree or Dollar Store.
- If you don’t have a champagne cork handy, a sparkling or regular wine cork will suffice. You can also find the champagne corks on Amazon.
- If you don’t have a self-healing mat, which is what sewers and crafters use when cutting with a rotary or craft knife, use a kitchen cutting board or butcher block instead.
More Fall Crafts You May Like
- Make a Fall Mickey Mouse Topiary: This magical fall craft makes the perfect tabletop decor for your fall theme. It will remind you of the Disney parks in the cooler, autumn months.
- DIY Pumpkin Napkin Rings: You will be amazed at how easy these pretty napkin rings are to make. They will surely spruce up any table.
- Standing Scarecrow Gnome Pattern: You will absolutely fall in love with this adorable Farmhouse style scarecrow gnome with poseable arms.
- Dollar Tree Fall Gather Sign: This 5-minute fall craft comes together with simple craft supplies from the Dollar Tree or your own craft bin. Don’t you love how it turned out?
Please Save or Share
Your shares are how this site grows and I sincerely appreciate it. Please save this repurposed canvas jack-o-lantern to your favorite fall craft pin board or share it on Facebook.
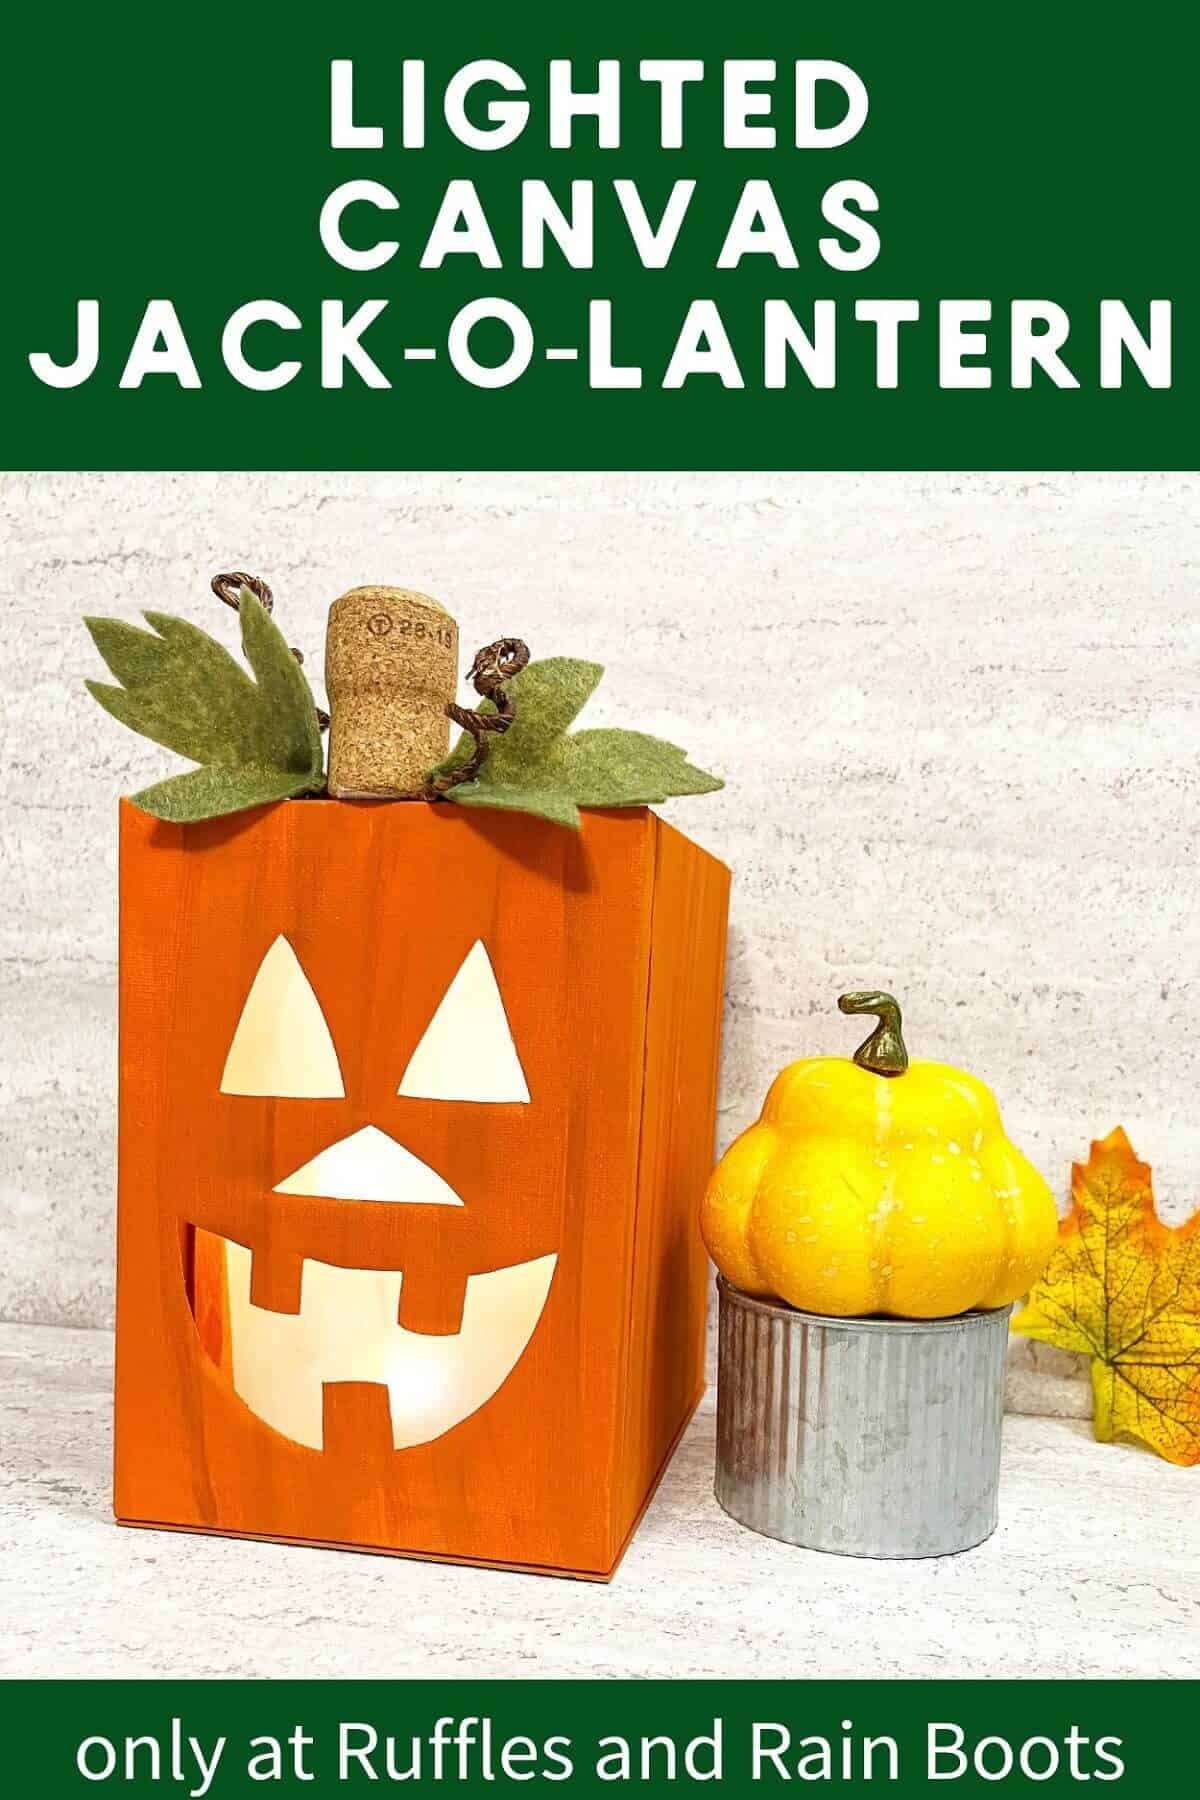
Lighted Canvas Jack-O-Lantern
This lighted canvas jack-o-lantern is quick and easy to make. Complete it in about an hour with simple supplies from the Dollar Store or your craft bin at home. This Halloween craft project repurposes simple Dollar Store art canvases to create a jack-o-lantern-inspired lantern. It is perfect for all those spooky Halloween nights. Friends and family won’t believe you made this instead of buying it from a local home décor store.
Materials
- 4 Art Canvases
- 1 Wooden Craft Stick
- Glue Gun and Glue Sticks
- White Twinkle Lights
- Batteries
- Bright Orange, Medium Orange, Dark Orange Acrylic Craft Paint
- Olive Green Scrap of Felt
- Recycled Champagne Cork
- Scrap of Cardboard
- Vellum Paper
- Wired Twine
- Jack-O-Lantern and Leaf Patterns
Tools
- Craft Knife
- Self-Healing Mat
- Scissors
- Wire Cutters
- Pencil
Instructions
- Paint the art canvases with medium orange craft paint. While they are still wet, add strokes of dark orange and light orange craft paint. Allow them to dry completely.
- Download, print, and cut out the jack-o-lantern face pattern. Flip over one canvas and trace the jack-o-lantern face pieces with a pencil.
- Place the traced canvas on a self-healing mat and carefully cut out the jack-o-lantern face pieces with a craft knife.
- Paint the backside, sides, and edges of the four canvases with medium orange acrylic craft paint.
- Cut a wooden craft stick into three pieces with scissors. Attach to the back of the
jack-o-lantern teeth with a glue gun. - Using a glue gun, attach the canvases together in a rectangle. Gluing a canvas to the right and left side.
- Attach the back canvas to the first three with a glue gun, completing the rectangle.
- Measure and cut a piece of scrap cardboard to fit the bottom of the lantern.
- Paint the cardboard with medium orange craft paint.
- With the orange side up, attach the cardboard to the base of the lantern with the glue gun.
- Download and print the leaf pattern. Place onto a scrap of olive-green craft felt and cut out two. Apply a dot of glue at the base of each leaf and fold it in half.
- Measure two 12” lengths of wired twine and cut using wire cutters. Wrap each around a pencil, and then slide off. Stretch and bend the wire to create pumpkin vines.
- Using the glue gun, attach the champagne cork to the front center of the canvas. Hold in place until the glue dries completely. Glue the wired twine vines and the leaves to either side of the cork stem.
- Measure and cut a piece of 4” by 6” vellum paper and place it inside the lantern behind the jack-o-lantern face. Place batteries in the twinkle lights.
- Place the lights inside and enjoy the warm glow of the jack-o-lantern.
Meet the Creator
Hi there, I’m Sarah Nenni-Daher. I’m a crafty gal and always have at least 14 projects going at once. I am a crafter, designer, DIYer, and pattern maker. I share my creations here and in the Ruffles and Rain Boots® Shop.
Here at Ruffles and Rain Boots®, you’ll find DIY gnomes, crafts, gifts, cupcakes, laser crafts, and so much more. I love sharing video tutorials over on YouTube and chatting with other crafters in my Facebook groups. We’d love to have you!