
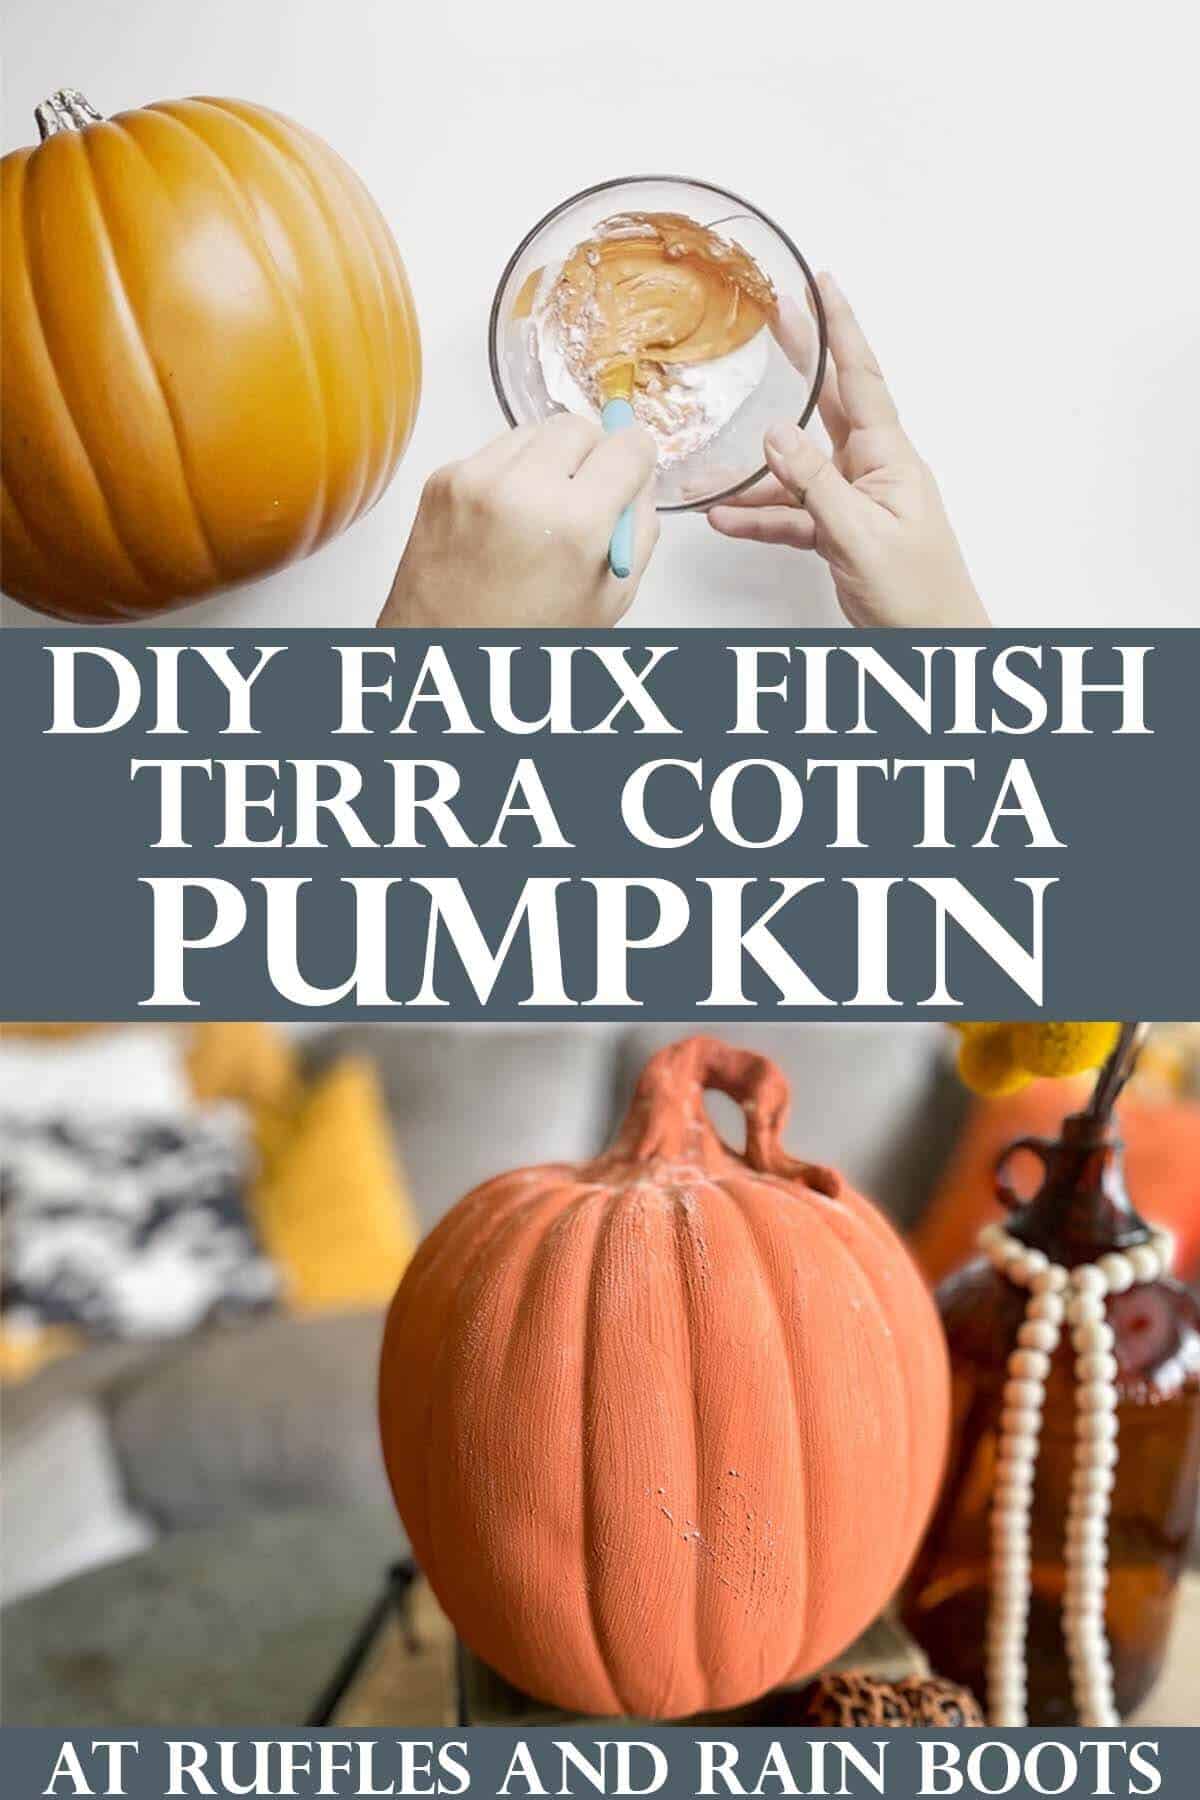
Easy DIY Terra Cotta Pumpkins
Today I’m sharing the a DIY version of the viral faux terra cotta pumpkins sensation by Pottery Barn. These went absolutely bananas on the Internet and across social media and friends, they are SO easy to make.
Unlike other tutorials, I am sharing the most simple way to get the look for less. Head on over to your kitchen pantry and grab the ‘secret’ ingredient you need!
RELATED READING: DIY Wood Bead Pumpkin (Wired Beaded Pumpkin)
DIY Terracotta Pumpkins
Here at Ruffles and Rain Boots, I’m a big fan of DIYing what I can for each season and holiday. When the the Pottery Barn terra cotta pumpkins came out and went absolutely VIRAL, I knew I could make them using a technique I’ve used for years.
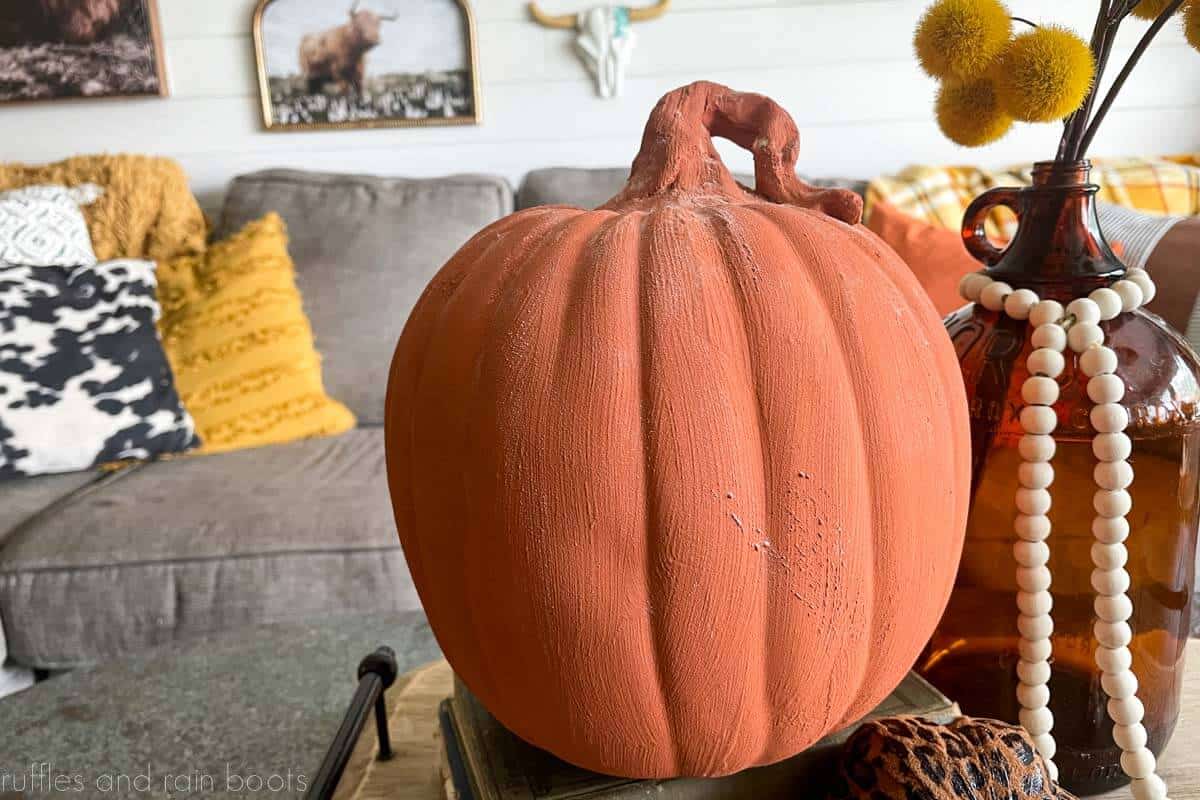
Because this is such an easy fall craft idea, I want to remind you: instead of buying new craft pumpkins, repurpose your old ones. The one I’m using here is a craft pumpkin with a hole cut out in the flat back and looks great tucked against the fireplace or by the door. Let’s get started this fun Fall craft.
No Time to Make This Now? Save or Share for Later
If you need to rummage through your fall supplies, save this DIY terracotta pumpkin to a crafty pin board or share it on Facebook. Either will make it easy to find when you’re ready to begin.
As an Amazon Associate, I could earn from qualifying purchases. There could be affiliate links within this article.
Tips for Making This Faux Pumpkin Craft
- Start with less baking soda than more. You can always add it to the mix if you start painting and feel there isn’t enough dimension.
- I used acrylic paint (basic craft paints) but you can opt to use chalk paint. It will cover the pumpkins well.
- To add further depth and visual interest, first paint the impressions of the pumpkins with the same color of paint mixed with a couple drops of black. Add the top coat with the baking soda and just lightly go over those areas.
- Don’t stop at terra cotta… Years ago, I went through a phase where everything had to be neutral colors and I used this same technique with a beige color. It’s easy to mix up the paint colors for your decor.
- Create Jack-O-Lantern faces on one side and leave the other side plain. That makes this DIY project pumpkin craft idea perfect for Halloween and all of fall.
- To stack pumpkins you create this way, be sure to either cut a hole into the bottom of the top pumpkins (to hold the stem) or remove the stems completely. Secure with E6000 or hot glue after painting each pumpkin individually.
How to Make a Faux Terra Cotta Pumpkin
Below is the written and printable tutorial for this fun fall craft. If you’re a visual learner, watch the quick faux terra cotta pumpkin DIY video tutorial here on YouTube.
One note: I’ve been asked if this works on ceramic pumpkins and the answer is yes. If that’s what you have, it will work for this Pottery Barn dupe.
More Fall Decor and Crafts You Might Like
I’m a HUGE fan of decorating for fall after the heat of summer has dissipated and given us all a break. Here are a few more fall craft ideas you might like:
- Elegant Fall Wreath – This easy DIY wreath for fall looks amazing and so elegant. You could even paint the mini pumpkins to match these terra cotta ones.
- Farmhouse Embroidery Hoop Pumpkins – Left natural or painted to match your decor, these are pretty fun to whip up in an afternoon.
- Wooden Bead Pumpkins – These little guys are a lot of fun to make and use up the wood beads from those muti-packs.
Please Save or Share These DIY Pumpkins
Your shares are how this site grows and I am sincerely grateful. Please save this to a fall crafts pin board or share it with a crafty group on Facebook.
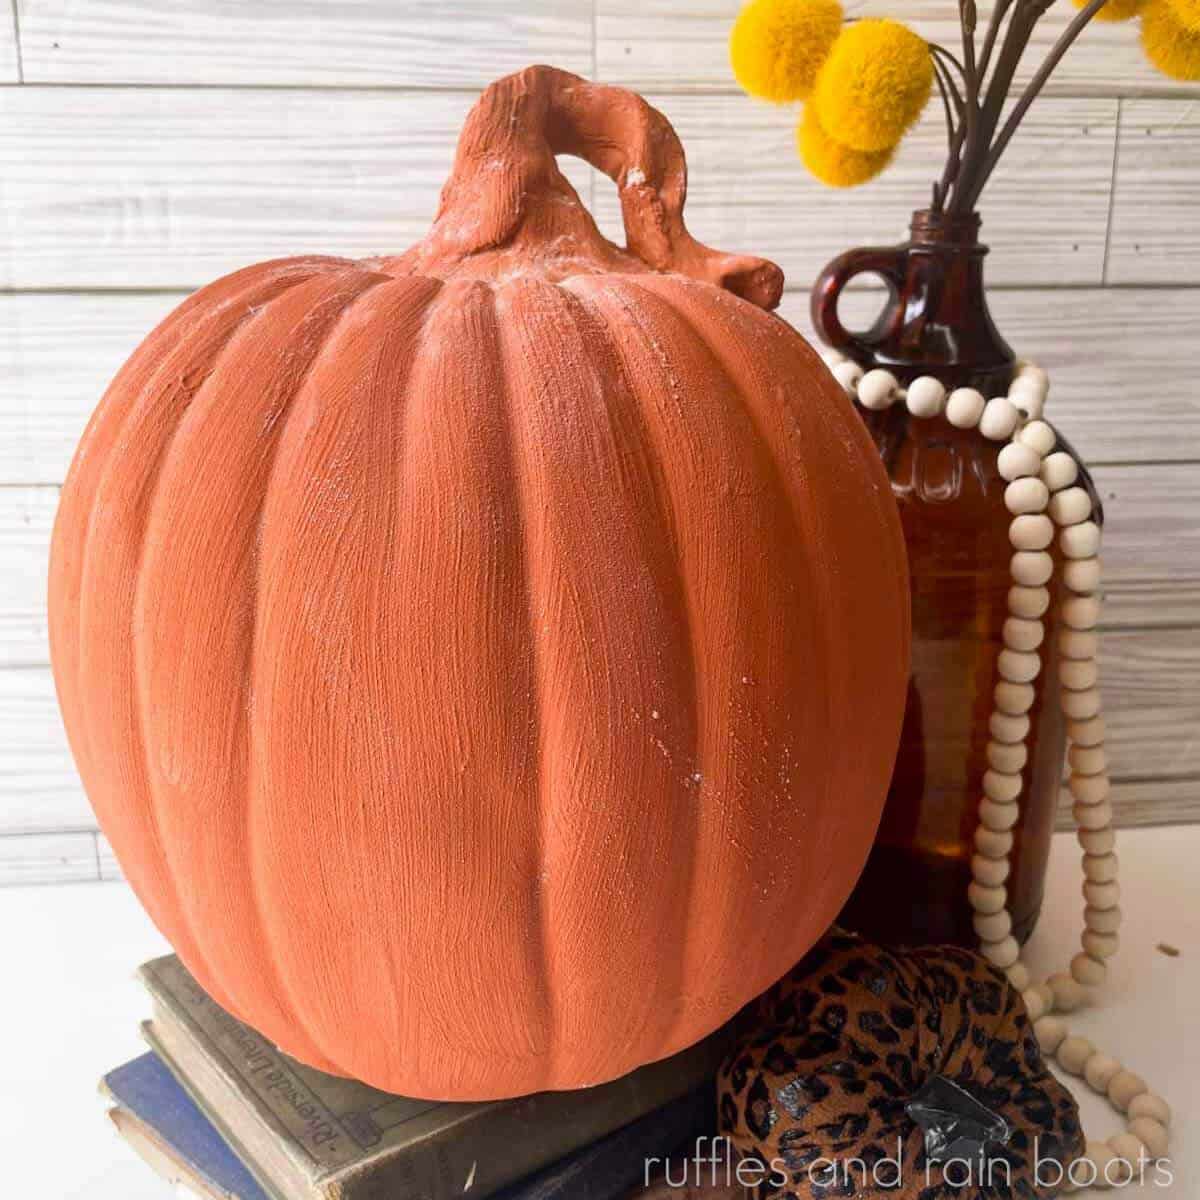
DIY Elegant Terra Cotta Pumpkin

The hottest trends of the season just became an easy DIY! The terracotta pumpkin has taken the world by storm but the prices are SO scary. This easy fall DIY will show you how to easily and quickly create the look of the Pottery Barn terra cotta pumpkin for less.
Materials
- Faux Pumpkin
- Acrylic Paint
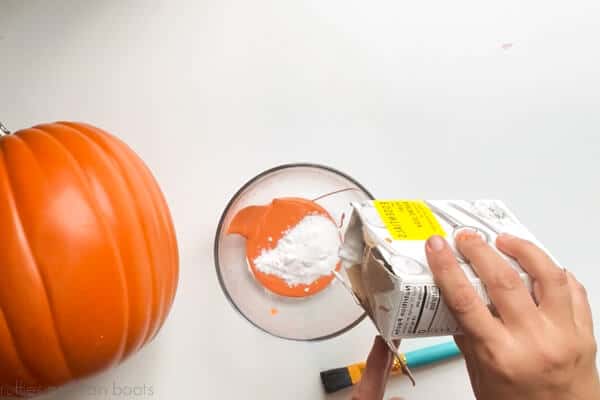
- Baking Soda / Sodium Bicarbonate
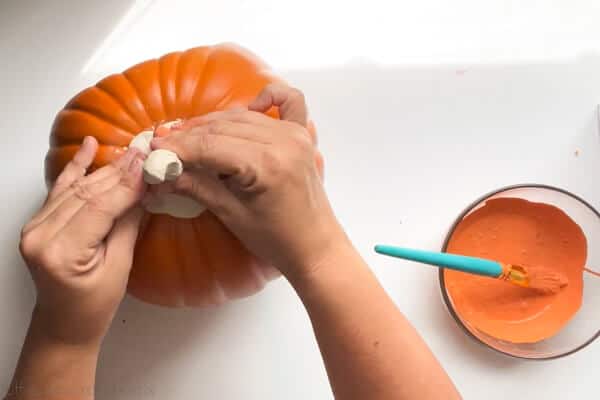
- Air Dry Clay (Model Magic), Optional
Tools
- Paintbrush
- Bowl
- Sandpaper or Sanding Sponge
Instructions
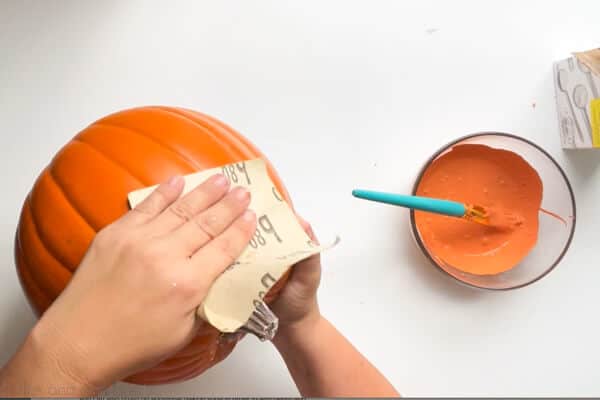
- Use the sanding sponge on the clean faux pumpkin to rough up the exterior. Wipe off to remove waste.

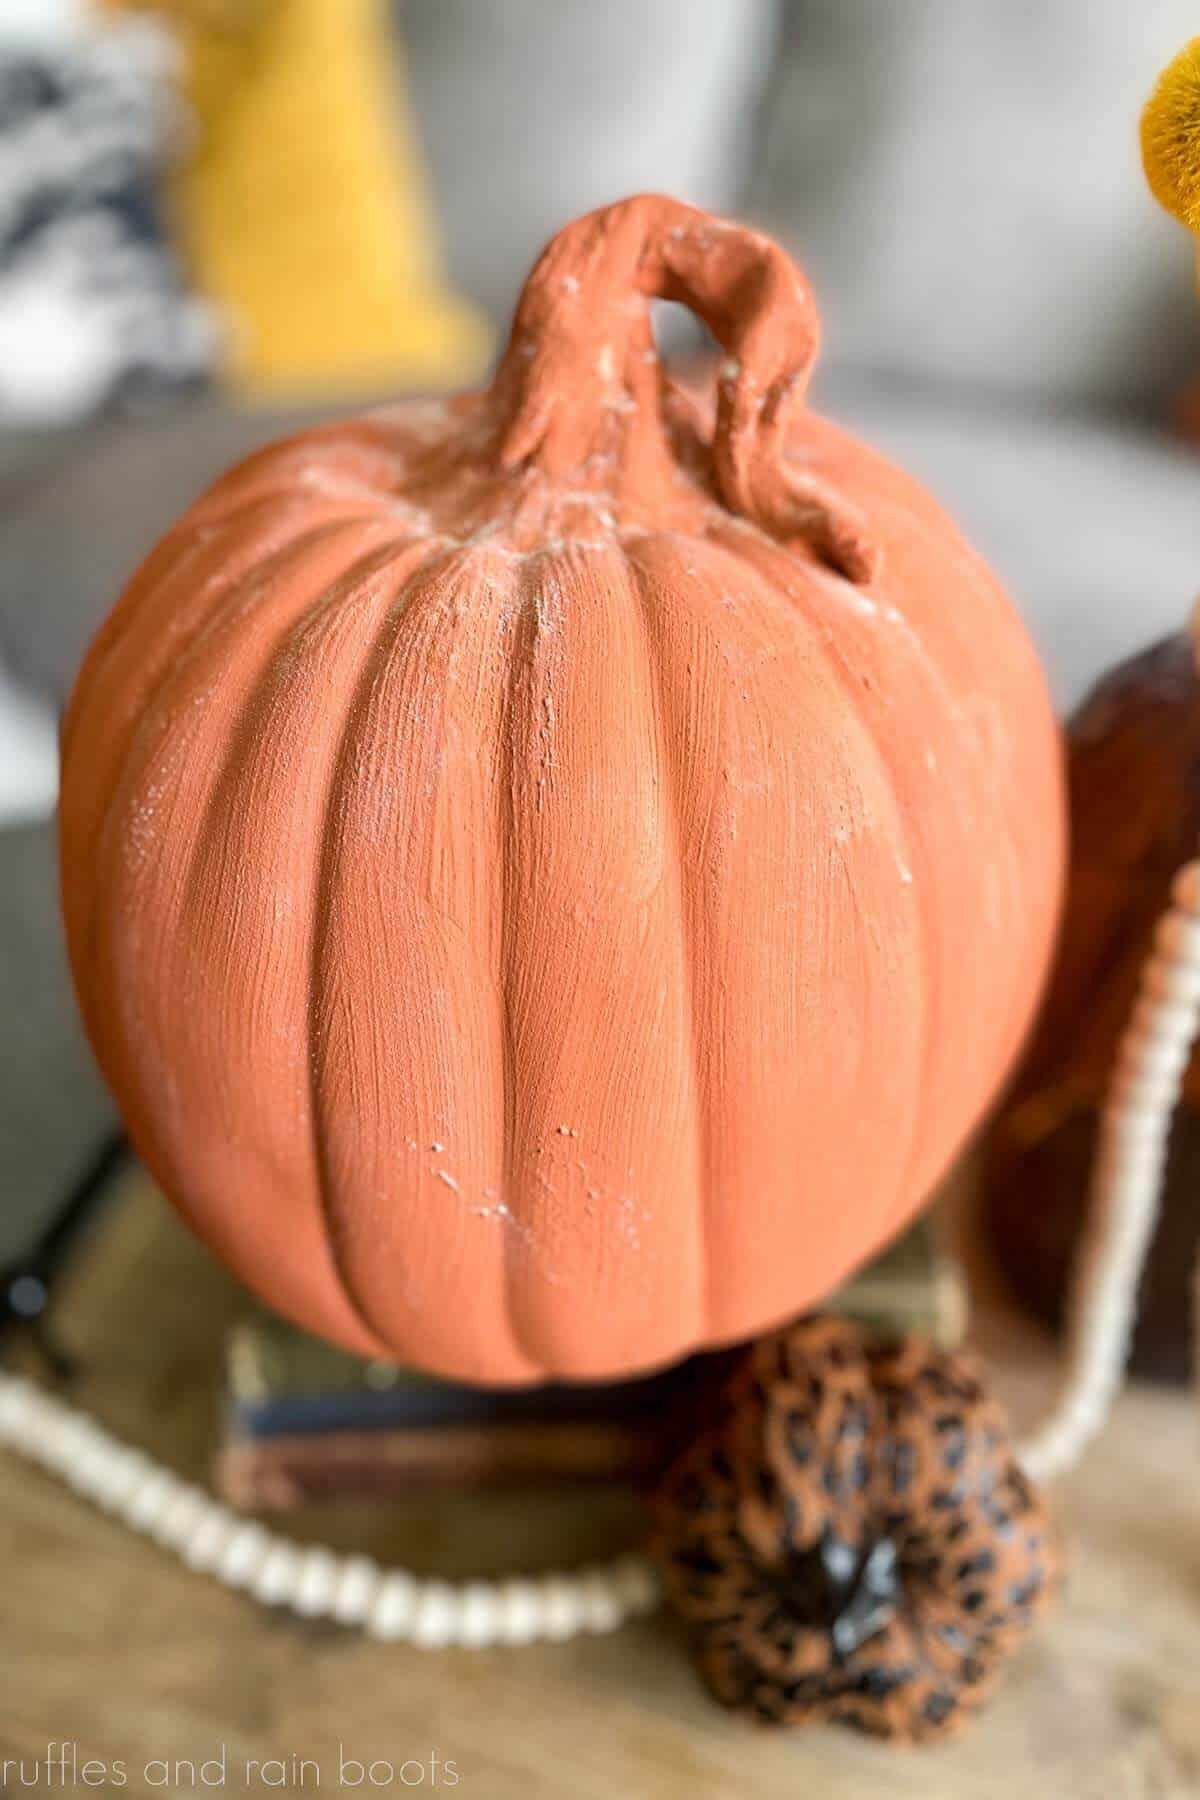
- Use the air dry clay to form a stem with a twisting vine look and let dry per the package instructions. If you do not want to wait on the stem to dry before painting, mix acrylic paint into the Model Magic® before forming and let dry.
- Add the acrylic paint to the bowl and slowly add baking soda, stirring with the paintbrush. You can add more to increase the textured look of the pumpkin, just be sure to fully incorporate each addition.
- Paint the baking soda mixture onto the pumpkin (and stem, if desired), building it up where you want the most texture. Before the paint dries, you can also brush on additional baking soda in order to add depth and dimension. Seal and display.

Notes
If you are placing these outside, protect and seal the painted pumpkin with a spray-on polyurethane. Additionally, use an air dry clay, let dry completely, paint, and seal to prevent damage.
Once dry, use black paint and a brush to paint on Jack-O-Lantern faces or leave as-is for a more elegant look to last the entire fall season.
Meet the Creator
Hi there, I’m Sarah Nenni-Daher. I’m a crafty gal and always have at least 14 projects going at once. I am a crafter, designer, DIYer, and pattern maker. I share my creations here and in the Ruffles and Rain Boots® Shop.
Here at Ruffles and Rain Boots®, you’ll find DIY gnomes, crafts, gifts, cupcakes, laser crafts, and so much more. I love sharing video tutorials over on YouTube and chatting with other crafters in my Facebook groups. We’d love to have you!