
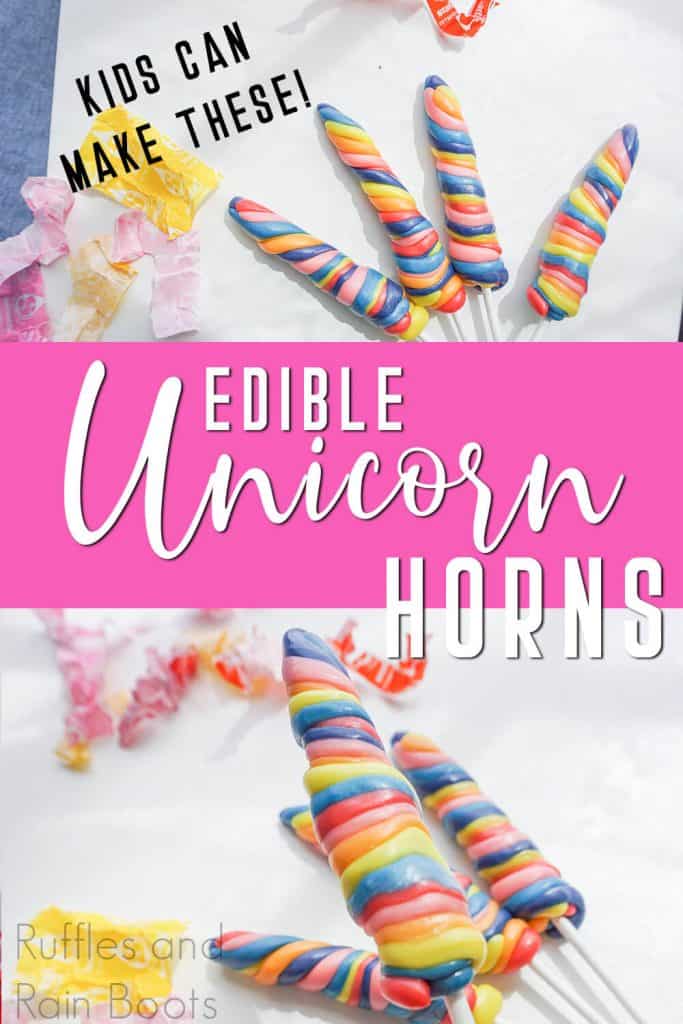
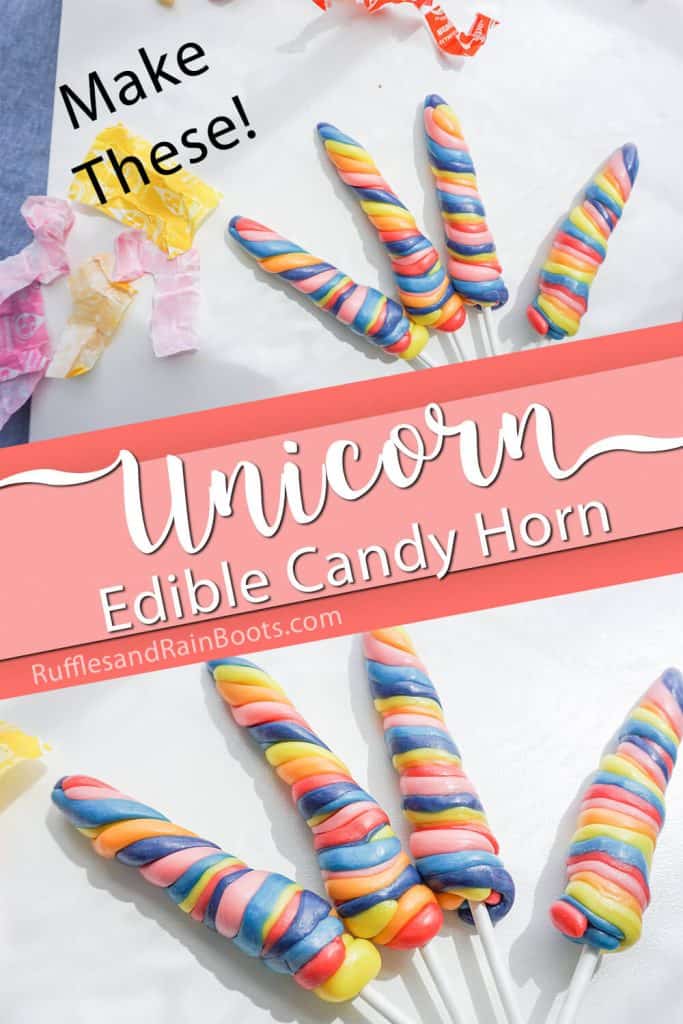
Make this Easy Candy Unicorn Horn with the Kids!
I was trying to think of a fun way to make an afternoon treat and this easy candy unicorn horn just popped in my head! So simple, these edible unicorn horns just rock!

Candy unicorn horn
Here at Ruffles and Rain Boots, we struggle with making after school snacks that aren’t boring. I mean, the kid has actually gotten to where she rolls her eyes when I hand her a cheese stick. So, I was trying to come up with something special–and really unique, when these cool edible unicorn horns popped in my head.
RELATED READING: DIY UNICORN FOOD, CRAFTS AND PRINTABLES!
I decided that, even though it’s a candy unicorn horn and in no way healthy, I had to try it, so the kid and I headed to the kitchen and got to making! So easy, we were done in about 5 minutes. And what fun!
If you’re ready to make a Starburst unicorn horn, let’s get started.
No Time to Make This Now? Pin it for Later
You’re busy, I get it. Pin this to your favorite unicorn birthday party ideas board on Pinterest and it’ll be here for when you’re ready.
Tips to Make A Unicorn Horn Made of Candy
- Do not over-microwave your Starburst candies. They’ll be melty and gooey and gross. Just for 5 seconds. That’s all it takes.
- I decided I didn’t want my hands to turn blue or purple, so when I colored the candies I wanted those colors, I wore some gloves. Not that food coloring won’t wash off, but, it might take a while.
- When you’re inserting the cake pop sticks into the twisted candies, be sure to push gently. You don’t want to undo the work you just did.
- If at any point, the candy unicorn horns get too stiff to manipulate, just put them back in the microwave for 5 more seconds.

How Do I Make this edible unicorn horn?
I’m so glad you asked. Below is our written tutorial.
Candy Unicorn Horn

I was trying to think of a fun way to make an afternoon treat and this easy candy unicorn horn just popped in my head! So simple, these edible unicorn horns just rock!
Ingredients
- 12 Pink Starburst Candies
- 4 Yellow Starburst Candies
- 4 Red Starburst Candies
- 4 Orange Starburst Candies
- 5 drops blue food coloring
- 5 drops purple food coloring
Instructions
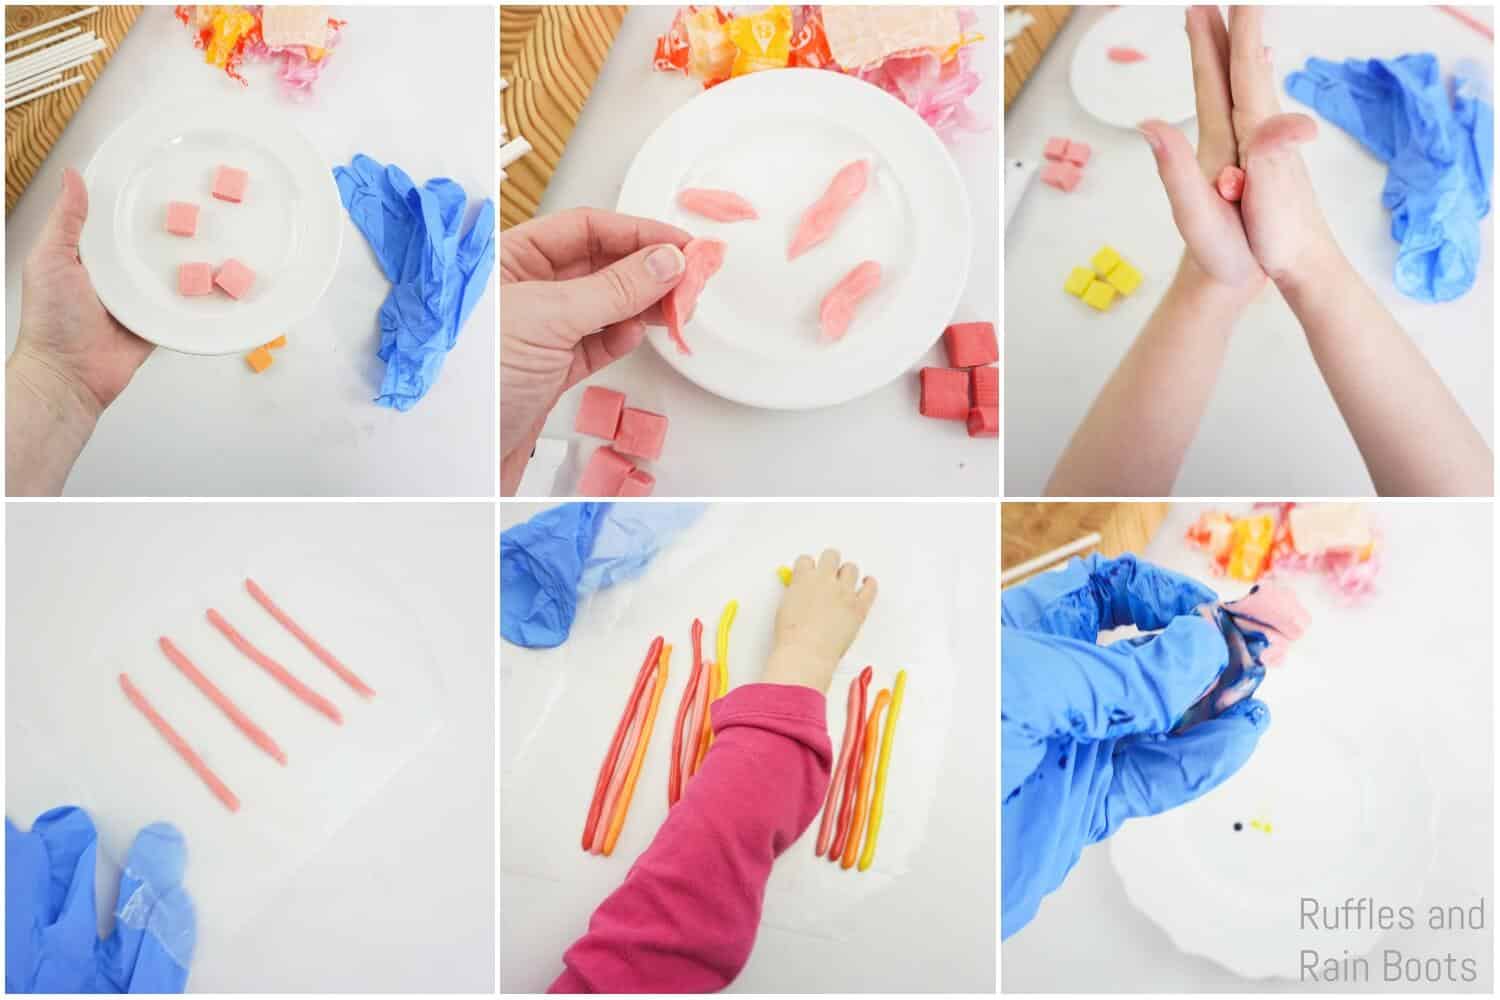
- Microwave 4 pink Starburst Candies on a microwave safe plate or paper towel for 5 seconds.
- Be careful, they may be hot in some places, but, with your hands, mold them into four long, skinny cylinders (make snakes) and lay them flat on a piece of wax paper or parchment paper (this is important so that you don’t have them sticking to your tabletop.
- Repeat this process with the yellow, red and orange Starburst Candies, laying one of each color in a group.
- Microwave 4 pink of the remaining Starburst Candies on a microwave safe plate or paper towel for 5 seconds.
- Be careful, they may be hot in some places, but, with your hands, mold them into a cup.
- Place blue food coloring into the cup you have made with the pink Starburst Candies.
- Knead with your fingers until the pink Starburst Candies are consistently blue throughout.
- Break-up the now blue Starburst Candies into 4 equally-sized pieces and mold them into four long, skinny cylinders and add them to your sets of the other colors.
- Microwave the last 4 pink of the Starburst Candies on a microwave safe plate or paper towel for 5 seconds.
- Be careful, they may be hot in some places, but, with your hands, mold them into a cup.
- Place purple food coloring into the cup you have made with the pink Starburst Candies.
- Knead with your fingers until the pink Starburst Candies are consistently purple throughout.

- Break-up the now purple Starburst Candies into 4 equally-sized pieces and mold them into four long, skinny cylinders and add them to your sets of the other colors.
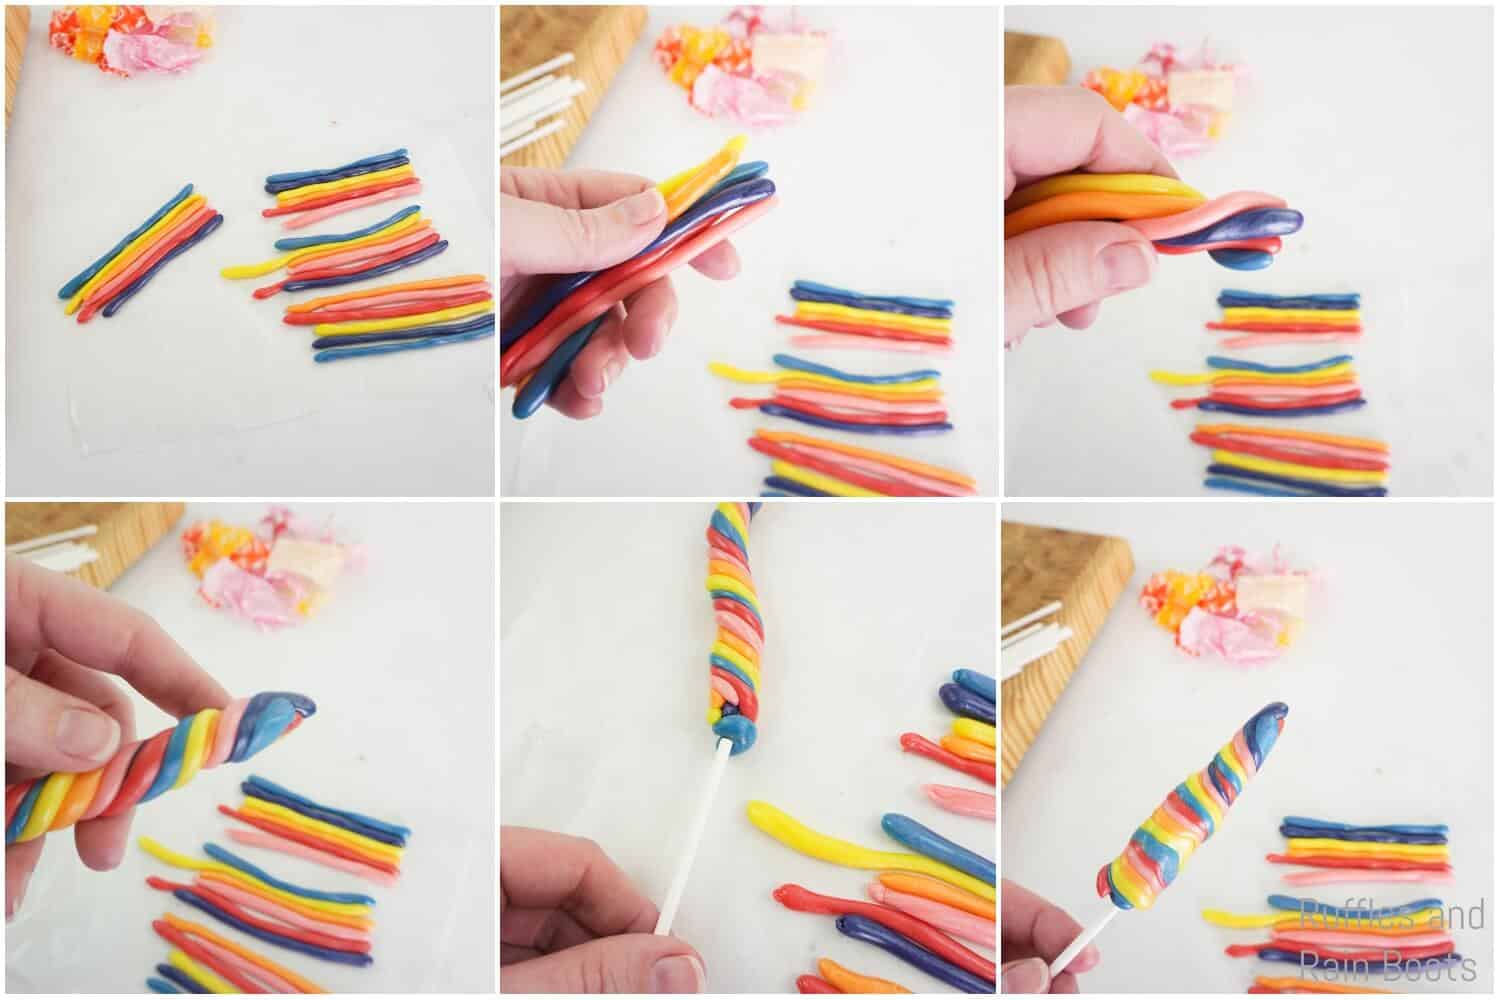
- Make sure all of your cylinders in each set are equally long and thick, approximately, and line them up on one end.
- Pick up one whole set of cylinders and, starting at the end where they’re all even, twist them together like a rope, very gently. Keep the tip you are starting at tighter than the other end by loosening your work as you go. Work your way down to the bottom, creating a horn.
- Using a cake pop stick, gently insert it into the thicker end about 1-inch. Don’t try to go too far or it will destroy your twisting.
- Allow to cool in the refrigerator for 10 minutes.
- Serve!
Notes
You'll also want:
- Wax paper or parchment paper
- 4 cake pop sticks
For more fun unicorn food ideas, visit Ruffles and Rain Boots!
Creativity, Delivered
Would you like inspiration delivered right to you each week? Sign up for the once-weekly Ruffles and Rain Boots newsletter and you’ll get that and more! Get access to the exclusive libraries full of free SVGs, hand lettering practice, and so much more.
More Unicorn Food You Might Like
- Unicorn Rice Krispies – Such a cute twist on the regular rice krispies treats you can totally make at home!
- Unicorn Cupcakes – You’re seriously going to be wow’d by this epic unicorn cupcake recipe.
- Unicorn Meringues – Light, fluffy and oh so easy to make, these meringue cookies are so fun, you’ll want to make them again and again!
Please Save This to Pinterest
Your shares are how this site grows and I am sincerely grateful. Know a friend who’d like this? Please share it on Facebook or save it to your favorite unicorn food ideas board on Pinterest.

I made a huge one for cake topper