
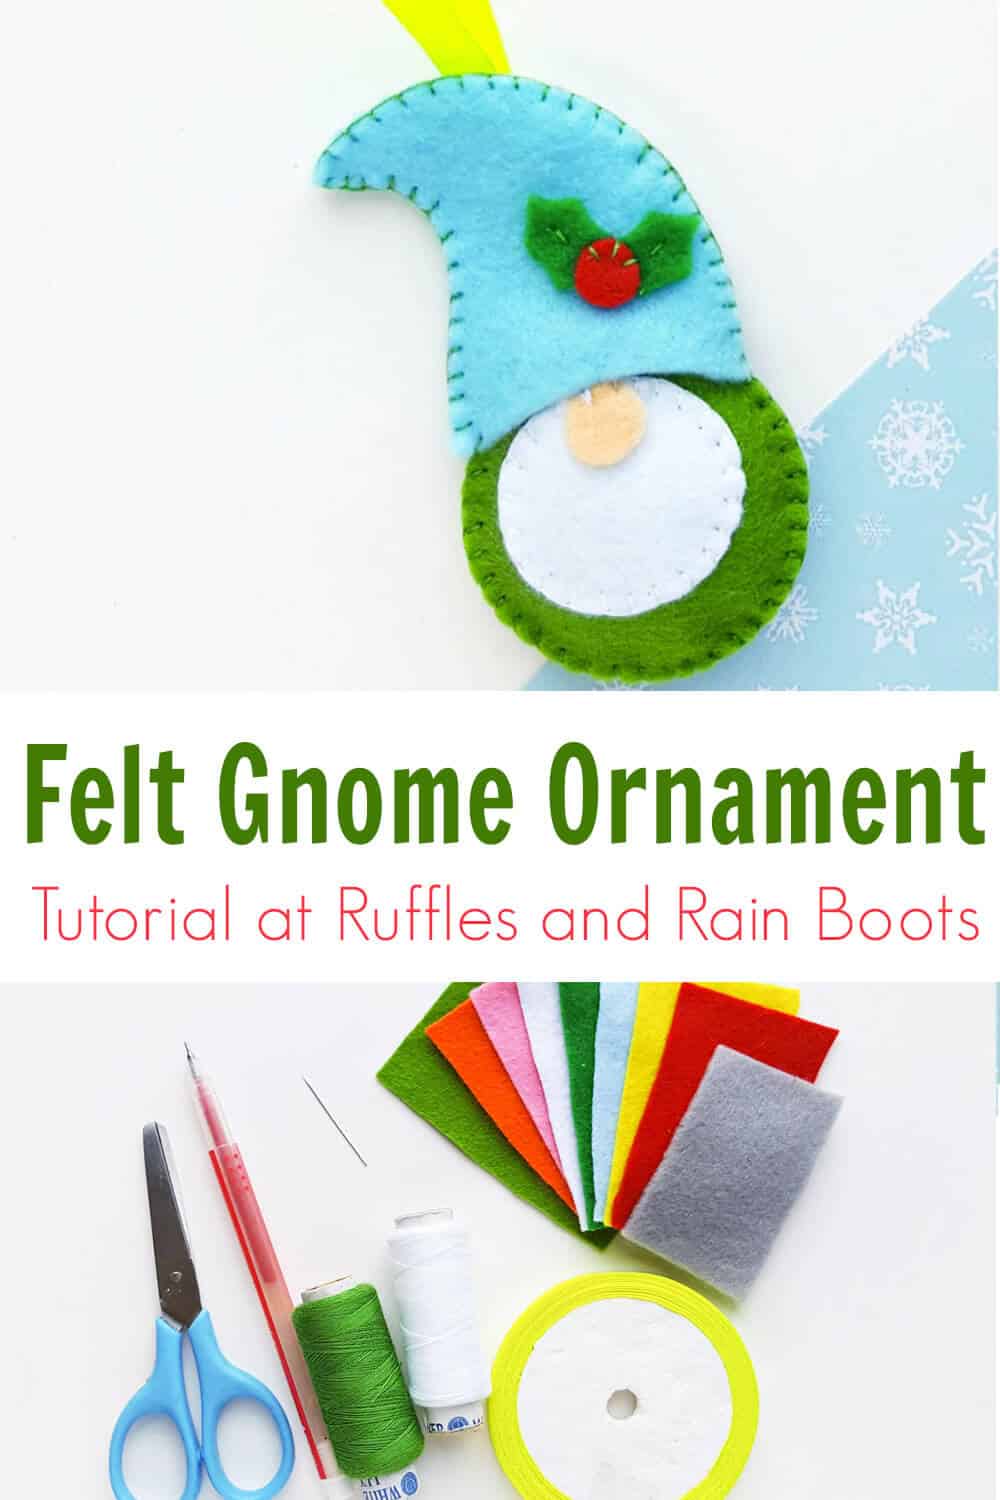
DIY Felt Gnome Ornament with Free Pattern
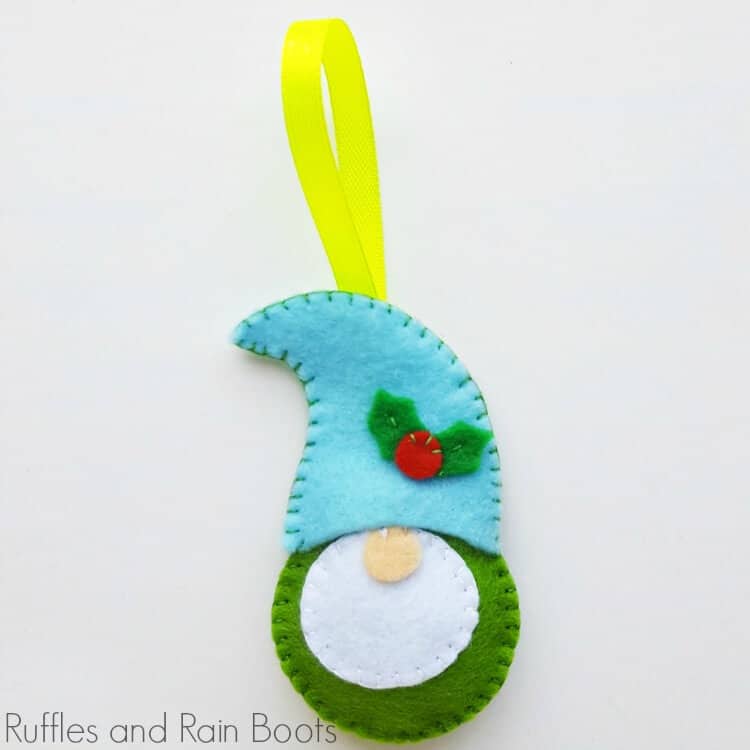
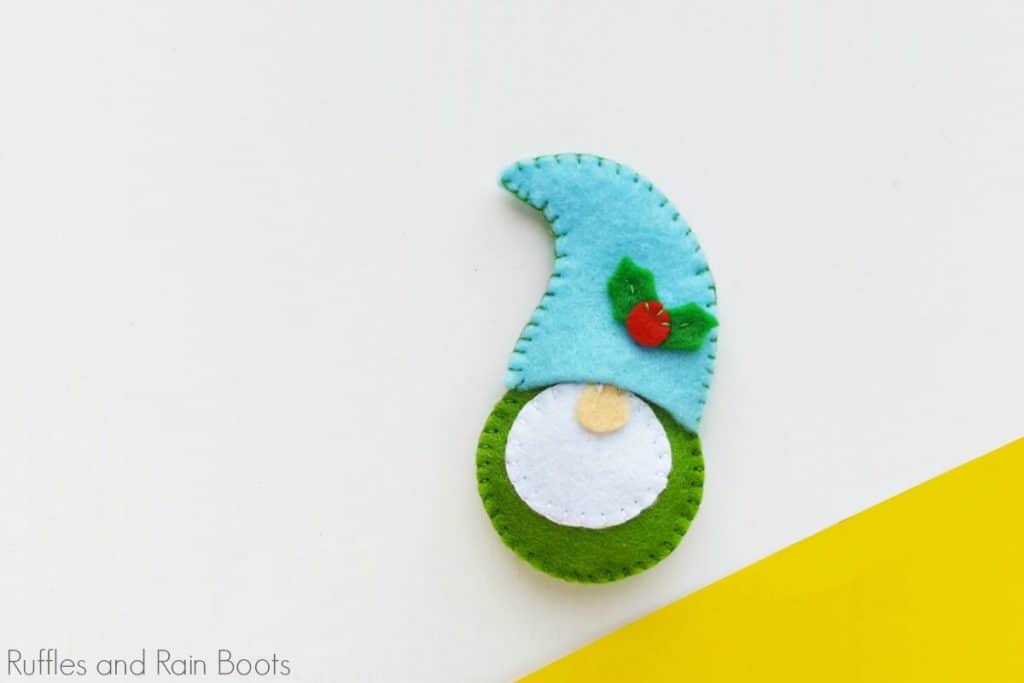
Make this adorable gnome felt ornament with the free pattern and this easy tutorial. You can hand sew it or use glue to assemble and can choose to stuff it or leave it flat. This gnome holiday craft idea is quick to come together.
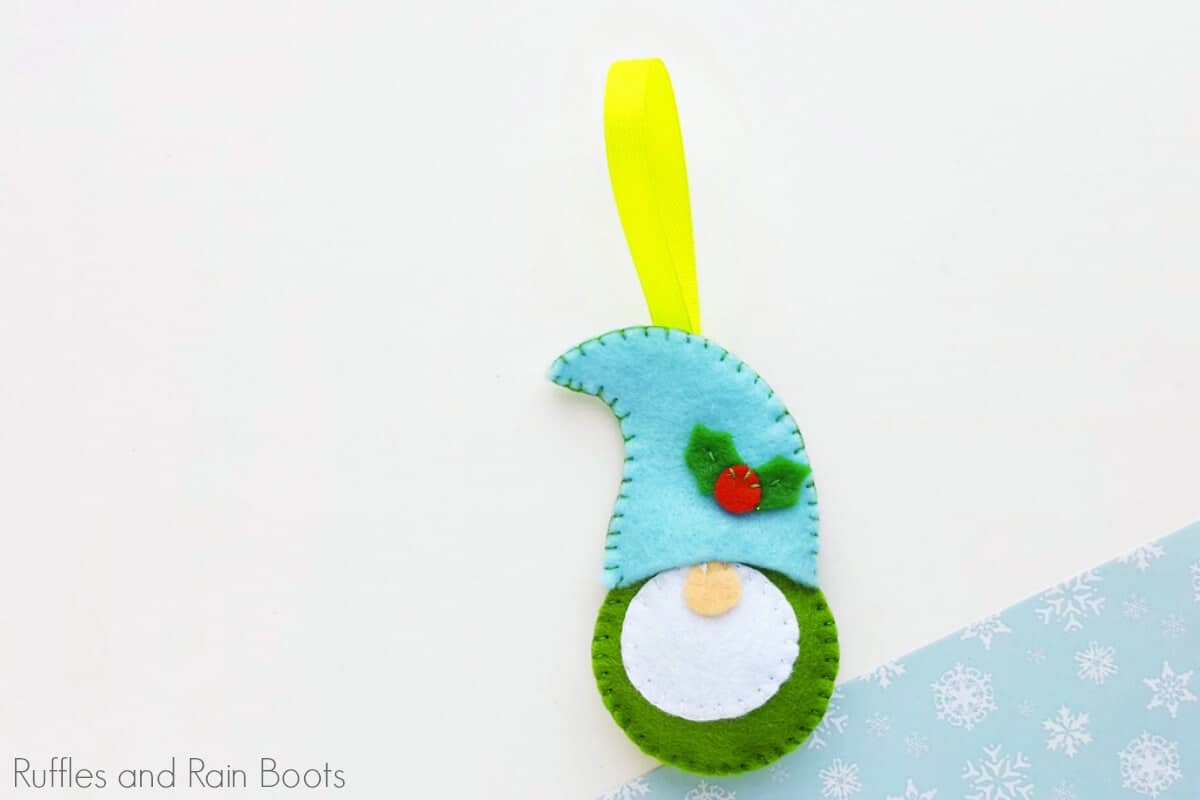
Gnome Felt Ornament
Here at Ruffles and Rain Boots, we take making DIY gnomes to the next level. With some of the most popular gnome crafts on the Internet, we’re a fan of the whimsical little guys and gals.
This gnome ornament from felt is great for all ages because it can be made with one layer (very young children), hand sewn (older kids, teens, and adults), or glued together (all).
If you’re looking for something a bit more grown up, these wood slice gnome ornaments might be more your style.
No Time to Make This Now? Save it for Later
If you can’t get started on this right now but want to save it, share it to social media or save it to a holiday craft pin board. Either way, it will be easy to find when you’re ready to begin.
Tips to Make Gnome Ornament Pattern
- Start by getting your free printable gnome ornament pattern here. Print it off and cut out the pieces.
- Use any colors, accents, and even charms to customize them. We’ve made these for Valentine’s Day, the 4th of July, and even Halloween.
- Sharp scissors cut craft felt best. To clean them, you can use balled up aluminum foil.
How to Make this Gnome Felt Ornament
Below are the materials needed and step by step instructions. Keep this page open or print off the instructional sheet below.
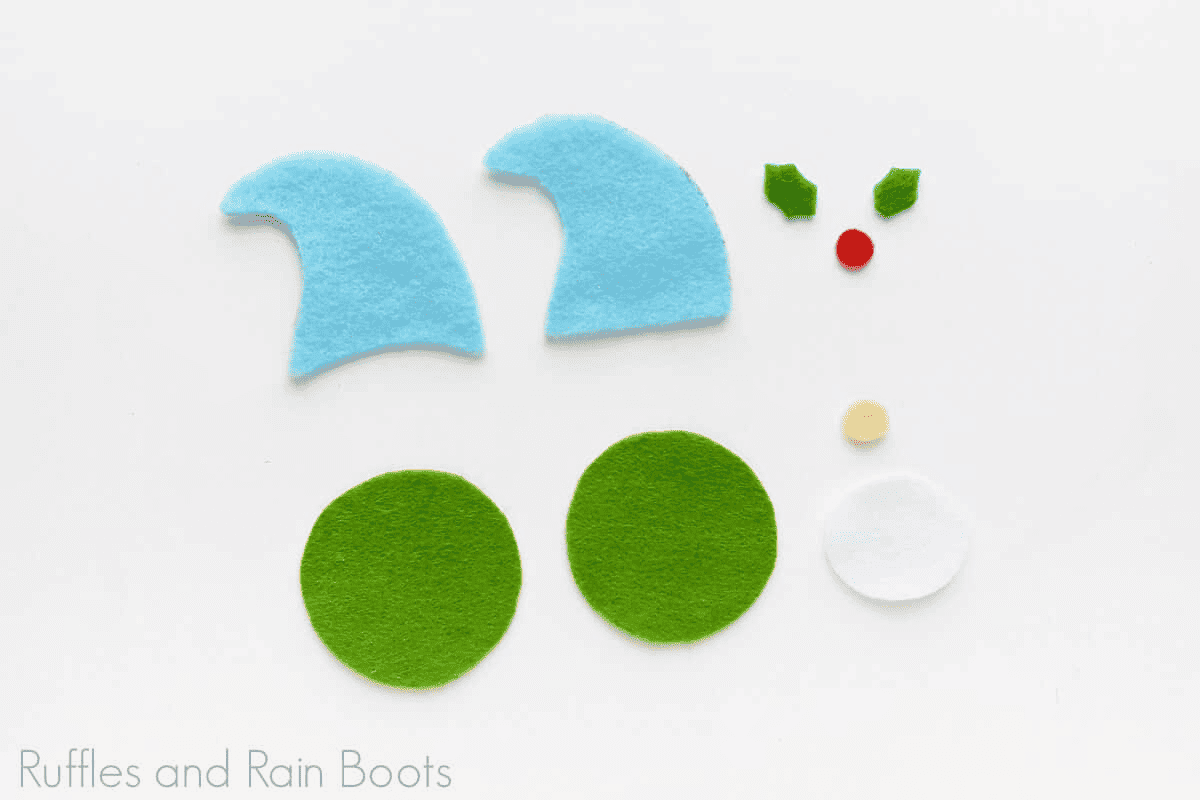
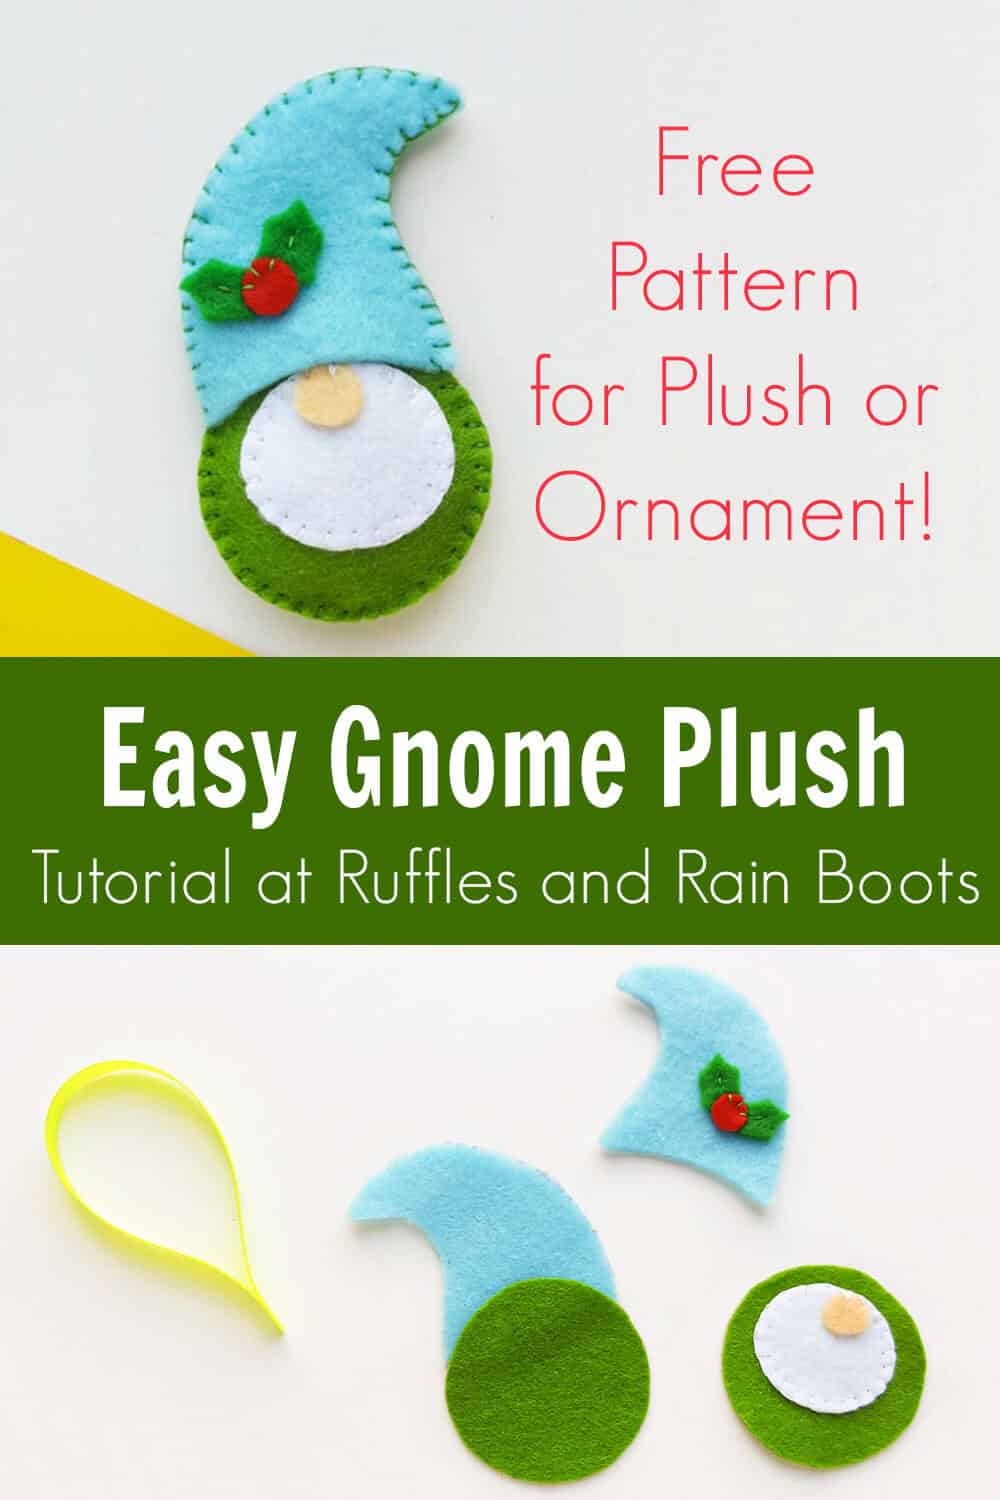
First, select felt fabrics for the gnome plush. Print the template pattern, cut them out, and then trace on the selected felt fabrics. Cut each piece out using scissors. The template includes the following but you can pick and choose what you would like.
- 2 big round shapes – the body (clothes)
- 1 small round shape – berry (for hat decoration)
- 1 medium oval shape – the beard
- 1 small oval shape – the nose
- 2 leaf patterns
- 2 hat patterns
Take the hat cut out with curvy bottom end and place the leaves and the berry cut out on it. Place the leaves adjacent to each other and then place the berry on the top of the leaves.
Take any one of the big round cutouts (the body/ clothes) and place the beard and the nose cut out on it as shown in the picture of this step.
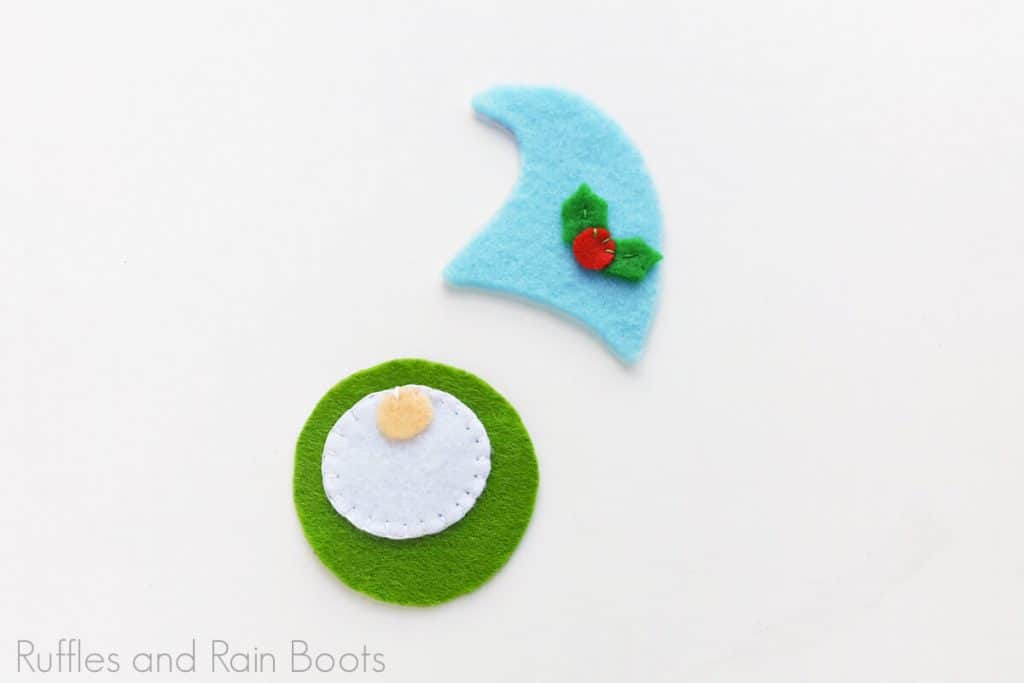
Prepare needle and thread. Stitch the items placed on the hat and the clothes cutouts in the previous step.
Cut a piece of ribbon (any length you prefer for the ornament) and fold it into half; glue the open ends of the folded ribbon to create a loop. Grab the other cutouts.
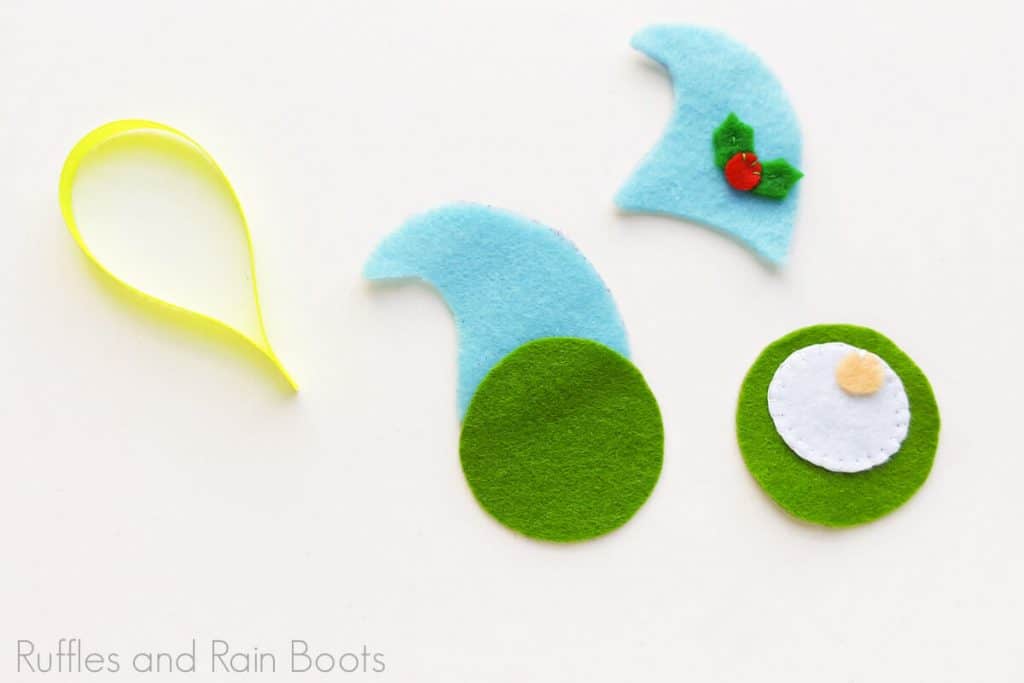
Place the back side of the hat cut out on a flat surface and then place the back side of the clothes cut out with it; by slightly overlapping the bottom end of the hat and the top end of the clothes cut out.
Now place the detailed clothes cut out (stitched beard and nose) on the top of the plain clothe cut out and then place the detailed hat cut out on the top of the plain hat cut out. Make sure that the open sides of all 4 items are matched nicely.
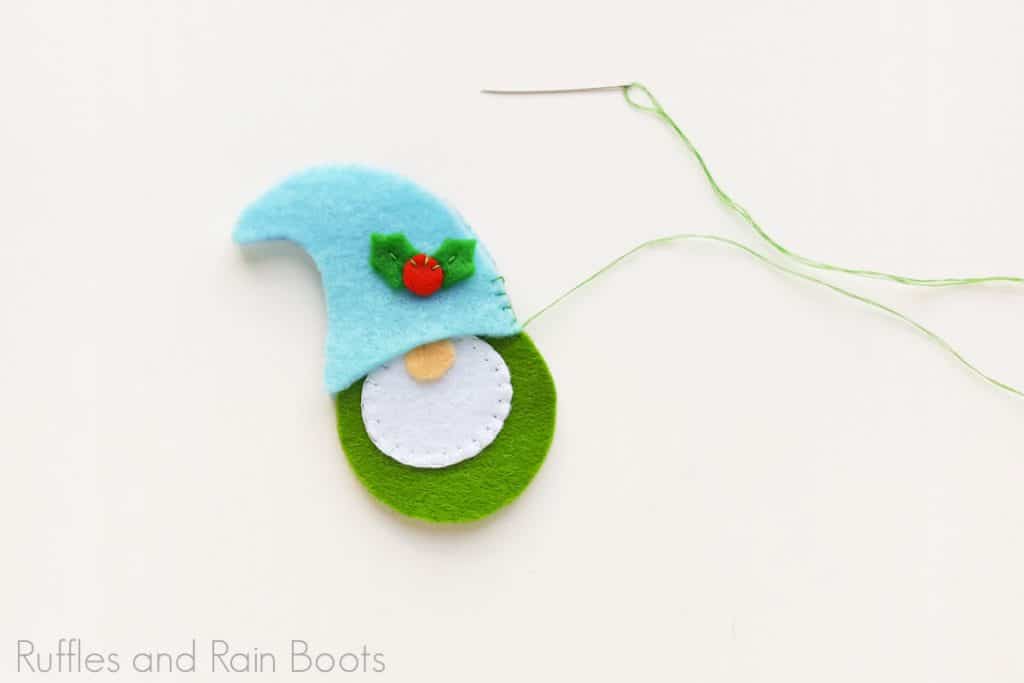
Prepare needle and thread and start to stitch around the sides of the items arranged in previous step.
Keep a small opening before closing the stitch. Cut leftover felt into small pieces (or use Poly-Fil) to stuff the Gnome plush.
Insert the scrap felts through the small opening to stuff the Gnome plush.

Once the plush is stuffed, stitch the open end to secure the stuffing. Tie a knot or two and cut off extra thread. You’re all done!
More Gnome Ornament Tutorial Ideas You Might Like
- Ultimate Gnome Tutorial – It’s every gnome tutorial you might ever need (and maybe a few more).
- DIY Scandinavian Christmas Gnome – I can’t get over this beautiful, but super simple Scandinavian Christmas gnome. There will be loads of these on the gnome Christmas tree this year.
- Christmas Wood Slice Gnome Ornaments – As one of the fastest and most fun gnome projects, I can’t not share this one–it’s so cute! And, bonus, it’s literally the fastest gnome ever.
Please Share or Save This Fun Felt Gnome
Your shares are how this site grows and I am sincerely grateful. Please share it on Facebook or save it to your favorite ornament tutorial ideas pin board.
Gnome Felt Ornament

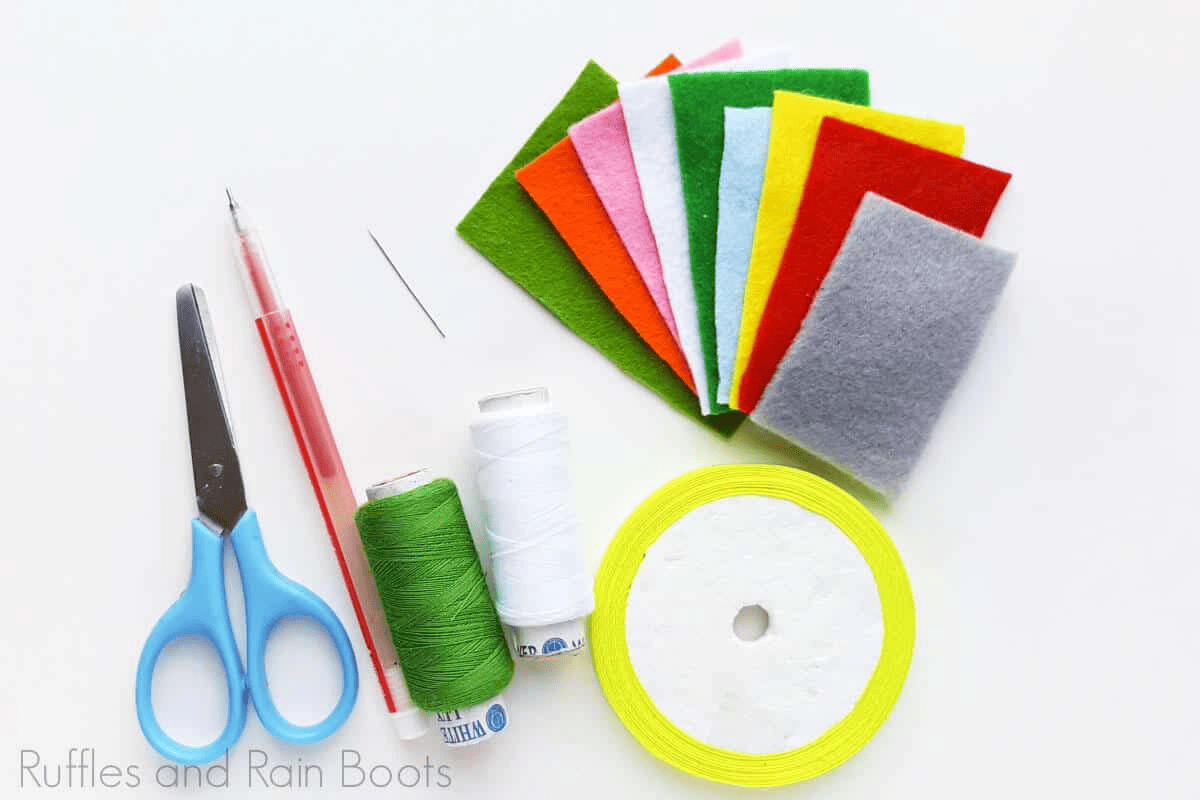
Materials
- Felt fabric
- Thread
- Ribbon
- Free Gnome Ornament Pattern
Tools
- Scissors
- Marker Pen
- Needle
Instructions
- Select felt fabrics for the gnome plush. Print, cut out, and trace the template patterns on the selected felt fabric. Cut them out using scissors.
- Take the hat cut out with curvy bottom end and place the leaves and the berry cut out on it. Place the leaves adjacent to each other and then place the cherry on the top of the leaves. Take any one of the big round cut outs (the body/ clothes) and place the beard and the nose cut out on it as shown in the picture of this step.
- Prepare needle and thread. Stitch the items placed on the hat and the clothe cut outs in the previous step using a blanket stitch.
- Cut a piece of ribbon (any length you prefer for the ornament) and fold it into half; glue the open ends of the folded ribbon to create a loop. Grab the other cut outs.
- Place the back side of the hat cut out on a flat surface and then place the back side of the clothes cut out with it, slightly overlapping the bottom end of the hat and the top end of the clothes cut out.
- Now place the detailed clothes cut out (stitched beard and nose) on the top of the plain clothes cut out and then place the detailed hat cut out on the top of the plain hat cut out. Make sure that the open sides of all 4 items are matched nicely.
- Prepare needle and thread and start to stitch around the sides of the items arranged in previous step.
- Keep a small opening before closing the stitch. Cut left over felt into small pieces to stuff the Gnome plush or use Poly-Fil.
- Insert the scrap felts through the small opening to stuff the Gnome plush.
- Once the plush is stuffed, stitch the open end to secure the stuffing. Tie a knot or two and cut off extra thread.
Notes
For more awesome gnome ornament tutorial ideas, visit RufflesanRainBoots.com
Meet the Creator
Hi there, I’m Sarah Nenni-Daher. I’m a crafty gal and always have at least 14 projects going at once. I am a crafter, designer, DIYer, and pattern maker. I share my creations here and in the Ruffles and Rain Boots® Shop.
Here at Ruffles and Rain Boots®, you’ll find DIY gnomes, crafts, gifts, cupcakes, laser crafts, and so much more. I love sharing video tutorials over on YouTube and chatting with other crafters in my Facebook groups. We’d love to have you!