
LOKLiK iEngrave Review
For the past month, I’ve been testing the LOKLiK iEngrave laser to share my thorough review. Could this be the best laser for you? It is definitely the most affordable beginner laser I have in my studio!
RELATED READING: DIY Laser Cut Sun Catcher (the Easy Way for Beginners)
LOKLiK sent me the iEngrave Cover laser to review. There could be affiliate links within this article.
What You'll Find On This Page
Affordable Laser: My LOKLiK iEngrave Laser Review
Here at Ruffles and Rain Boots, I’ve been working with lasers for a few years now. I’ve learned a metric ton of tips, tricks, and have been sharing those to help others decide on what laser to buy.
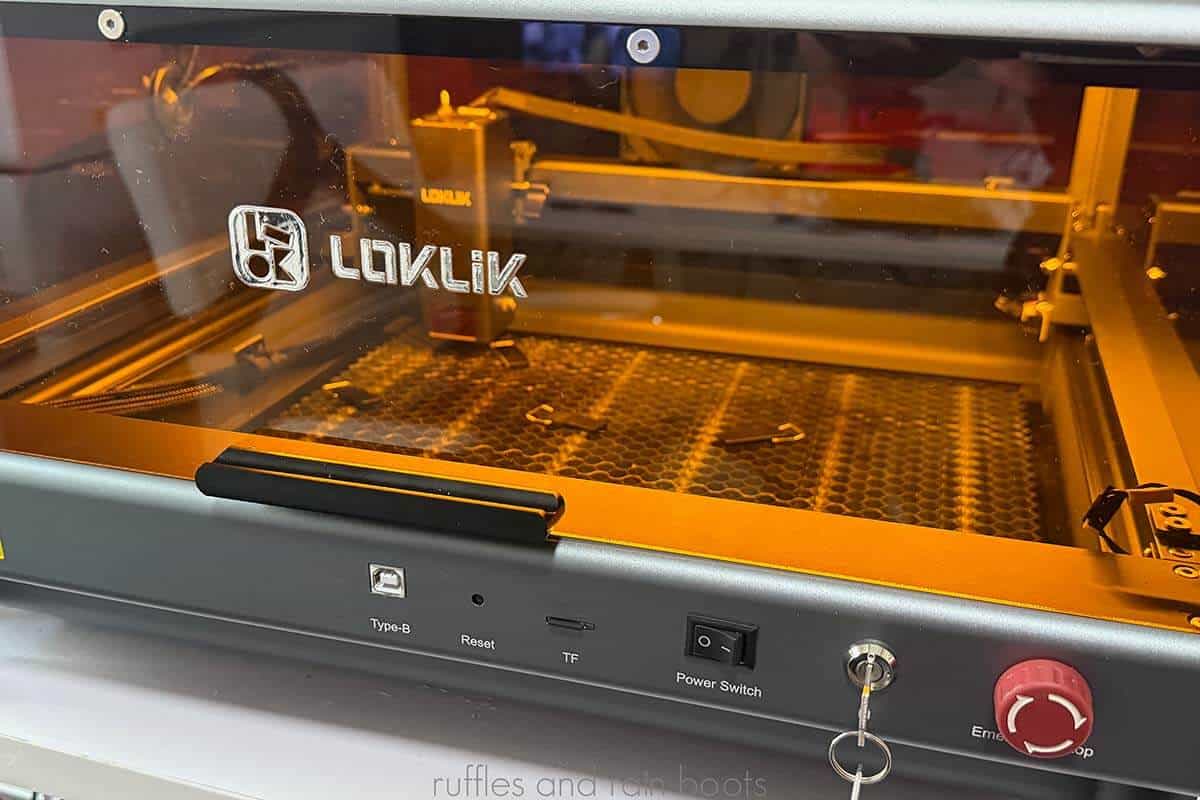
I’ve been working with the Class 1, safety-forward, LOKLiK iEngrave Cover 10 watt diode laser for the past few weeks, putting it through some testing and throwing whatever I can at it. Using both the LOKLiK app and Lightburn, I’ve made many projects using a myriad of materials to show you what it can do.
The very budget-friendly LOKLiK iEngrave is an optimized 10 watt laser, perfect for making crafts, customizing wood pieces, creating heirlooms, and much more. Algorithms are optimized, making the engraving faster than other lasers and it is the quietest laser I’ve ever used.

LOKLiK iEngrave Laser Review Video
If you’re a visual learner or want to see ALL the projects I made with this laser (and there are a lot), watch the LOKLiK iEngrave laser review video.
It’s a good look at the machine, how to use it, it’s use with both the LOKLiK app and Lightburn, a TON of projects, and my colorful commentary. :)
What impressed me about the LOKLiK iEngrave is that all of what you will see in the video review was done ON THE FIRST ATTEMPT. While I am not a beginner to lasers, I cannot tell you how much this wowed me.

Materials You Can Use with the iEngrave
Before we get too far into this, one of the biggest questions I’m asked when discussed lasers is, “Will a diode laser cut acrylic?” The answer is yes, but…
Diodes are limited with regard to the color and thickness of acrylics. While most colors (and clear) can be engraved, some colors will not cut. For example, we will never cut clear acrylic with a diode. If you need to be unlimited with regard to acrylic, please seek out a CO2 laser.

This machine, however, can be used on more than 300 materials. I did not feel limited at all and figured I would throw as much as I could at the unit to test it for you. And now that we have the craft plastics line from Houston Acrylics, this is an absolute GAME CHANGER.
The LOKLiK iEngrave’s bed size (15.7 inches square) allows for a large set of materials. What’s more fun is that you can use a variety of heights because the laser module itself can be raised and lowered, making it easy to engrave tumblers, jewelry boxes, and other items.
The LOKLiK iEngrave can be used with wood (hard woods and plywoods), veneers, bamboo, leather, diode-friendly acrylics, Craft Plastics, felt, aluminum*, stainless steel*, glass*, hat patches, powder coated tumblers and other coated blanks*, fabric, kraft paper, card stock, slate and more.
Note * – engraving only; diode lasers do not cut metal or glass. The unit supports more than 300 materials.

Assembly and Set Up
The 10 watt iEngrave Cover package includes some assembly. If you liked playing with Erector sets or Nuts and Bolts build sets, you’ll have a fun time putting this together following their easy assembly video.
Please note there is no camera with this laser and everything is done through positioning. If you would like a
My unit came with only the iEngrave Cover set up. During my review, I used my own honeycomb but there are bundles with one included.
If you’re interested in the iEngrave laser, I highly recommend adding a honeycomb and an air assist unit or to purchase one of the LOKLiK bundles.

Using the iEngrave with Lightburn or the LOKLiK App
Once your set up is complete, you need to determine how you would like to operate and communicate with the iEngrave laser. You have two options: the LOKLiK mobile App or Lightburn.
Lightburn is a very, very robust program. It takes quite a bit of tinkering (and a bit of web-sleuthing) to figure it out and use it, however, it is the laser industry’s leading, paid software.
Conversely, the LOKLiK mobile App is a very easy to use option. If you purchase your files or design in alternative programs, this program can serve you well.
I prefer to operate the iEngrave with Lightburn vs the LOKLiK App because I have more control. Lightburn is a paid software and does not come with the iEngrave while the LOKLiK mobile app is free to download and use.

How to Measure Materials on the iEngrave
In order to keep the price low and measurements accurate, the iEngrave has a drop down slider on the laser module. This is a manual measurement tool but it does a good job.
Once you position your material, you will:
- move the laser over the material,
- disengage the module lock,
- slide down the measurement lever, and
- touch or hover over the item.
Once you have the measurement, you reengage the laser module lock and raise the measurement slider. You’re ready to close the cover, position the laser module, and enter the settings. I found the manual measurement slider very easy to figure out and use.
Do I Recommend the LOKLik iEngrave Laser?
As I mentioned, this machine tackled nearly everything I threw at it. From slate and fabric, to various woods and thin acrylics, I have a large set of completed projects which were made on the first attempt.
While a beginner to lasers might have a slightly longer learning curve, I am confident that the LOKLiK iEngrave is absolutely what it says it is: a budget-friendly, beginner-friendly, Class 1 laser.
If you want a wallet-friendly laser for your crafting or you’re seeking a product line addition or customization option to an existing business, I do believe this is a quality machine and is more than worth the price.
I do recommend the LOKLiK iEngrave Cover. My recommendation is to buy a bundle (there are multiple options), but please add on a honeycomb and an air assist at the minimum if you plan to cut any items.

What I Would Like to See Improved or Changed
- Laser Dot Location – Because we’re doing manual positioning in the App and have the option to use Current Position in Lightburn, a laser dot while positioning the laser would be helpful to cut down on framing frequency.
- Desktop App Support – This is coming in August 2025 and I’m happy because I don’t like doing much on mobile.
- More Materials in the Box – As this unit as a beginner-friendly laser, I would love to see a few more items included in the box. I received three very small pieces of 3mm basswood, but feel a few pre-made items, a larger piece of wood, a small piece of diode-friendly acrylic, and maybe a slate coaster should be added.
More Laser DIY Projects You Might Be Interested In
- Highland Cow Laser Cut Ornament (Highland Coo) – Get the file, get the tips, and start making these very popular cuties!
- 4th of July Laser Project Ideas – Whether you’re selling or DIYing for yourself, these projects are fun and will help you build your laser crafting skills.
- Christmas Laser Project: Wooden Wine Tags – These are modern designs that won’t have you gifting a boomer gift to a young millennial…
Please Save or Share This Laser Review
Your shares are how this site grows and I am sincerely grateful. Please save this to a laser pin board or share it with a laser group if you found it valuable.

Meet the Creator
Hi there, I’m Sarah Nenni-Daher. I’m a crafty gal and always have at least 14 projects going at once. I am a crafter, designer, DIYer, and pattern maker. I share my creations here and in the Ruffles and Rain Boots® Shop.
Here at Ruffles and Rain Boots®, you’ll find DIY gnomes, crafts, gifts, cupcakes, laser crafts, and so much more. I love sharing video tutorials over on YouTube and chatting with other crafters in my Facebook groups. We’d love to have you!