
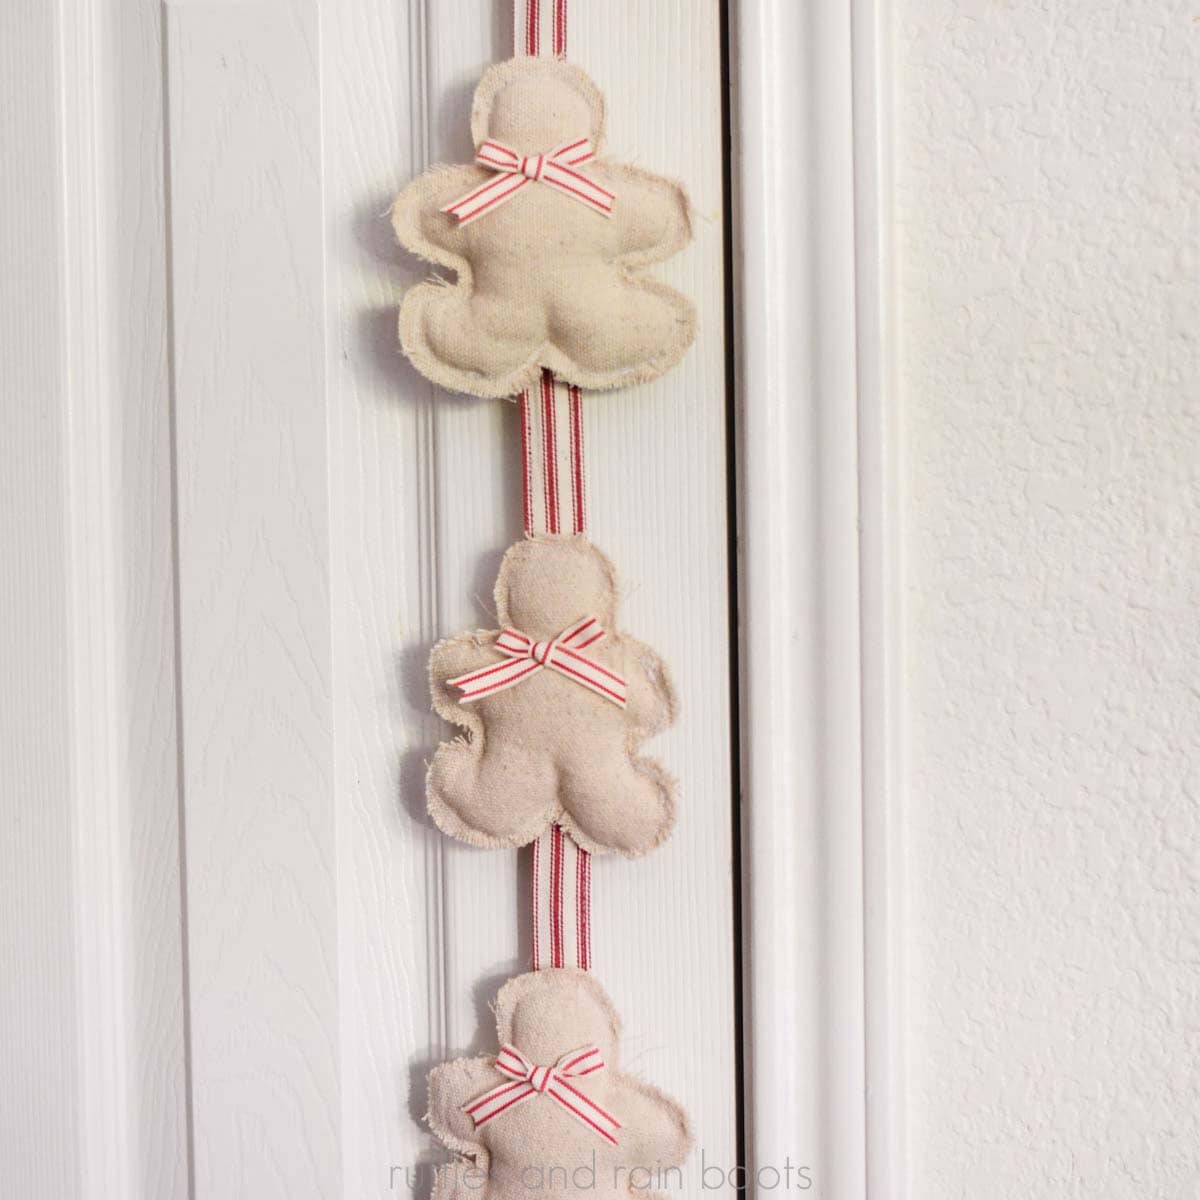
Gingerbread Door Knob Garland
This vertical hanging gingerbread door garland comes with a free pattern for two styles of gingerbread cuties and this free tutorial. Whether you want to sew or hot glue this Christmas craft, you need about 40 minutes to complete.

RELATED READING: You Can Make This Cute Gingerbread Gnome
What You'll Find On This Page
Christmas Gingerbread Garland DIY
Here at Ruffles and Rain Boots, I’m working on my gingerbread kitchen. While I love the traditional brown and white, I want to incorporate coordinating colors because… Brown and white can get a little old quite fast.
Today, I wanted to create a nice homespun feeling vertical hanging garland to put on my pantry door. And this little free gingerbread pattern DIY was born.
Supplies You Will Need for This Christmas Decor Idea
I used drop cloth for this craft (unbleached, straight from the hardware store) but you can use home decor fabric or even thin fabric if it has interfacing. Instead of making your own hanger as I’ve done, you could also just use a ribbon to hang these gingerbread on (and save yourself about 15 minutes).
- drop cloth fabric (or other)
- free gingerbread man pattern
- ribbon for a bow (I used 3/8″ ticking stripe ribbon)
- ticking stripe fabric (or 1″-1.5″ ribbon) for a hanger
- stuffing (this is my favorite stuffing because it’s soft and inexpensive)
- suede cord or other hanger
Gingerbread Door Garland Video Tutorial
If you’re a visual learner, watch the step-by-step gingerbread door knob garland video tutorial. While you’re there, be sure to subscribe – we have a lot of fun on the channel.

RELATED READING: Gingerbread Cookie Mason Jar Recipe
How to Make This Gingerbread Garland
Below are the step by step instructions for this Christmas craft. Leave this page open to follow along or scroll down to print the image-free tutorial.
Print off the free gingerbread pattern. Cut it out and make a note of the space to be left open.
Fold over drop cloth or fabric and trace the gingerbread shape in pencil. Pin. Repeat for the number of gingerbread you want.

If assembling with a glue gun, cut a 1/4 inch seam around the traced shape. You will glue (with a detail tip glue gun) 1/4 inch inside the outside edge to mimic the frayed edge of sewing. Remember to leave the opening to stuff. Skip the next paragraph.
If assembling with a sewing machine, top stitch along the traced gingerbread outline, leaving the bottom center open. Be sure to reverse stitches to lock the start and ending into place.
Generously stuff the gingerbread and top stitch the opening closed (glue gun users will hot glue it closed). Be sure to move around the stuffing to ensure an even fluff.

Cut a piece of 28 inch long by 3.5 inch wide fabric or use a 1-1.5 inch wide ribbon cut to 28 inches long. If using ribbon, fold over the top into a small loop and stitch into place. If using fabric, fold up the bottom and hem, fold down the top and hem, and then fold each edge into the center, overlapping the raw hems. Top stitch both vertical edges to ensure the fabric lays flat.
Trim around the edges of the gingerbread men, leaving at least a 1/4 inch allowed for fraying. Fray the edges with your hands by rubbing them between your fingers.

Cut small bows for the gingerbread men’s bow ties and hot glue them onto the necks of each ginger.
Glue each gingerbread man onto the ribbon. Be generous with the glue and glue from the head to the base of the body to ensure the gingerbread men do not fall forward.

Tie on a suede cord to hang on the door knob and display your vertical hanging gingerbread garland.
More Christmas Craft Ideas You Might Like
- Gingerbread House Hot Cocoa Bombs Recipe – Friends, these are wow-worthy and are SO easy to make.
- Free Printable Gingerbread House Coloring Pages – There’s something for all ages (even you) to enjoy some relaxing coloring this holiday season.
- Gingerbread Bath Bombs Recipe – If you’re looking for a great stocking stuffer idea or gift for a neighbor, these are quick to prep and are well-received.
Please Save or Share This Cute Gingerbread Garland and Free Pattern
Your shares are how this site grows and I am sincerely grateful. Please save this to a DIY holiday craft ideas pin board or share it to social media.

Gingerbread Door Garland

This adorable gingerbread garland is designed to hang vertically and can be made with a sewing machine or a hot glue gun.
Materials
Tools
- hot glue gun and glue sticks
- pins and/or clips
- pencil
- sewing machine, optional
Instructions
- Fold over the drop cloth or fabric and trace the gingerbread shape in pencil. Pin. Repeat for the number of gingerbread you want.
- If assembling with a glue gun, read the notes below.
- If assembling with a sewing machine, continue here. Top stitch along the traced gingerbread outline, leaving the bottom center open (I like to leave halfway up the legs to the center open so I can easily stuff the tips of the feet). Be sure to reverse stitches to lock the start and ending into place.
- Generously stuff the gingerbread and top stitch the opening closed.
- Move around the stuffing to ensure an even look.
- Cut a piece of 28 inch long by 3.5 inch wide fabric or use a 1-1.5 inch wide ribbon cut to 28 inches long.
- If using ribbon, fold over the top into a small loop and stitch into place. If using fabric, fold up the bottom and hem, fold down the top and hem, and then fold each edge into the center, overlapping the raw hems. Top stitch both vertical edges to ensure the fabric lays flat.
- Cut small bows for the gingerbread men's bow ties and hot glue them onto the necks of each ginger.
- Glue each gingerbread man onto the ribbon. Be generous with the glue and glue from the head to the base of the body to ensure the gingerbread men do not fall forward.
- Tie on a suede cord to hang on the door knob and display your vertical hanging gingerbread garland.
Notes
Gingerbread Man Garland Notes:
- Either 3 or 4 gingerbread will work on a 28 inch hanger.
- To turn this into a traditional garland, measure the space, add 6 inches for hems and loops, and be sure to attach the gingerbread near the upper part of the body / lower part of the head so they don't flip over.
- If assembling with a glue gun, cut out each gingerbread shape with a 1/4 inch seam allowance all around the edge. Glue along the outside 1/4 inch in from the edge (preferably with a detail tip glue gun), leaving an opening as detailed above for the stuffing. This way, you can still fray the edges for a rustic look.
Meet the Creator
Hi there, I’m Sarah Nenni-Daher. I’m a crafty gal and always have at least 14 projects going at once. I am a crafter, designer, DIYer, and pattern maker. I share my creations here and in the Ruffles and Rain Boots® Shop.
Here at Ruffles and Rain Boots®, you’ll find DIY gnomes, crafts, gifts, cupcakes, laser crafts, and so much more. I love sharing video tutorials over on YouTube and chatting with other crafters in my Facebook groups. We’d love to have you!