
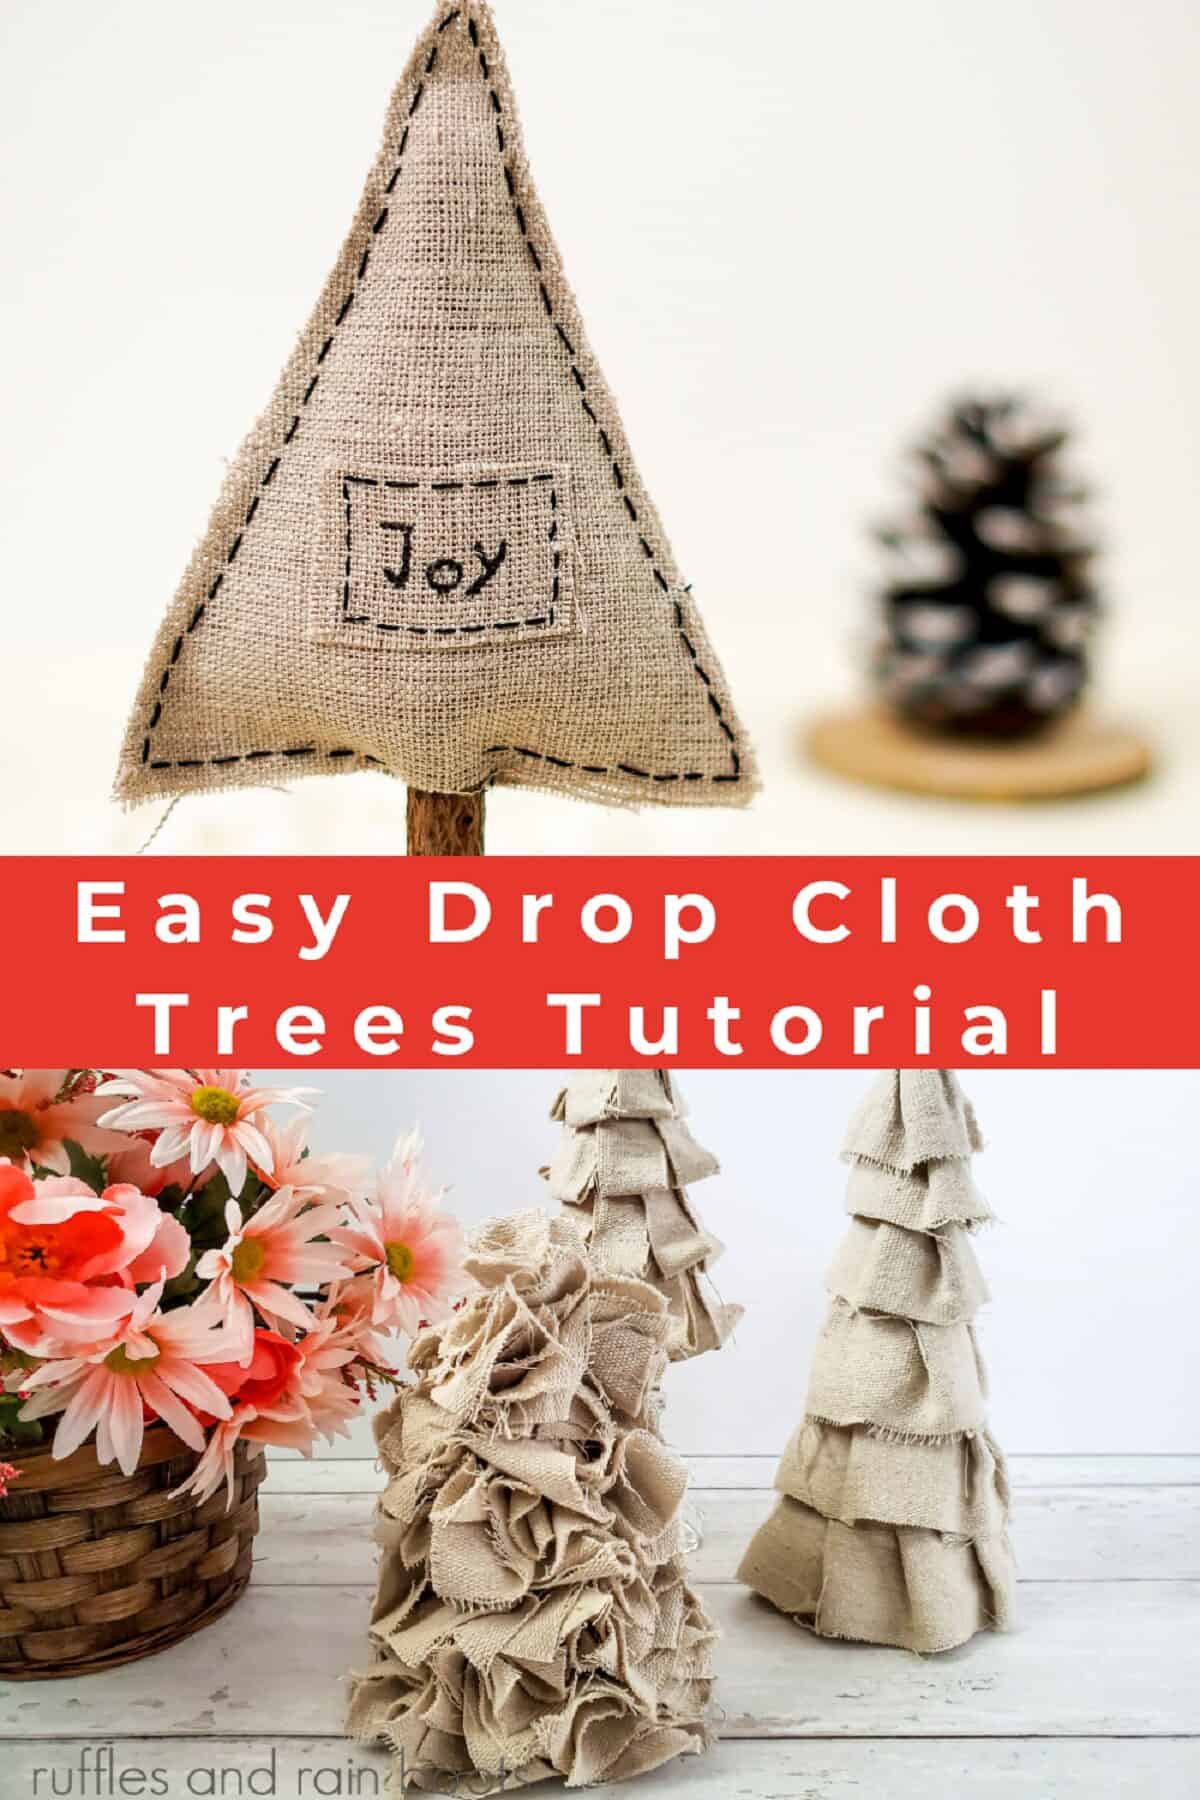
Christmas Drop Cloth Trees Craft
If you like a rustic Christmas, these fabric trees can be finished in about 30 minutes and are a perfect palette for any color scheme or theme. And they’re based on one of my favorite craft items for the holiday season
These drop cloth trees are done in less than 30 minutes and can be done while watching tv or listening to your favorite audio book. Let’s get started.
RELATED READING: The Best Farmhouse Christmas Decorations for a Rustic Holiday
What You'll Find On This Page
Fabric Trees For Your Farmhouse Decor
Here are Ruffles and Rain Boots, I try to be diligently frugal with my crafting. Large pieces of drop cloth are only a few dollars and, with the options for bleaching, dying, and fraying, you can make it match most decor.
Because a fabric drop cloth is typically made from a durable canvas, it is the perfect medium for our fabric tree craft. These quaint fabric trees will be the perfect base for your holiday crafting, so even though I leave mine plain, I urge you to add color.
No Time to Make This Easy Christmas Craft Now? Save or Share It for Later
Use the sharing buttons if you’re off to gather supplies. Please save this to an easy Christmas crafts pin board or share it on Facebook. Either will make this easy to find when you’re ready to begin.

As an Amazon Associate, I could earn from qualifying purchases. There may be affiliate links within this article.
Tips and Variations for This Drop Cloth Craft Idea
- To add color, themes, and decorations that you don’t have to really commit to year after year, add skewers to each bauble and press them into the cones.
- The average size of a canvas drop cloth is several feet square. Because you are using a small amount of fabric drop cloth for this project, you can easily make several other crafts at the same time, like this no-sew drop cloth gnome.
- Use this material for fun DIY wall art. You can use paint, markers, or vinyl – I made this Christmas gnome wall hanging in just a few minutes!
- Another fun craft project using a fabric drop cloth would be a DIY lampshade. You can find the skeleton of a lampshade in most thrift, hobby, or home improvement stores. Stain or dye the canvas to match your decor, and with some scissors and hot glue, you can have a fresh look to a tired lamp in minutes.
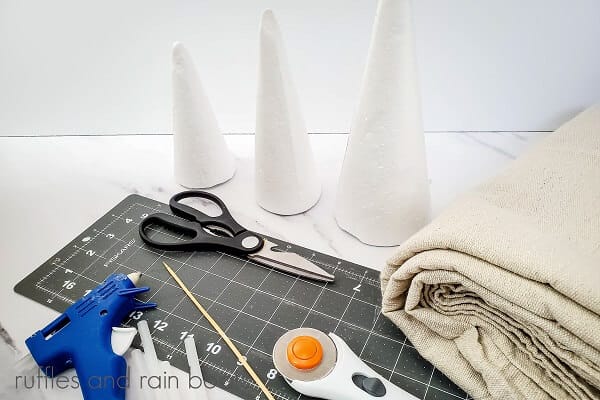
Supplies You Will Need to Make These Rustic Drop Cloth Trees
- Canvas Drop Cloth
- 3 Styrofoam Cones (I get them on Amazon here, the dollar store, or craft stores)
- Scissors or Rotary Cutter
- Cutting Mat or Board
- Hot Glue Gun and Glue Sticks
- Wooden Skewer or Chopsticks
How to Make Drop Cloth Christmas Trees
Keep this page open while you create your fabric trees craft. If you would like to work from a printable how-to, scroll down and select the print button.
Notes To Keep in Mind While Making This Holiday DIY
- A canvas drop cloth has a looser weaving than cotton fabric, meaning the canvas is more prone to unweave. You can pull apart threads for a more rustic look.
- With fabric that is not as tightly woven as perhaps a Kona cotton, they are prone to be more absorbent. If you are going to be painting or dying the drop cloth, be sure to have some plastic down so you don’t stain your carpet or furniture.
- If you are planning to make a pillow cover, a window treatment, or a seat cover, be sure to use an appropriately strong needle if using an electric sewing machine. We suggest using a needle that is 16 or 18 gauge, which is the same needle you would use when working with a cotton duck or denim fabric.
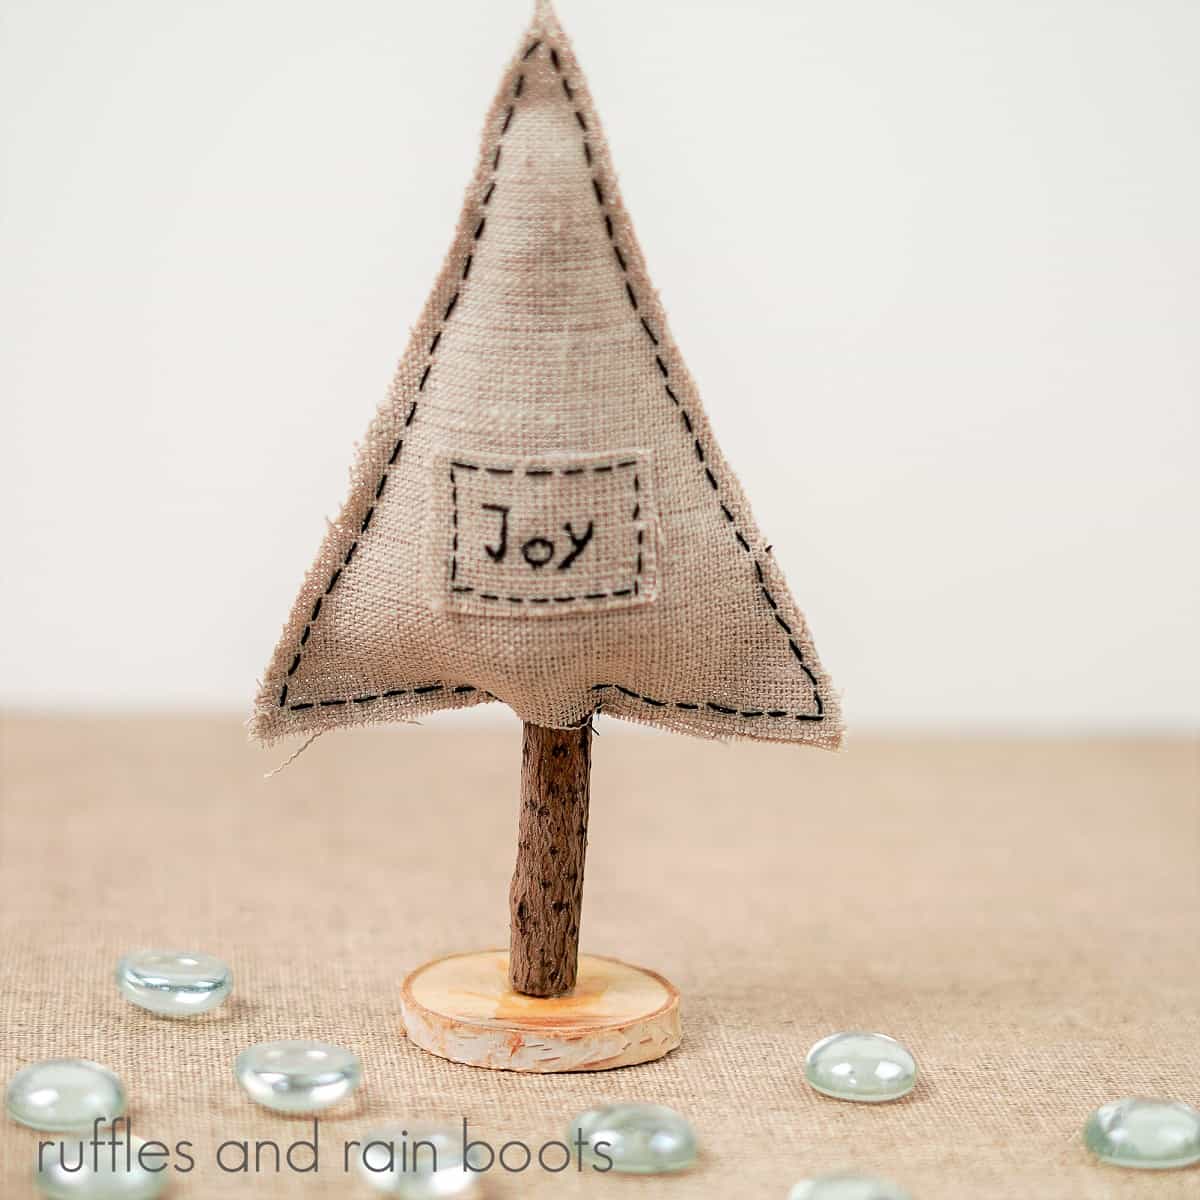
Here is a 4th way to make our fabric drop cloth trees. This cute craft project uses the same basic fabric, but we are going to stitch these trees together and fill them with poly-fil, giving them a 3-D appearance.
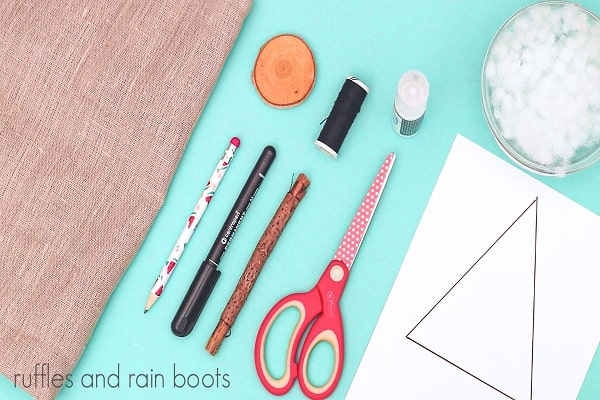
Here are the Supplies to make the Stitched Fabric Drop Cloth Trees:
- Fabric drop cloth
- Tree Template
- Pencil and black marker
- Scissors
- Black thread
- Sewing needle
- Poly-Fil
- Small wooden stick or branch
- Small wooden disc
- Wood glue
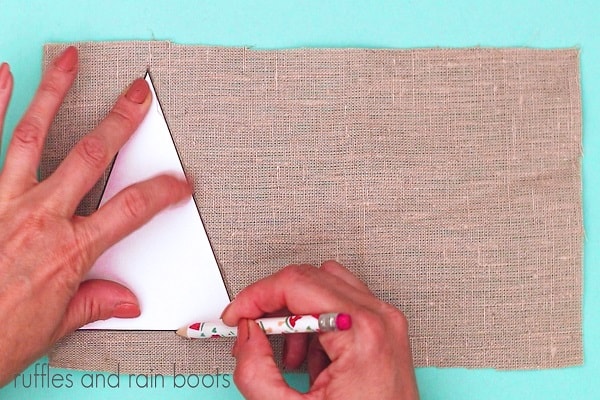
Step 1: Cut out the template and trace two onto the fabric.
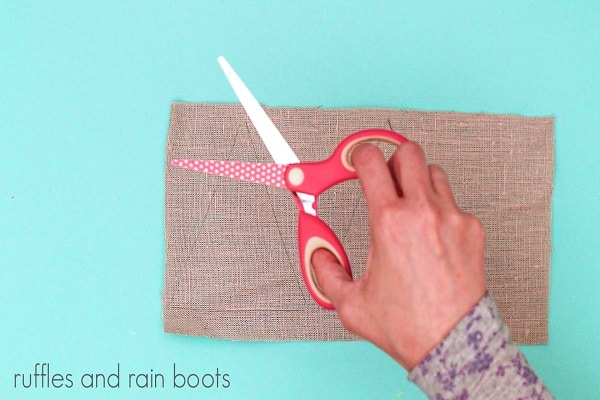
Step 2: Cut out the two traced trees from the drop cloth fabric.
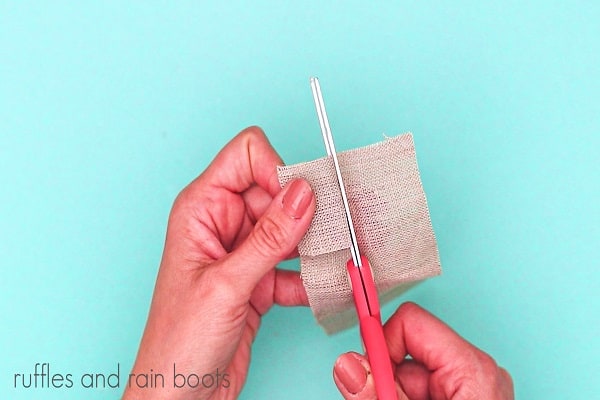
Step 3: Cut a small rectangle from the drop cloth.
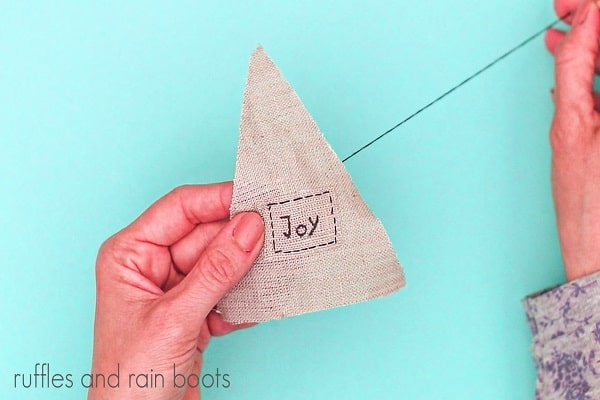
Step 4: With a marker, write the word Joy on the small rectangle, and using black thread, sew the lettering onto one of the triangle-shaped fabric pieces.
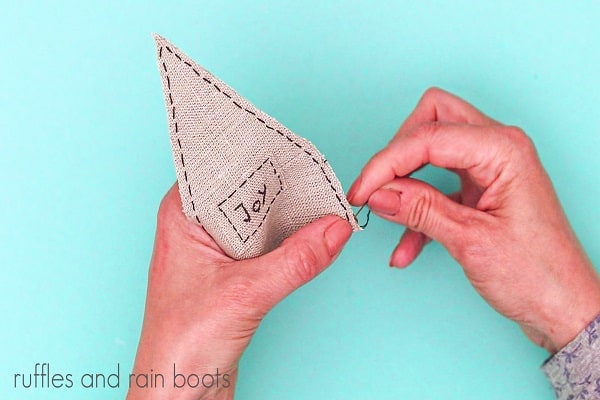
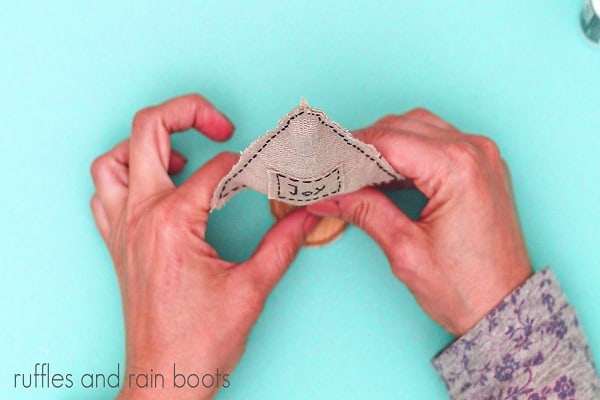
Step 5 Place the two triangles on top of each other and start stitching along the edges, leaving a small opening at the bottom.
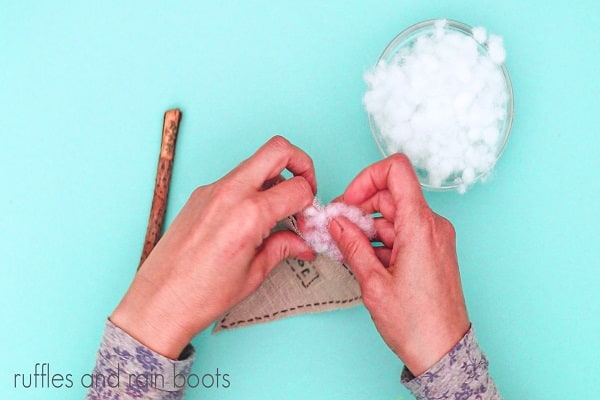
Step 6: Fill the stitched tree with the Poly-Fil.
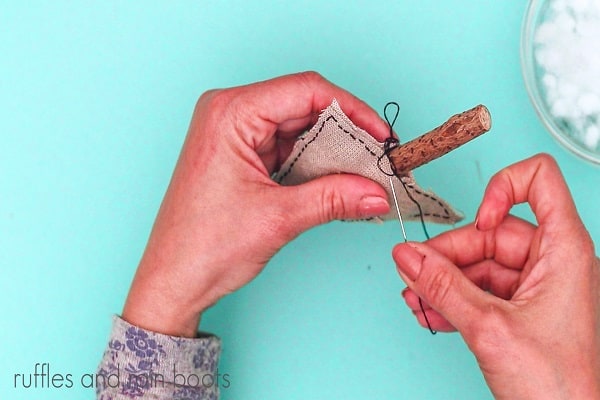
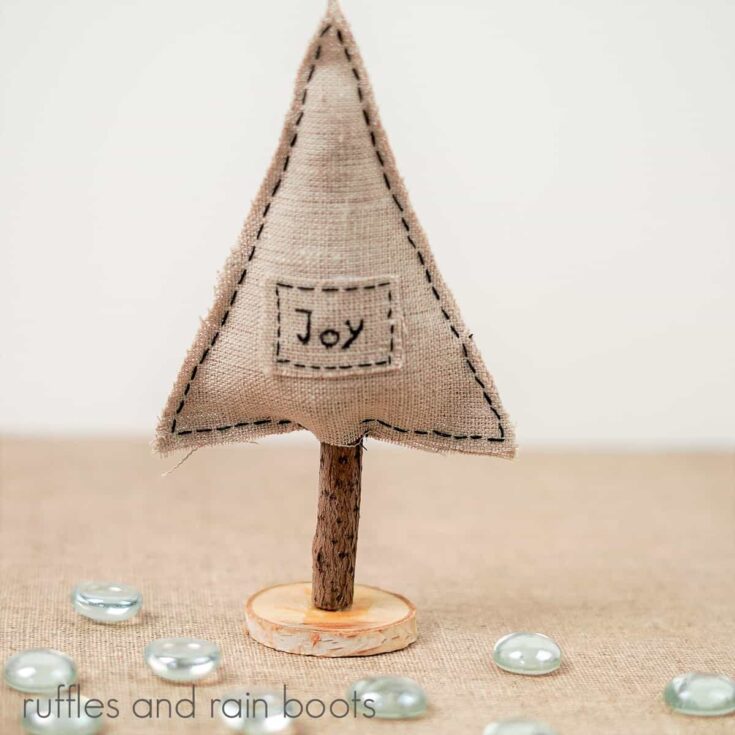
Step 7: Insert the small tree branch into the bottom of the stitched tree and stitch it in place.
Step 8: Glue the bottom of the branch to the middle of the wooden disc with wood glue.
More Holiday Farmhouse Craft Ideas You Might Like
- This Drop Cloth Gnome Banner for the Holidays is an Easy Cricut Craft – You can whip us this adorable “Gnome, sweet home” craft in just a few minutes. What a cute addition to your Christmas decor.
- Dollar Tree Angel Gnome – All you need to create this sweet craft project are a few supplies from Dollar Tree and our FREE wing template.
- Make This Easy Rustic Farm Truck Holiday Sign Cricut Craft – I am not ashamed to admit that I am a sucker for a red pickup truck like the one in this stinking cute Cricut craft project.
Please Save or Share This Fun Holiday Craft Idea
Your shares are how this site grows and I sincerely appreciate it. Save or share this drop cloth craft to your favorite craft project pin board or share it with a crafty group on Facebook.
Fabric Drop Cloth Trees
This easy-to-make fabric drop cloth trees craft easily fits into your rustic farmhouse decor, just in time for the holidays.
Materials
- Canvas Drop Cloth
- 3 Styrofoam cones of variou sizes
Tools
- Cutting mat
- Hot glue gun and hot glue sticks
- Wooden skewer or chopstick
- Drop cloth material
- Template
- Pencil
- Scissors
- Sewing needle
- Black thread
- Black marker
- Small wooden branch
- Round wood slice
- Poly-Fiberfil
- Wood glue
Instructions
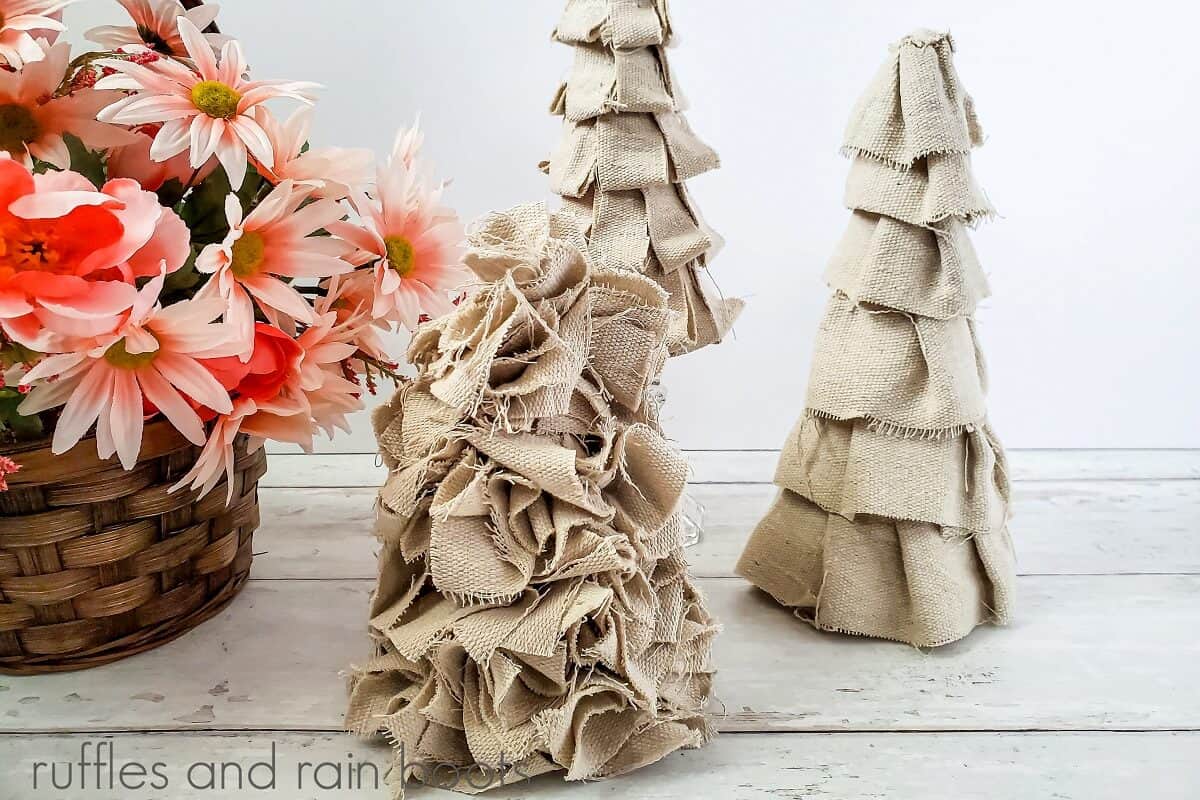
- Cut your drop cloth as follows: Ruffled Tree: Cut 2-inch by 12-inch lengths of drop cloth, Looped Tree: Cut 1-inch by 4-inch strips of the drop cloth, and the Gathered Tree: Cut 3-inch by 3-inch squares of the drop cloth fabric.
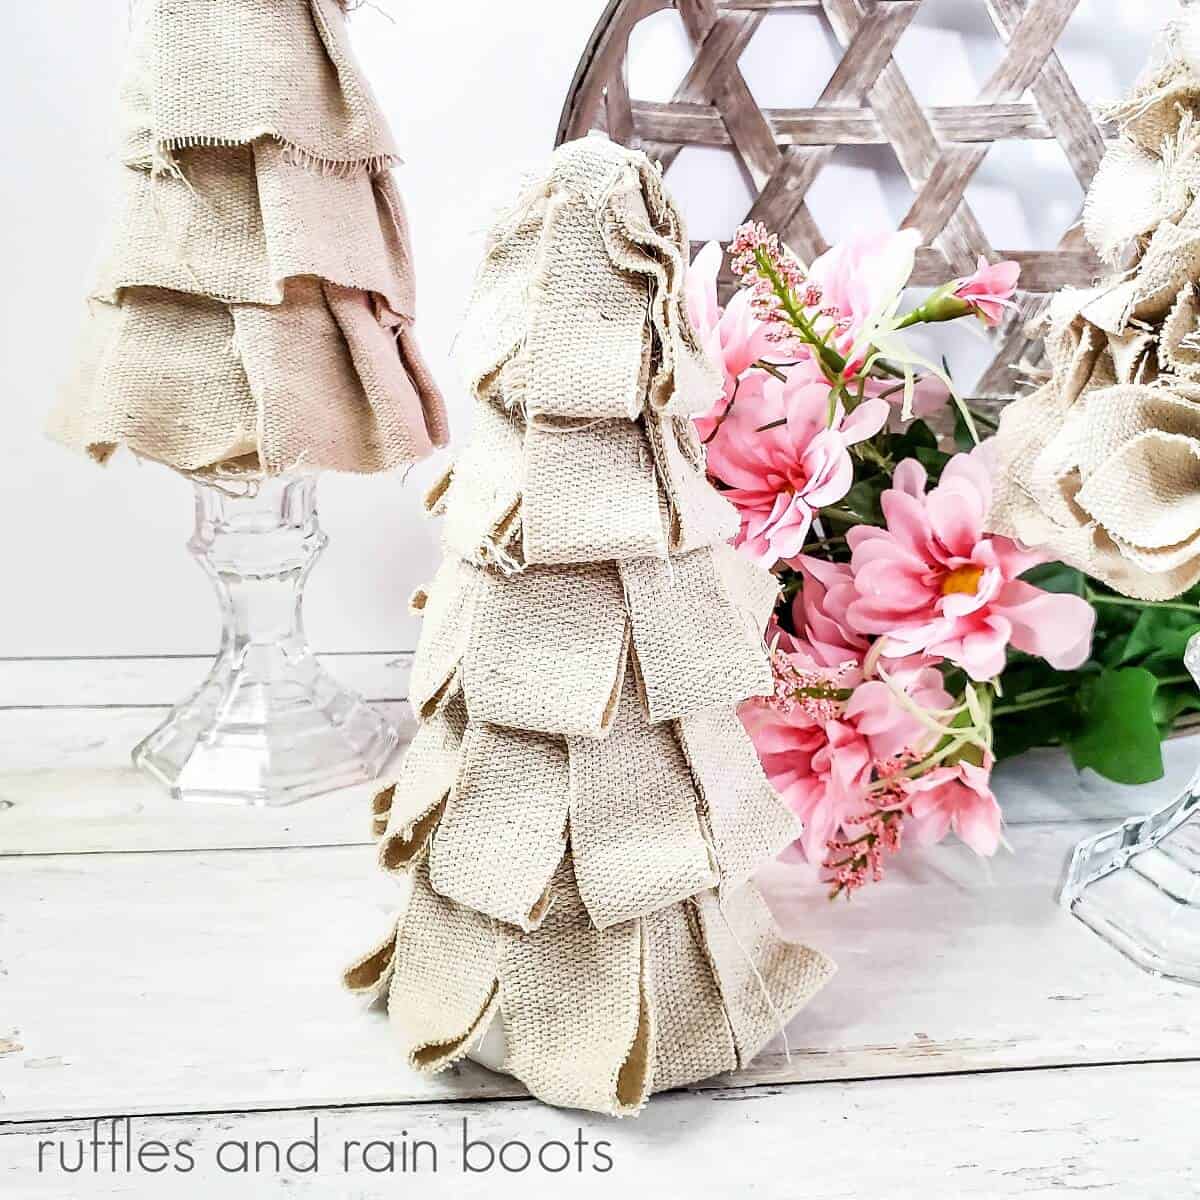
- For the ruffled tree: Apply a drop of hot glue to a corner of the fabric strip. Line the glue up with the bottom of the cone and then add a second drop of glue about 1.5” in from the corner. Adhere to the Styrofoam cone. Next, make a ruffle by folding the fabric back about ½” and securing it in place with another drop of glue. Repeat the process until you have a bottom tier. Working up, repeat the process, but overlapping the row below by about ¼.” When you reach the top, cut a small square of fabric and adhere it with a drop of glue.
- For the looped tree: Fold each strip of fabric in half and glue the raw edges together. Attach the loop to the cone, making sure the bottom of the loop is flush with the bottom of the cone. Repeat with the next row gluing in between two loops from the row below, so they overlap by ½”. Continue until you reach the top. Cut a small square and adhere it to the top with a drop of glue.
- For the gathered tree: Fold a square of fabric around the end of a skewer. Add a drop of glue to the end and push into the cone about ¼”. Repeat until the cone is covered.
- For the Stamped tree: Cut out the template and trace two onto the fabric. Cut out the two trees from the fabric. Cut a small rectangle from the drop cloth. With a marker, write the word Joy on the small rectangle, and using black thread, sew the lettering onto one of the triangle-shaped fabric pieces. Place the two triangles on top of each other and start stitching along the edges, leaving a small opening at the bottom. Fill the stitched tree with the Poly-Fil. Insert the small tree branch into the bottom of the stitched tree and stitch it in place. Glue the bottom of the branch to the middle of the wooden disc with wood glue.
Meet the Creator
Hi there, I’m Sarah Nenni-Daher. I’m a crafty gal and always have at least 14 projects going at once. I am a crafter, designer, DIYer, and pattern maker. I share my creations here and in the Ruffles and Rain Boots® Shop.
Here at Ruffles and Rain Boots®, you’ll find DIY gnomes, crafts, gifts, cupcakes, laser crafts, and so much more. I love sharing video tutorials over on YouTube and chatting with other crafters in my Facebook groups. We’d love to have you!